Red Dead Redemption 2 features four sets of treasure maps, with the first set being a bonus for pre-ordering the game. Each set contains three maps that lead to well-hidden gold bars, providing a great opportunity to earn a lot of money quickly. Our guide provides all the information you need to complete the quest.
Jack Hall’s Gang Treasure maps
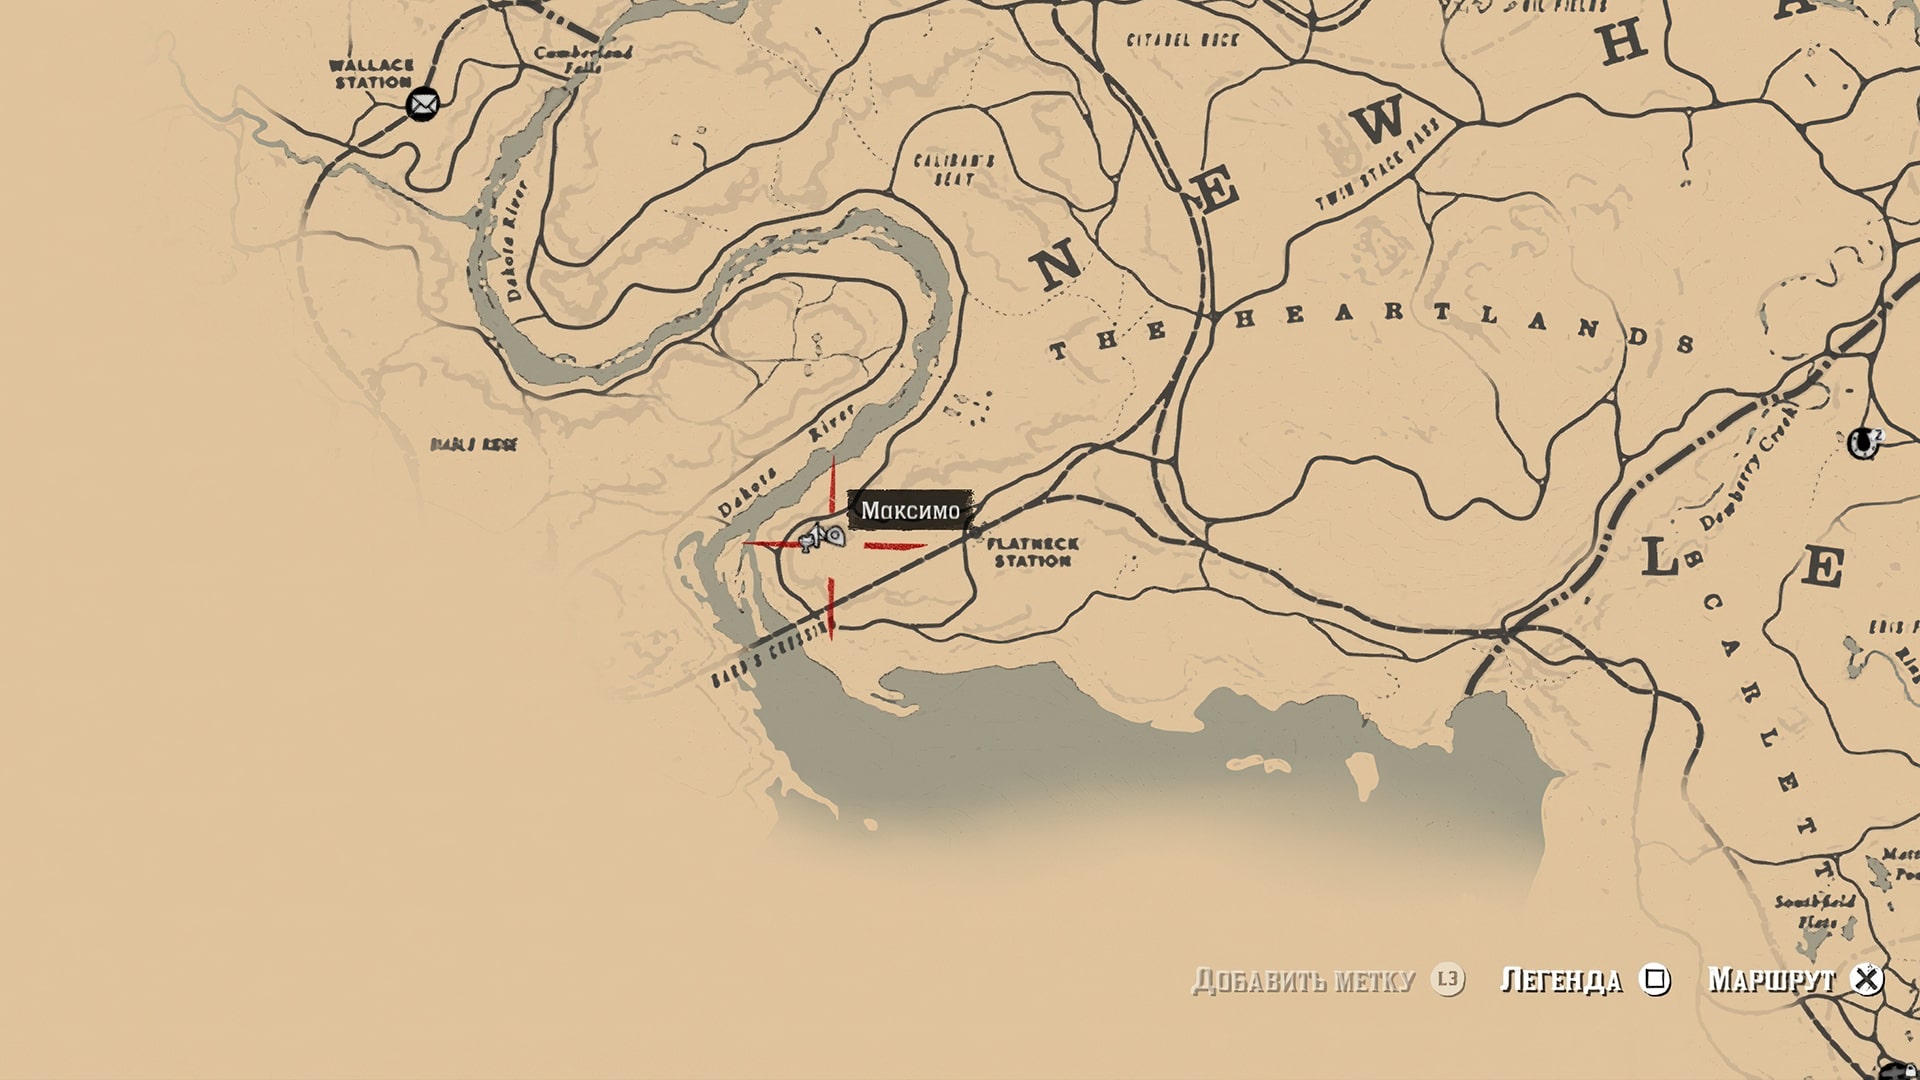
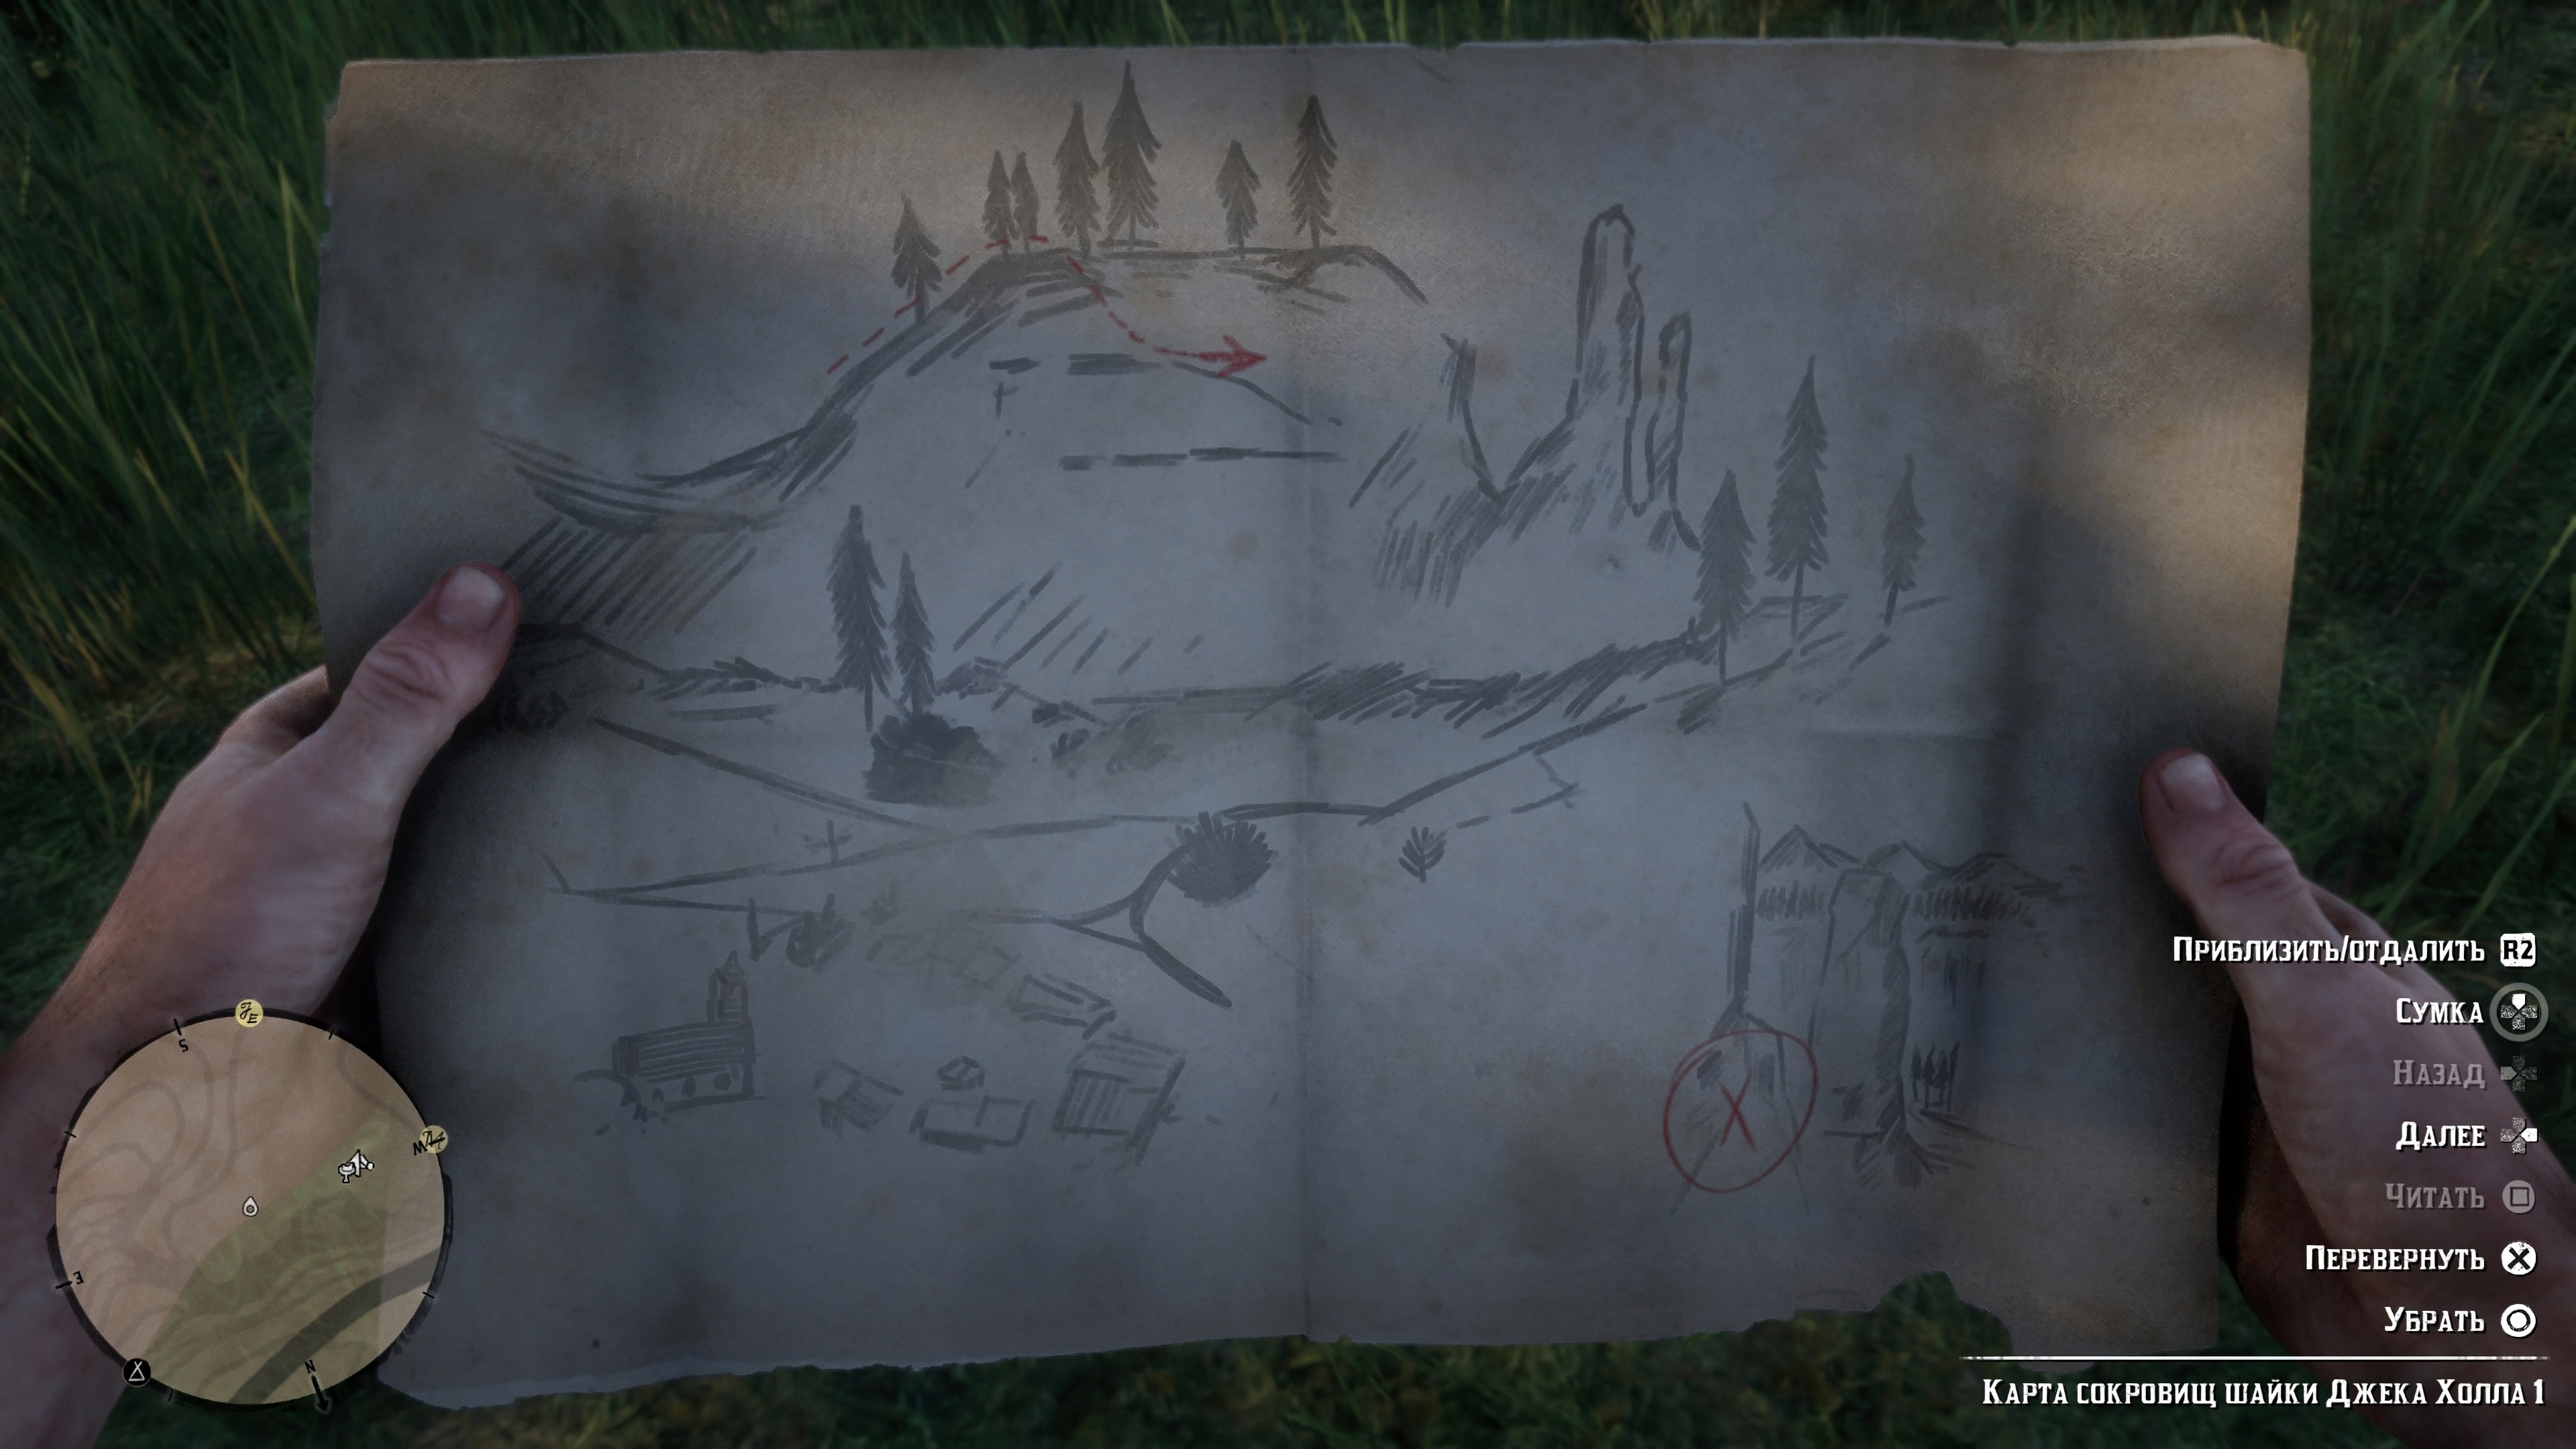
To start your search for the first map, track down traveler Maximo southwest of the base. He’ll be on a treasure hunt and will offer to sell you the map for $10. This is part of the optional “All That Glitters” quest.
Treasure Map 1
Examine the map you received and begin your search. The mountain you need to find is located south of Valentine and can be easily located by the inscription “Caliban’s Seat” on the map. Search the area to find a match to the drawing on the map.
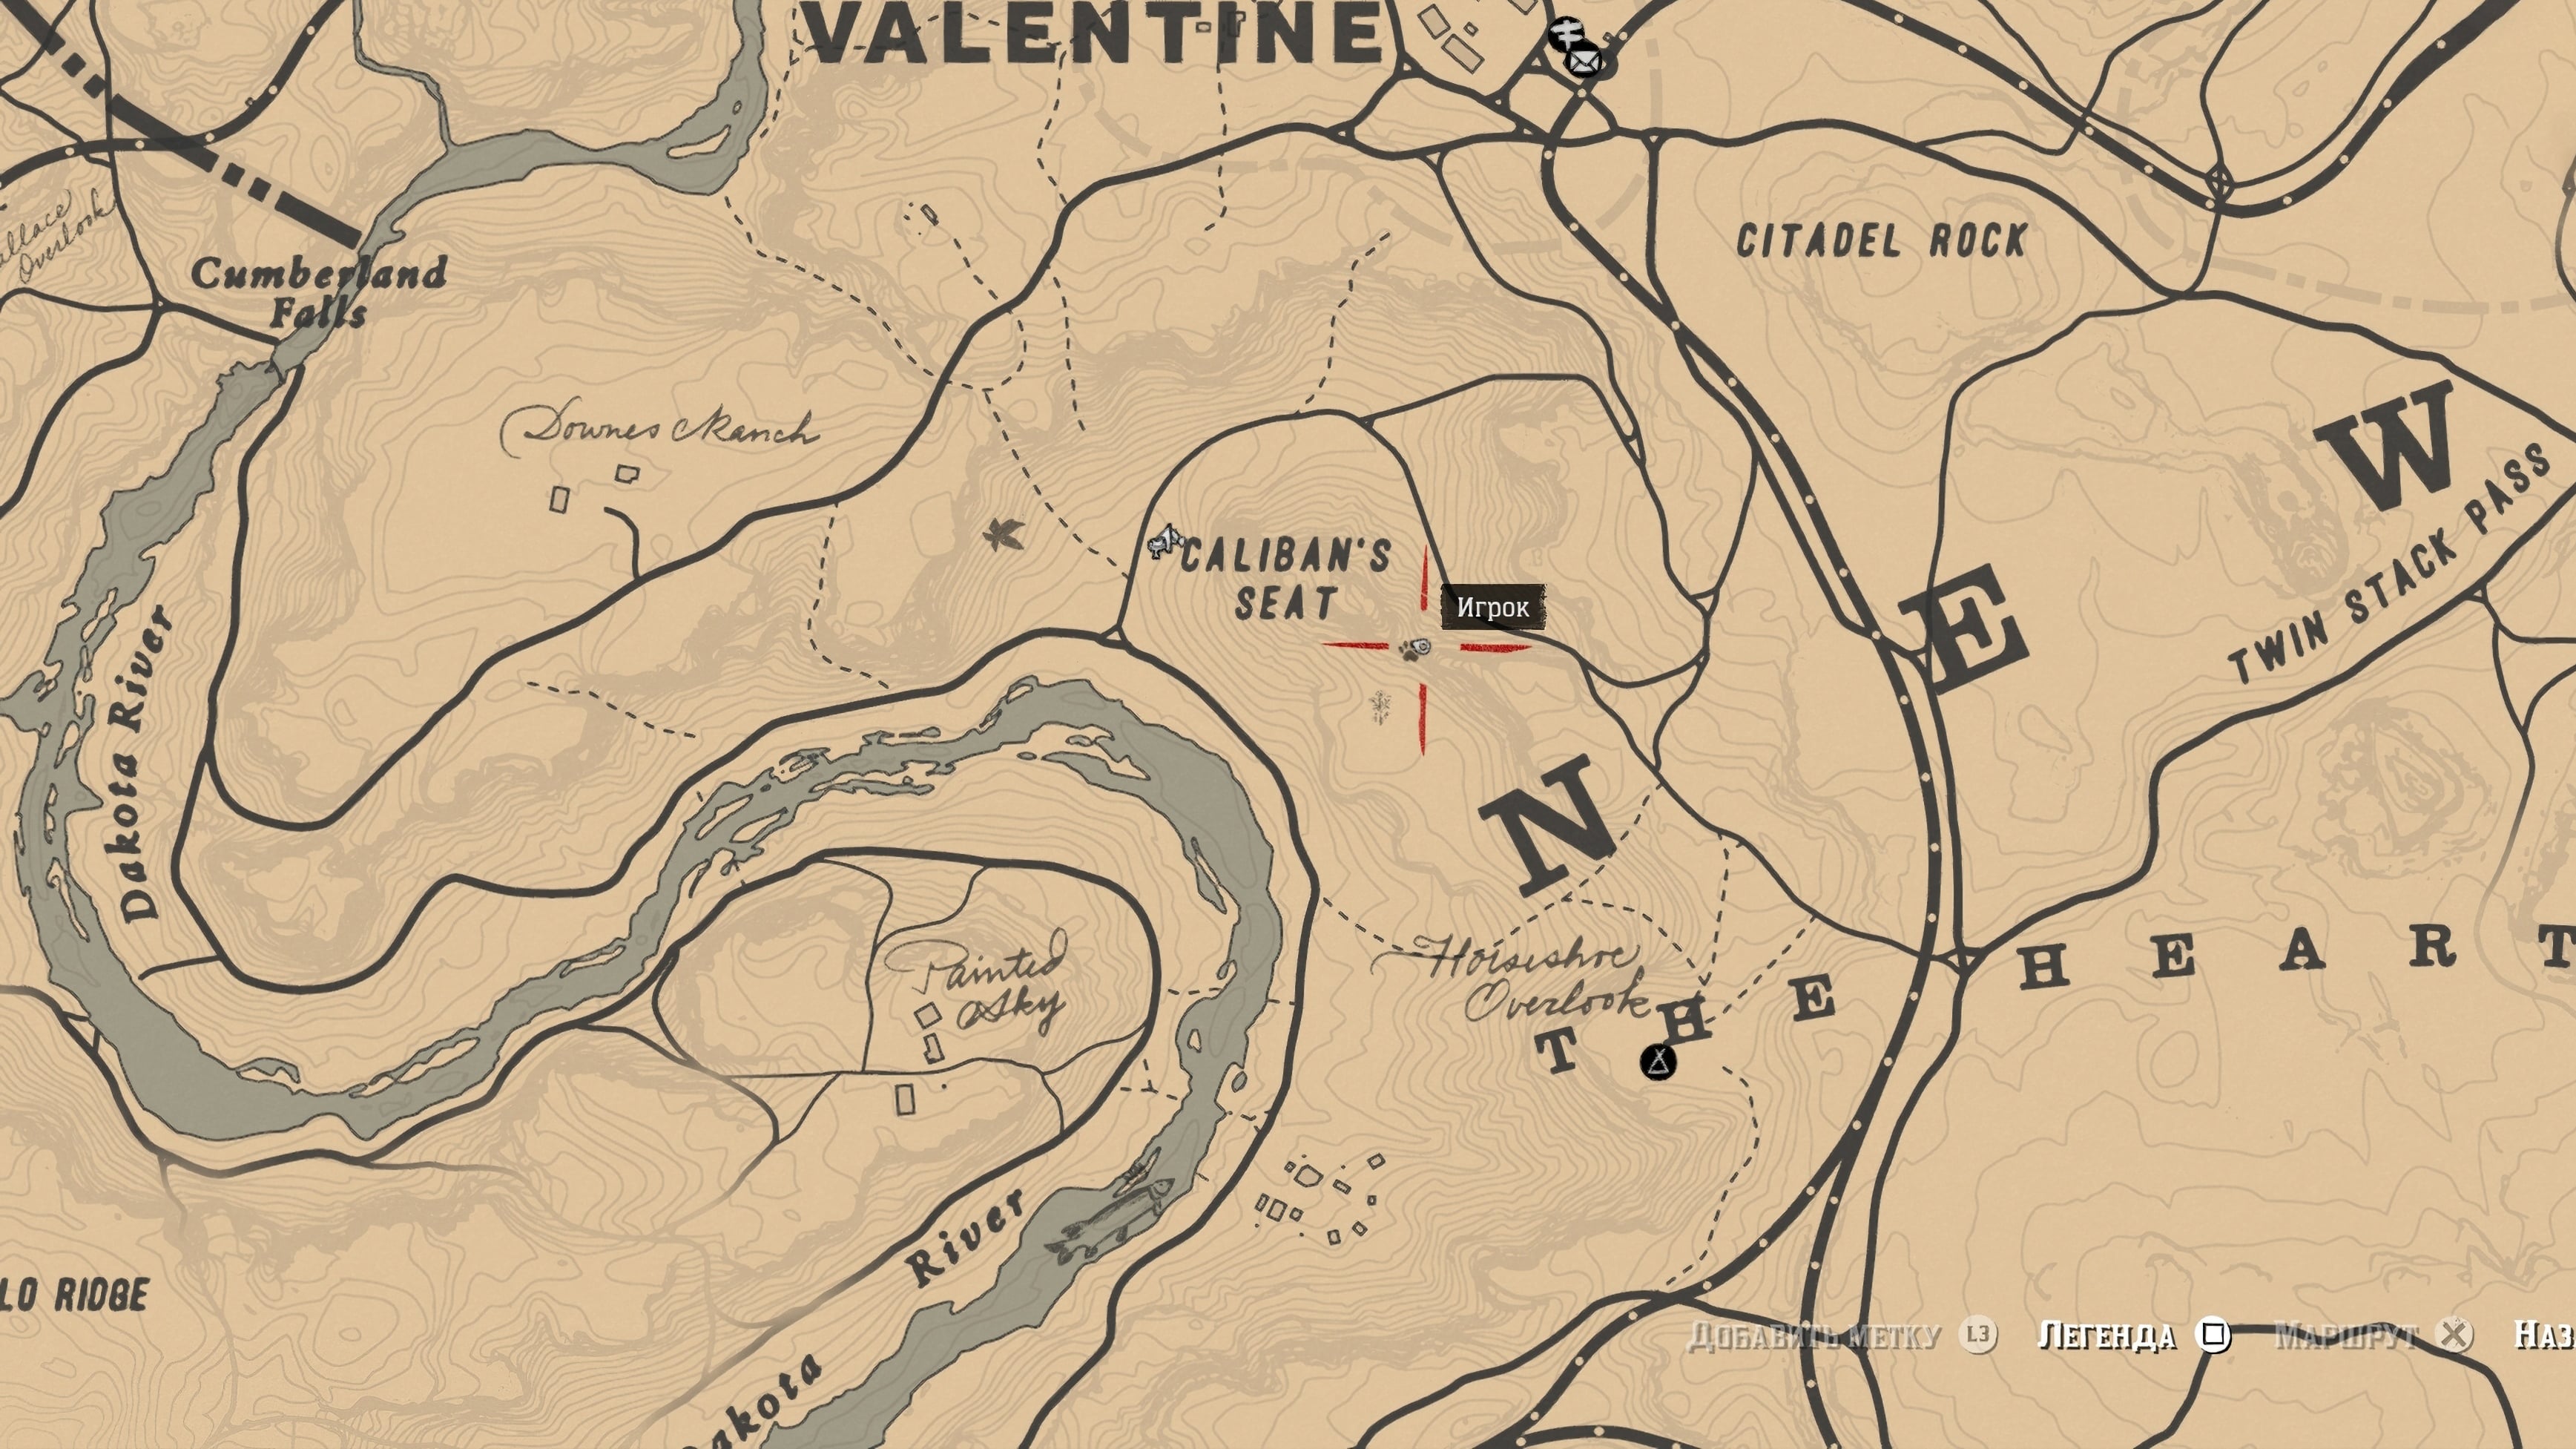
To reach the next map, find a relatively easy climb and ascend the mountain. The player marker on the map is at the beginning of the climb. Look for a tent and in front of it, you’ll find a descent to a small ledge. Follow it all the way to the end to find the next map hidden in a rock. Be careful as you’ll need to jump once, pull yourself up, and then go back down on the ledge.
Treasure Map 2
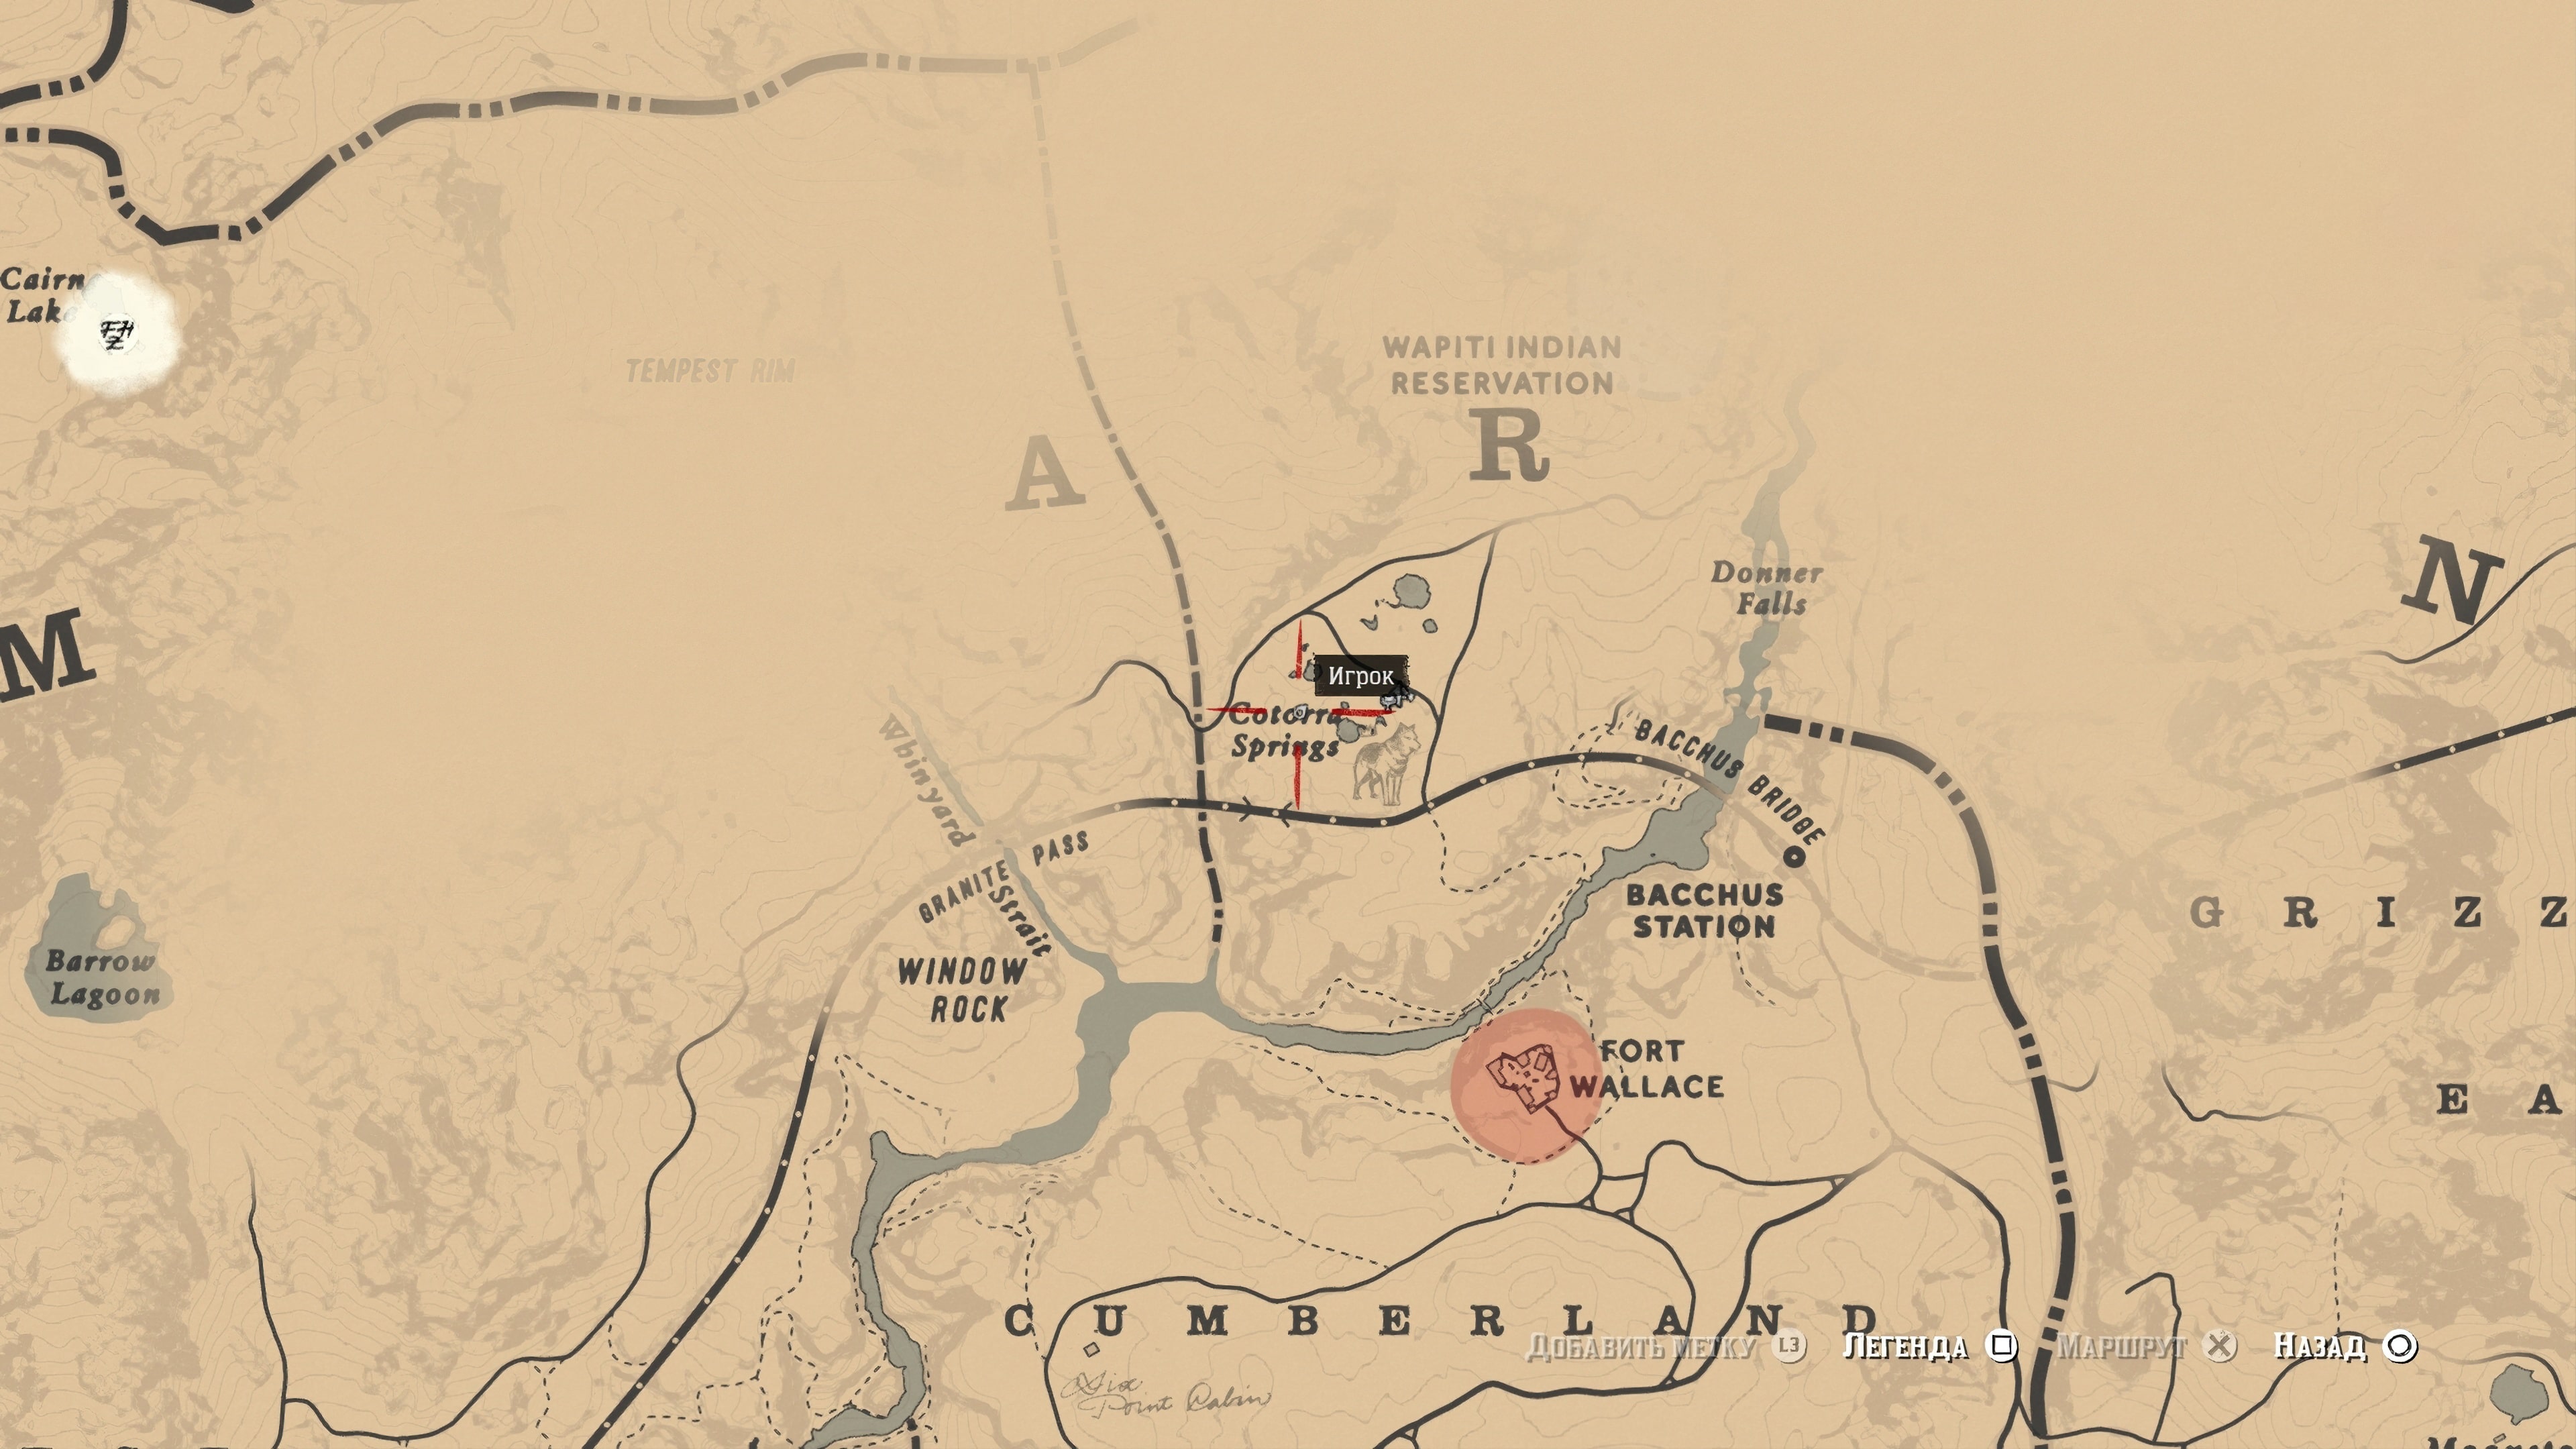
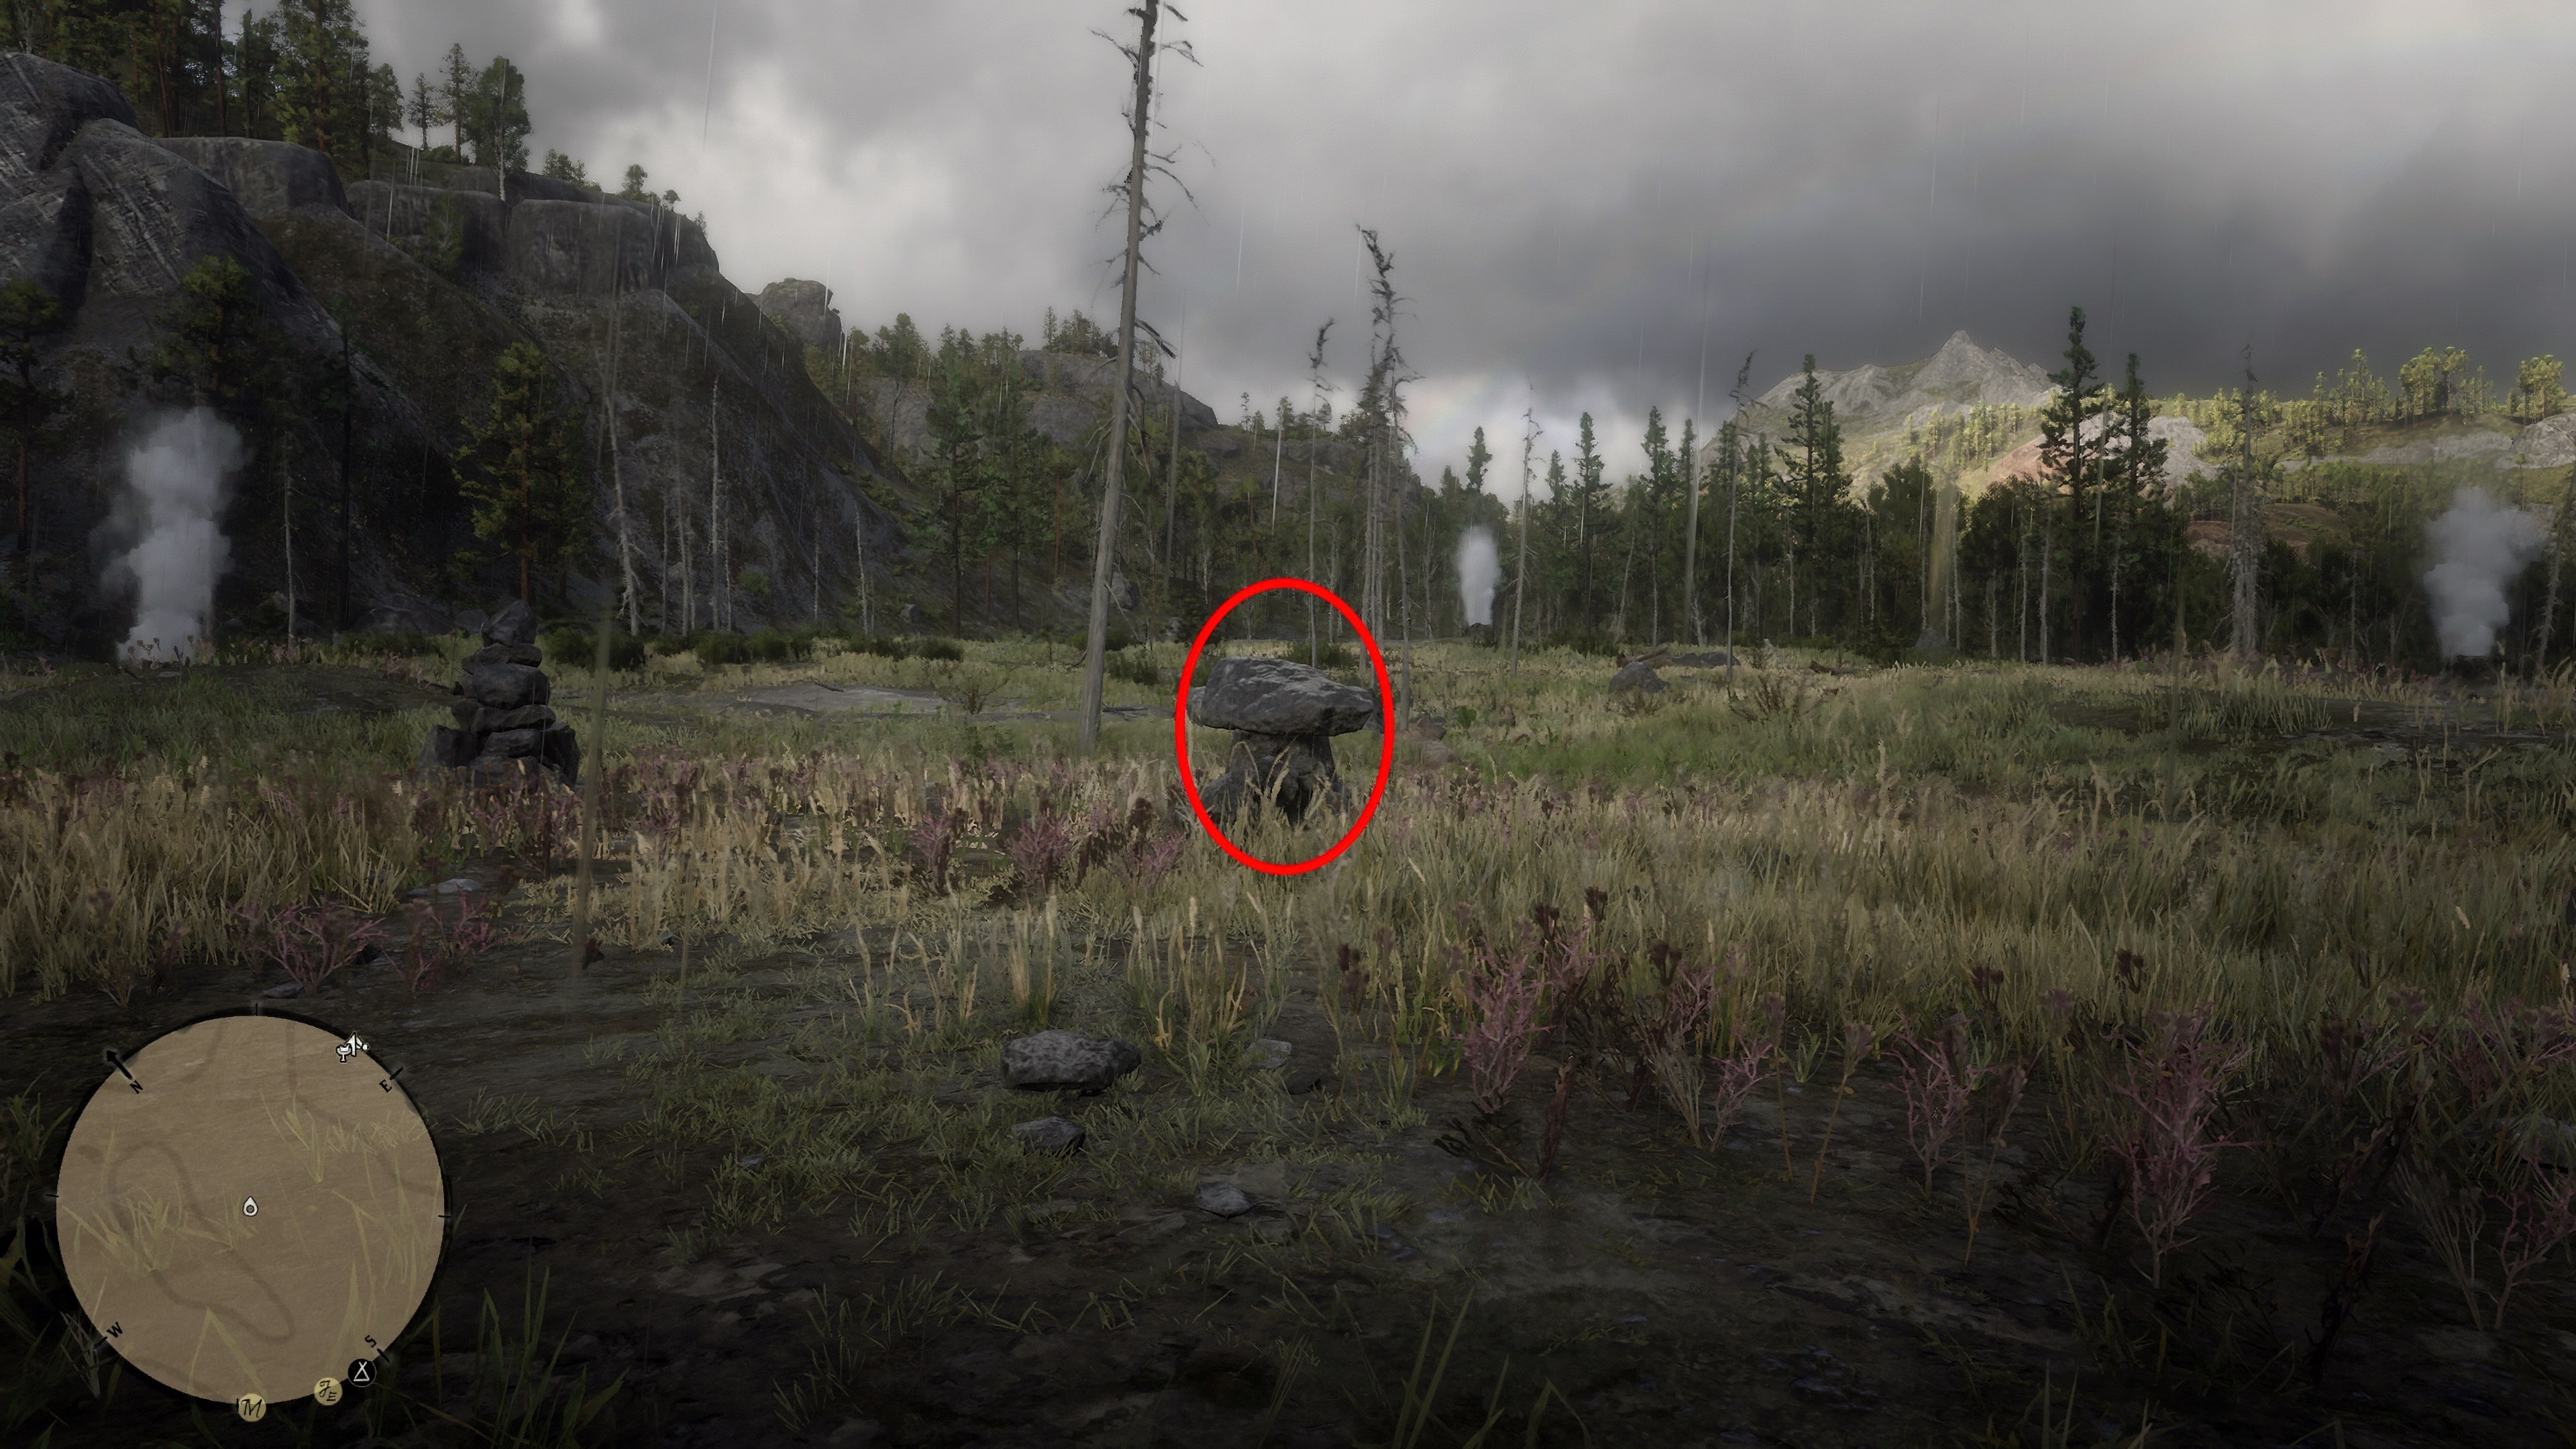
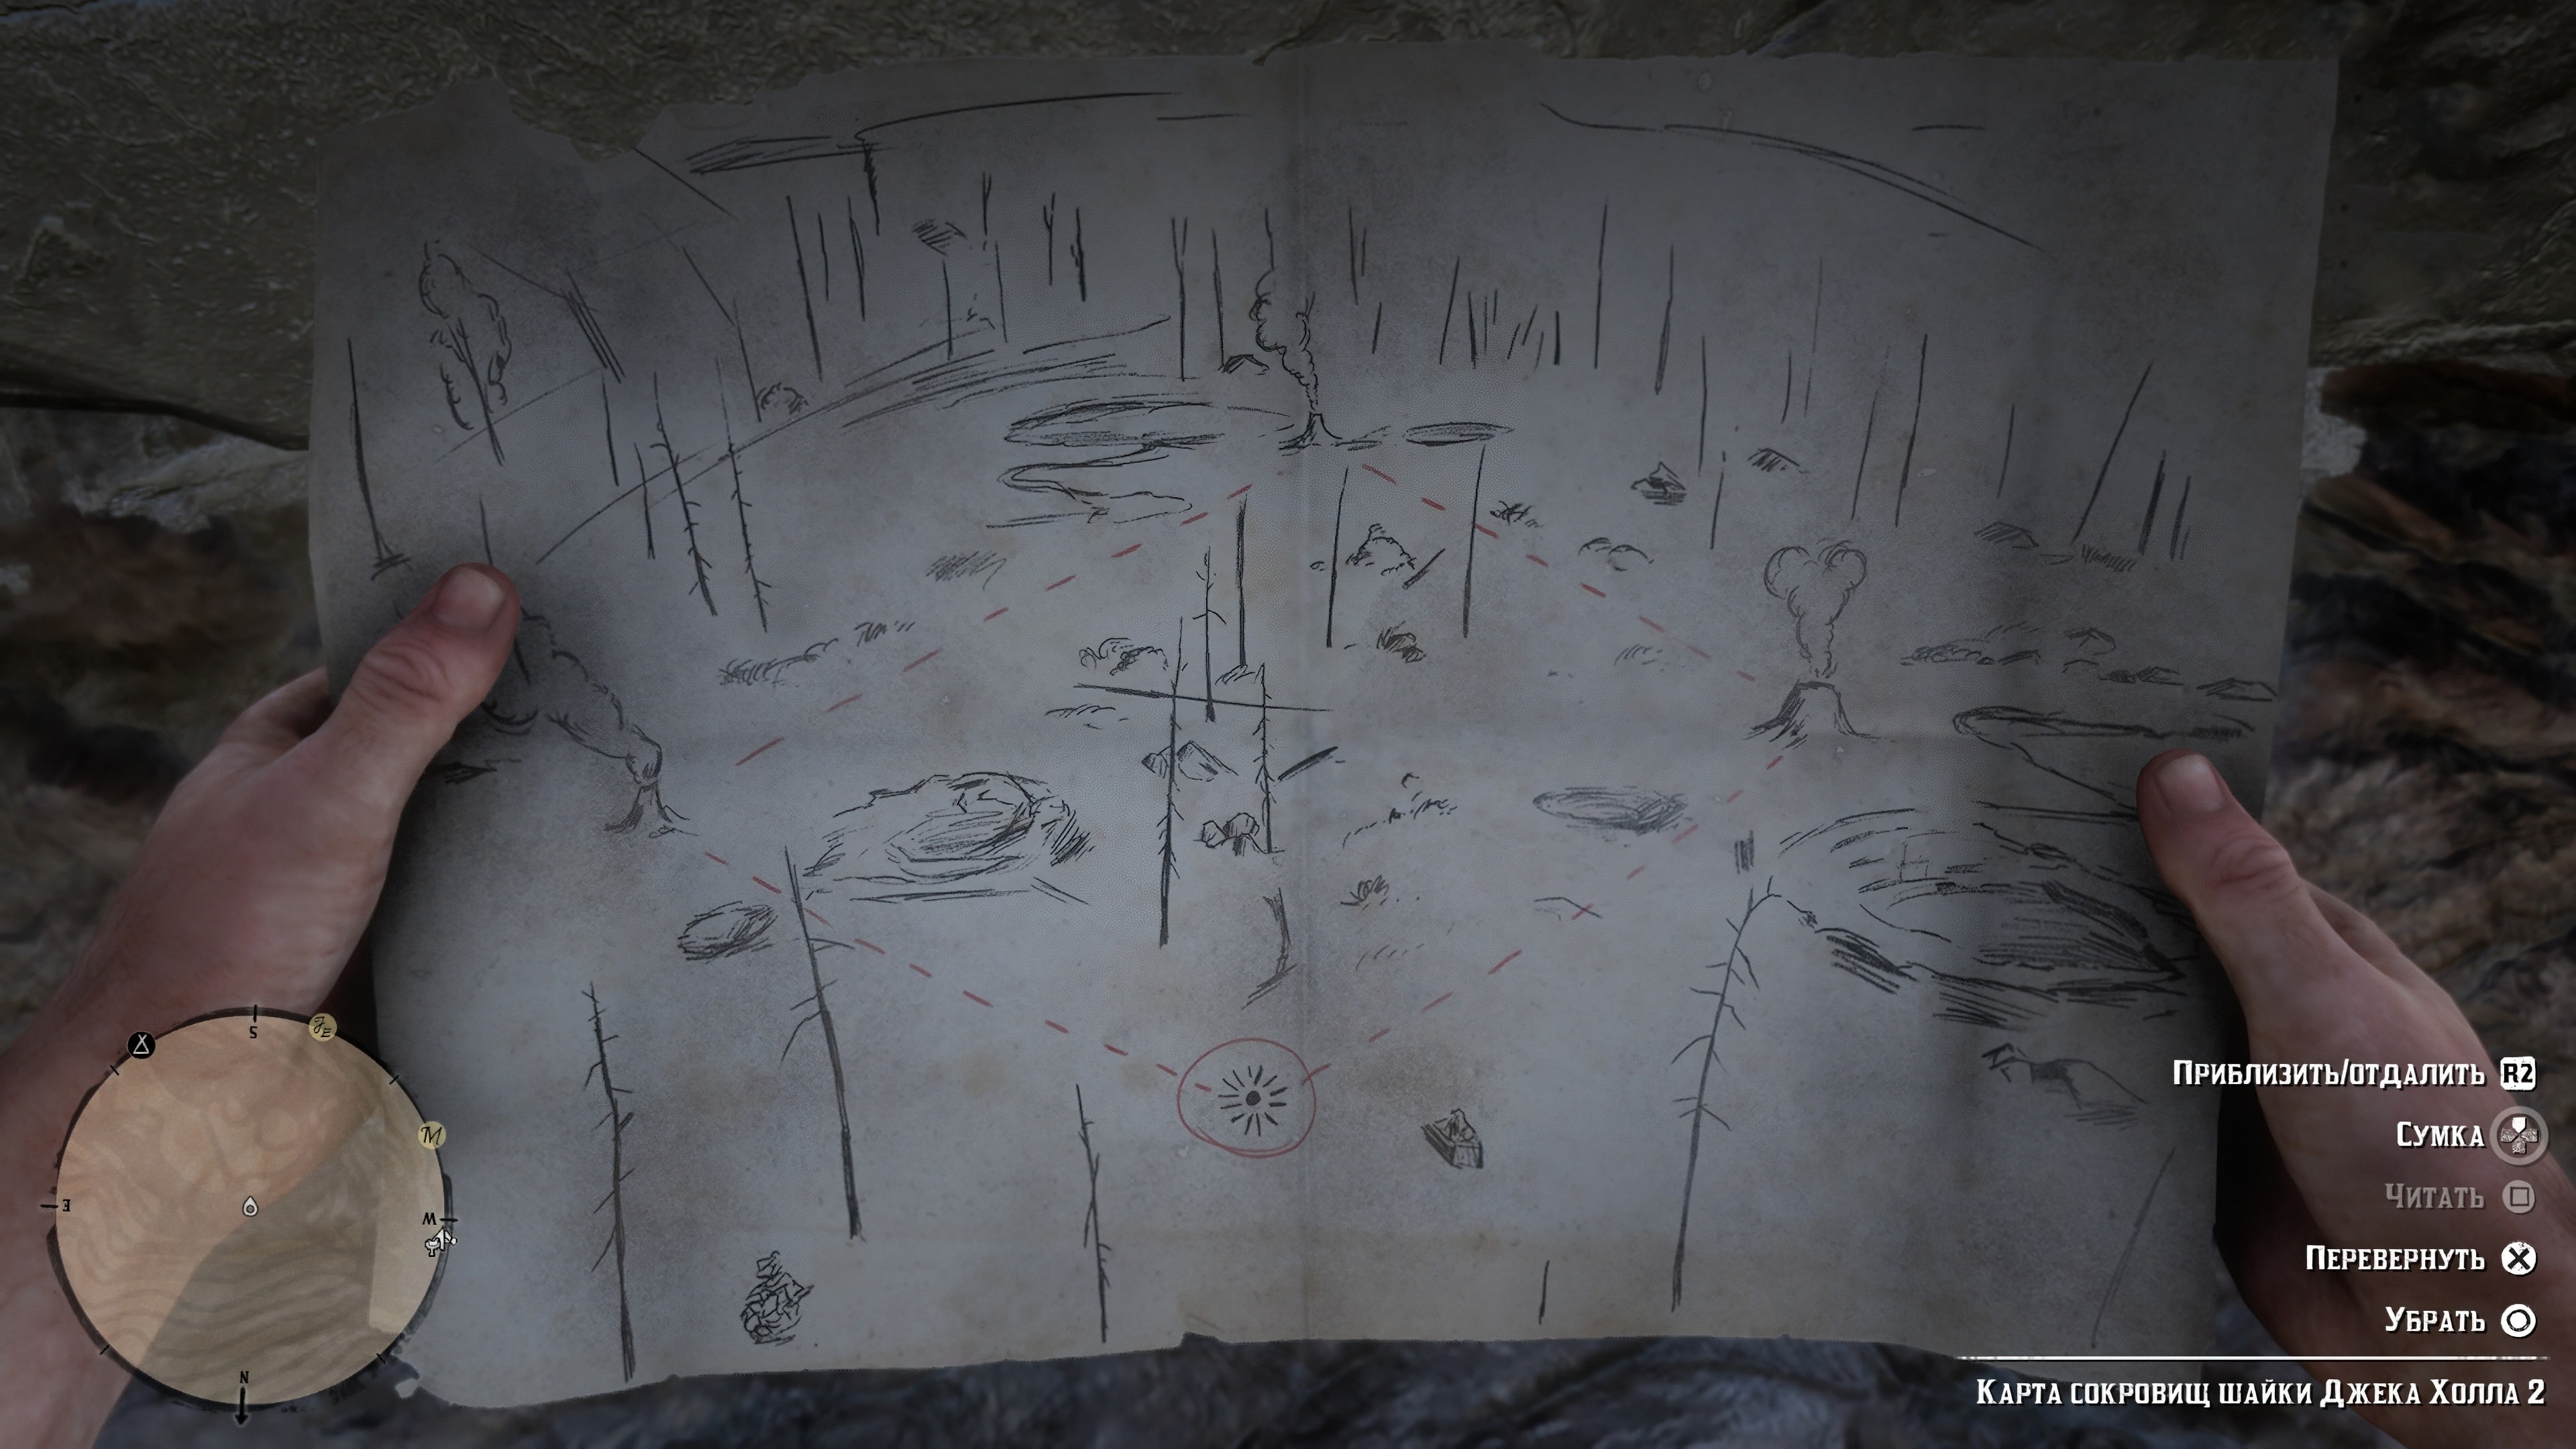
The second map in the set takes you north of Valentine, past Fort Wallace. It’s advisable to bring warm clothes as the temperature in the area is cooler. Look for the letter “o” in Cotorra Spring to reach your destination.
You’ll easily recognize the clearing from the picture as it features three conspicuous geysers. Look for the boulder marked in red in the screenshot and at its base, you’ll find a small crevice where the next map is hidden.
Treasure Map 3
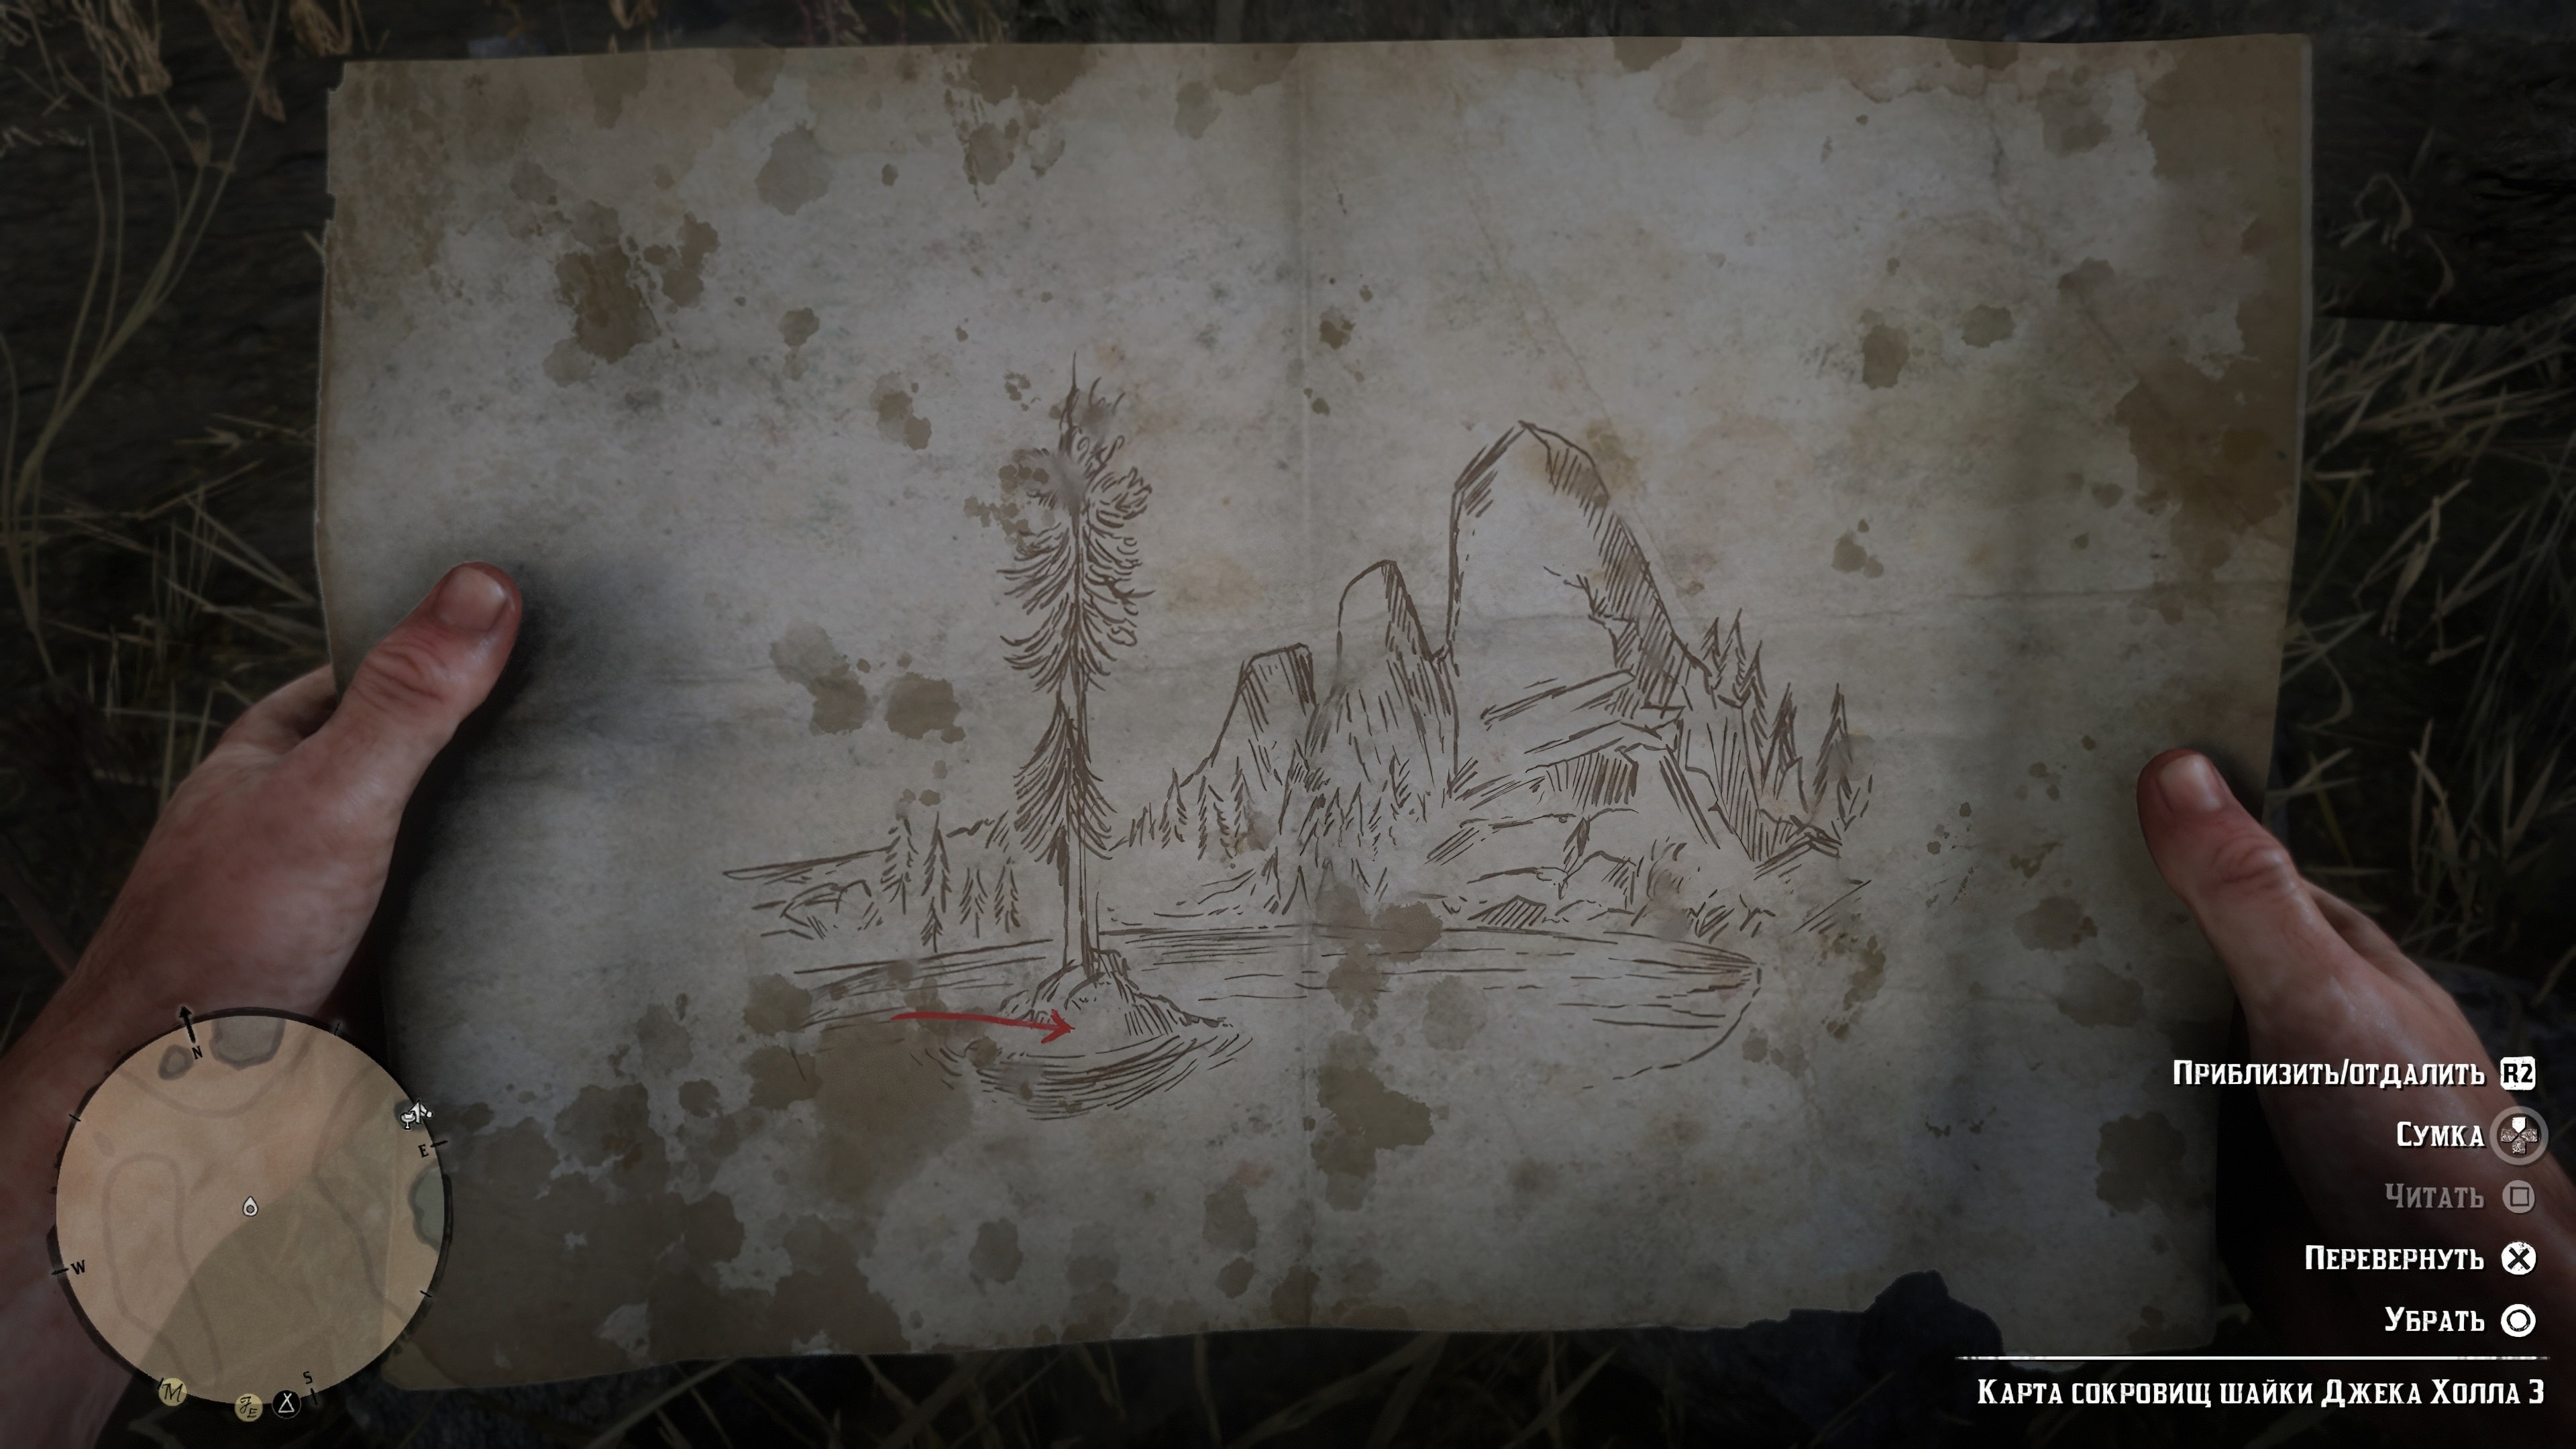
The final map will reward you for all your hard work. The treasure contains two gold bars that can be sold to the Scooper for $500 each. Head north from Emerald Ranch to O’Creagb’s Run Lake and find the small island in the middle of the lake.
To reach the island, it’s better to drink a tincture as your character runs out of stamina quickly in water. On the island, look for an almost invisible boulder (as seen in screenshot 2) and you’ll find the bars hidden underneath.

Poison Trail Treasure maps
The first map in the Poison Trail set can be found in a safe located under the shop in the small house northwest of Valentine. This area can get very cold, so be sure to wear a winter suit. We found this map while on a quest to find Flaco Hernandez, making it a convenient two-for-one mission.
Treasure Map 1
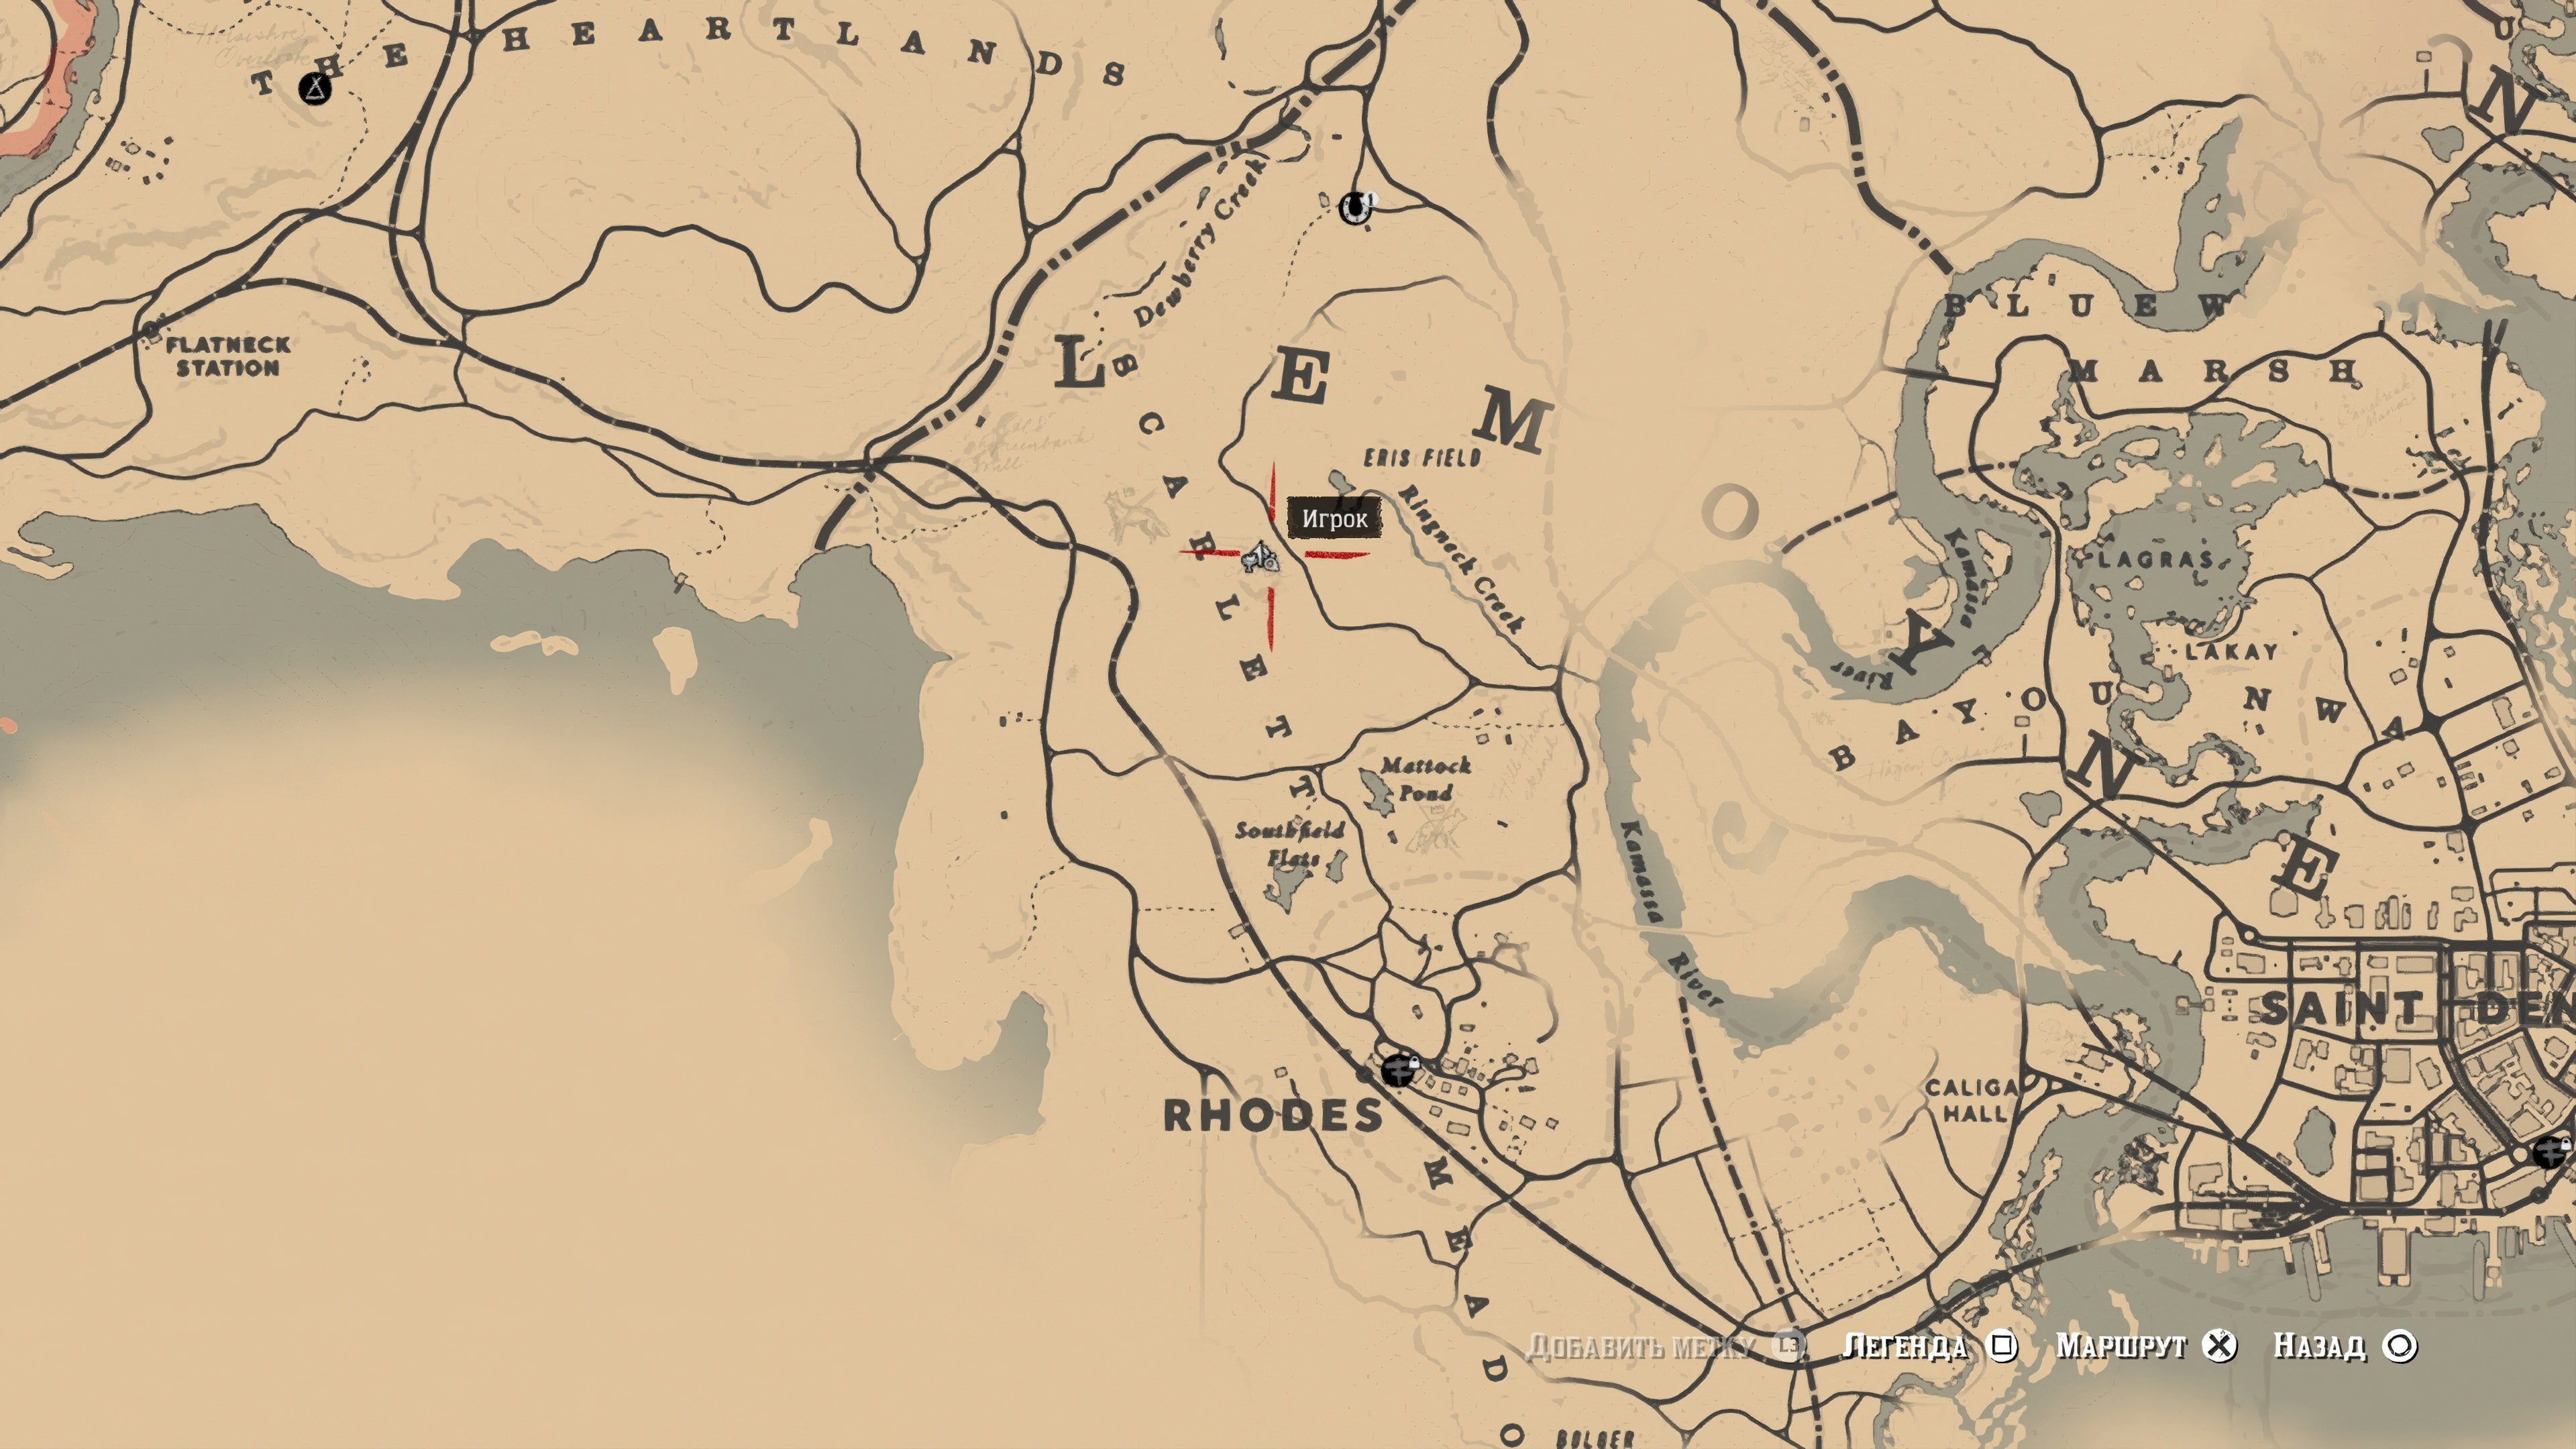
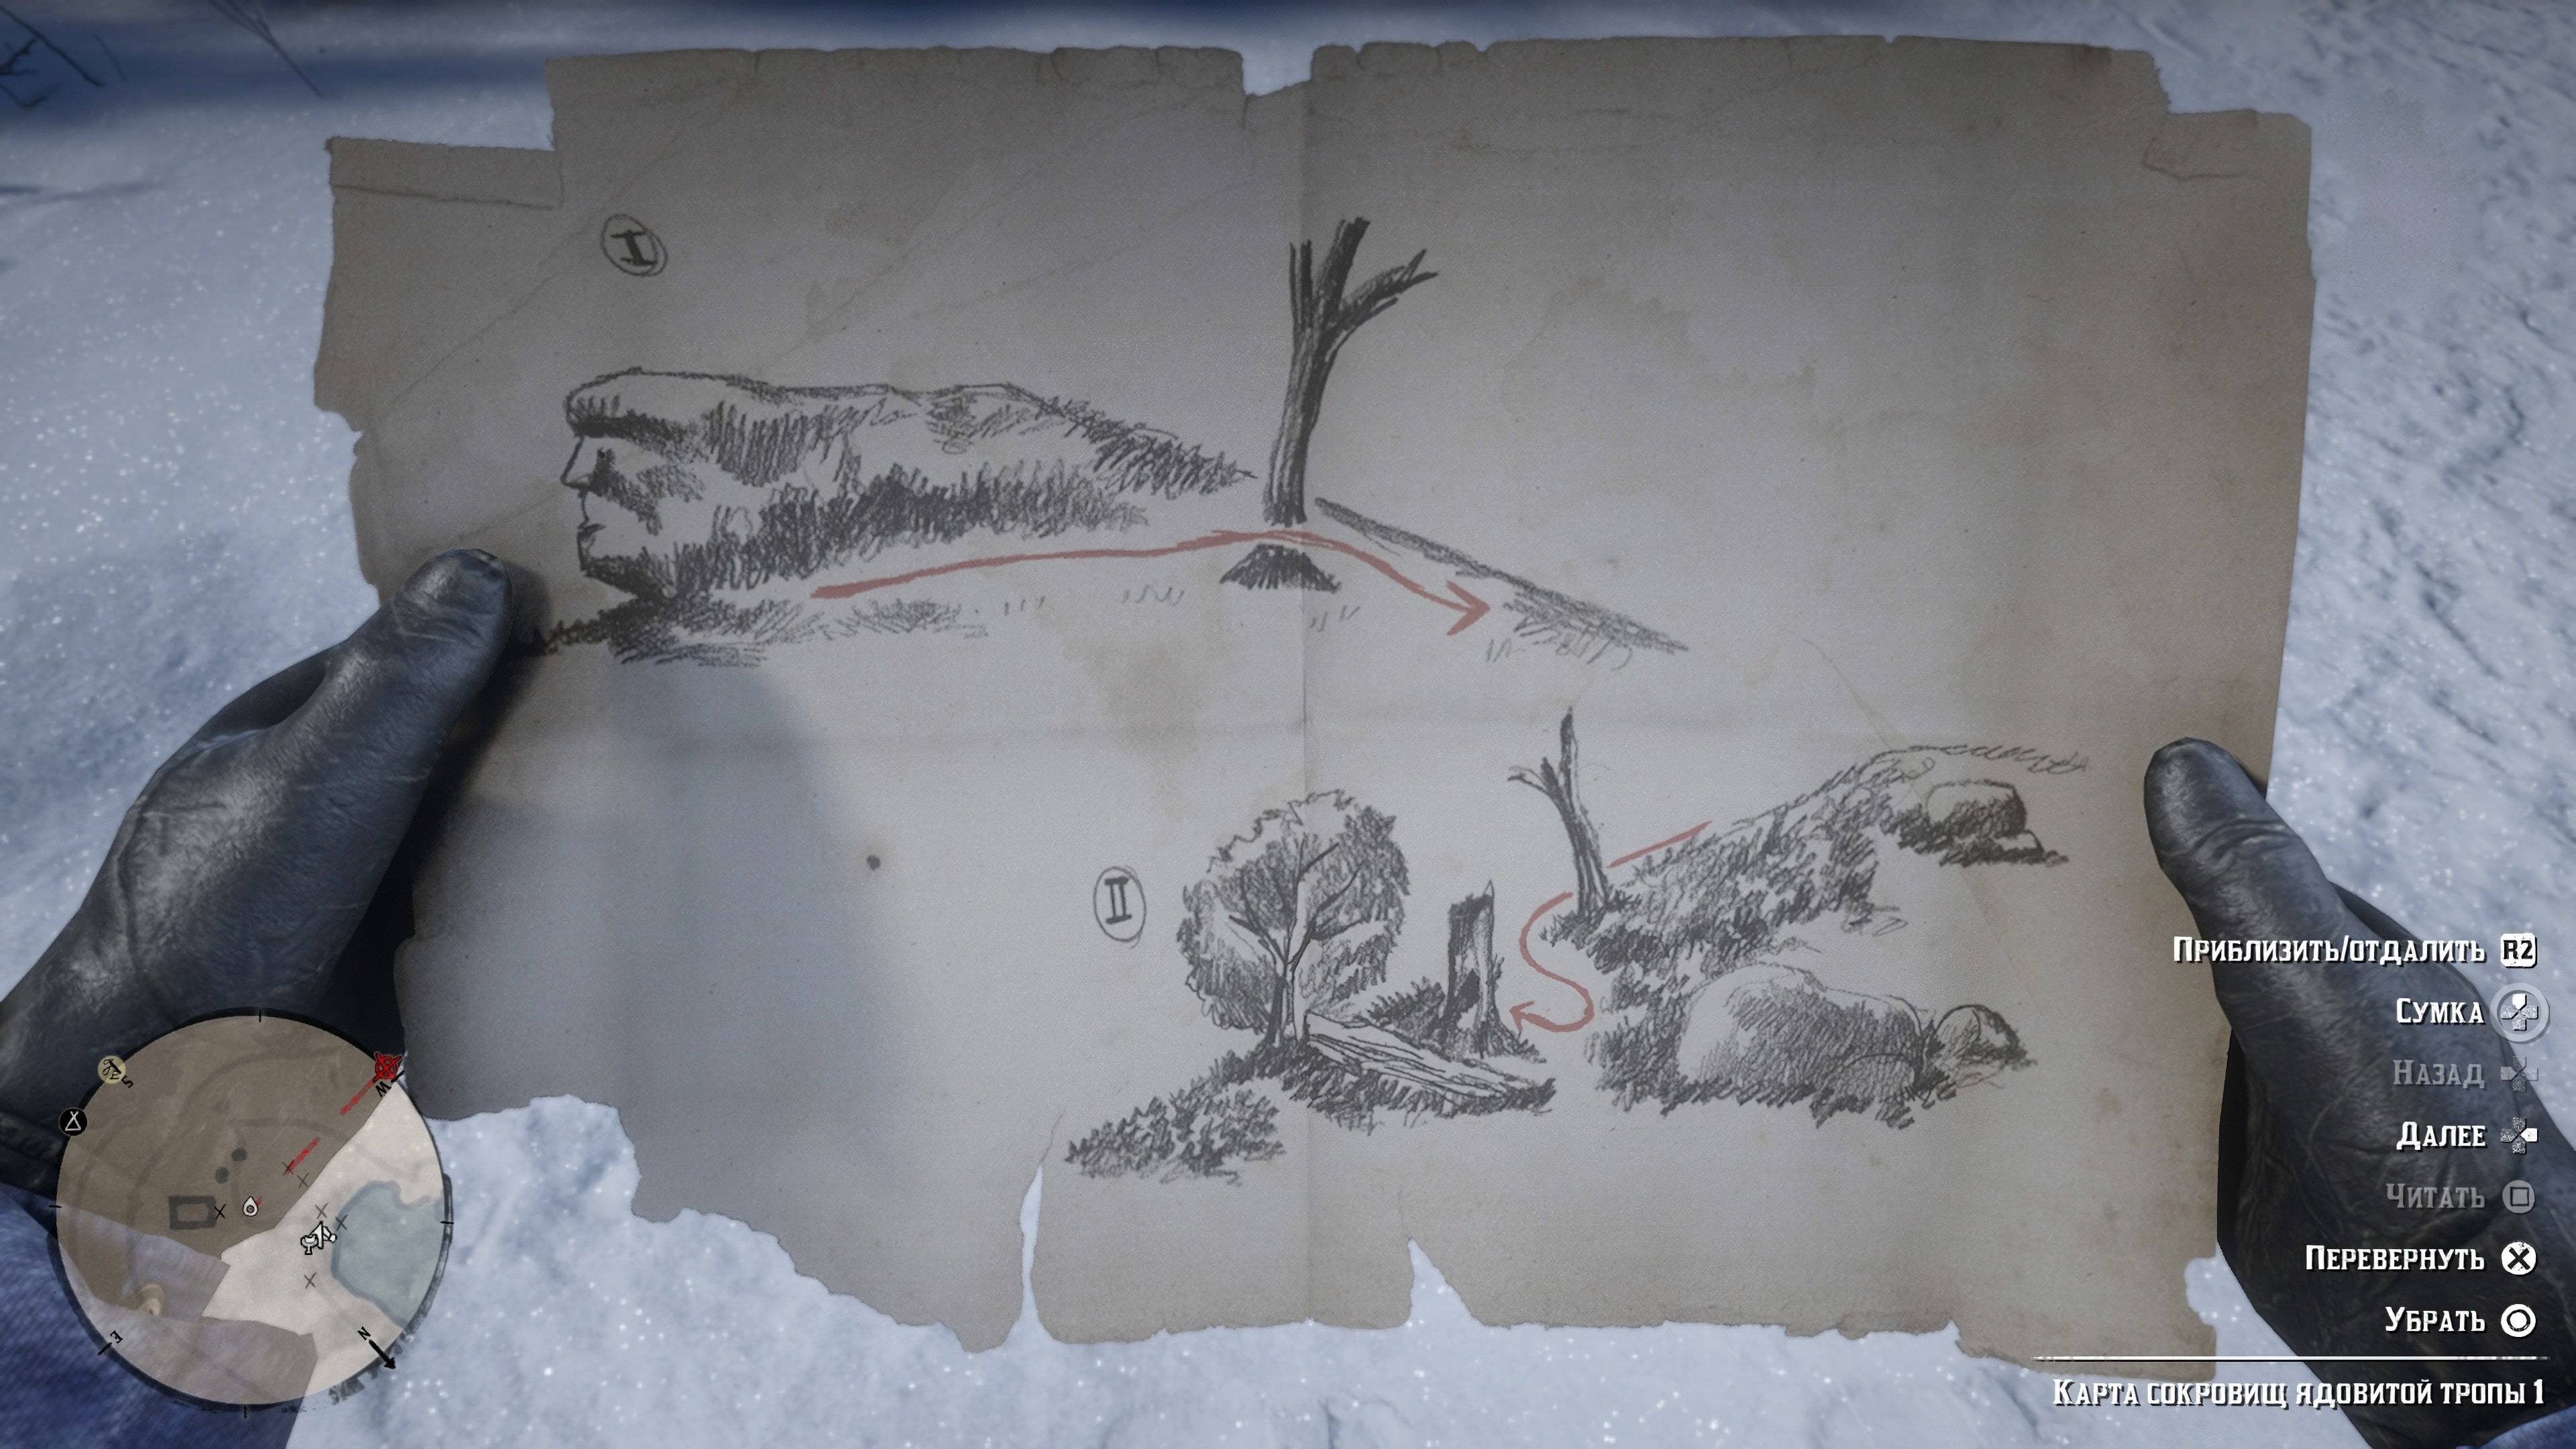
Locating the destination of the first map is easy enough. It is located just north of the town of Rhodes, which is accessible by stagecoach. Look for the “Faw Rock” inscription written on the map.
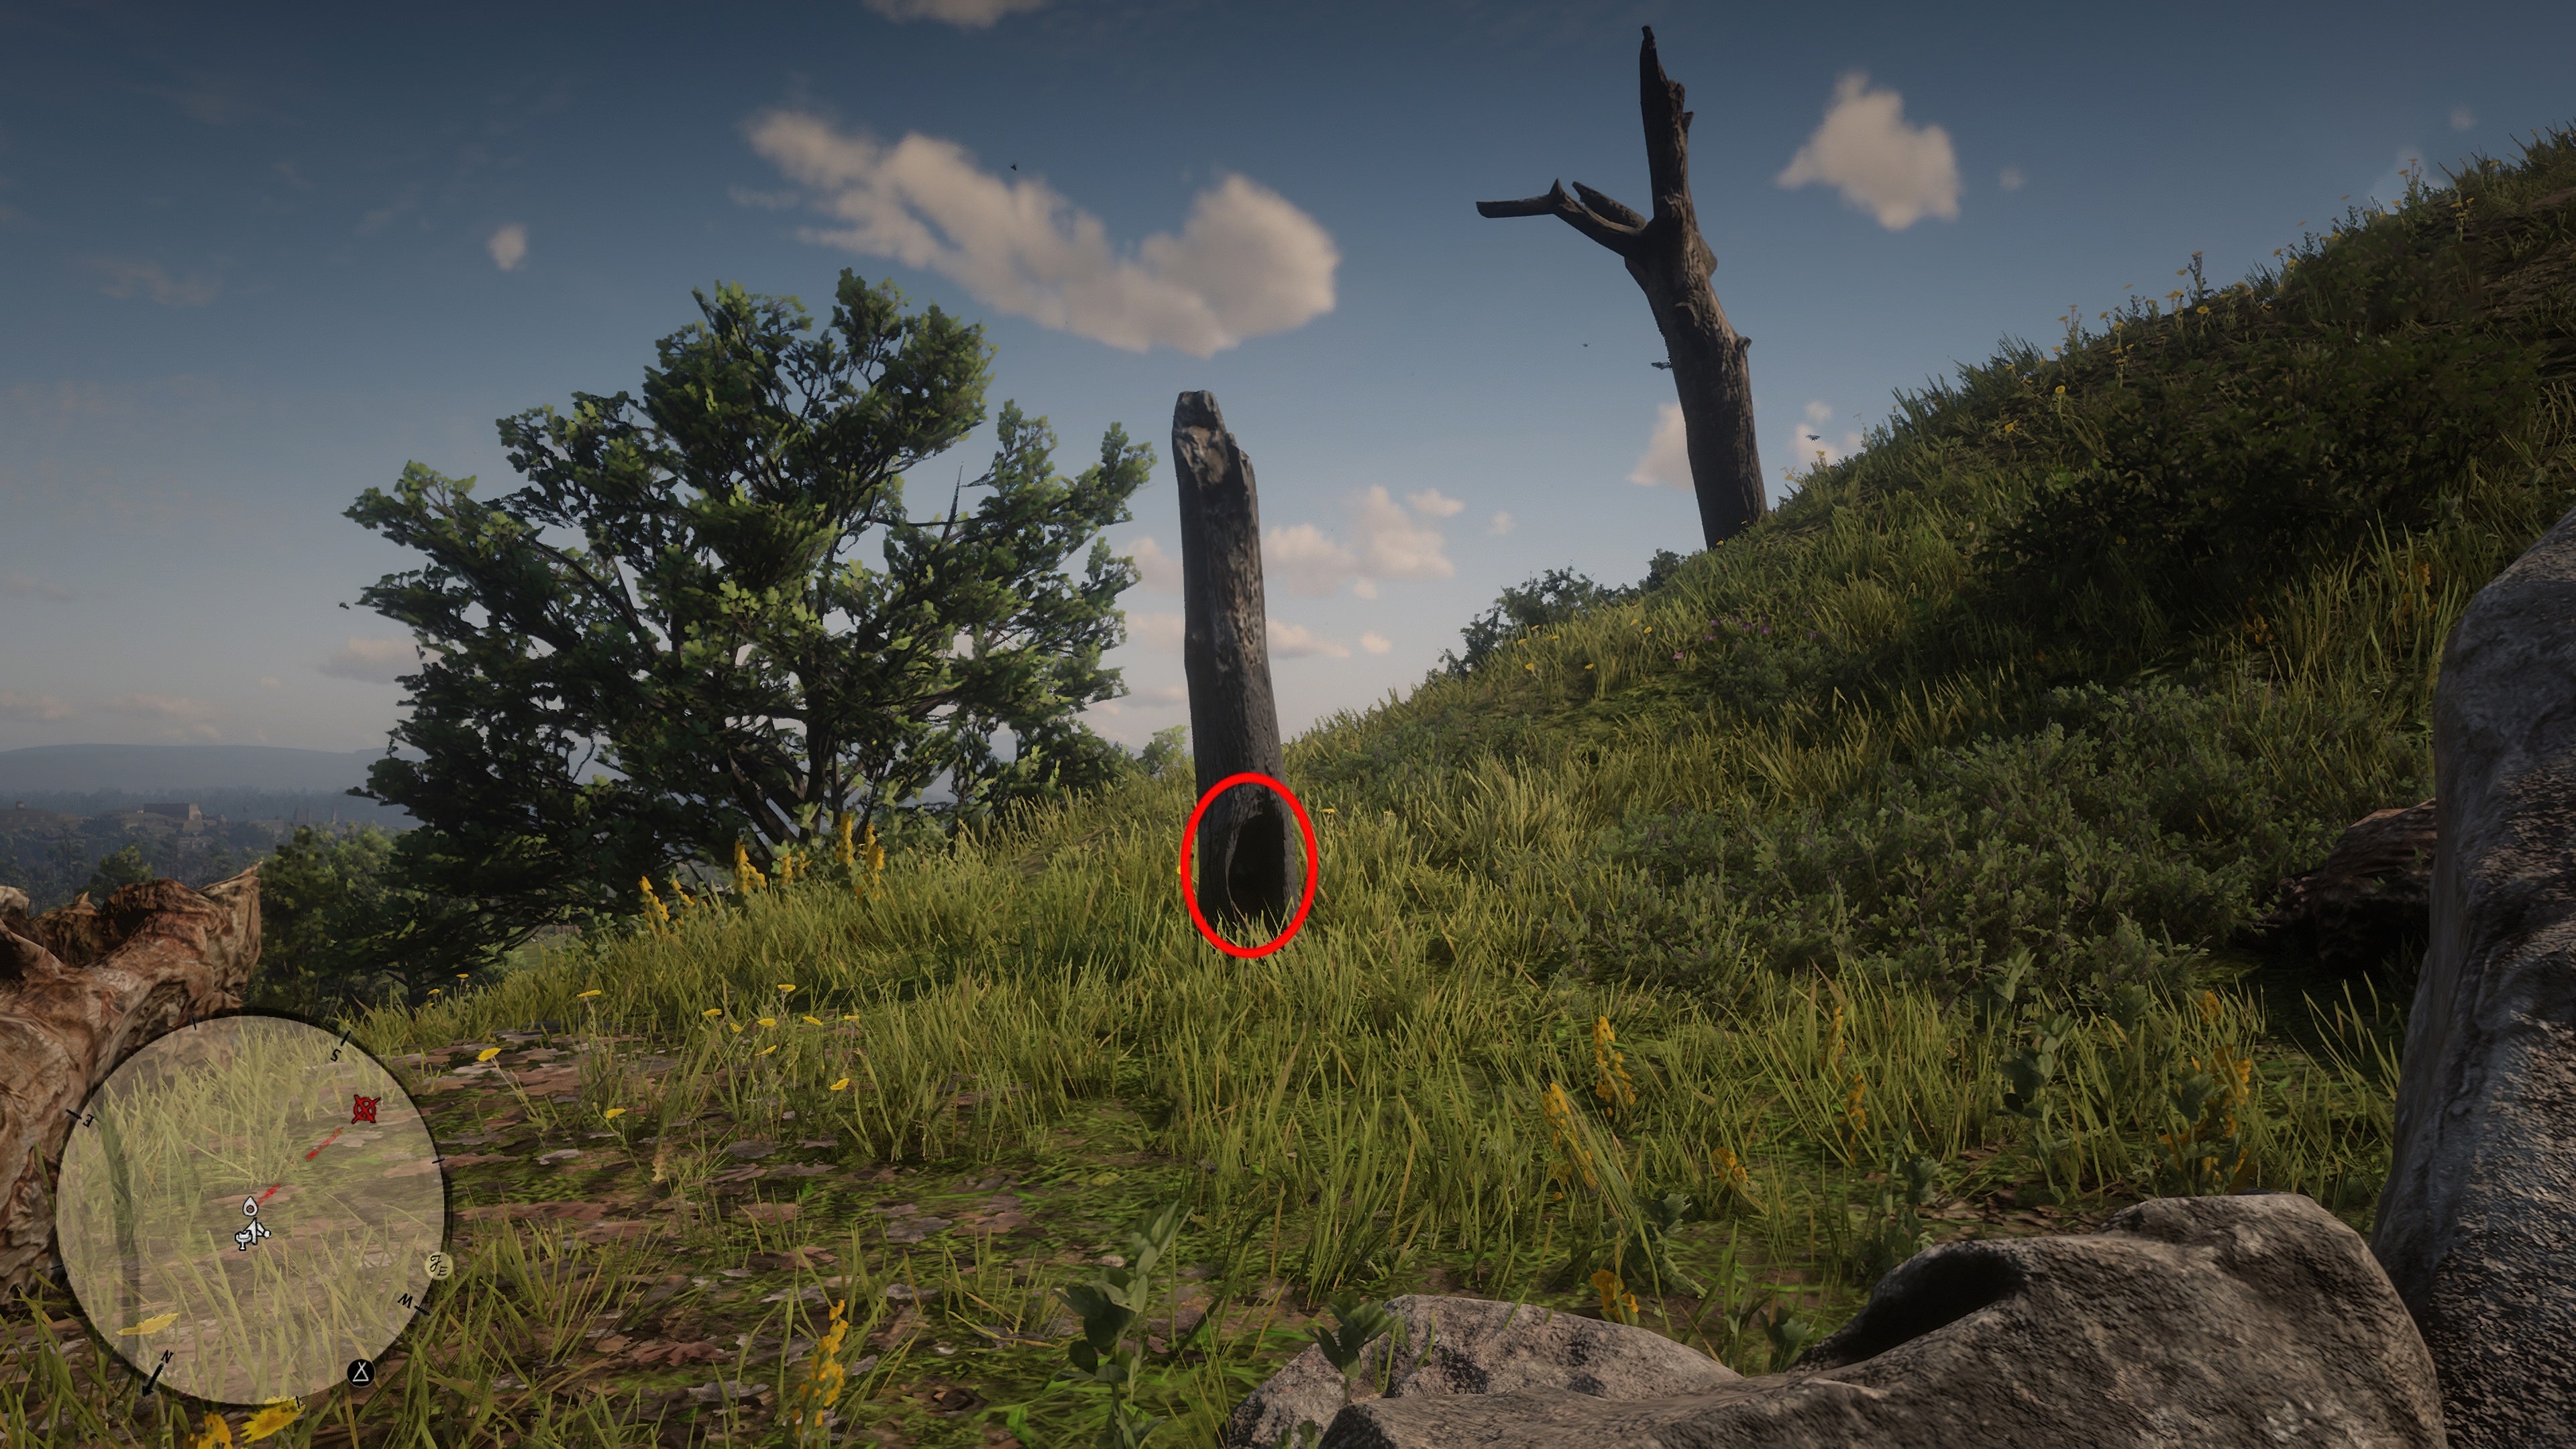
When you arrive at the site, look for a bald tree with a hollow at its base. The next treasure map will be inside. The slingshot-shaped tree can be used as a reference point as it is visible from a distance.
Treasure Map 2
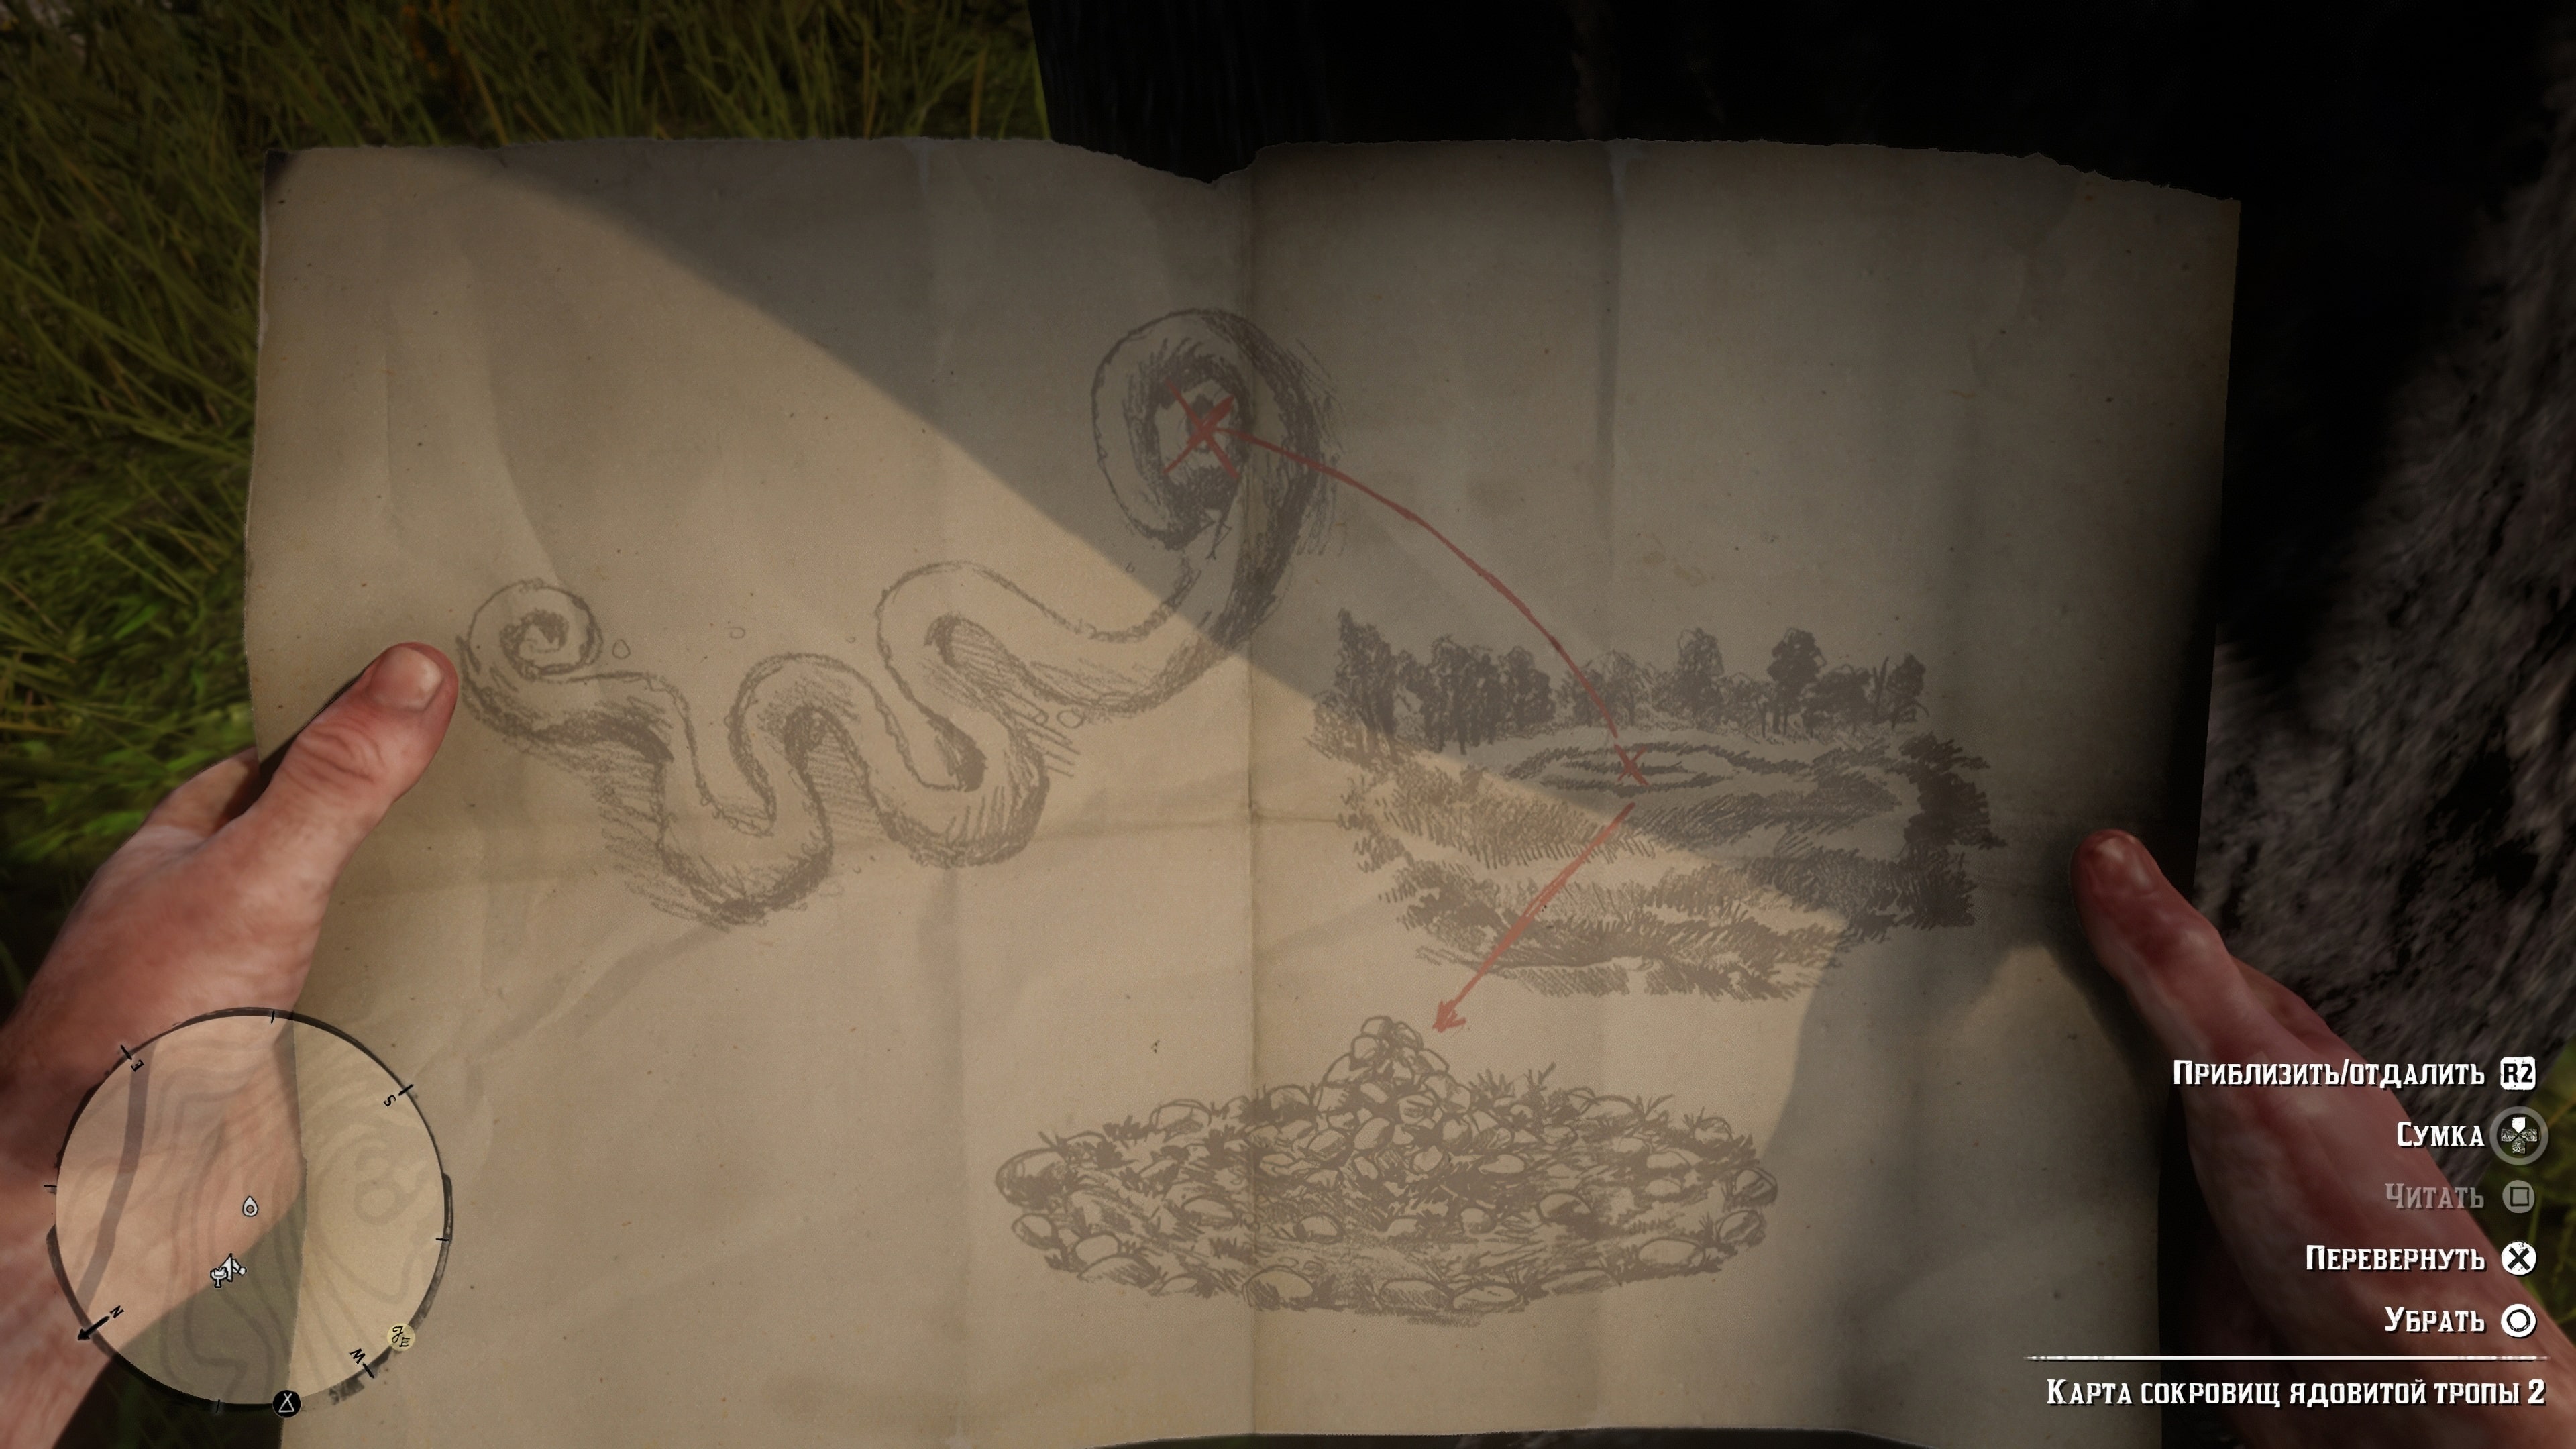
The next map will lead you to a location near the Van Horn trading post, located north of Saint-Denis. You can easily reach the area by stagecoach.
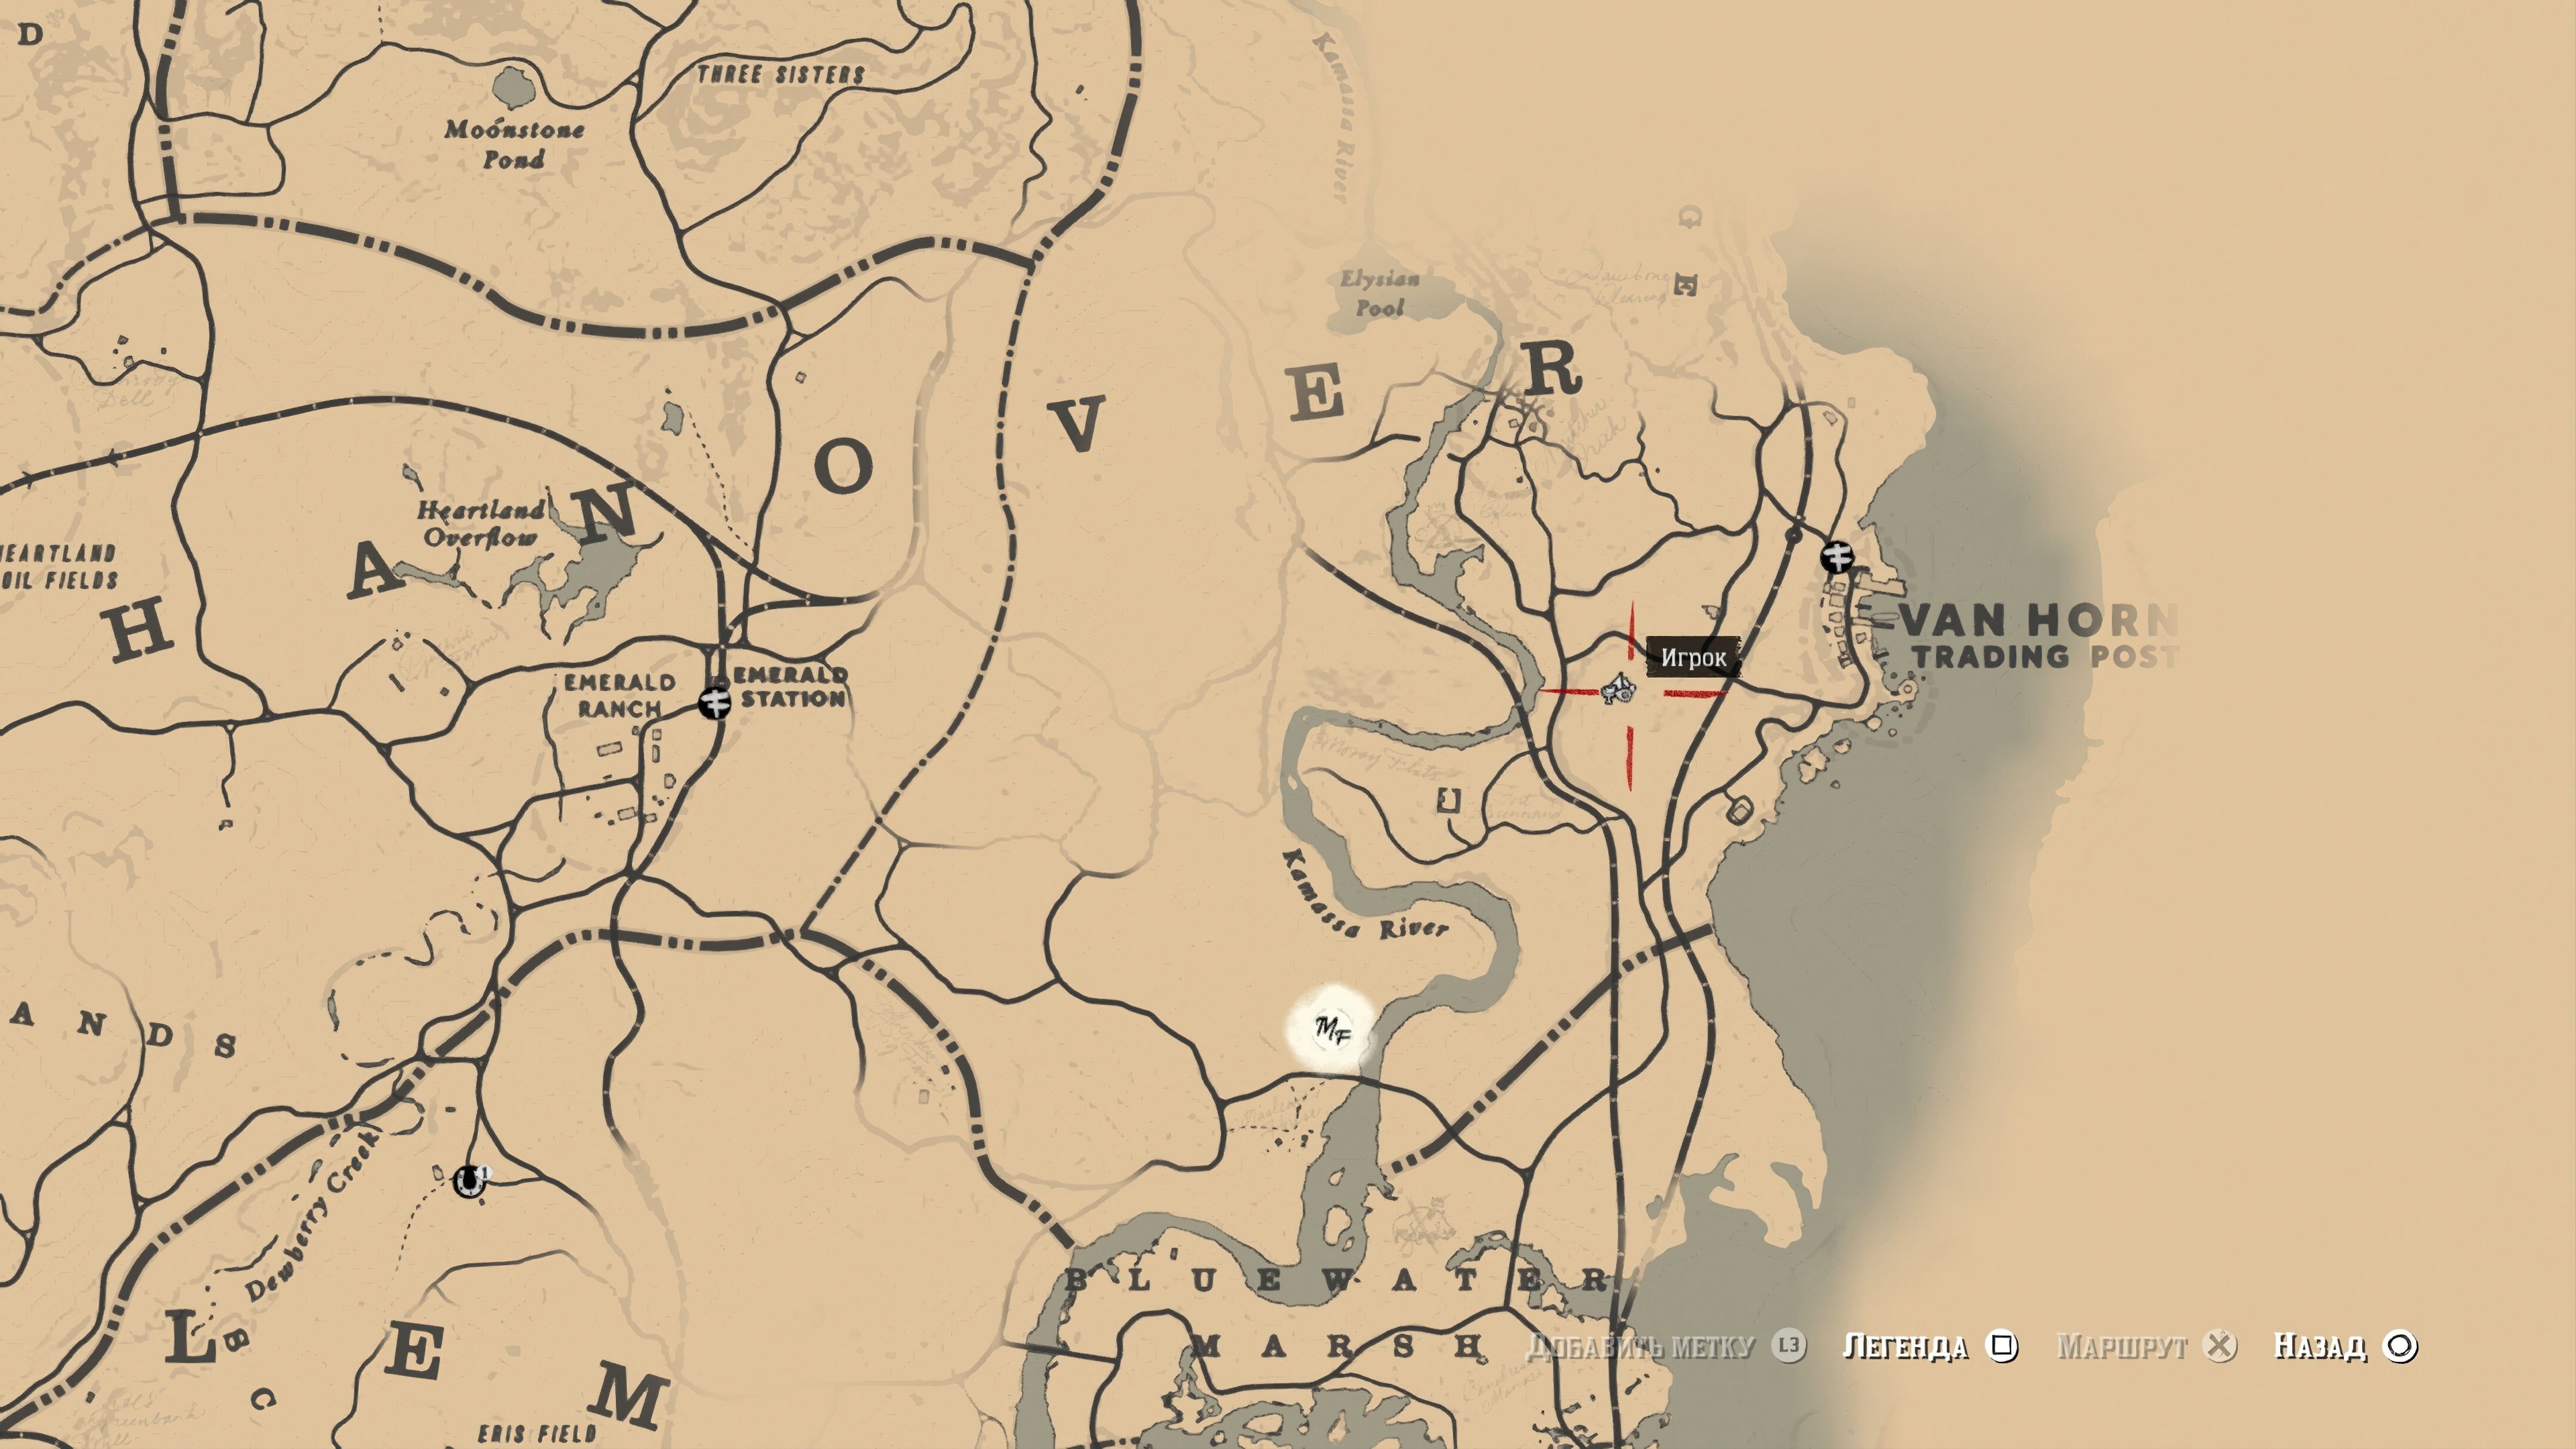
Once there, look for a pile of stones with a distinctive appearance. The final treasure map can be found in the middle of the pile. There are no inscriptions nearby, so refer to the second screenshot for the exact location.

Treasure Map 3
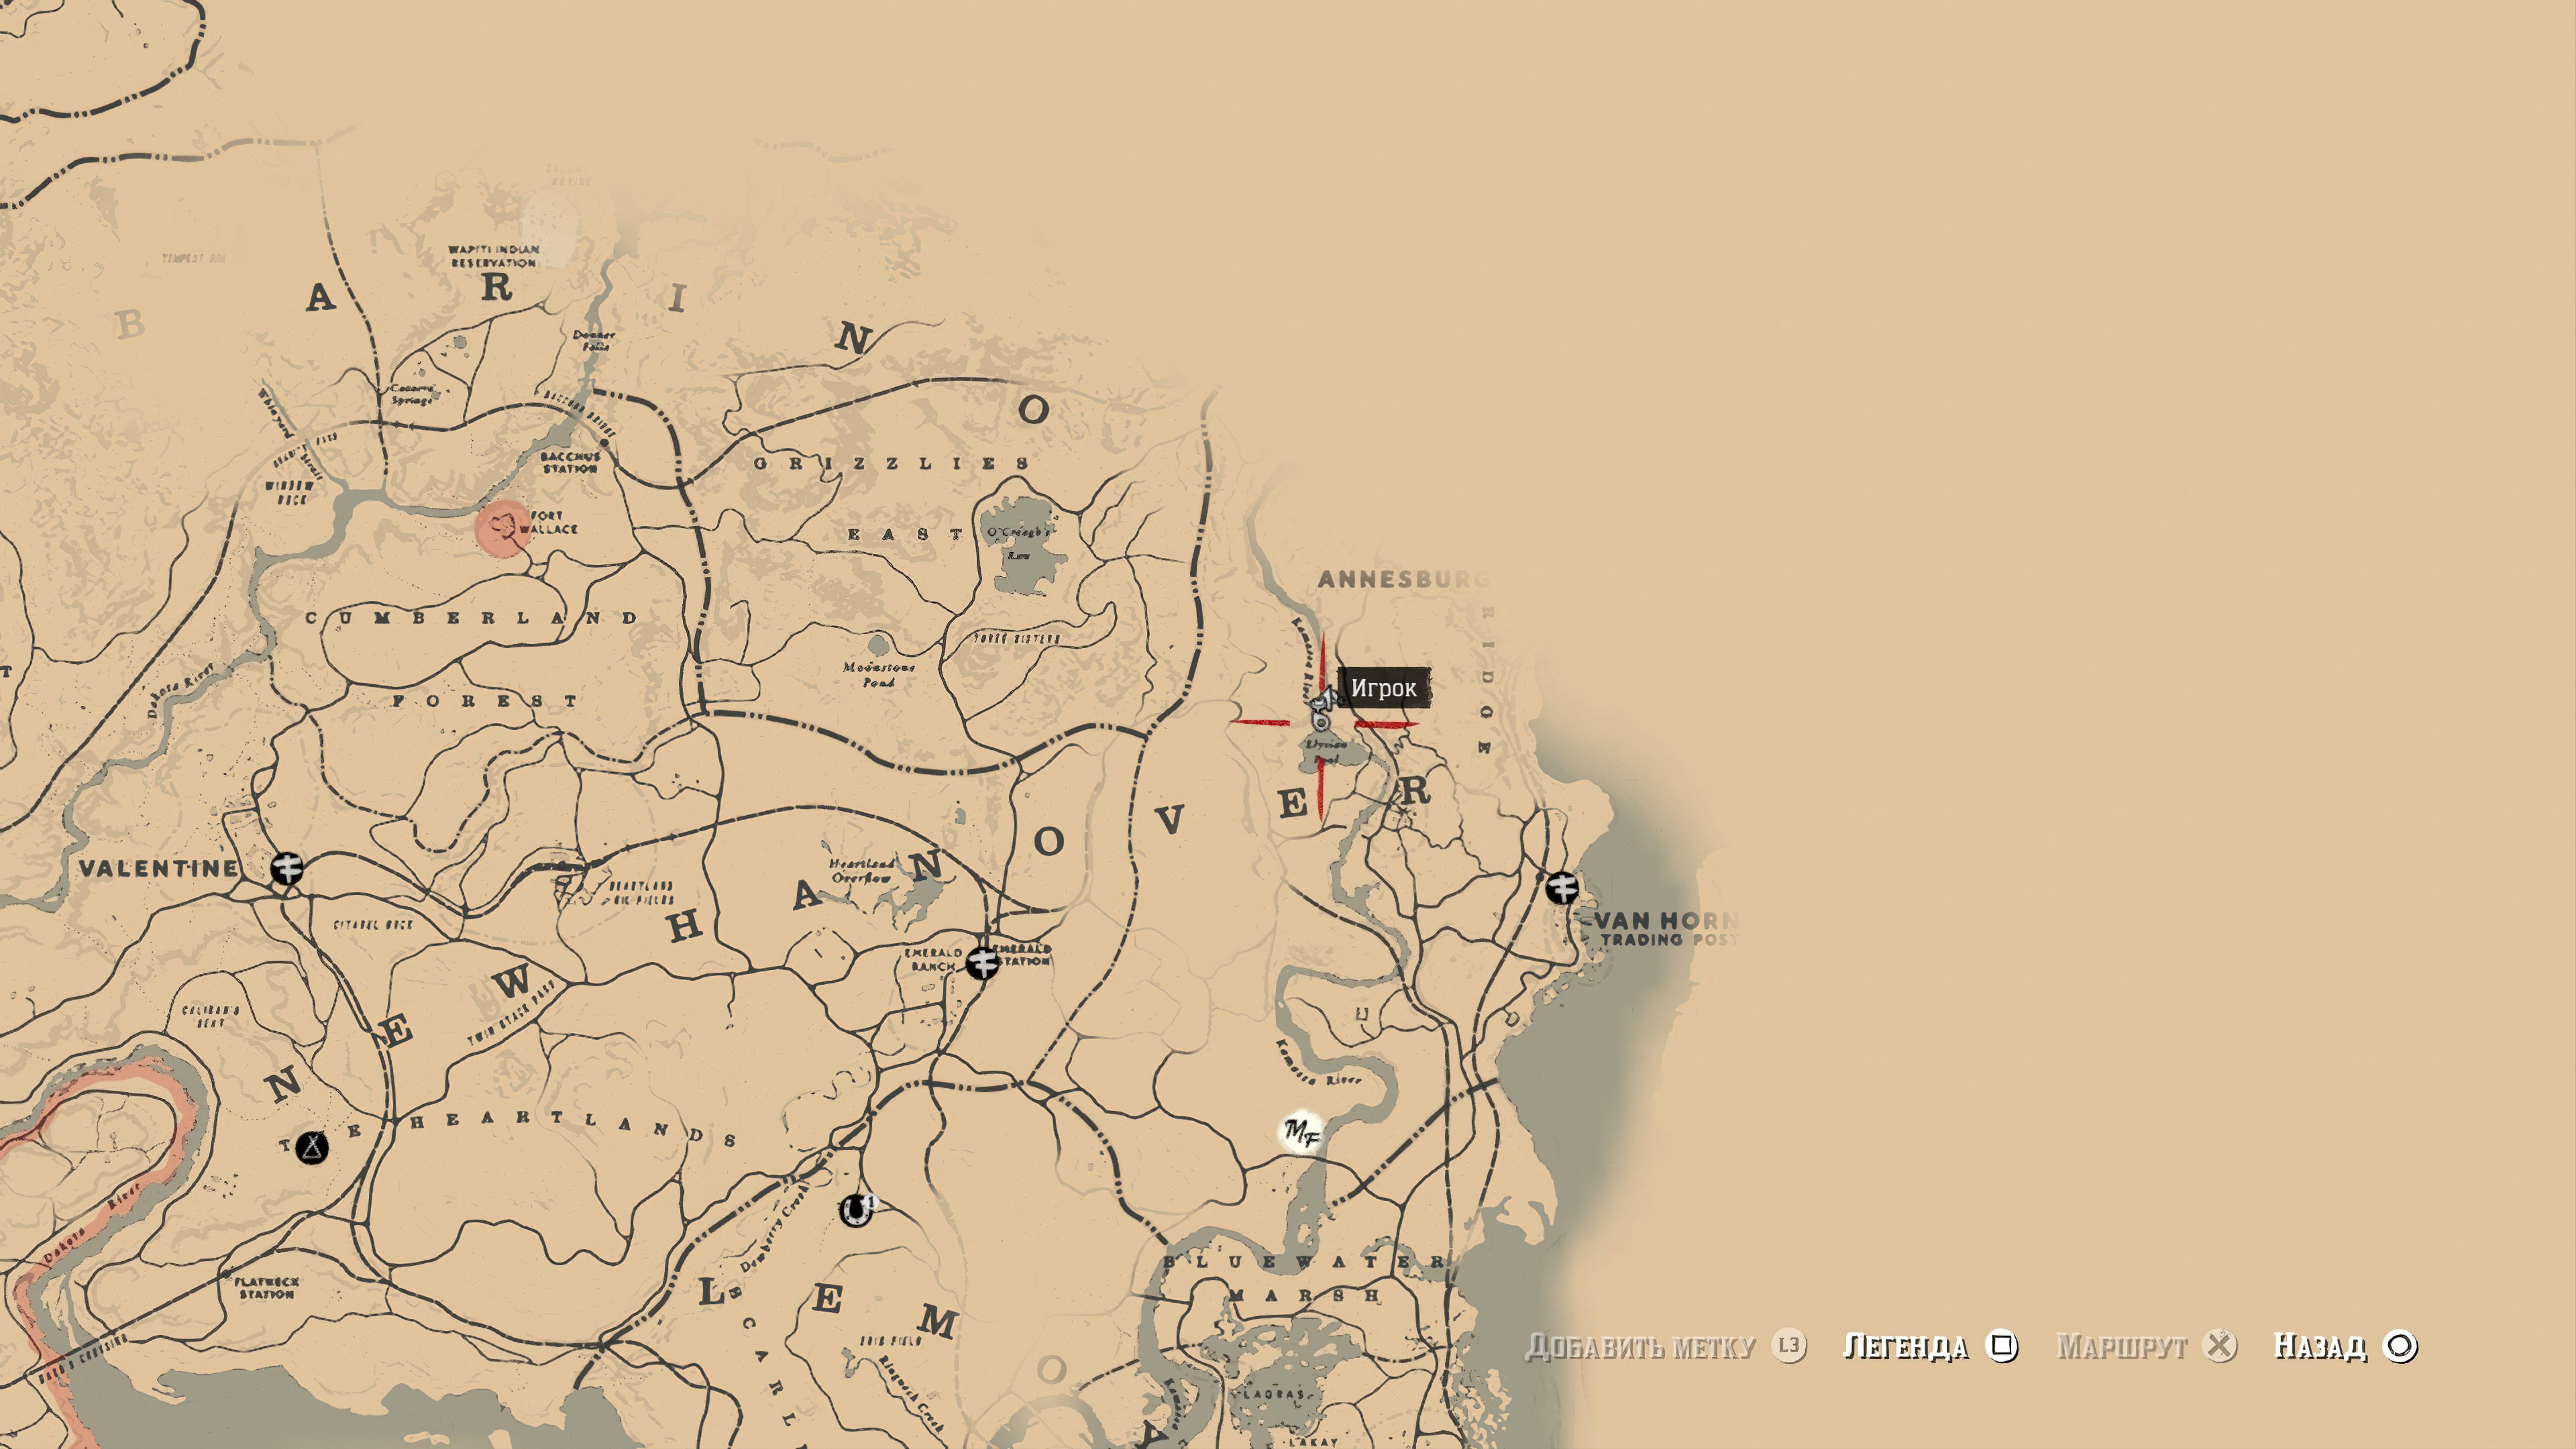
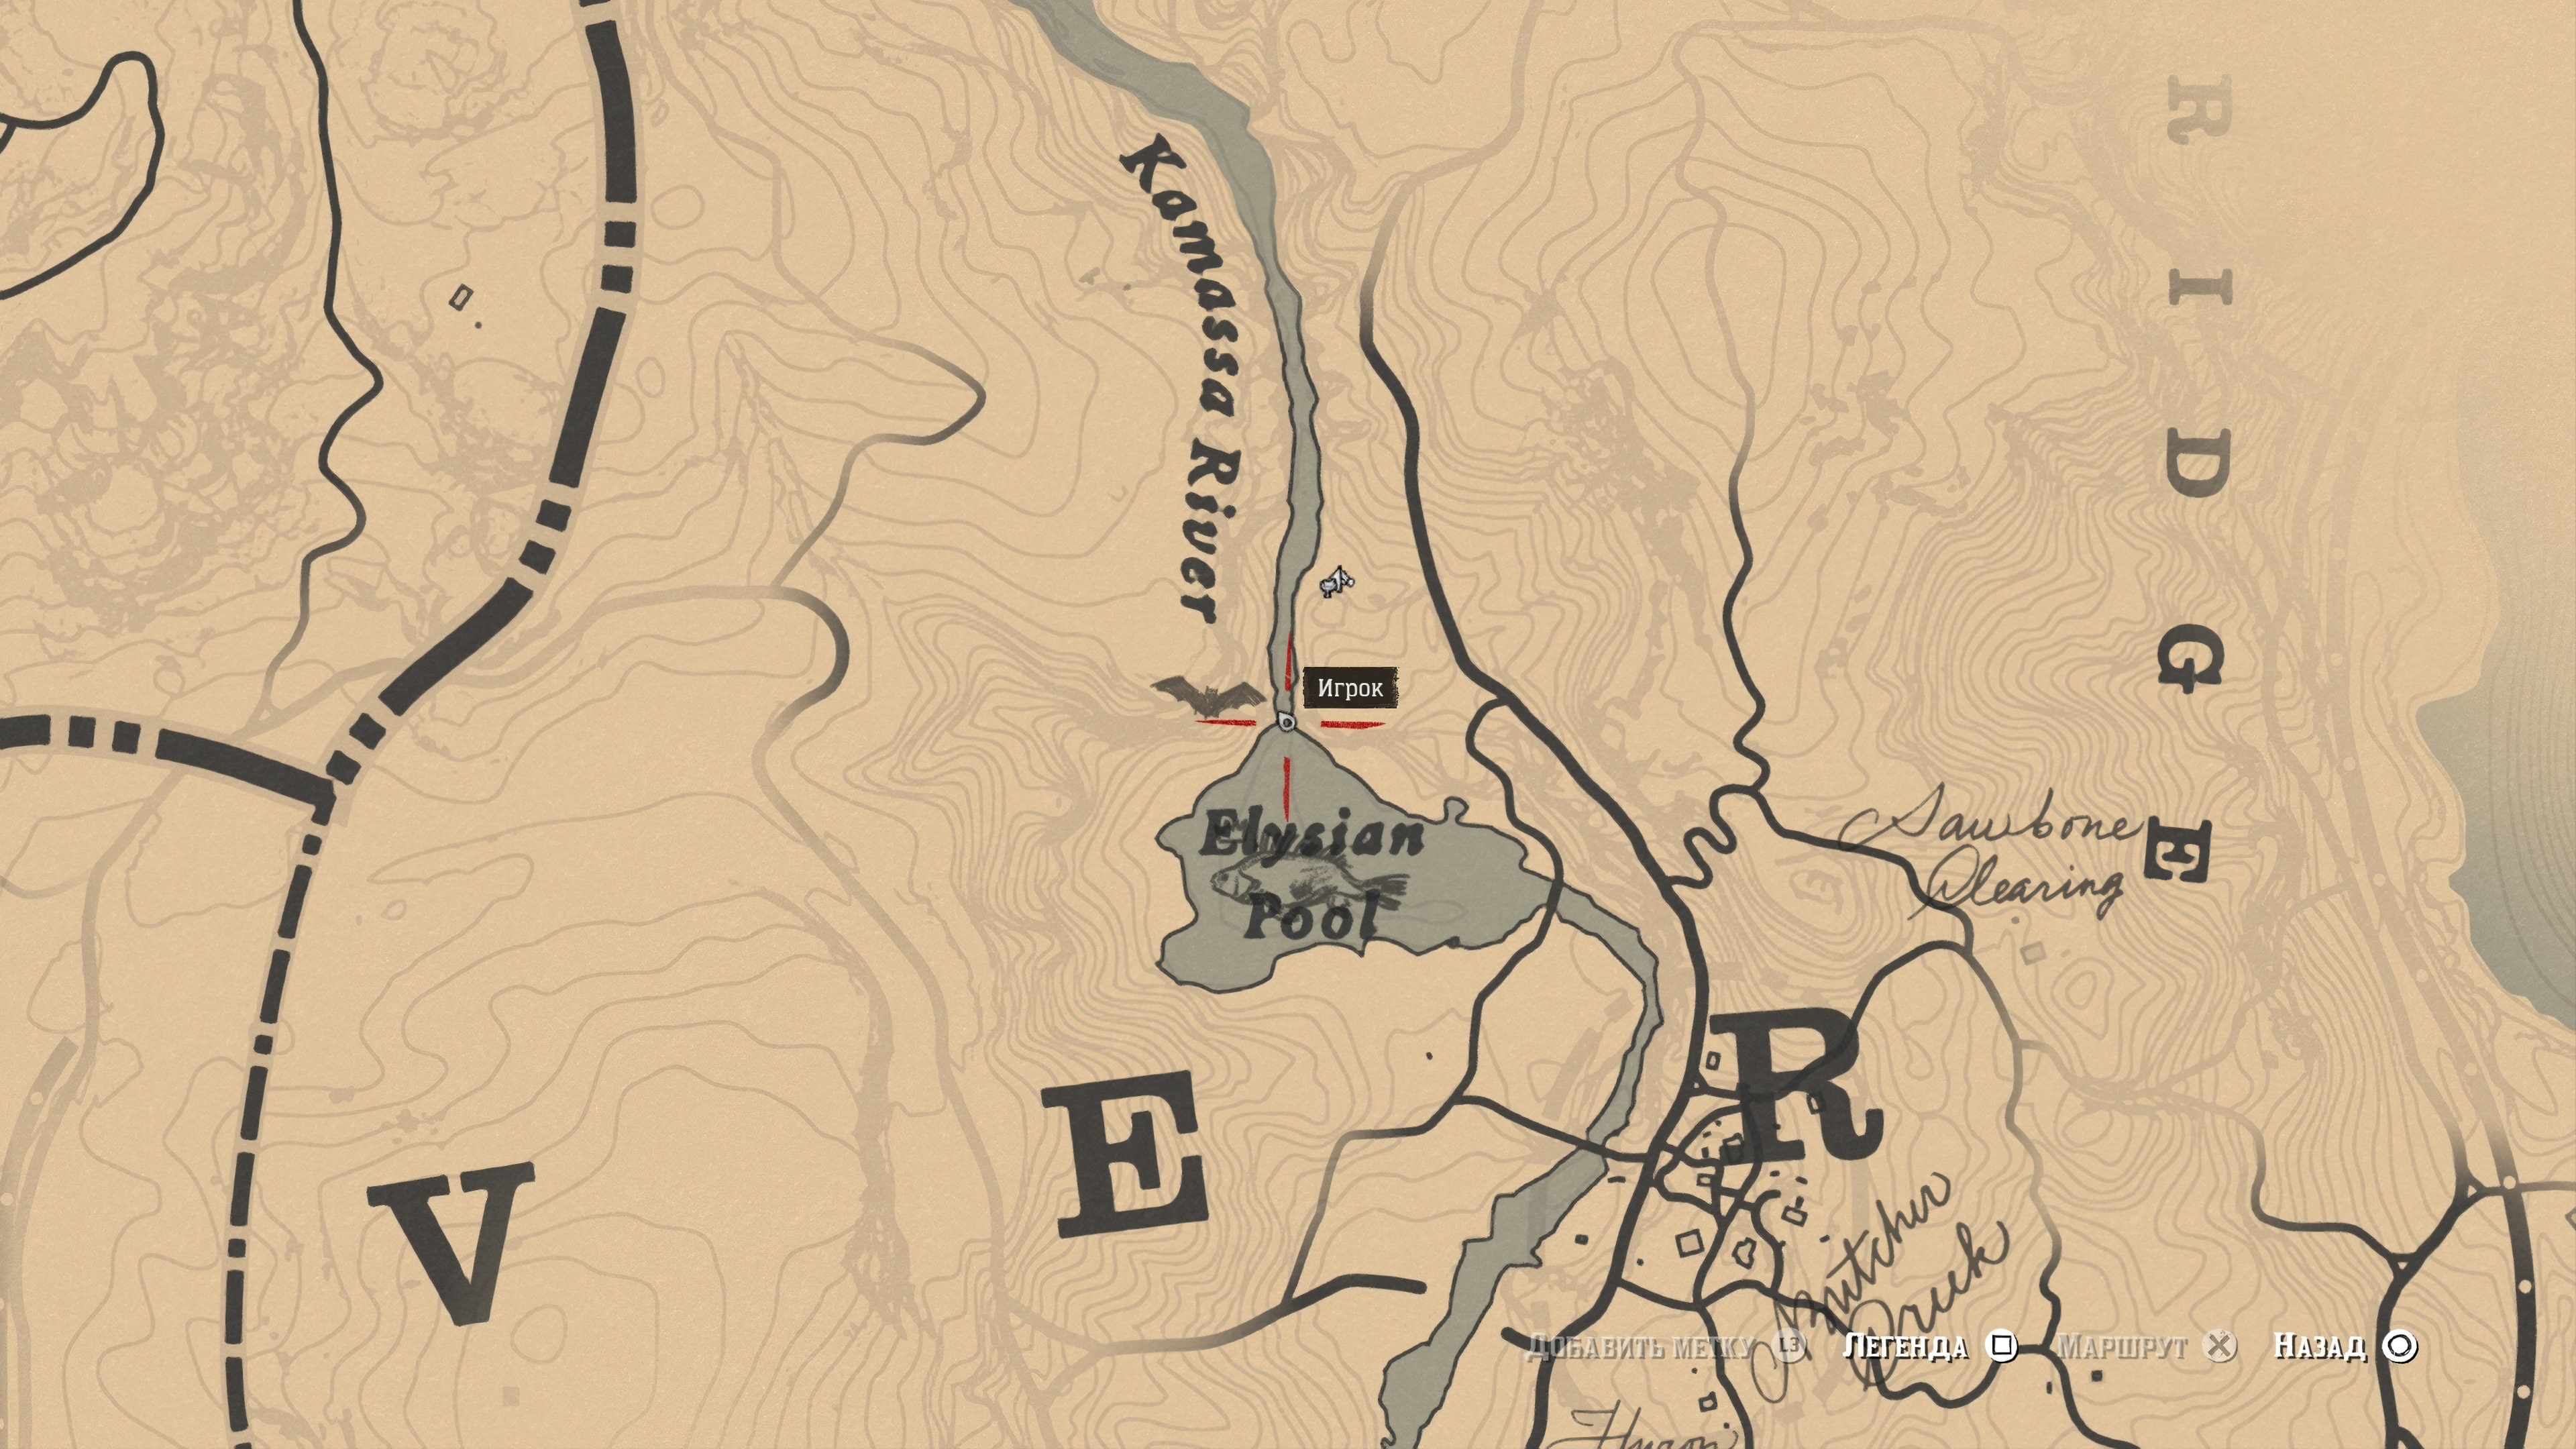
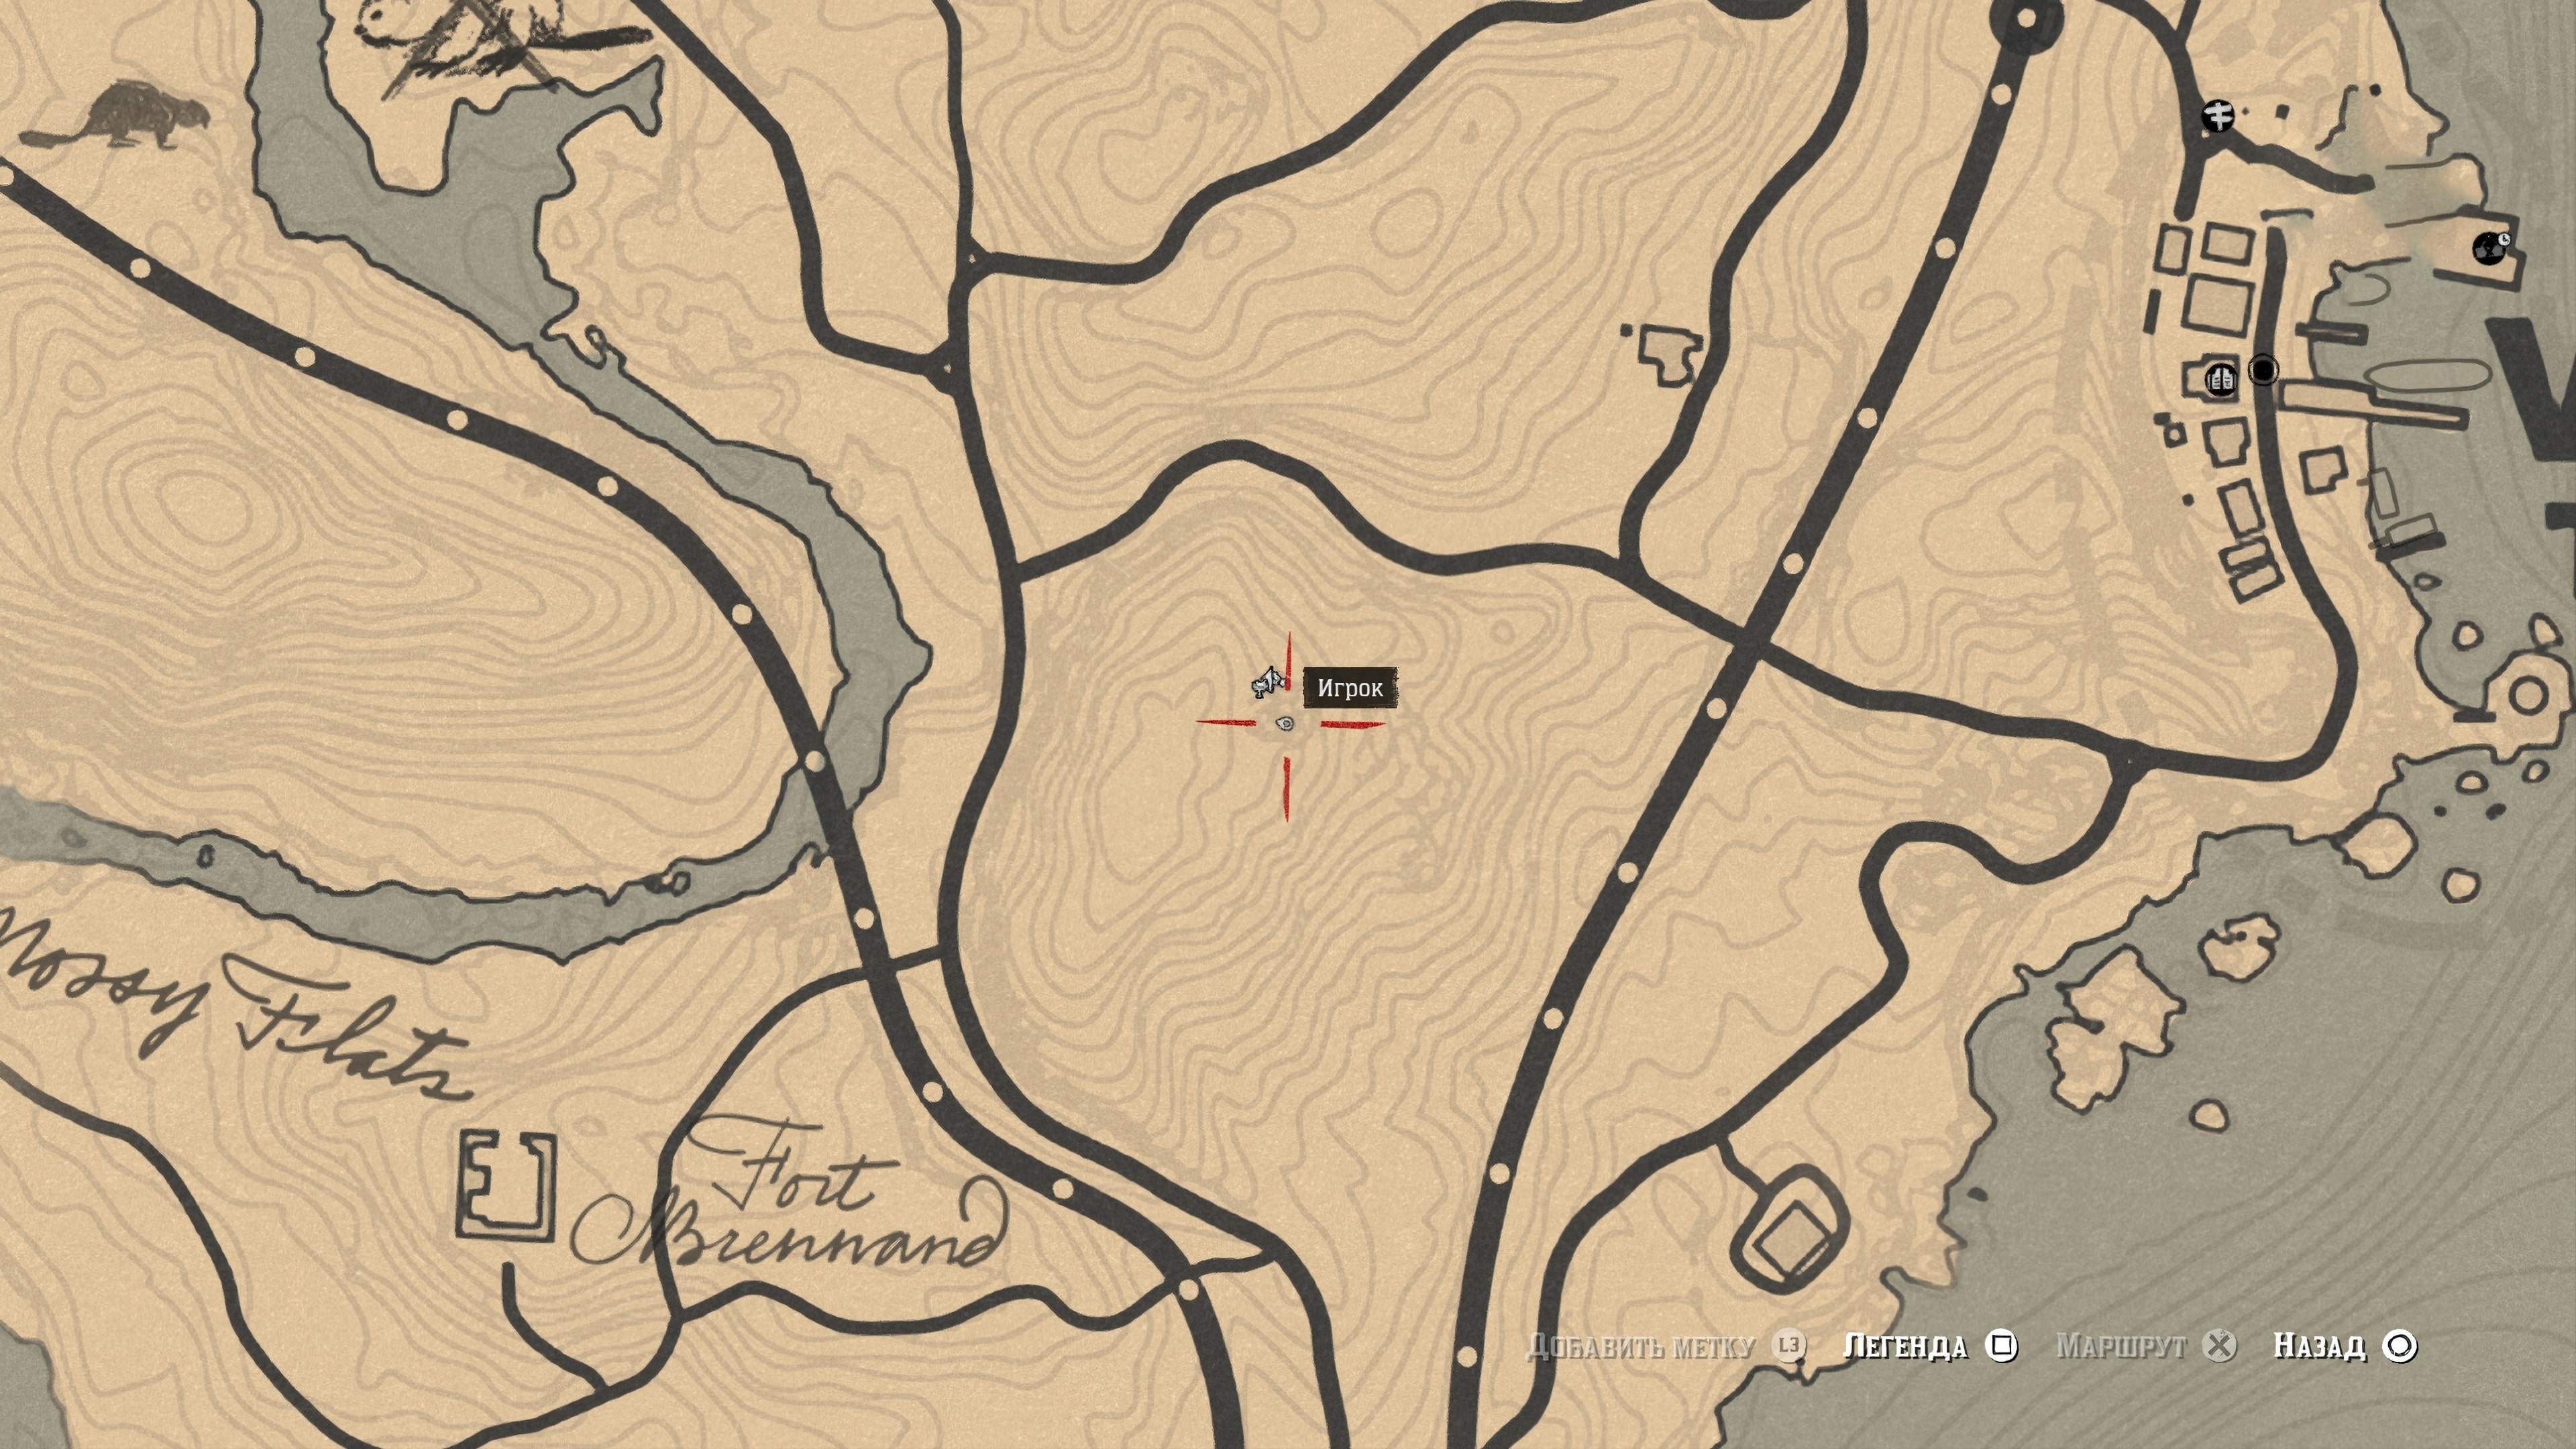
Finding the treasure on the final map of the Poison Trail set will reward you with four gold bars, which can be sold to a fence for $2,000. Head northwest from the Van Horn trading post to find Lake Elysian pool.
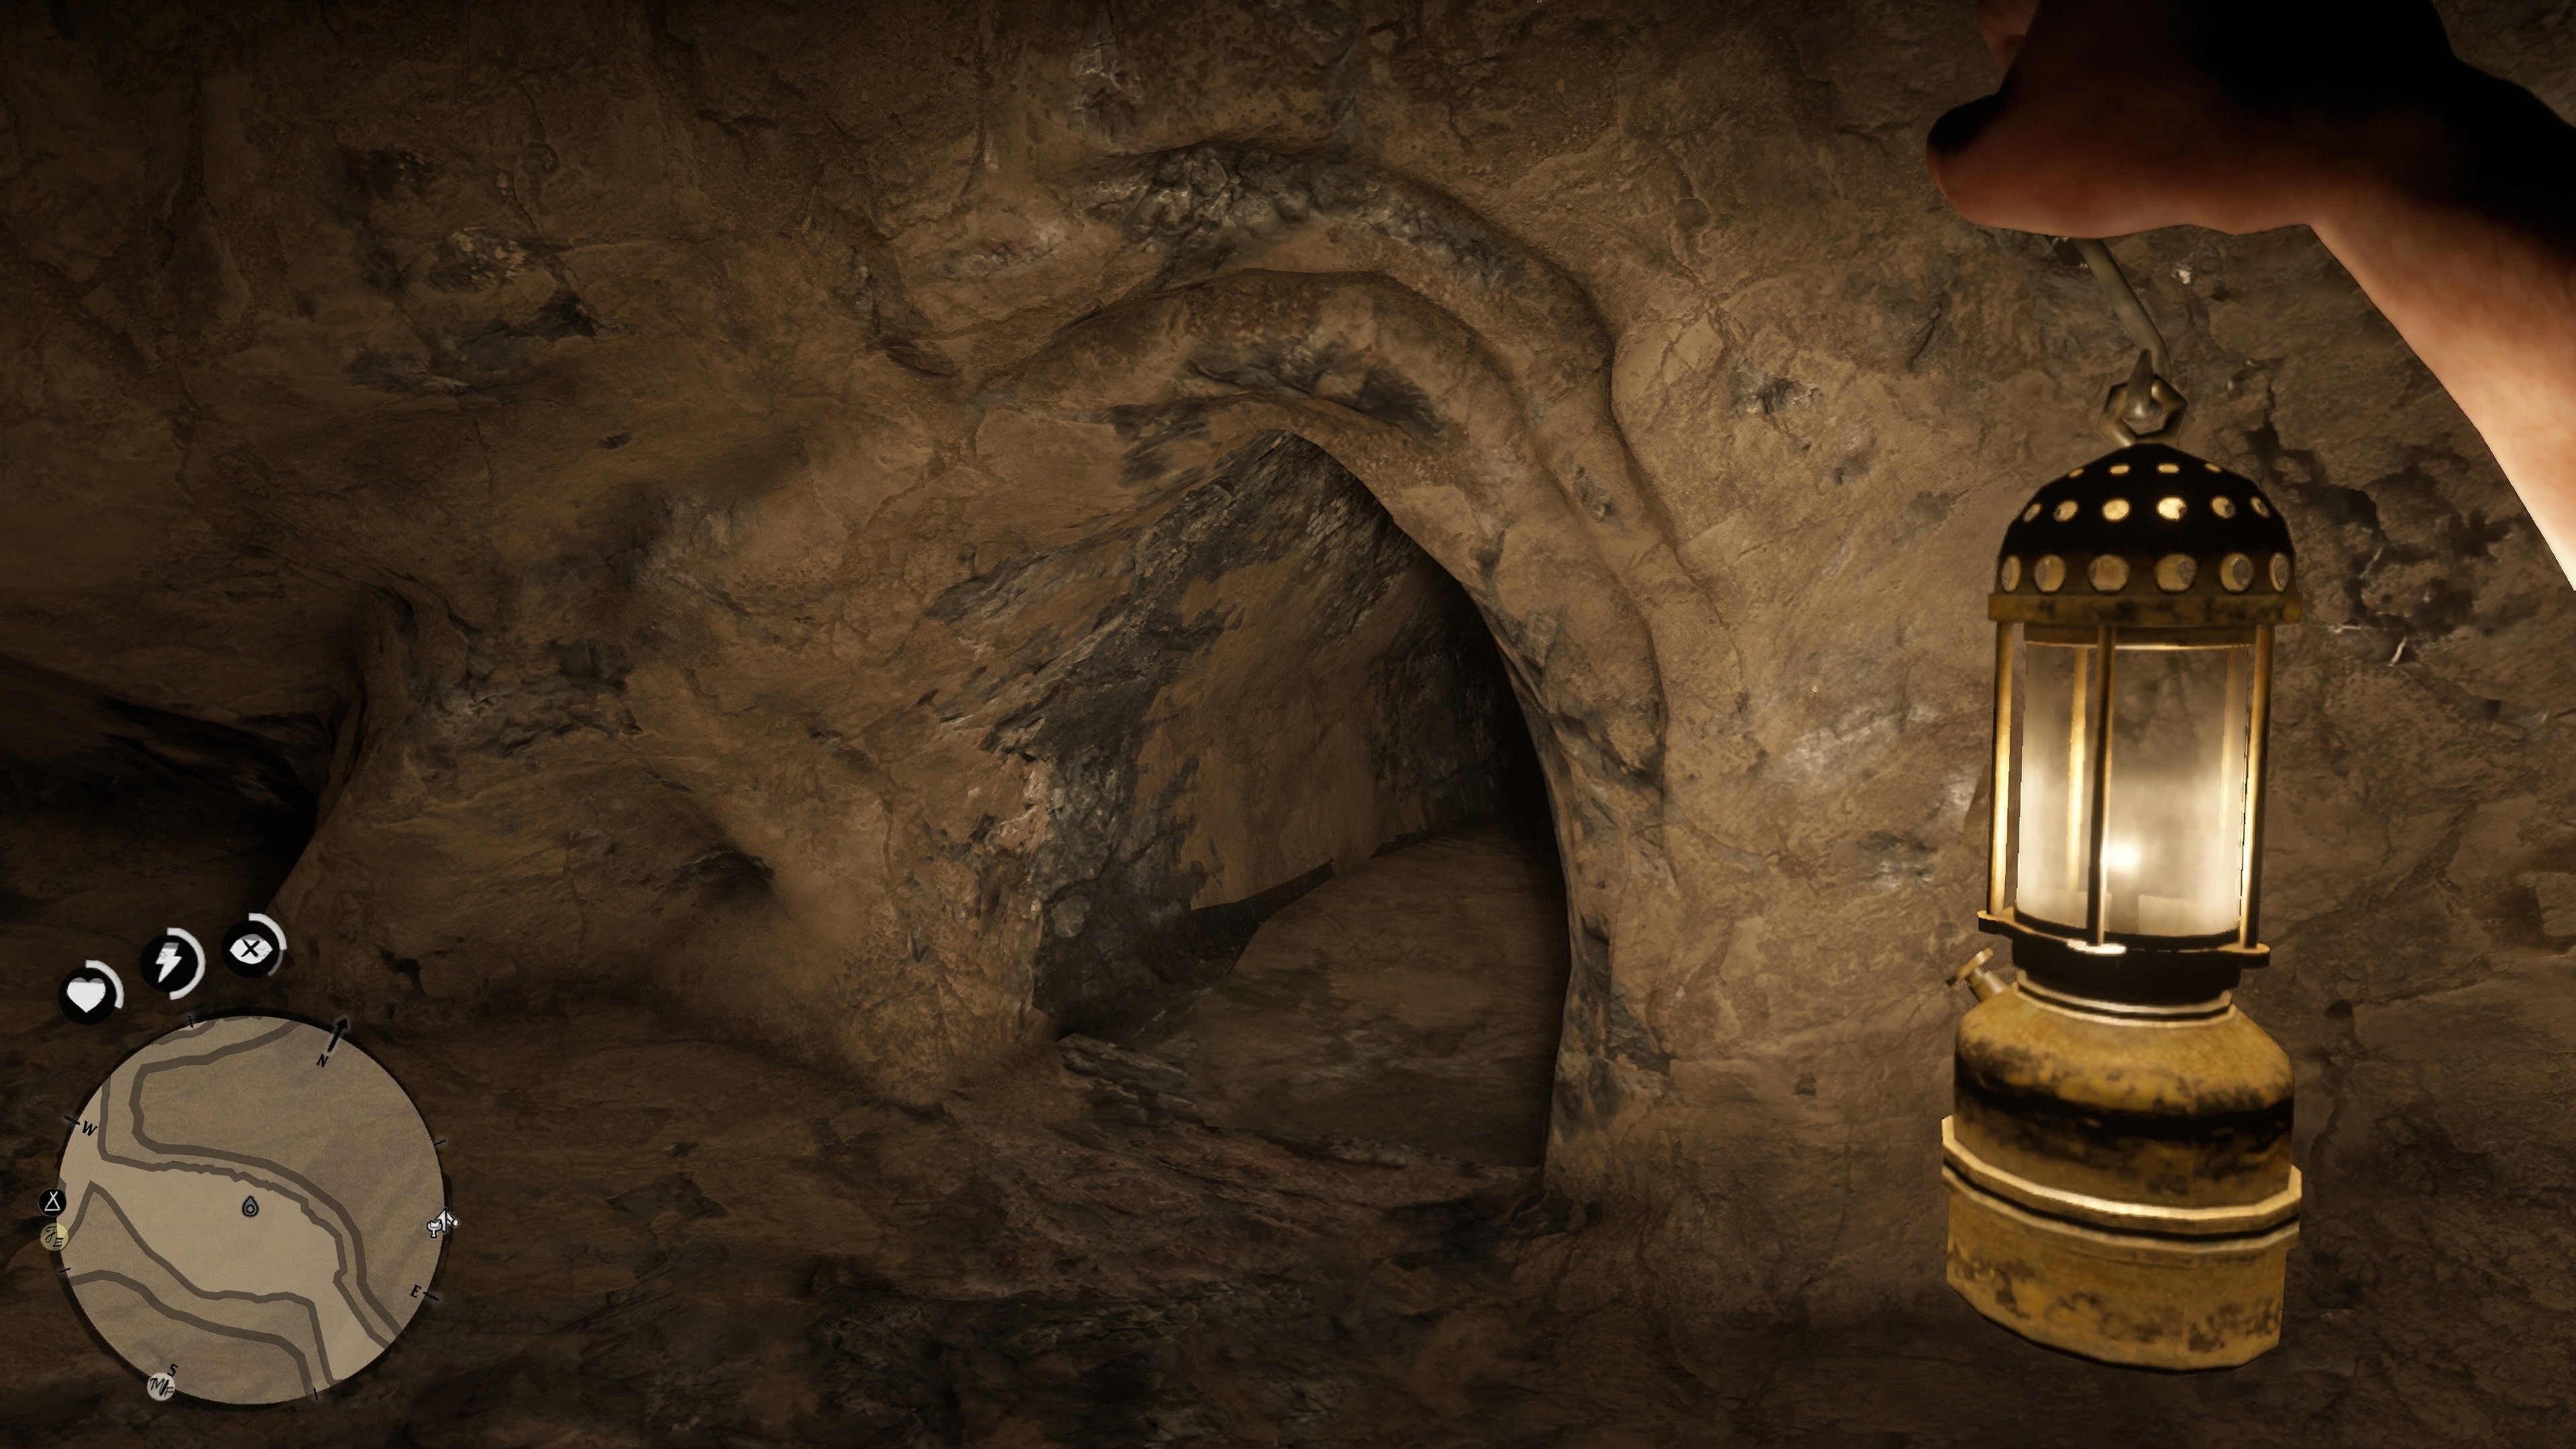
Go through the small waterfall in the river to find yourself in a small cave. It’s dark in the cave, so select the lantern in the weapon selector (knife cell).
Move through the tunnel until you reach a wider area. On the right side, carefully climb down to the floor and look for a small gap at the bottom. Refer to the minimap in the screenshot for an accurate picture.
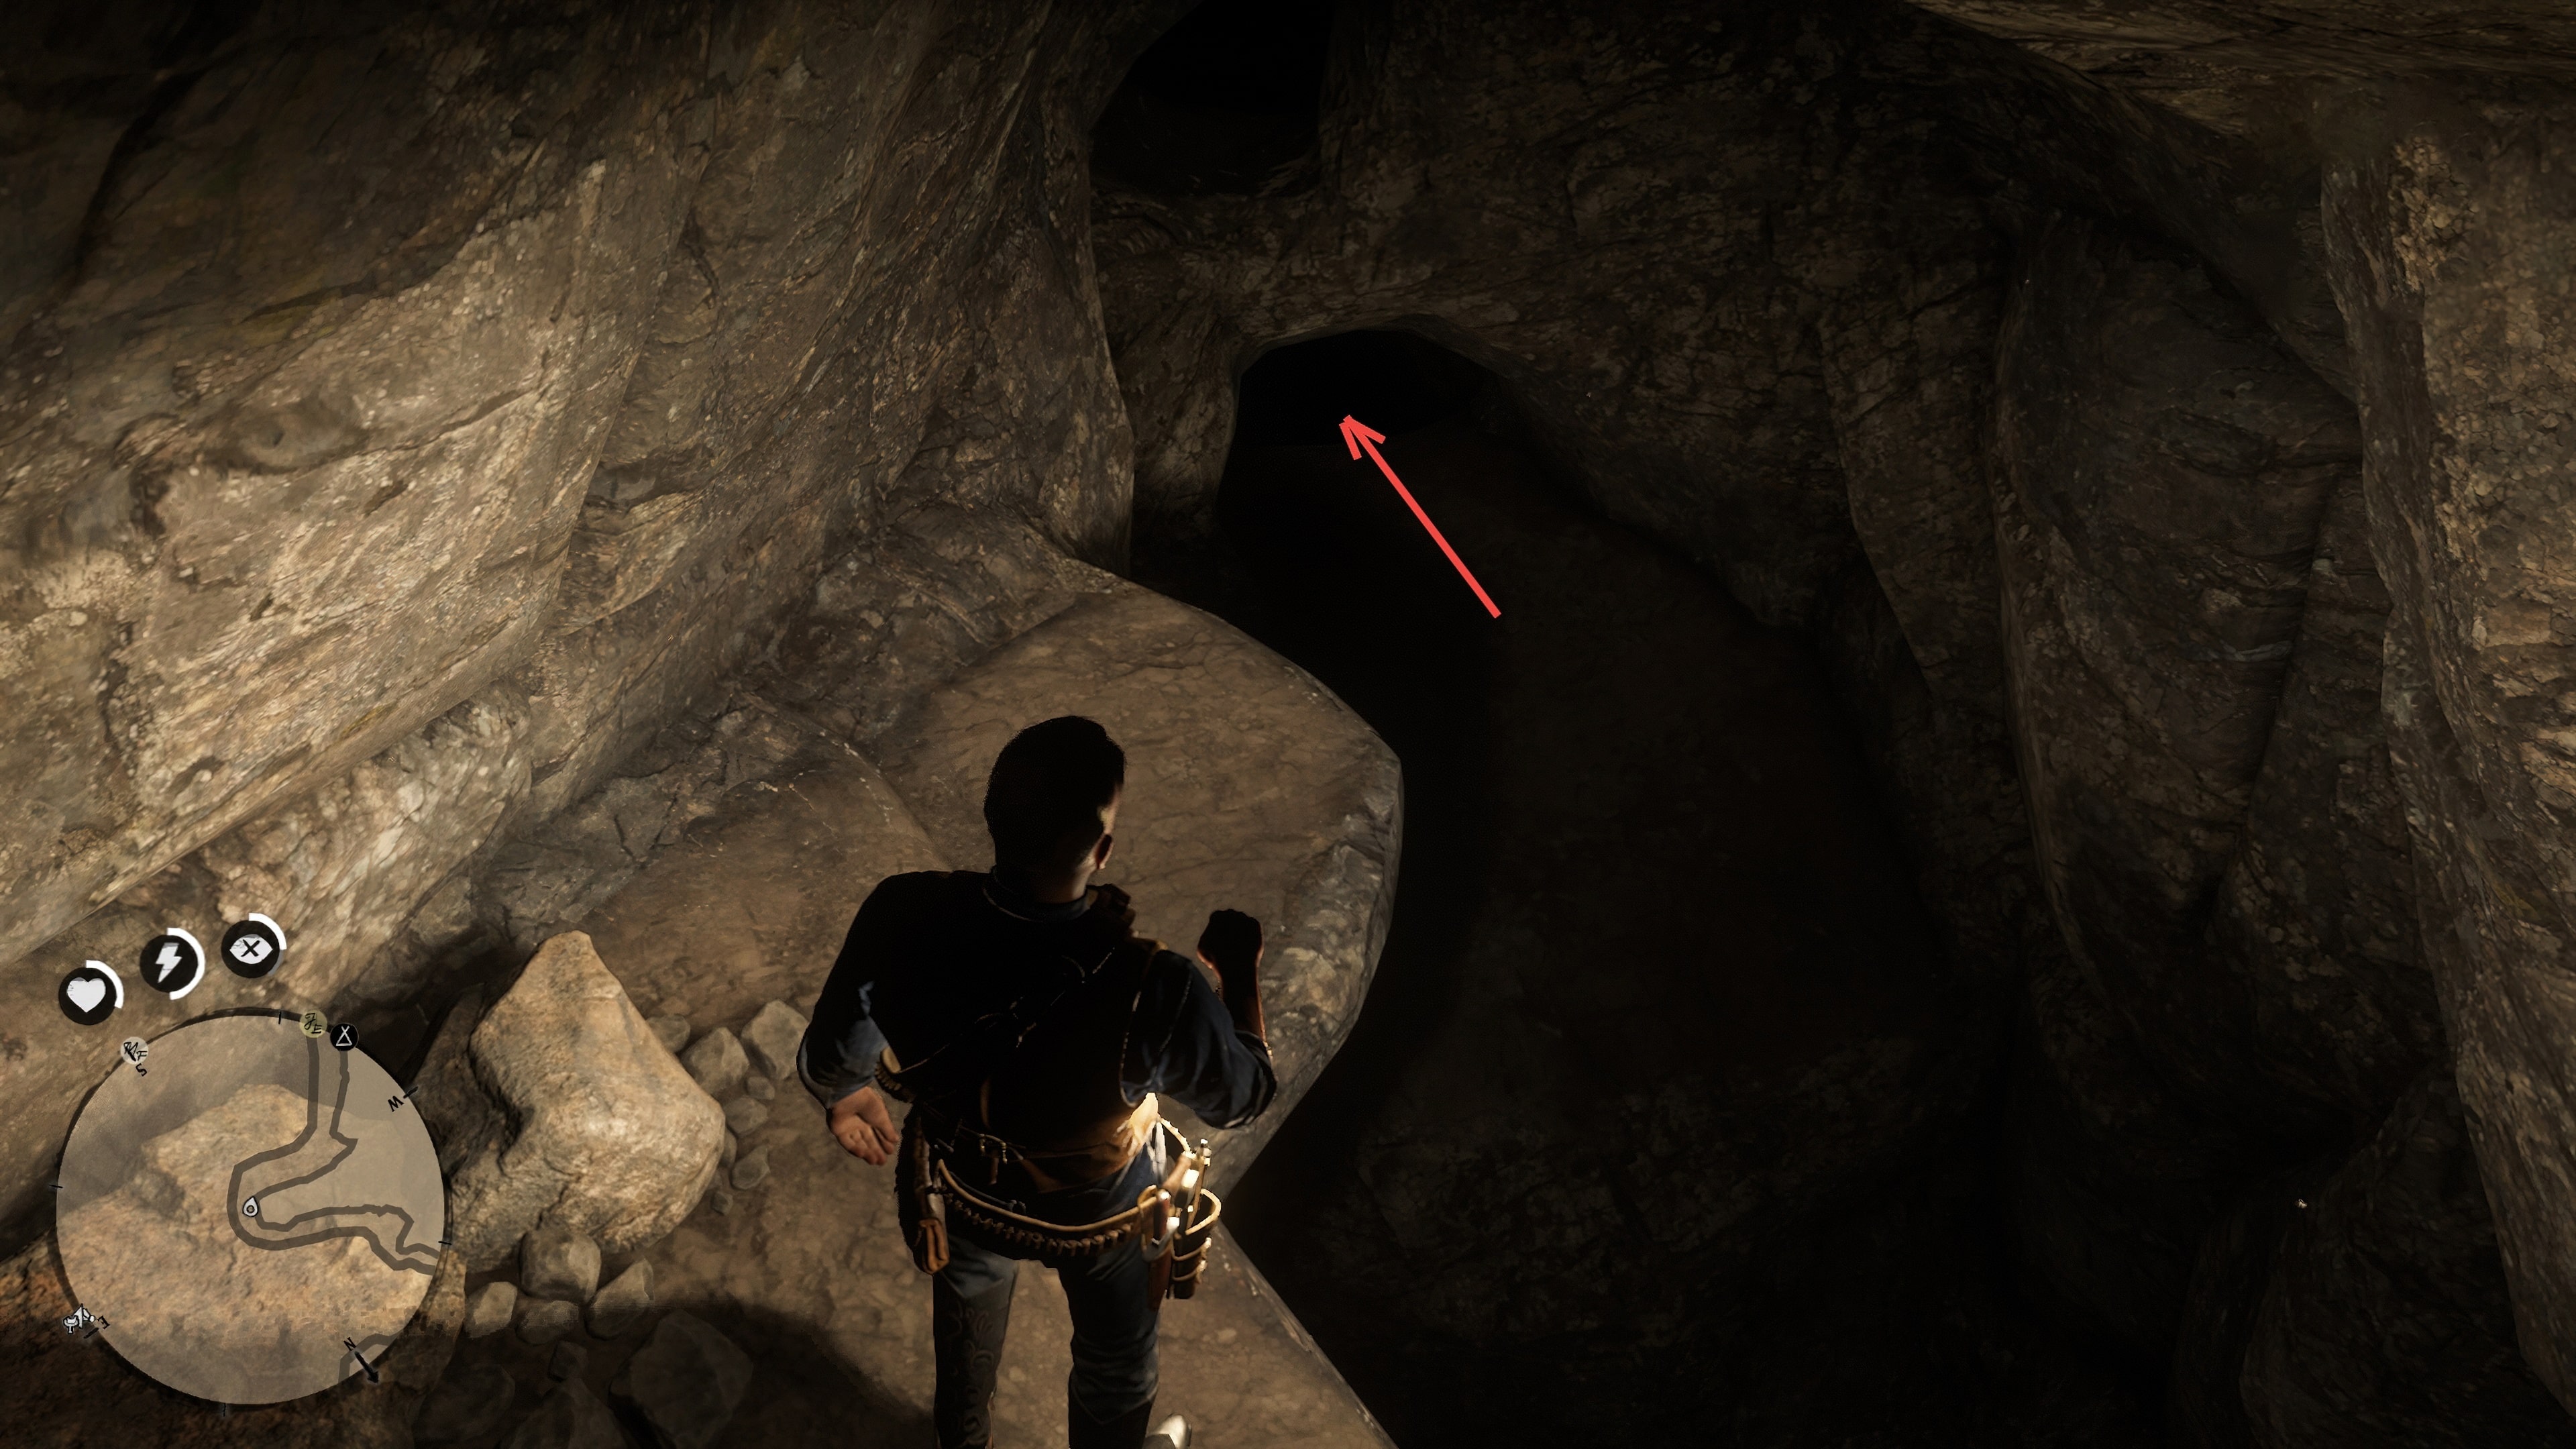
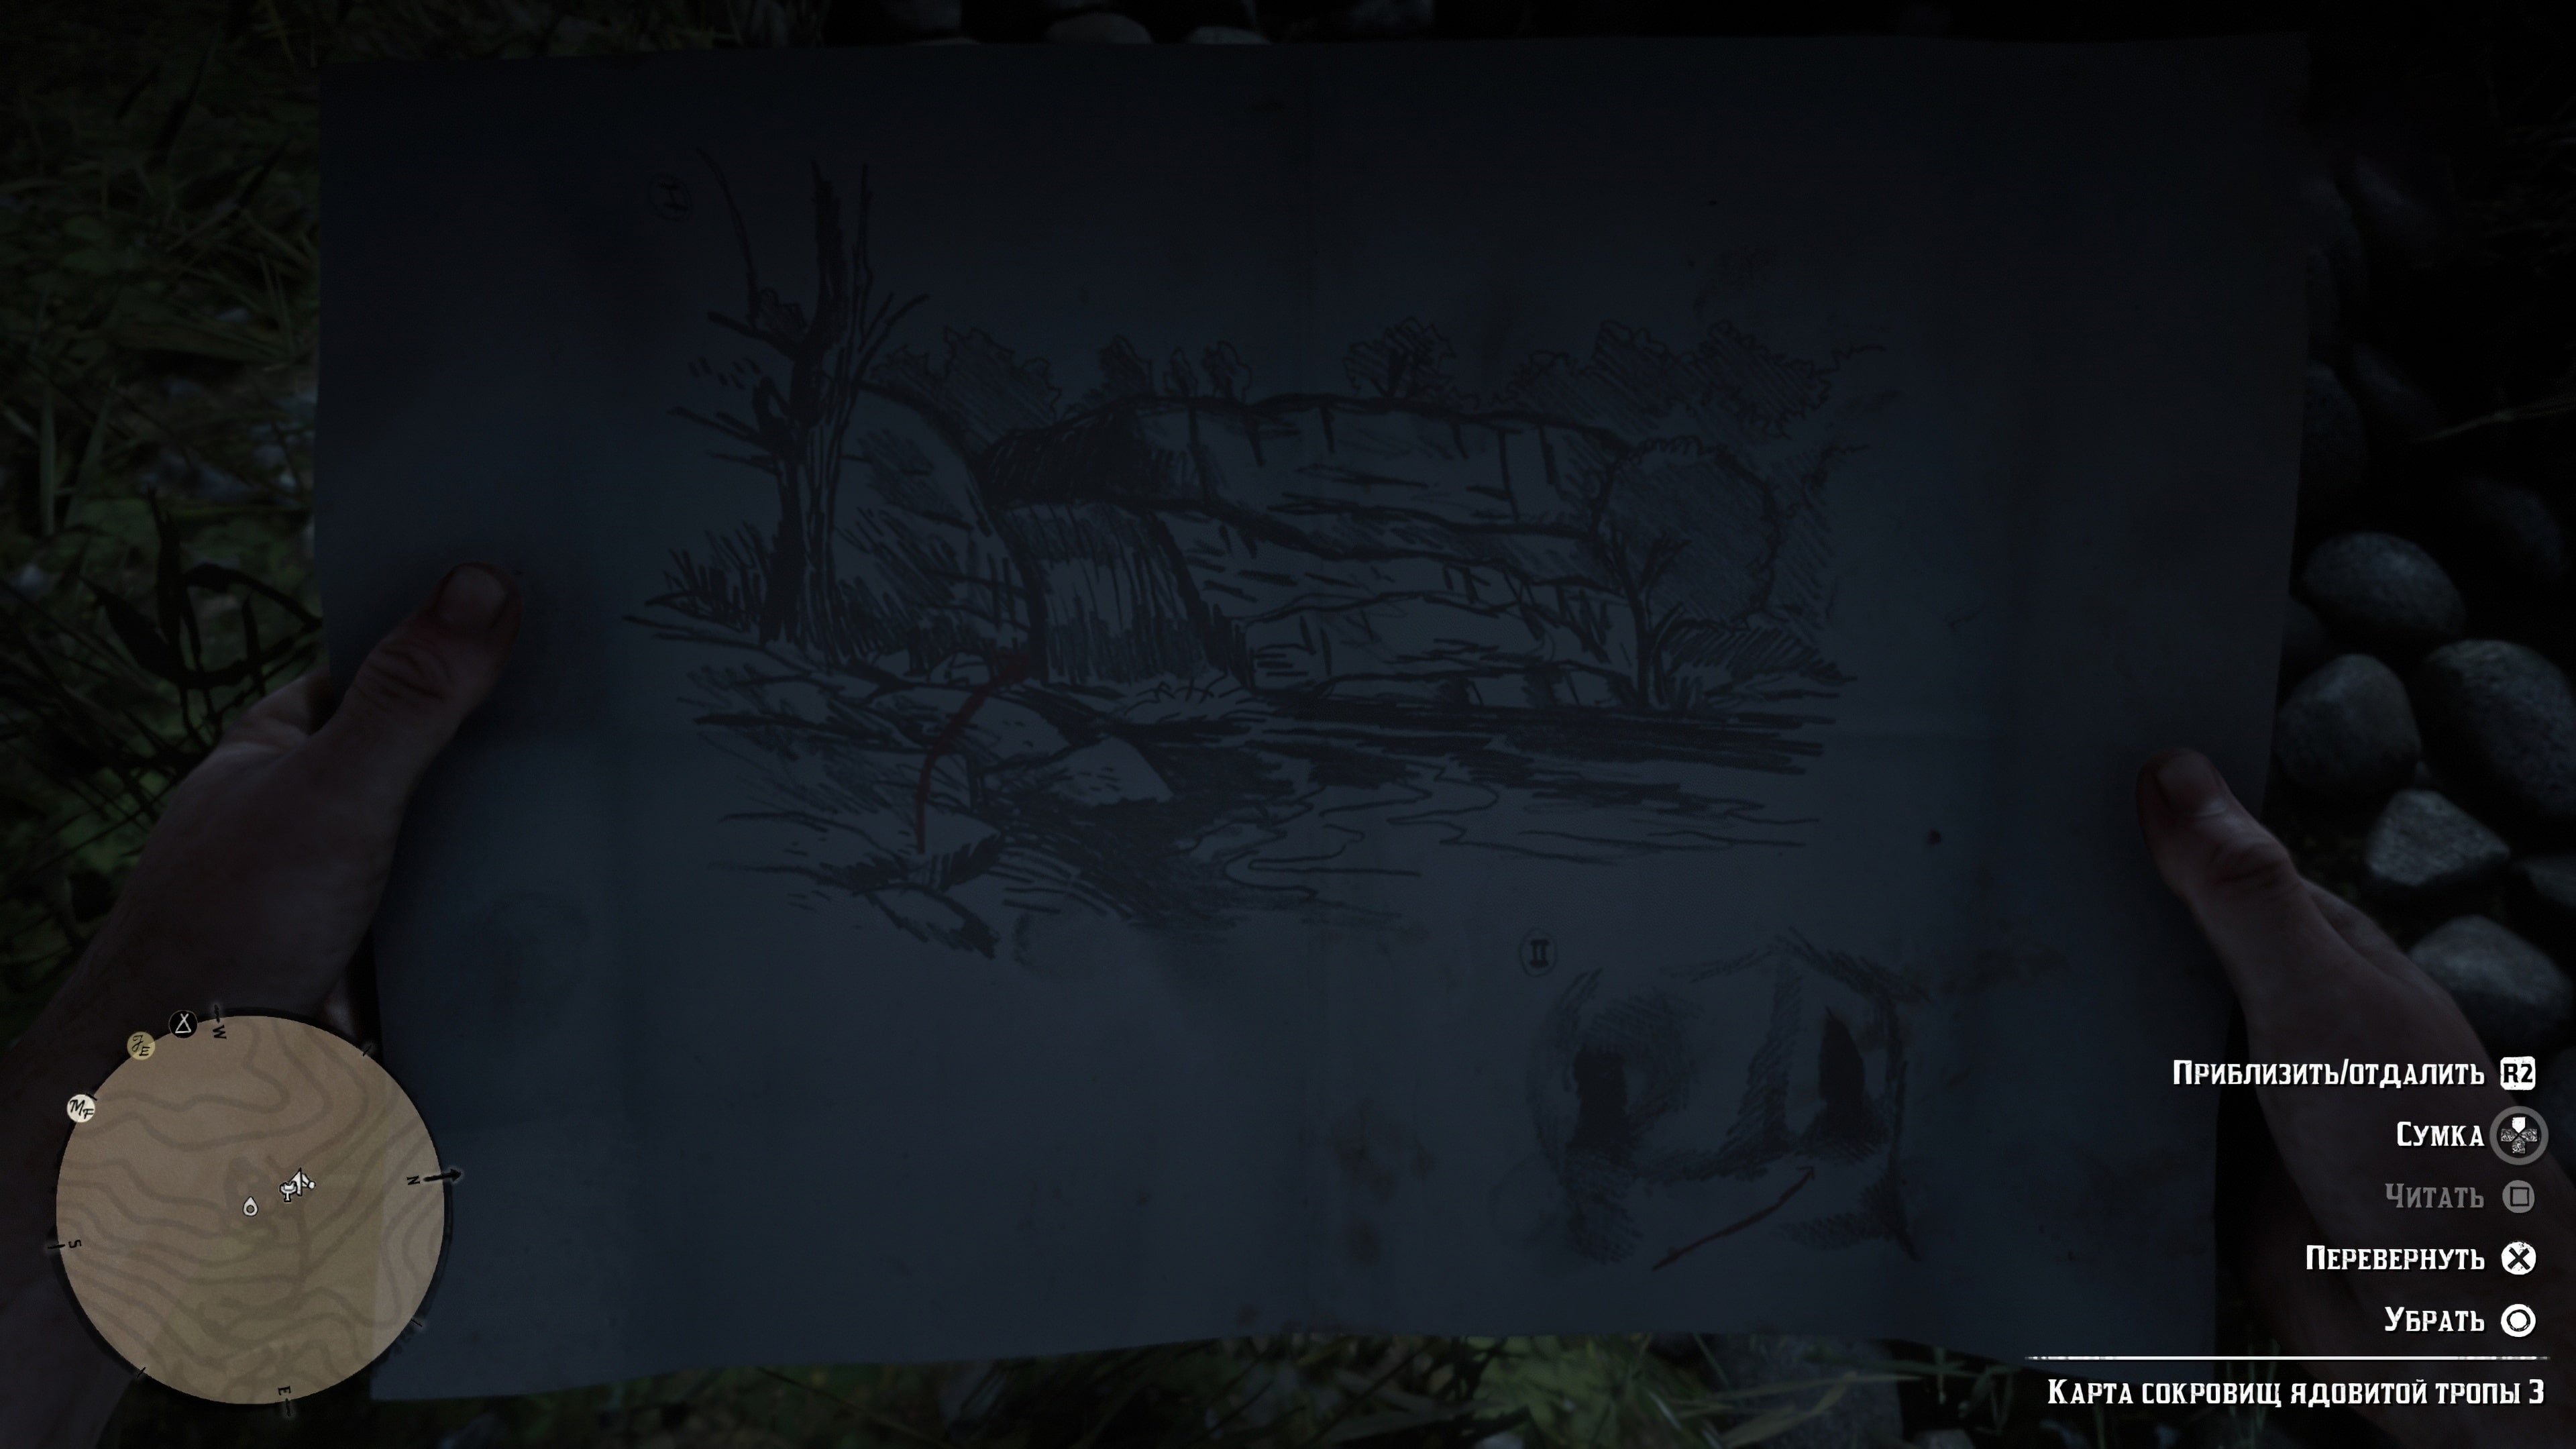
Follow the right branch of the tunnel to the end. There’s a cliff there, so be careful not to fall. Jump down to the left side of the ledge. The further direction is marked in the screenshot.
You will roll down and land in a puddle. After that, pull yourself up on the wall nearby and find the ingots near a large boulder. To climb back up, crouch down and keep to the right side, then climb up another ledge and exit through the tunnel above.
Great Expectations Treasure maps
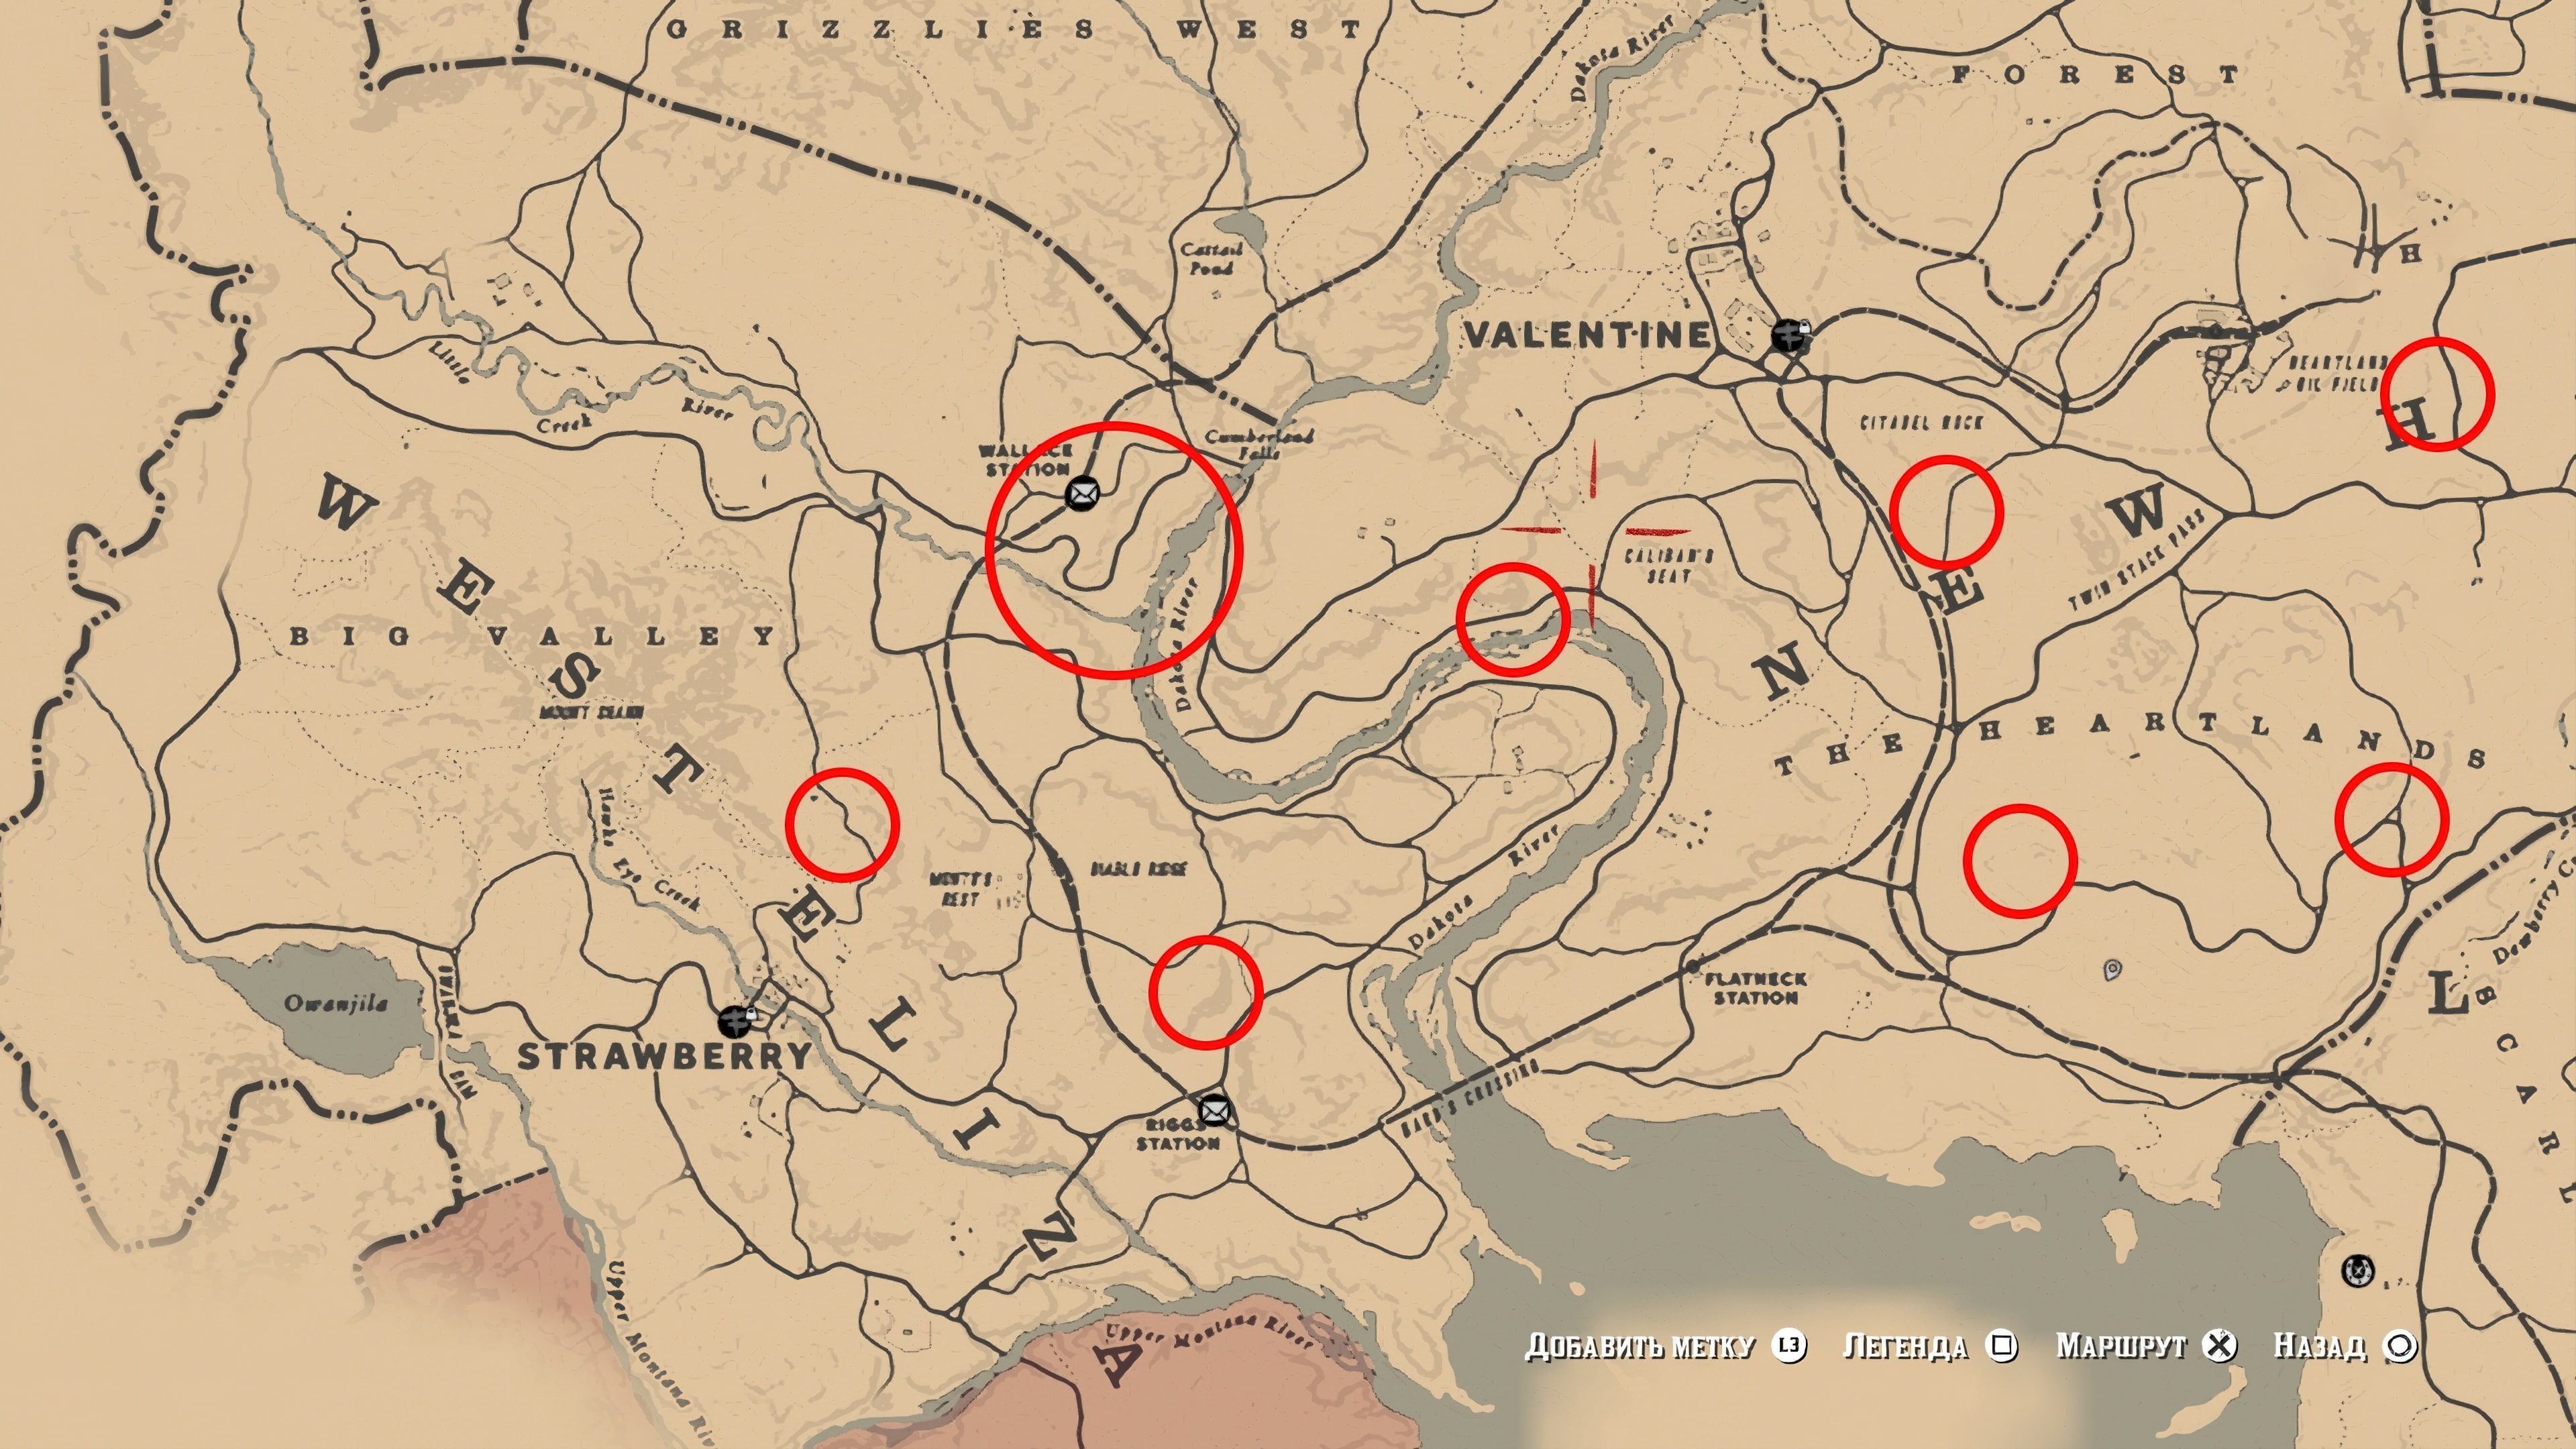
To acquire the first map in the set, you must find a treasure hunter and take the map from him. The appearance of the treasure hunter is random, and possible locations are marked below. When you get close enough, a white dot representing the event will start flashing on the map. The stranger is typically standing on the edge of a cliff, holding a piece of paper and muttering to himself.
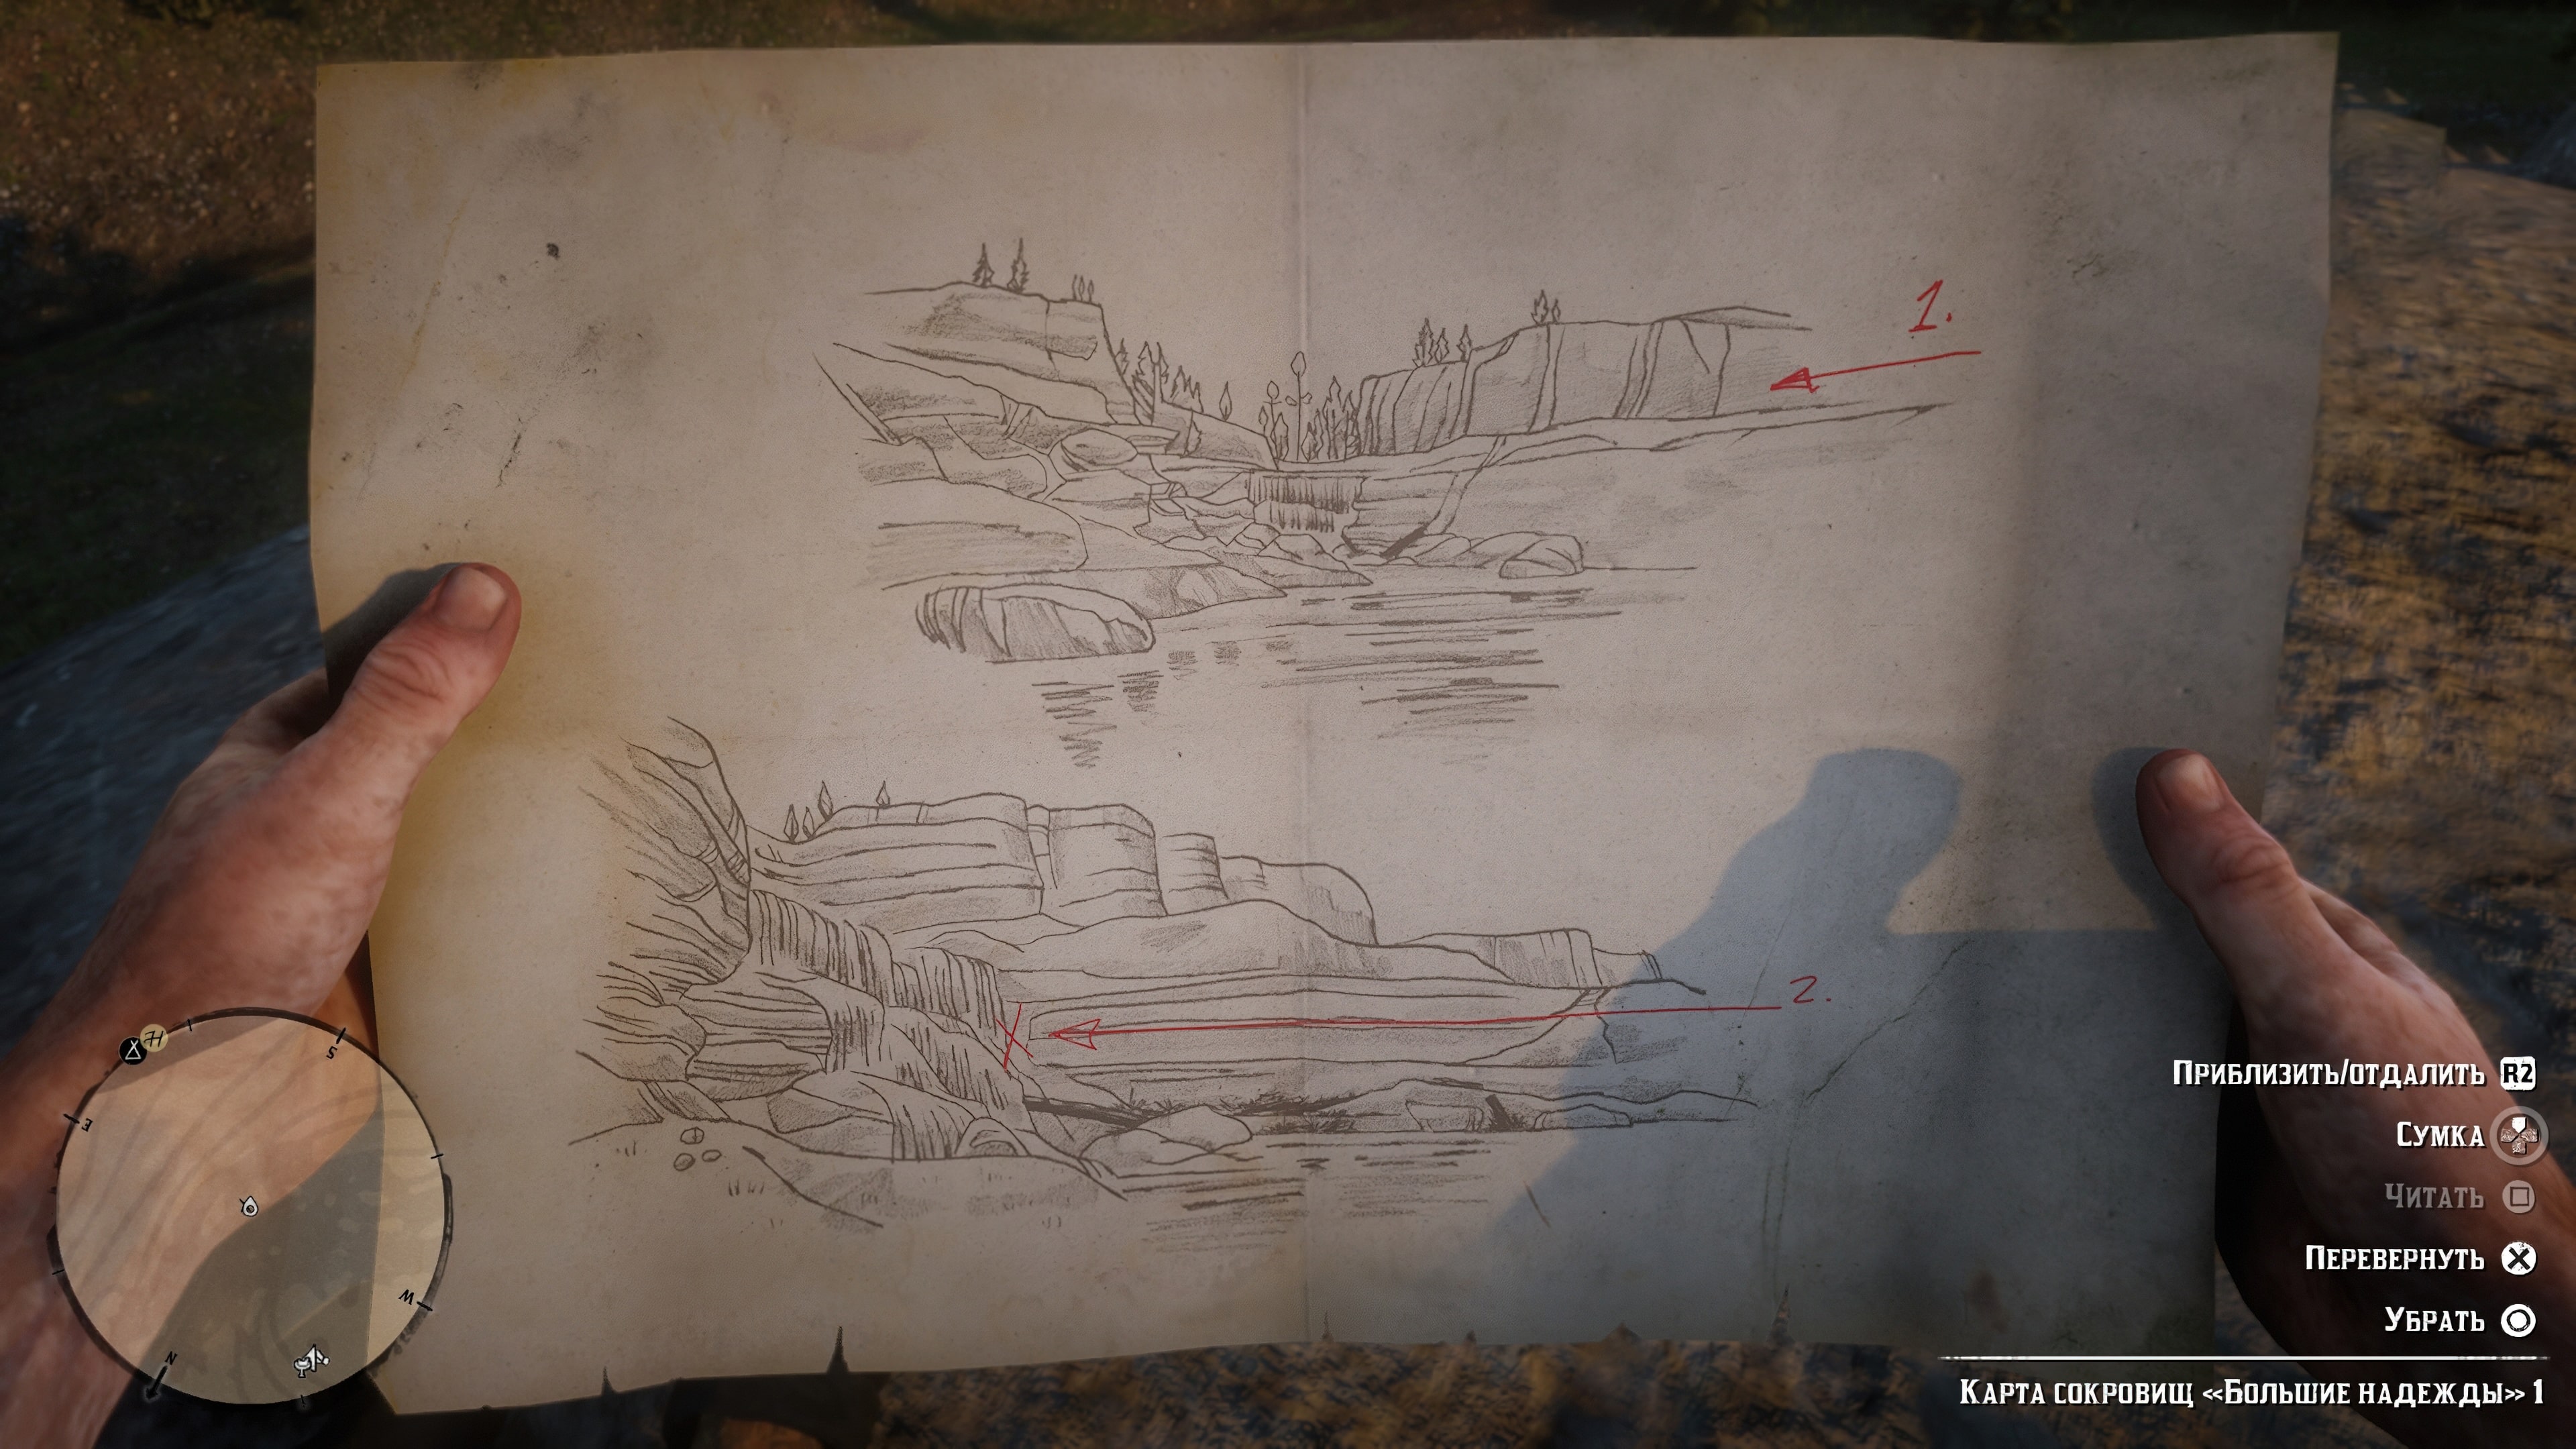
Treasure Map 1
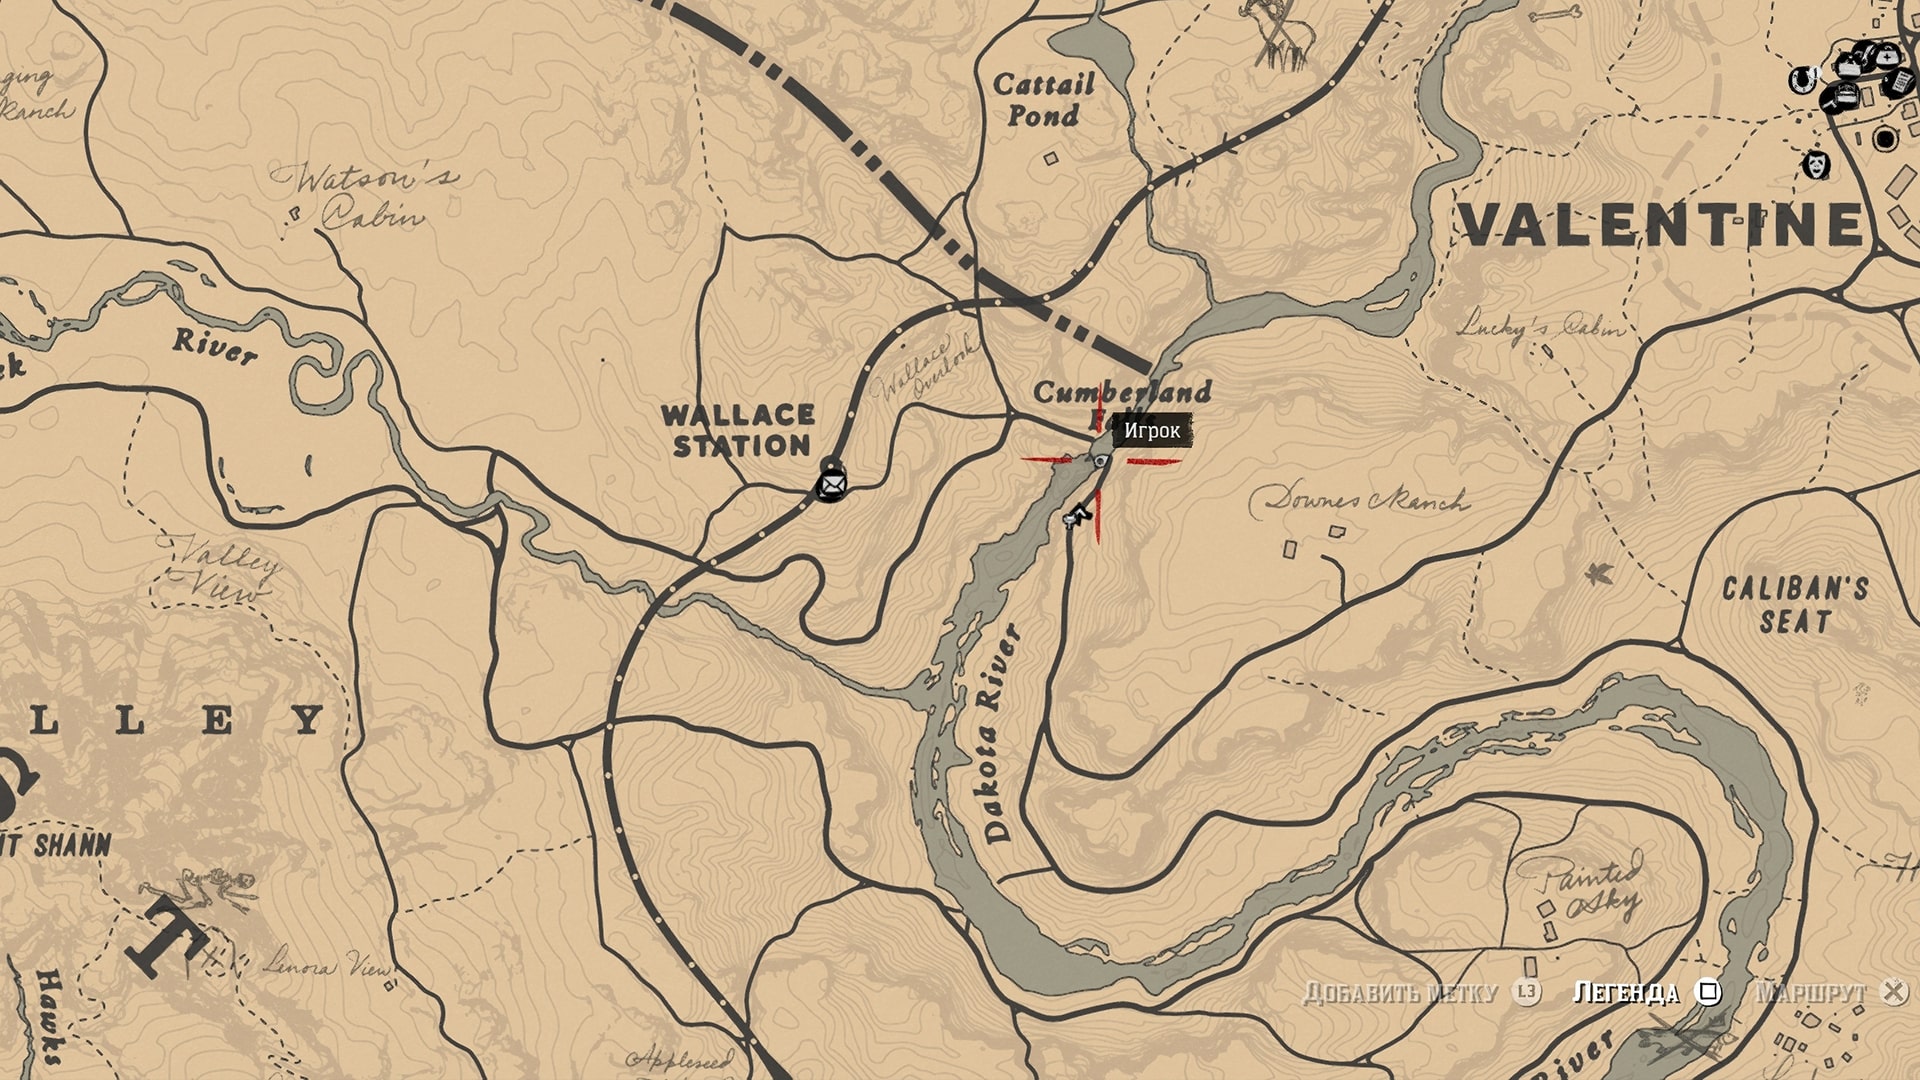
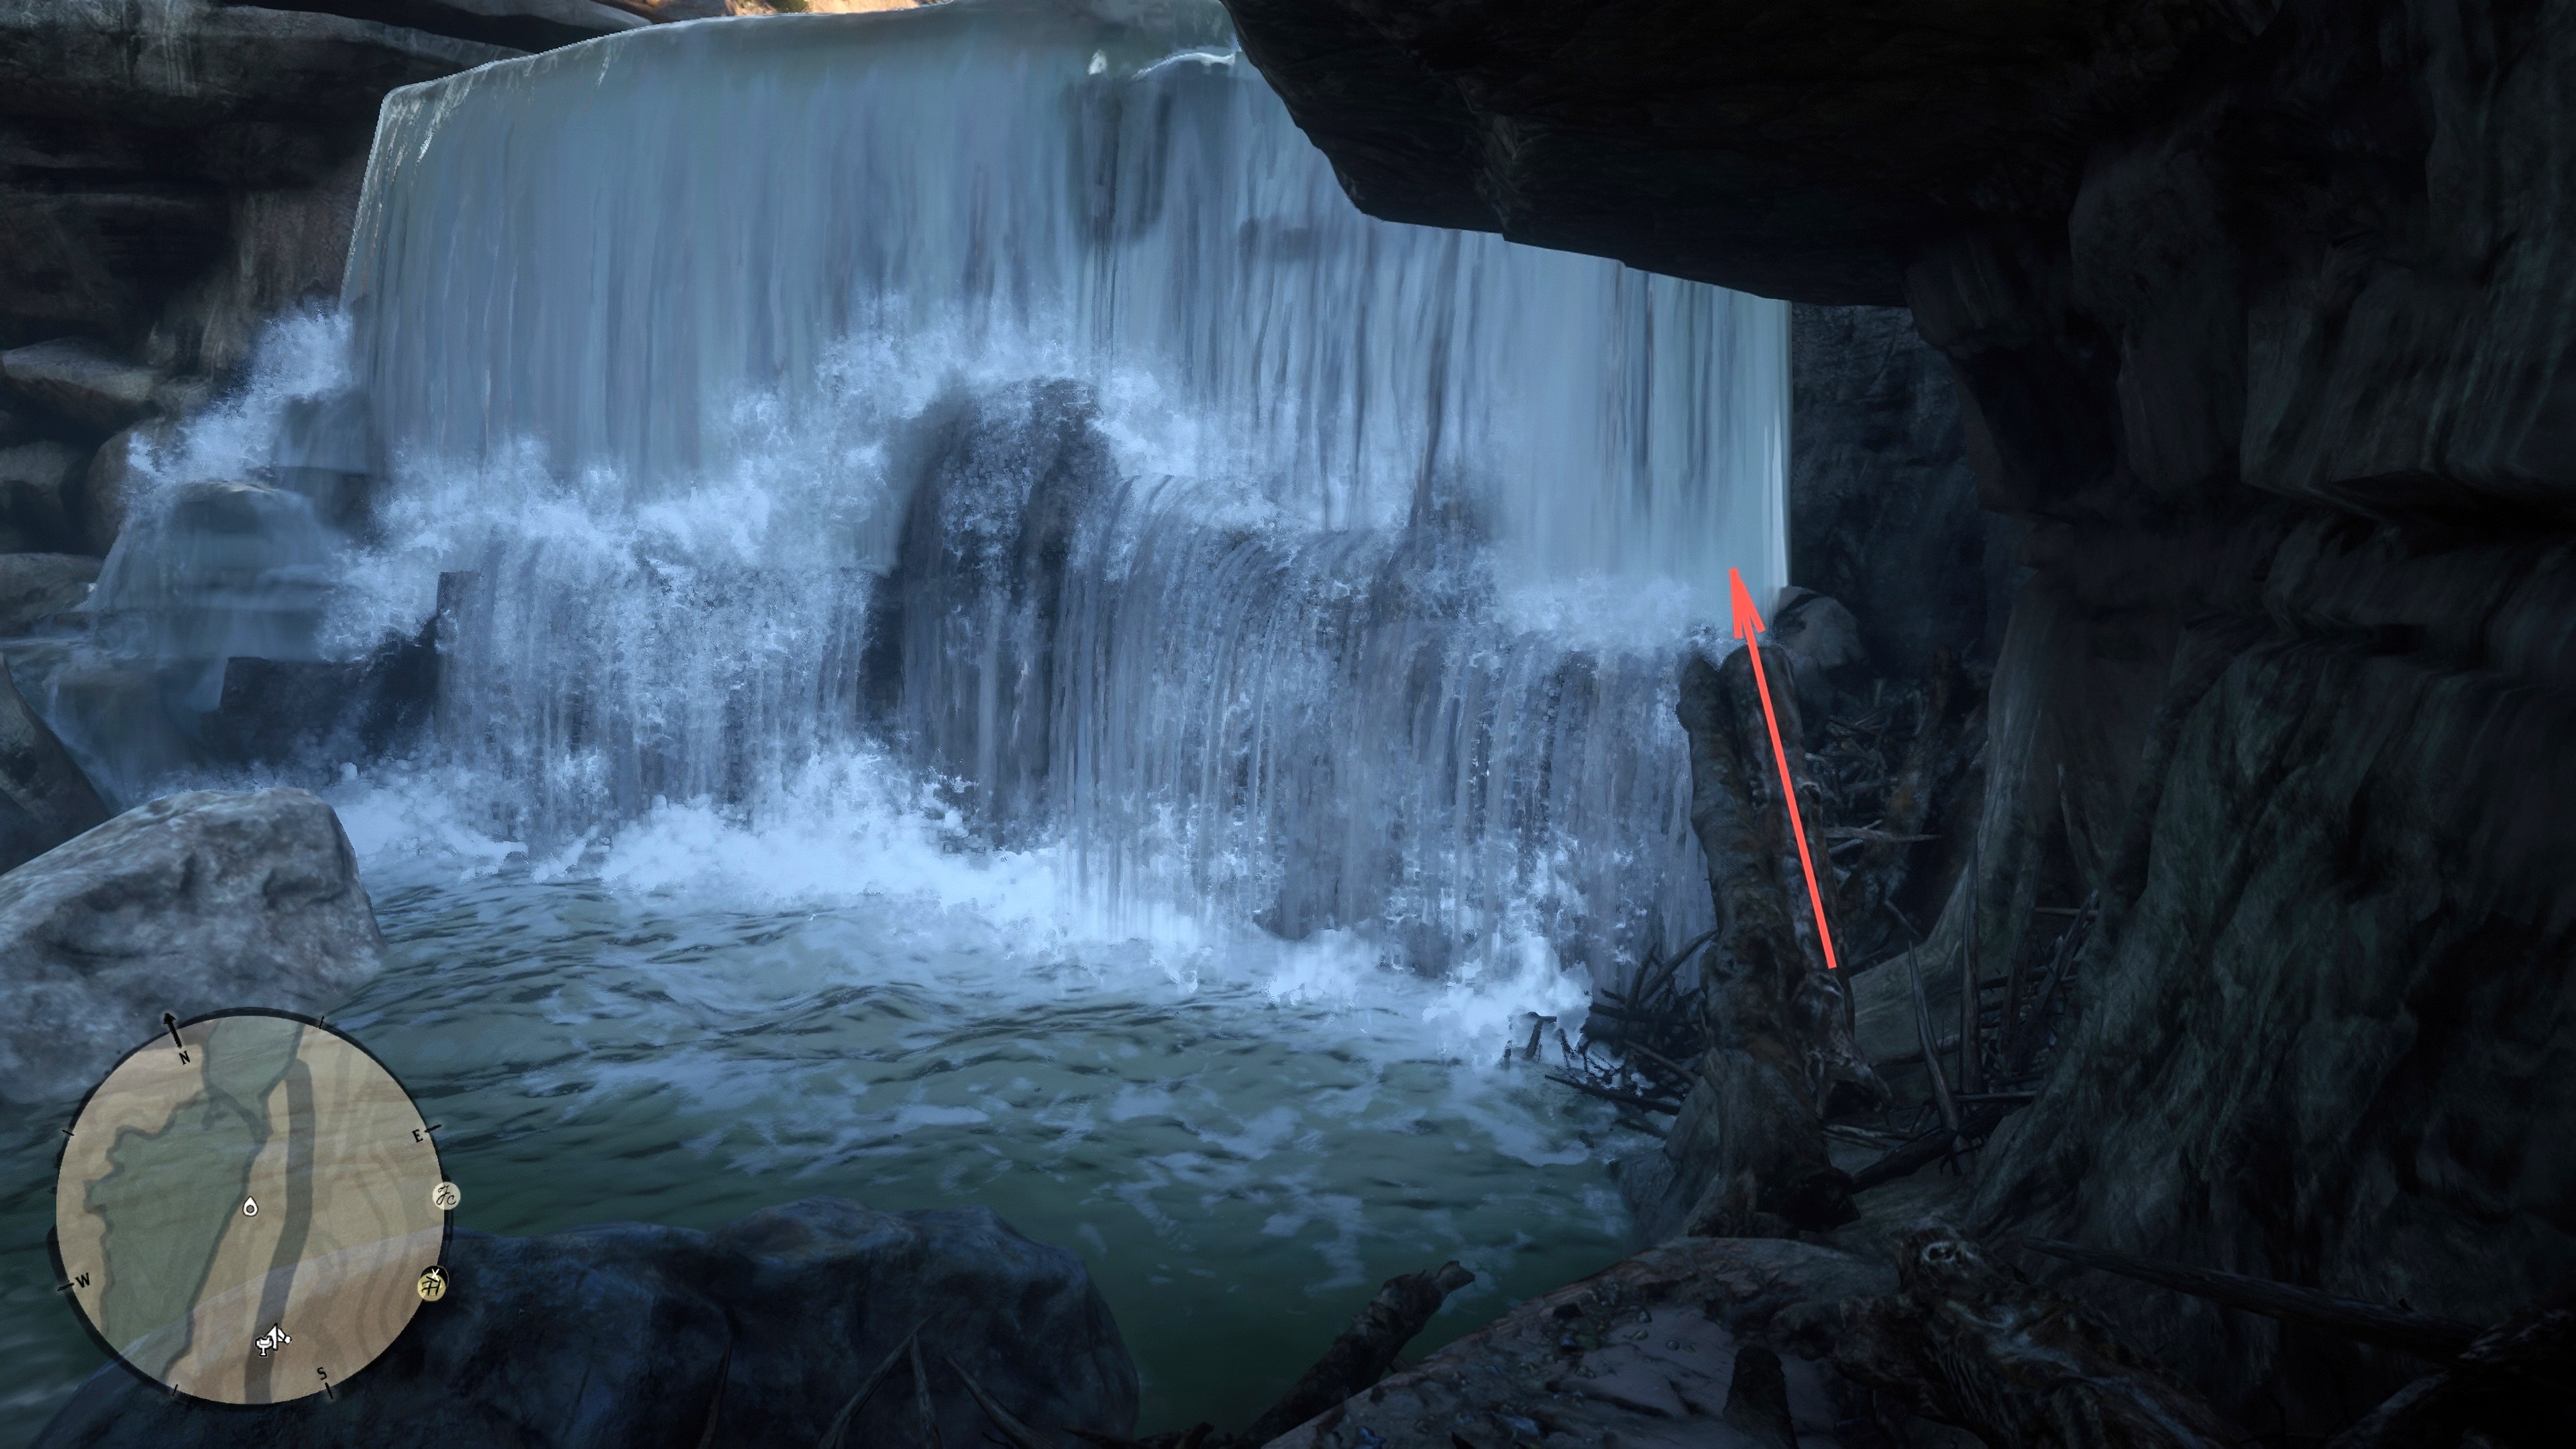
The first map leads you to Cumberland Fall southwest of Valentine. Go down to the right bank of the river and to the base of the waterfall.
You’ll need to walk behind the waterfall along a log near the rock. It’s best to switch to first-person mode, as you won’t be able to see anything in third-person mode. A stash can be found in a recess in the rock behind the water flow.
Treasure Map 2
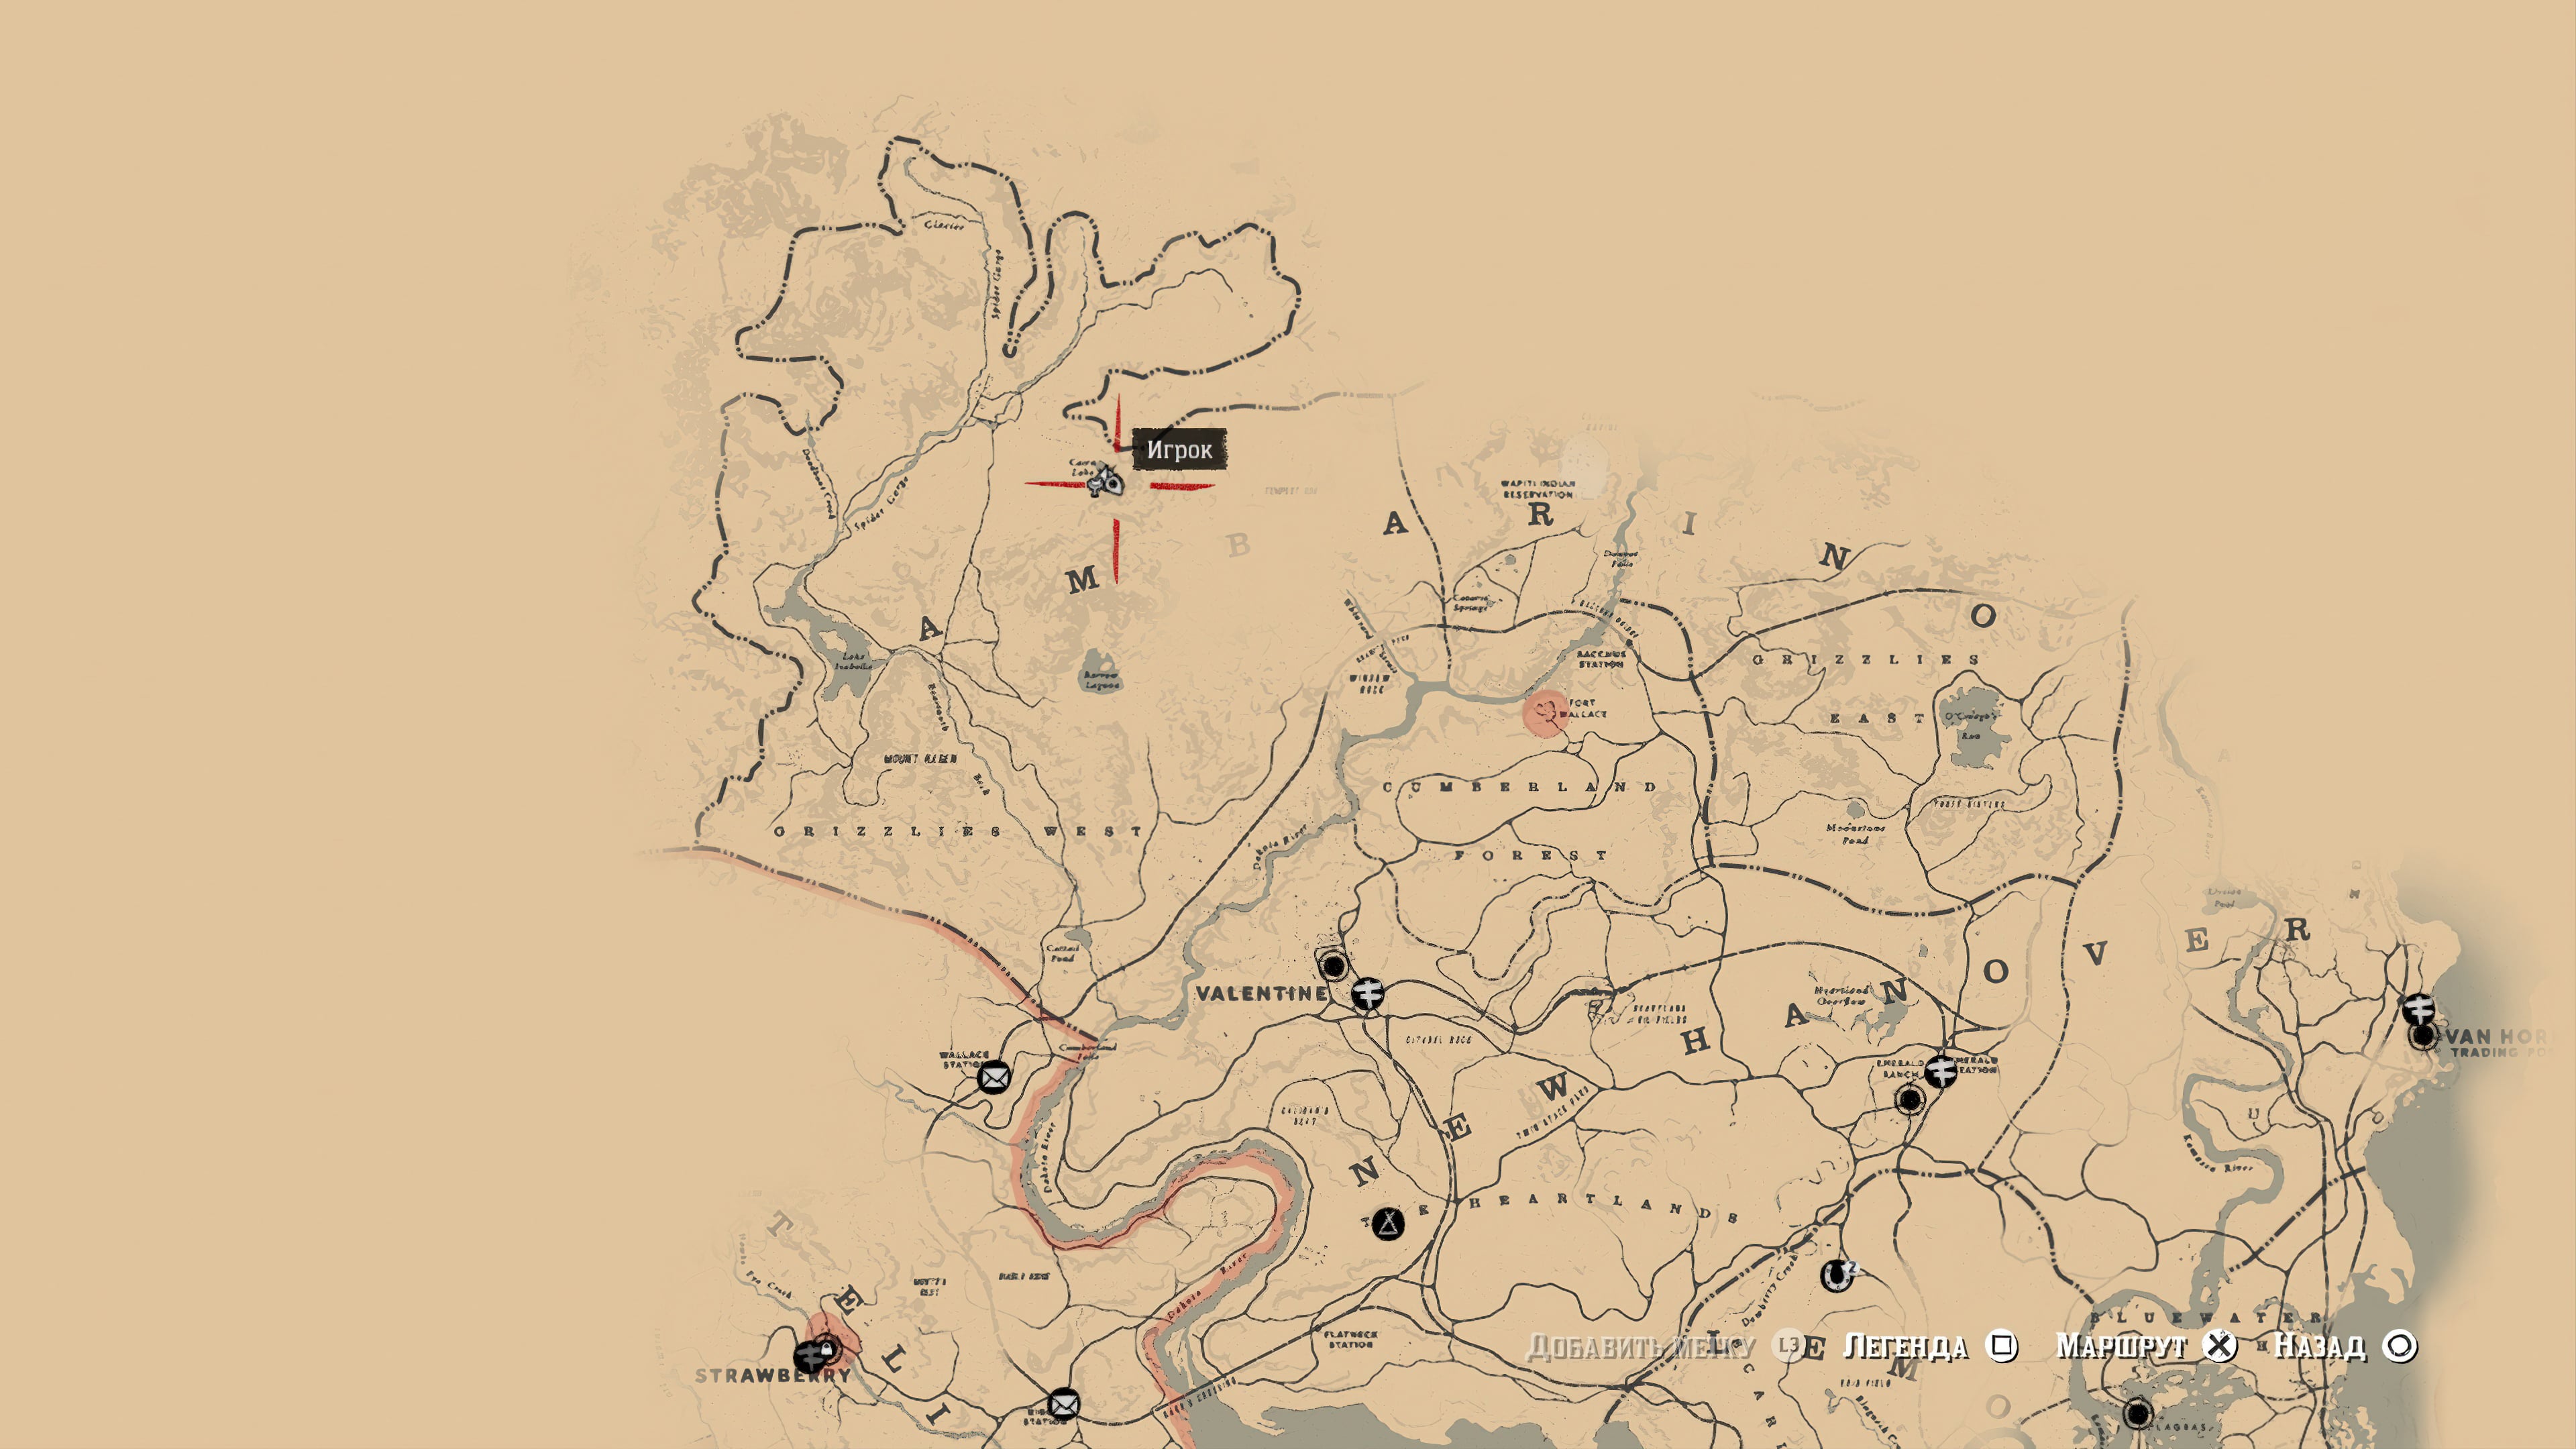
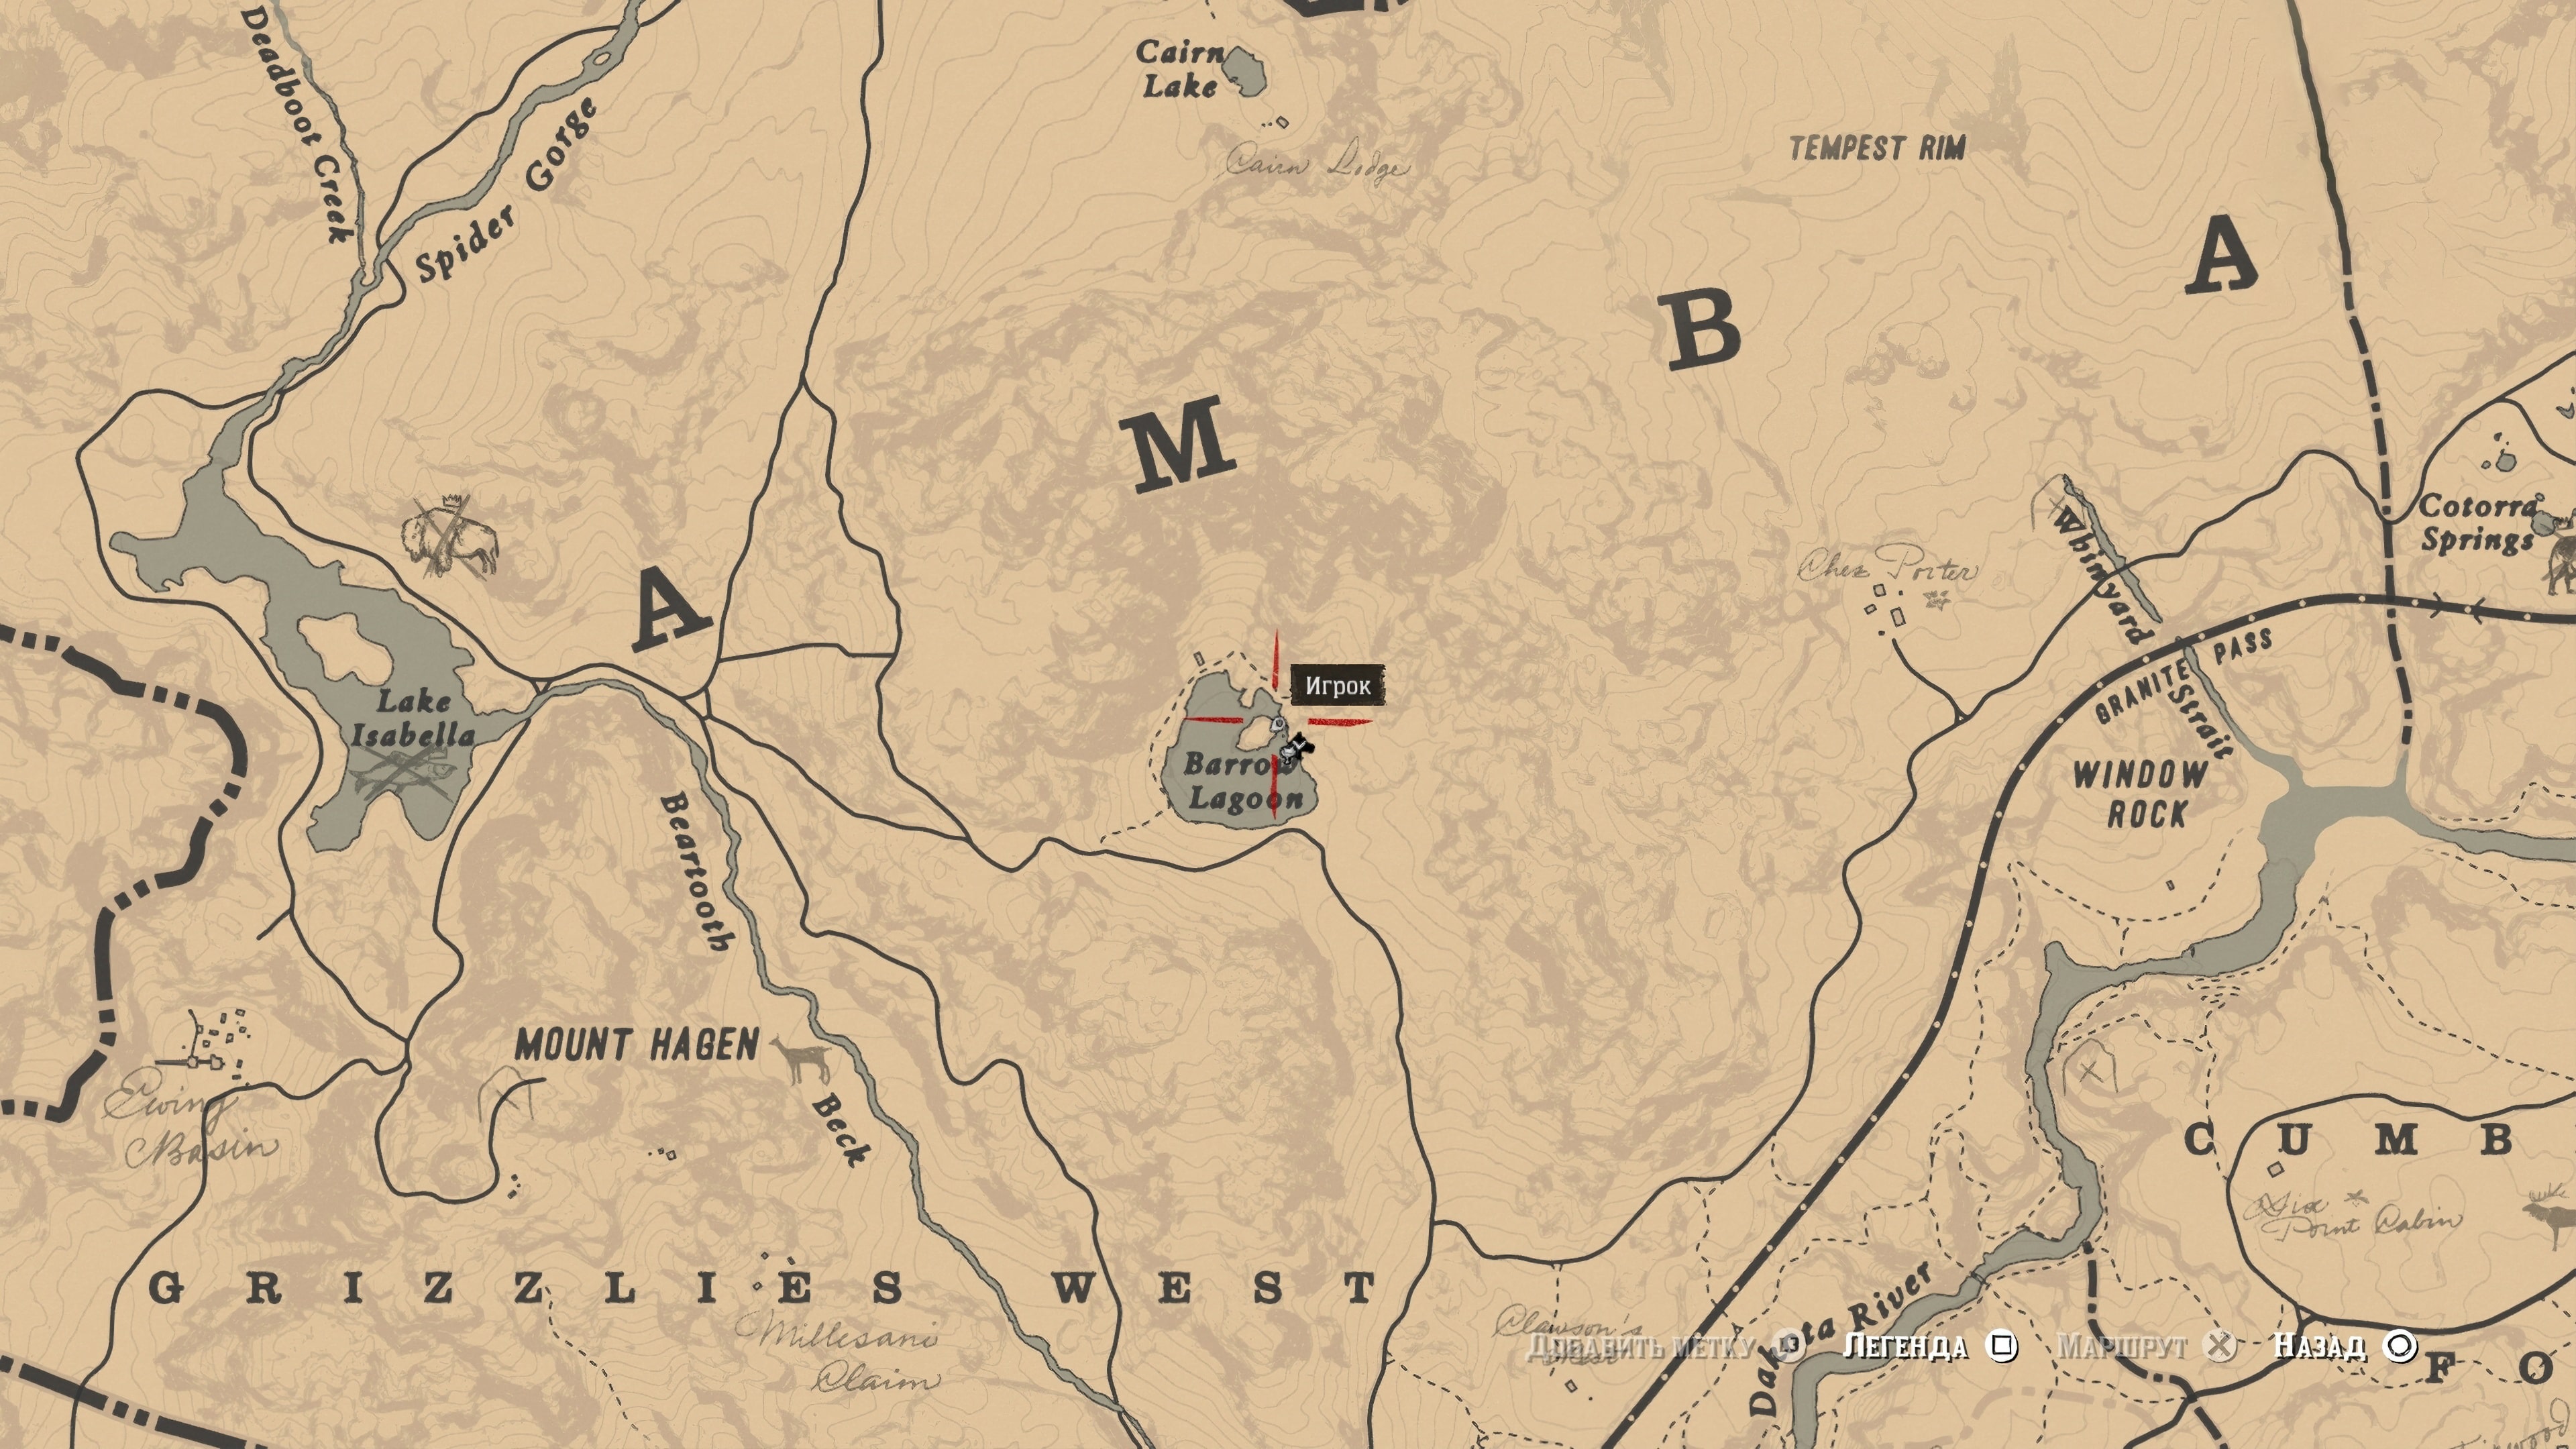
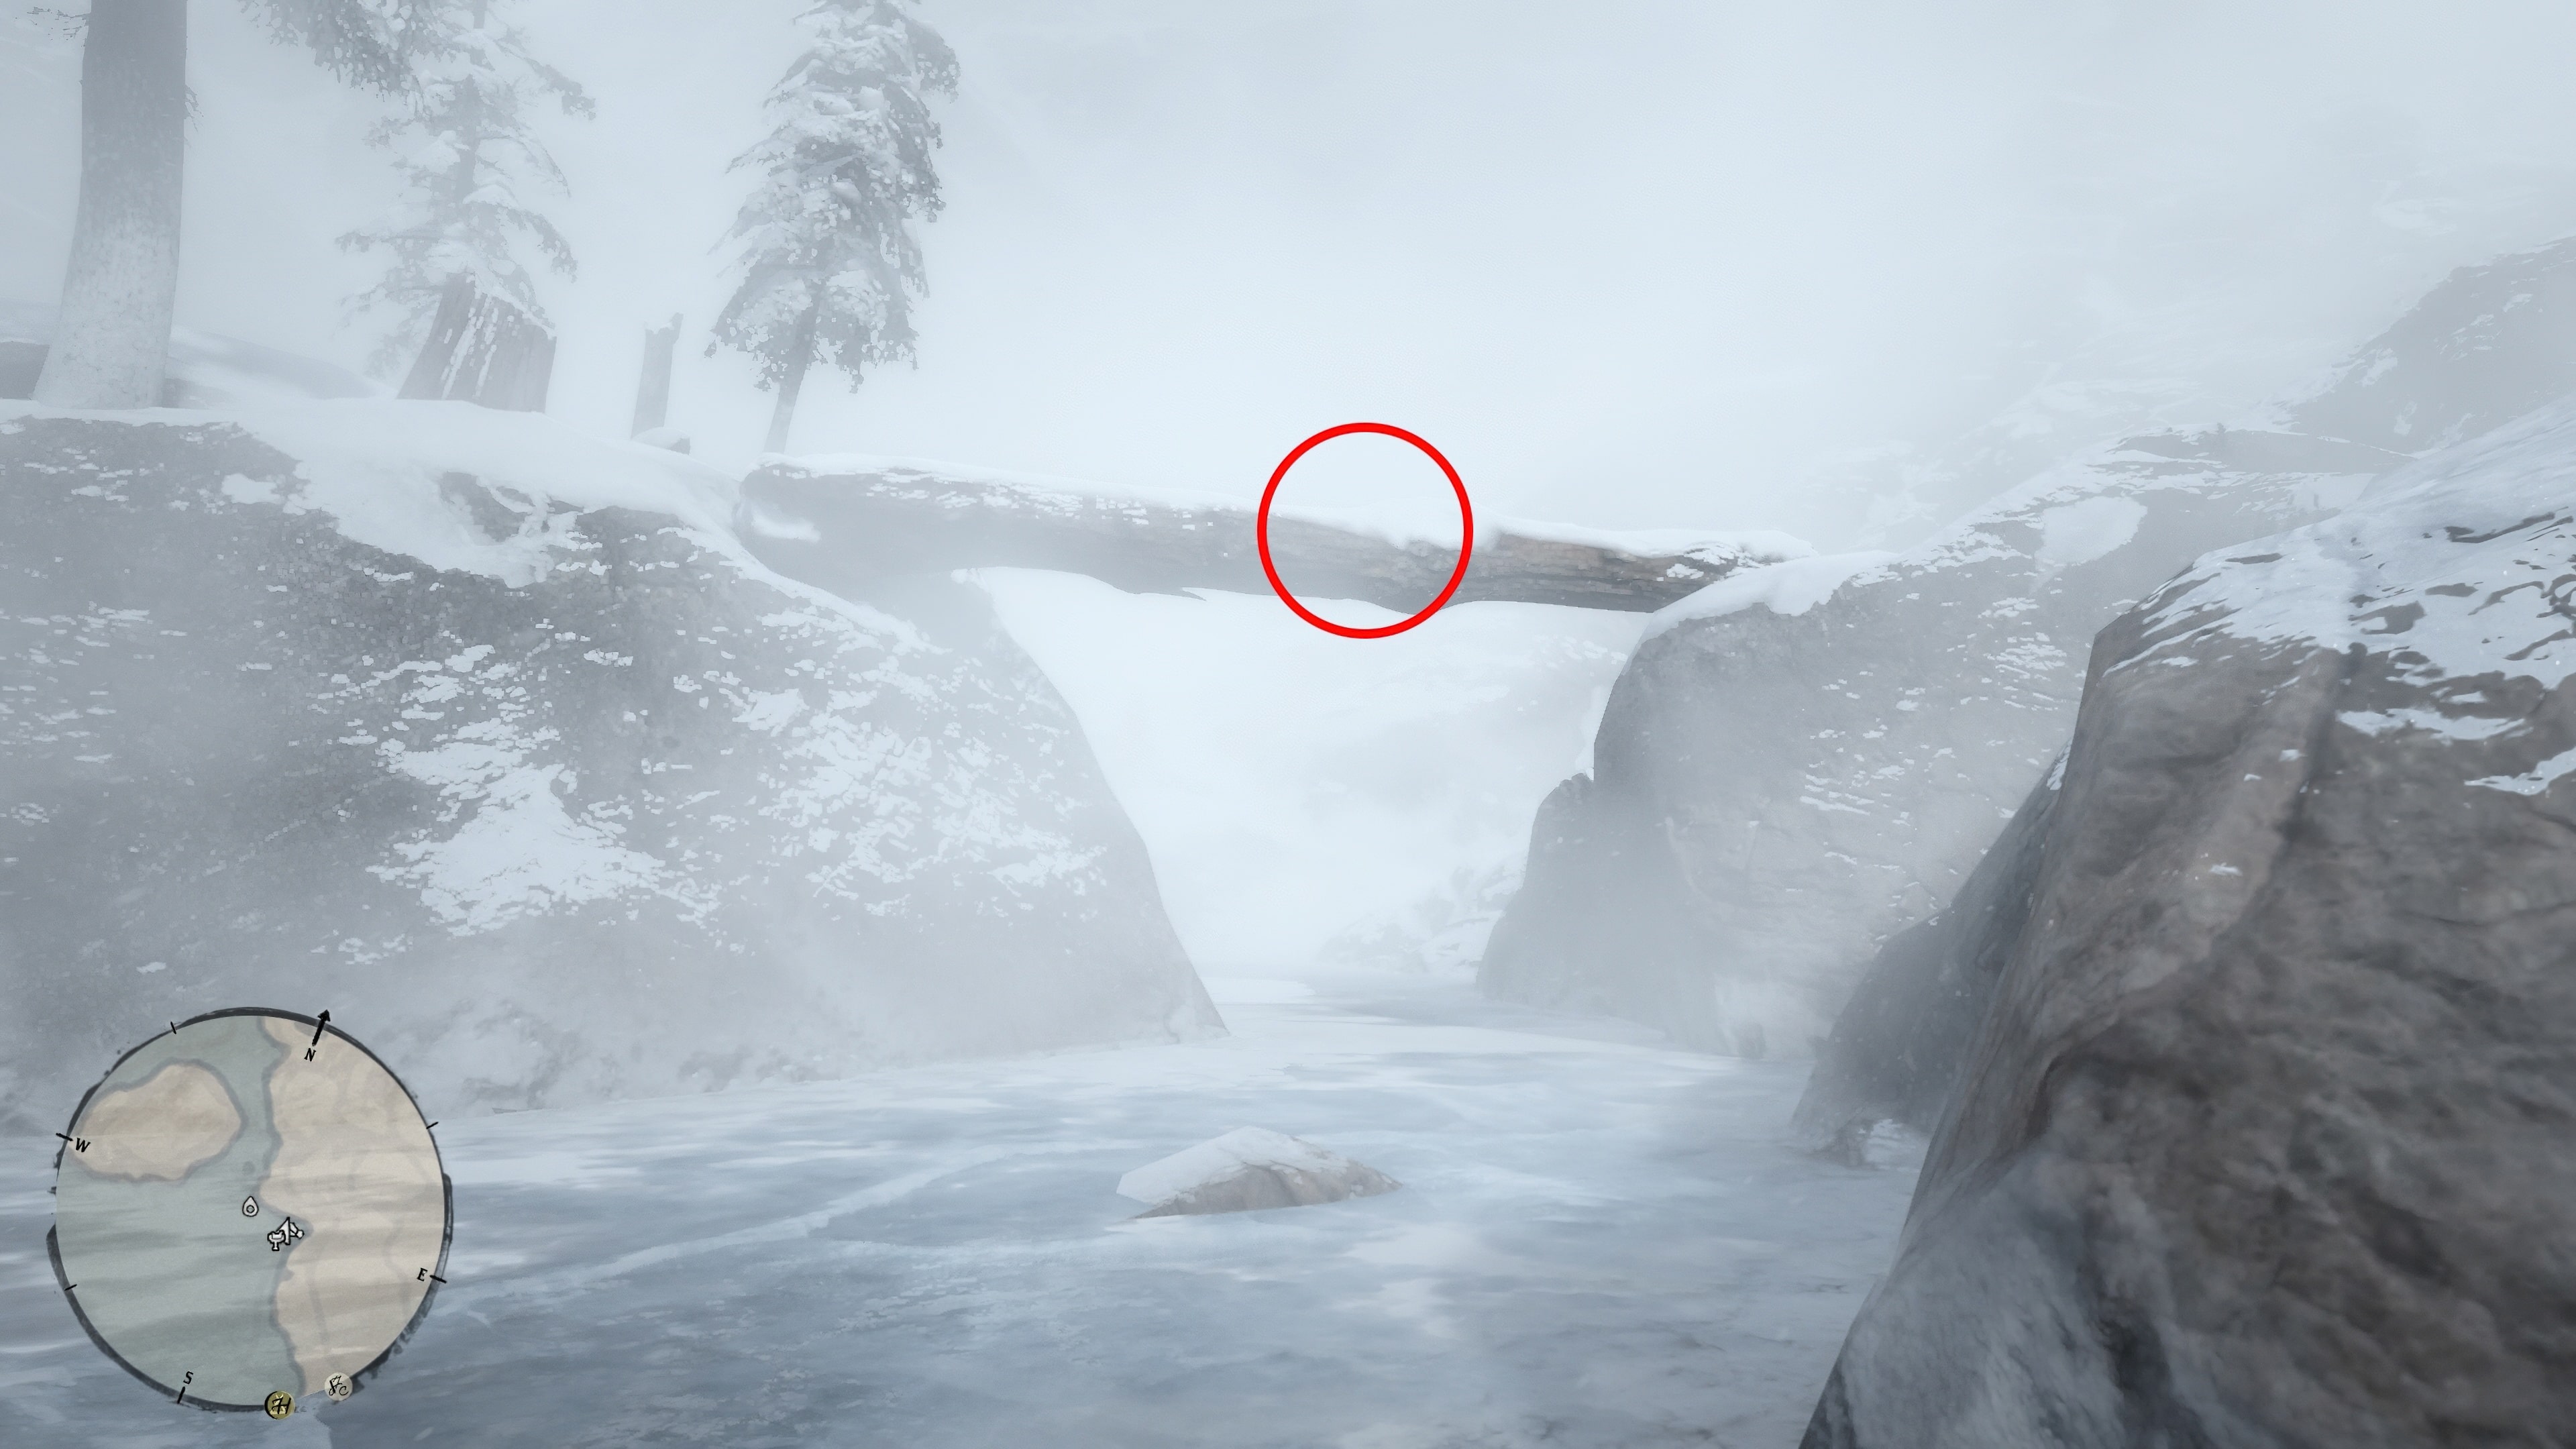
To find the second cache, head to Barrow Lagoon Lake northwest of Valentine. Bring warm clothing and a rifle as the area is cold and full of bears.
At the site, look for a fallen tree leaning on two rocky banks on either side. The treasure is waiting for you in the middle of the tree.
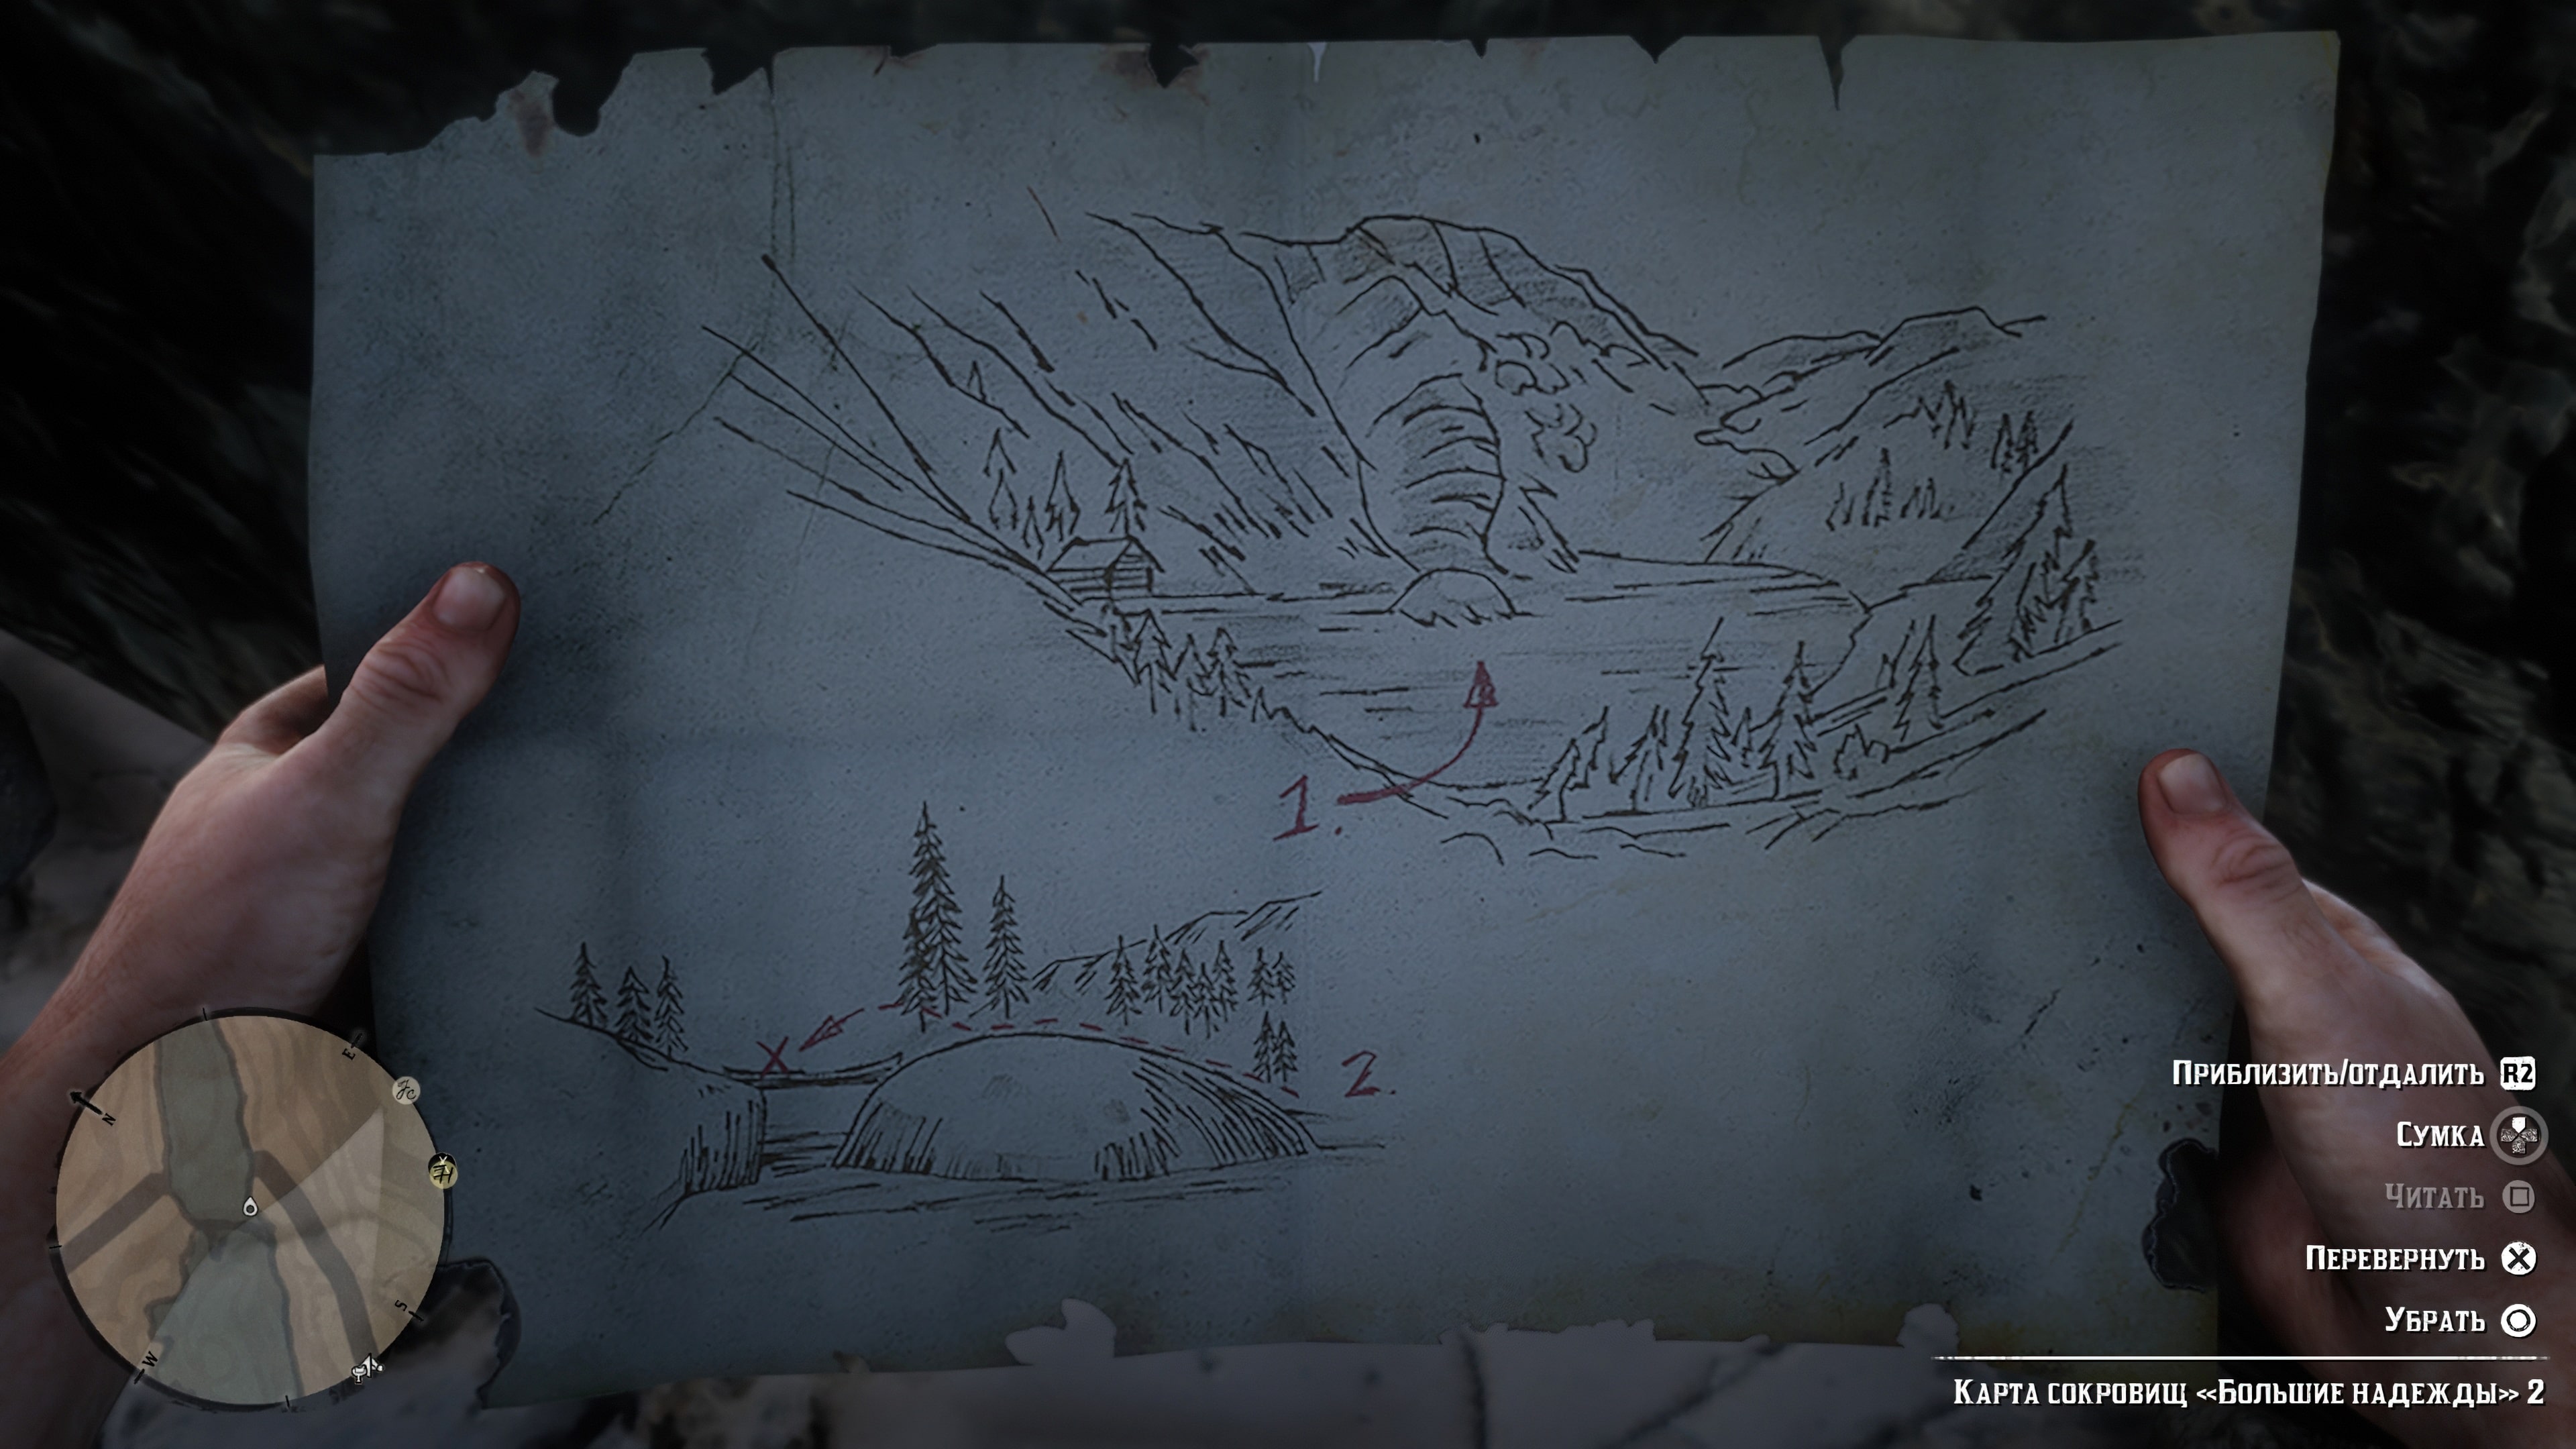
Treasure Map 3
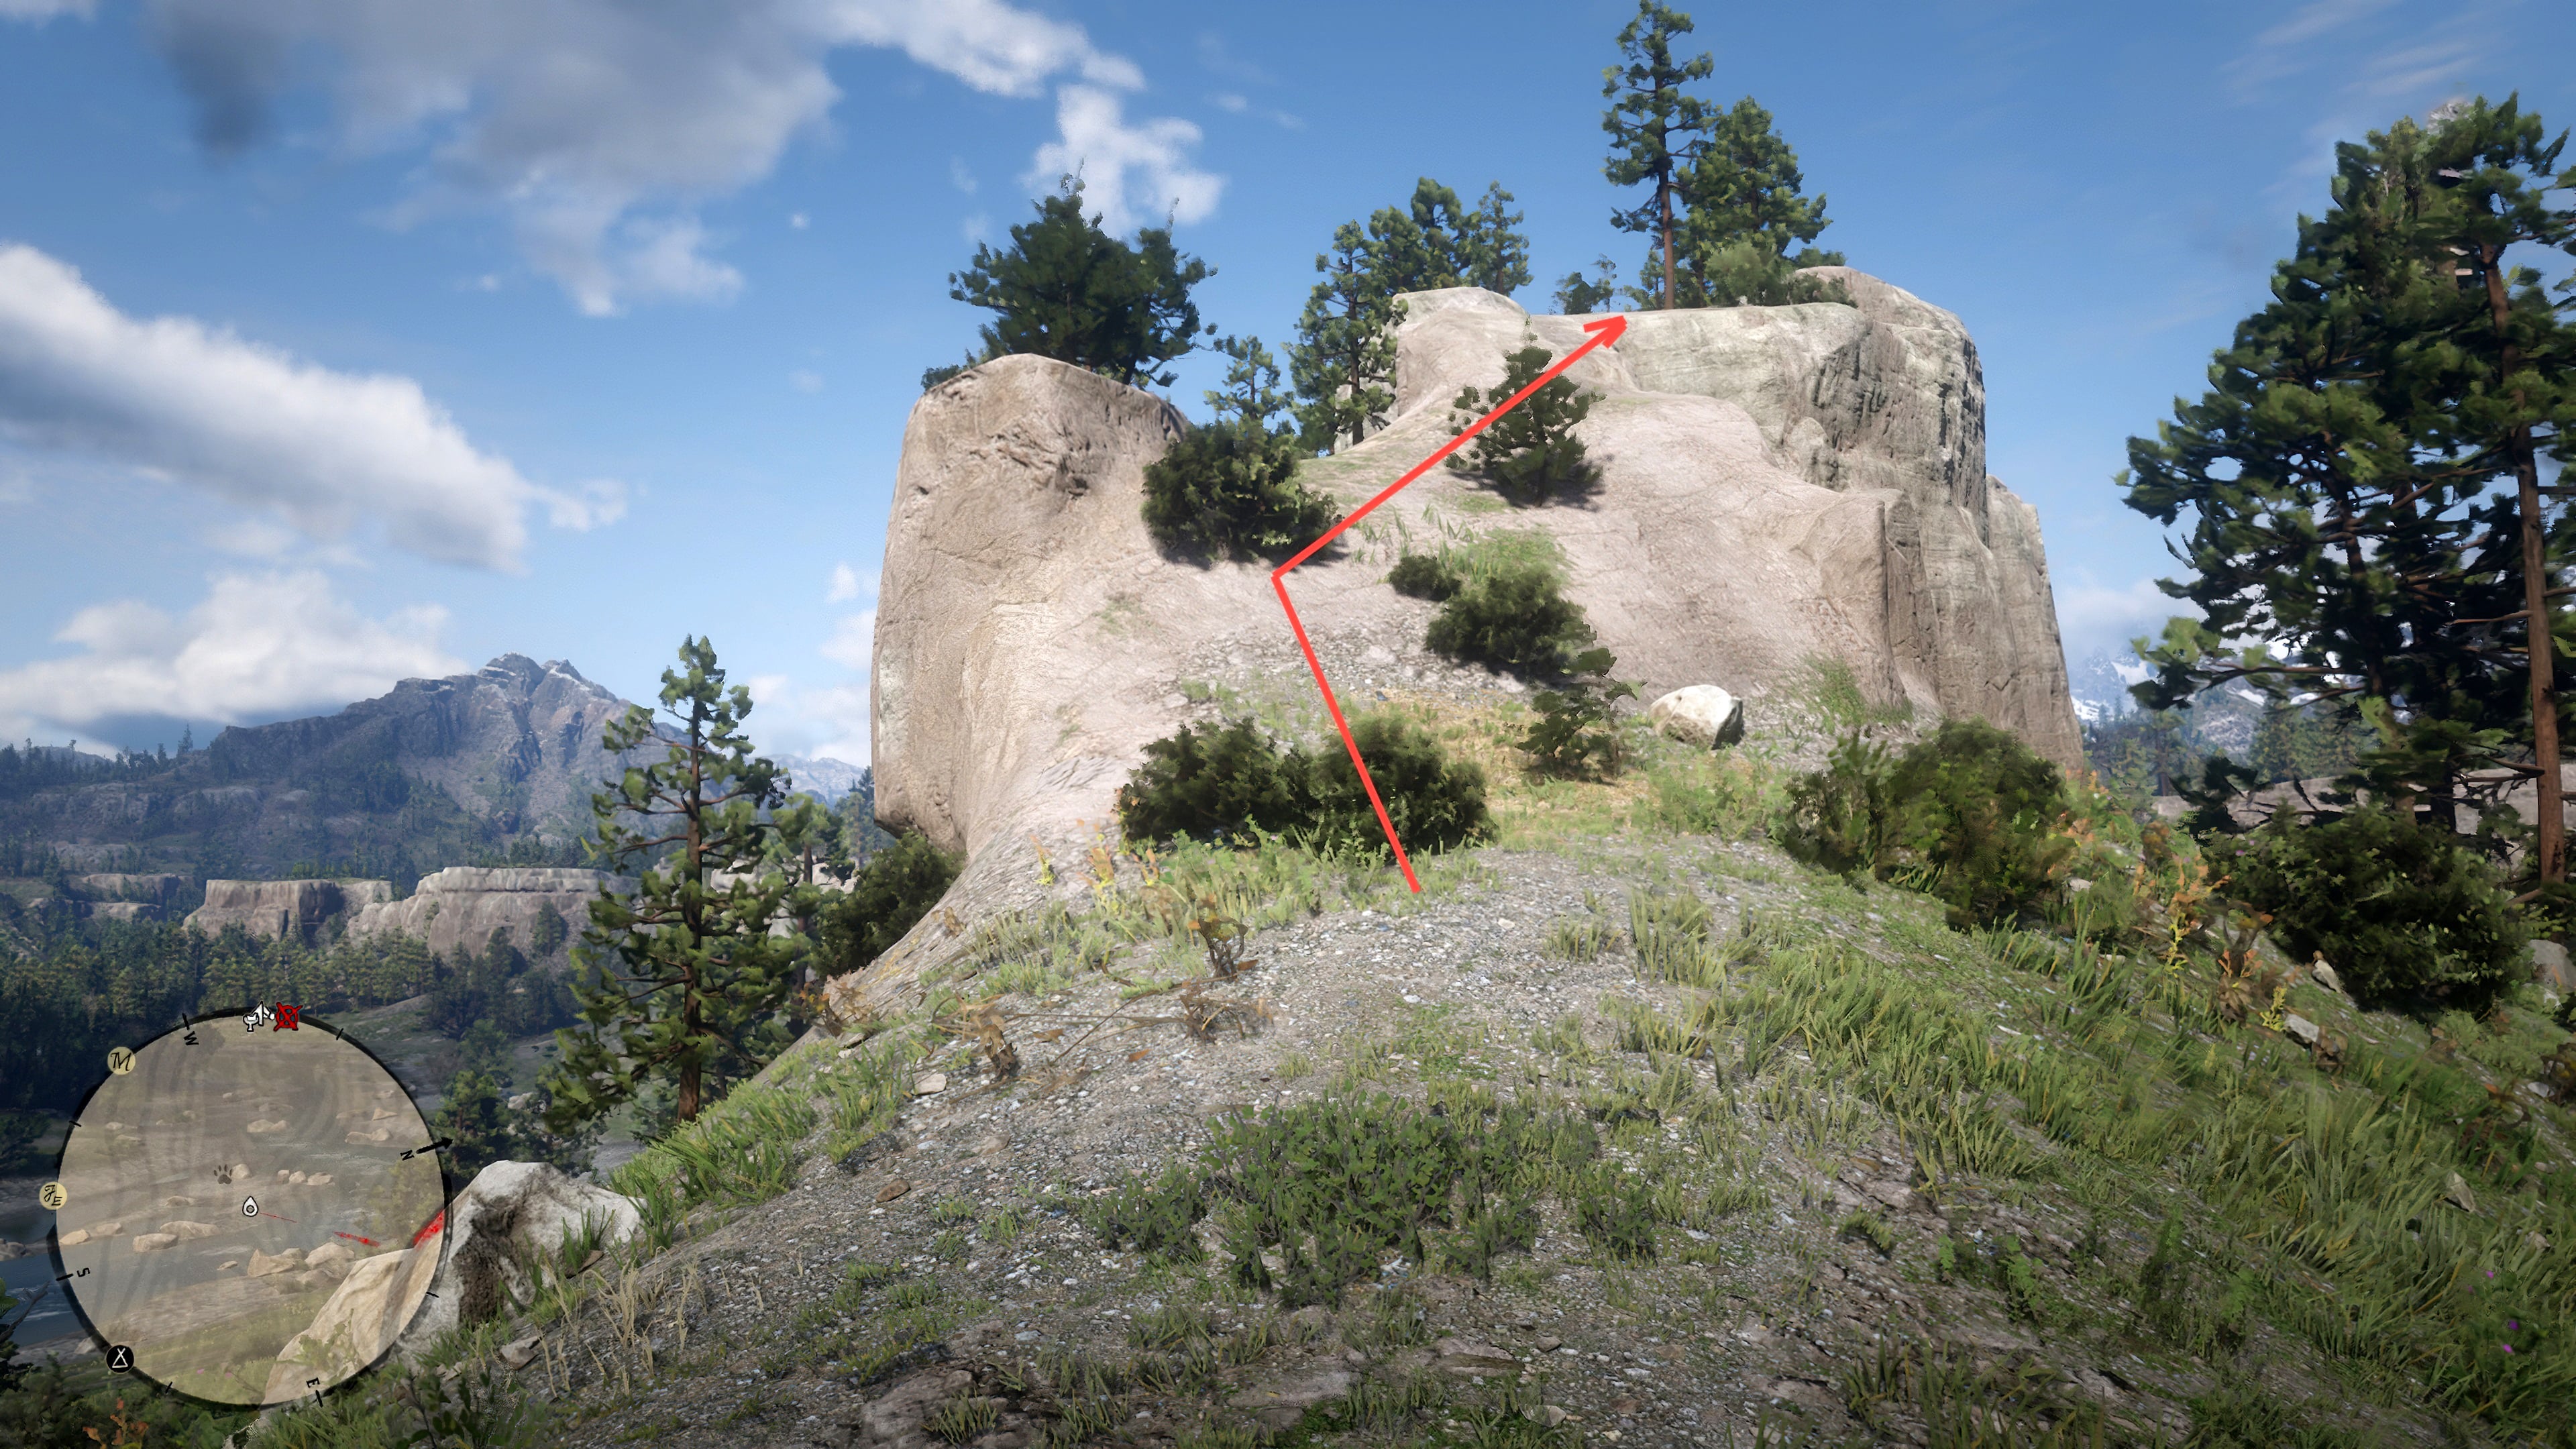
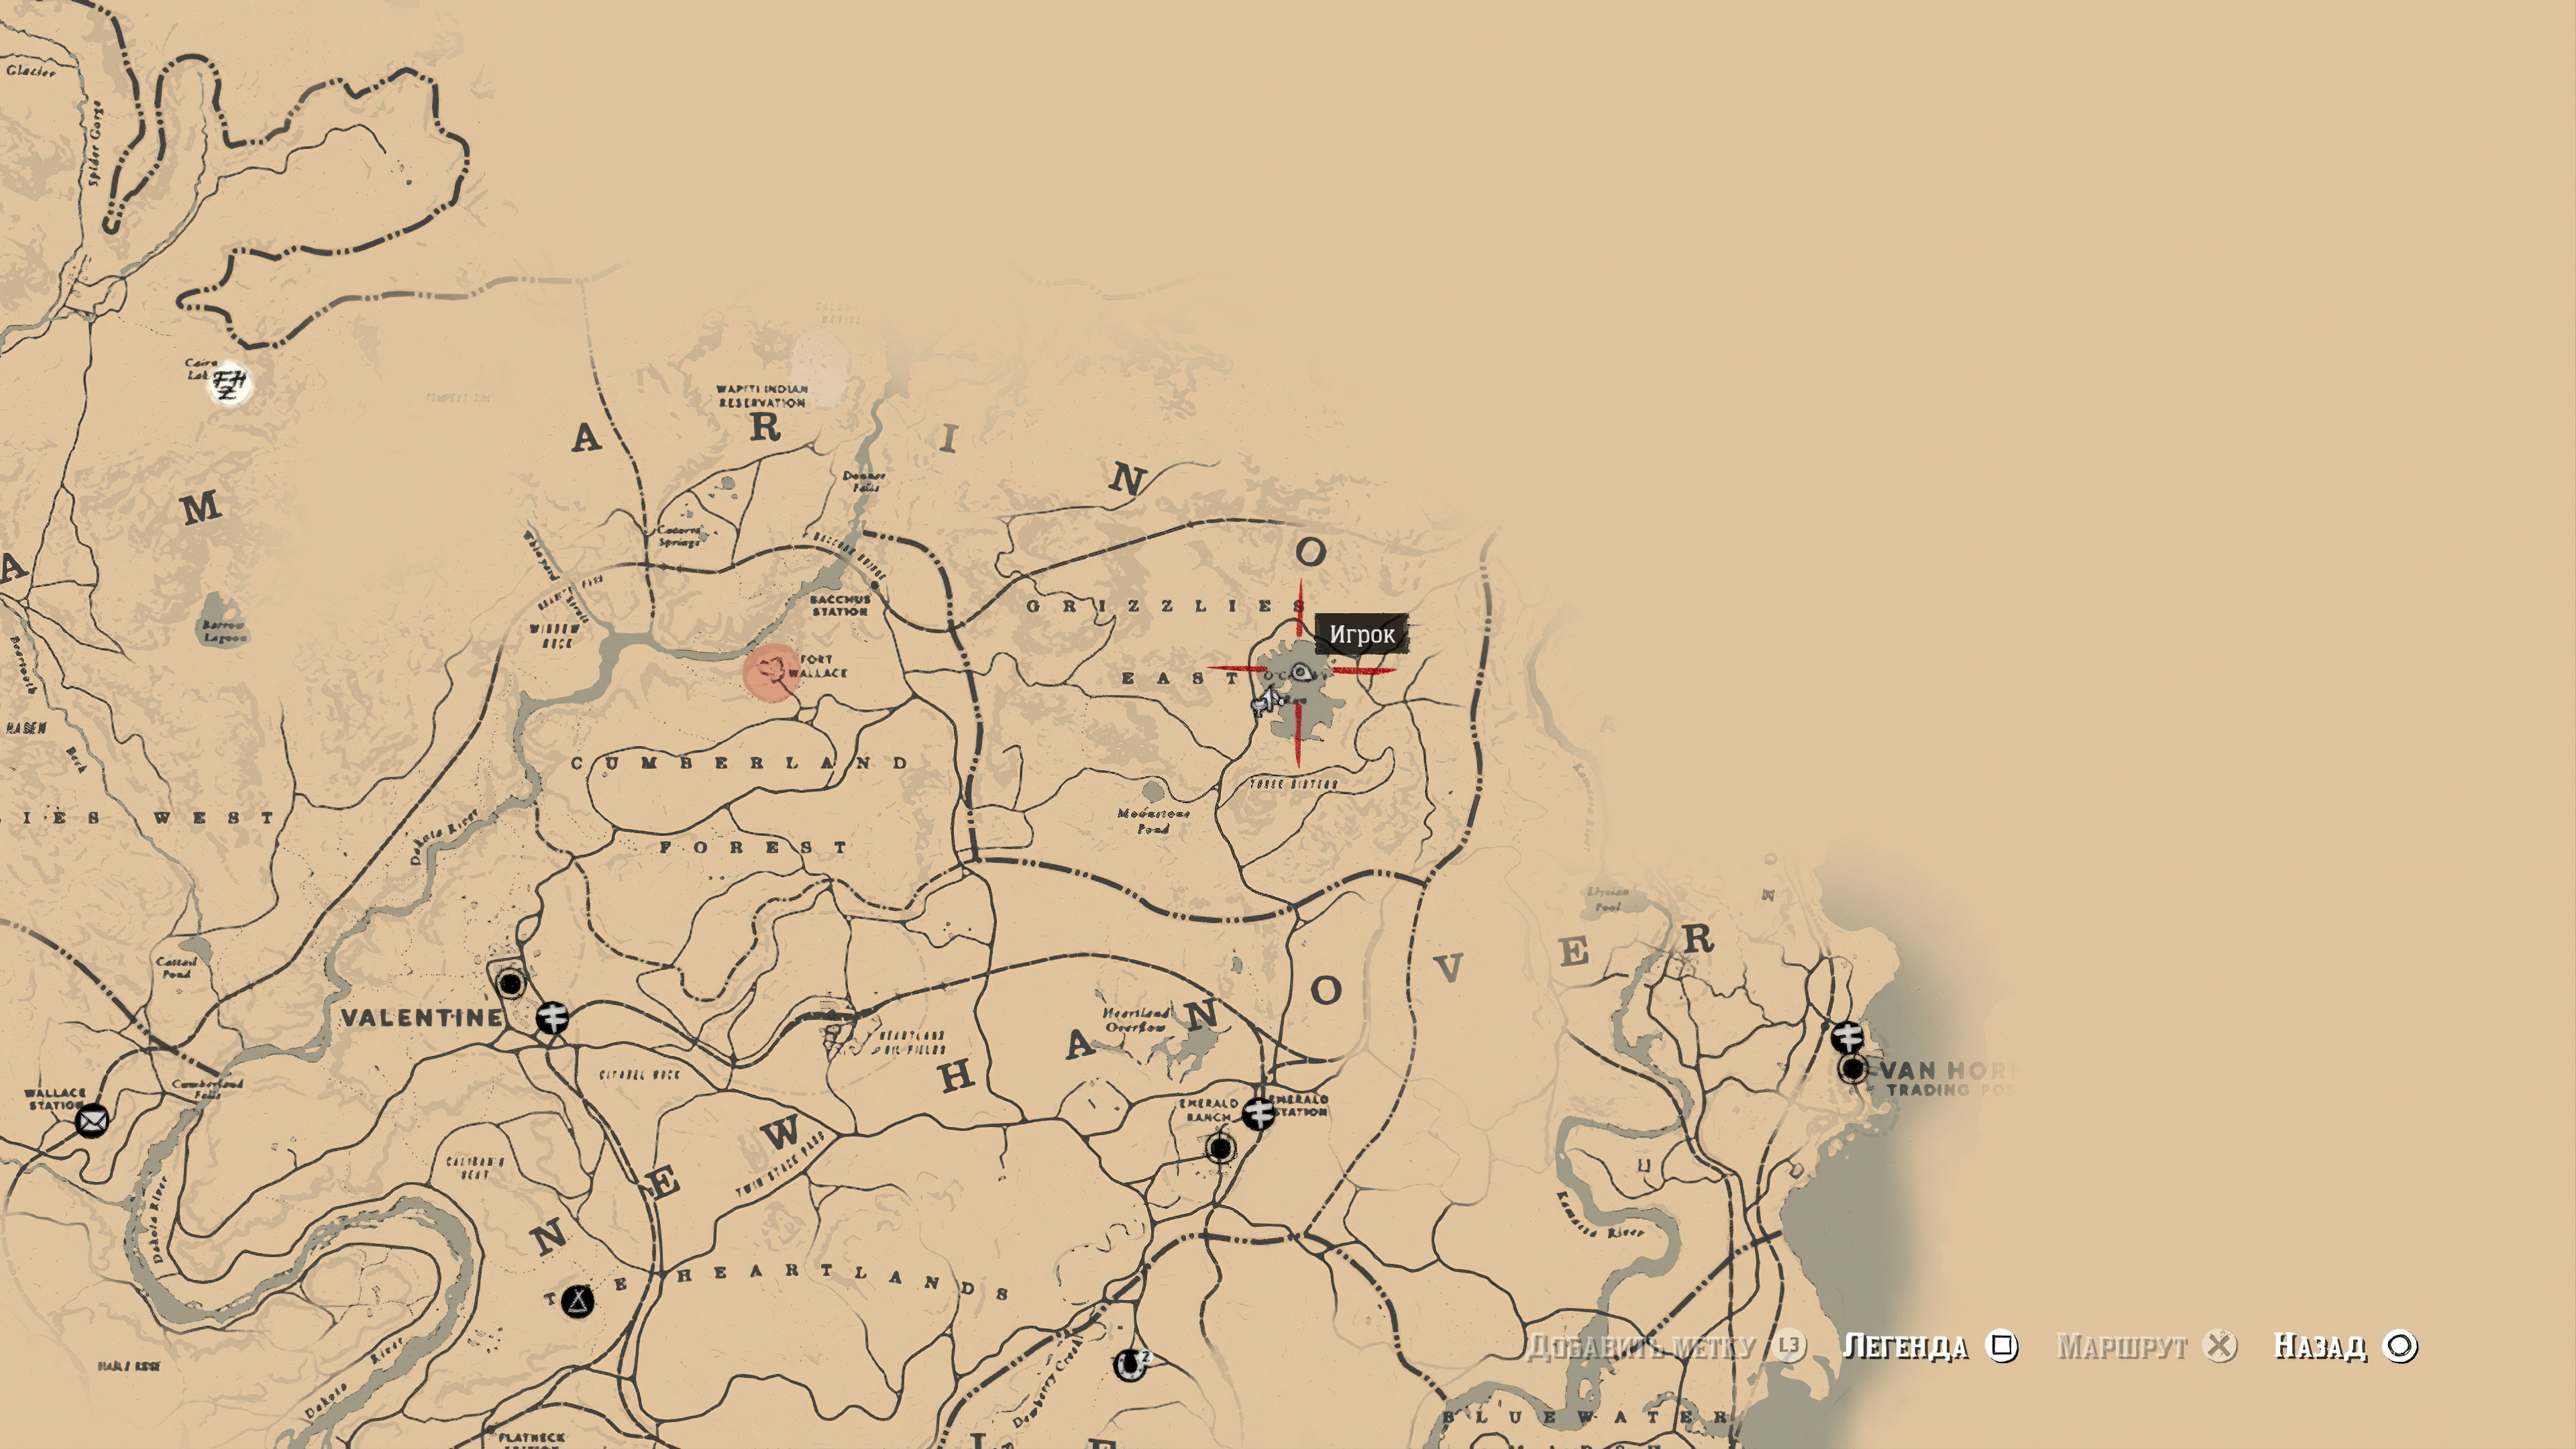
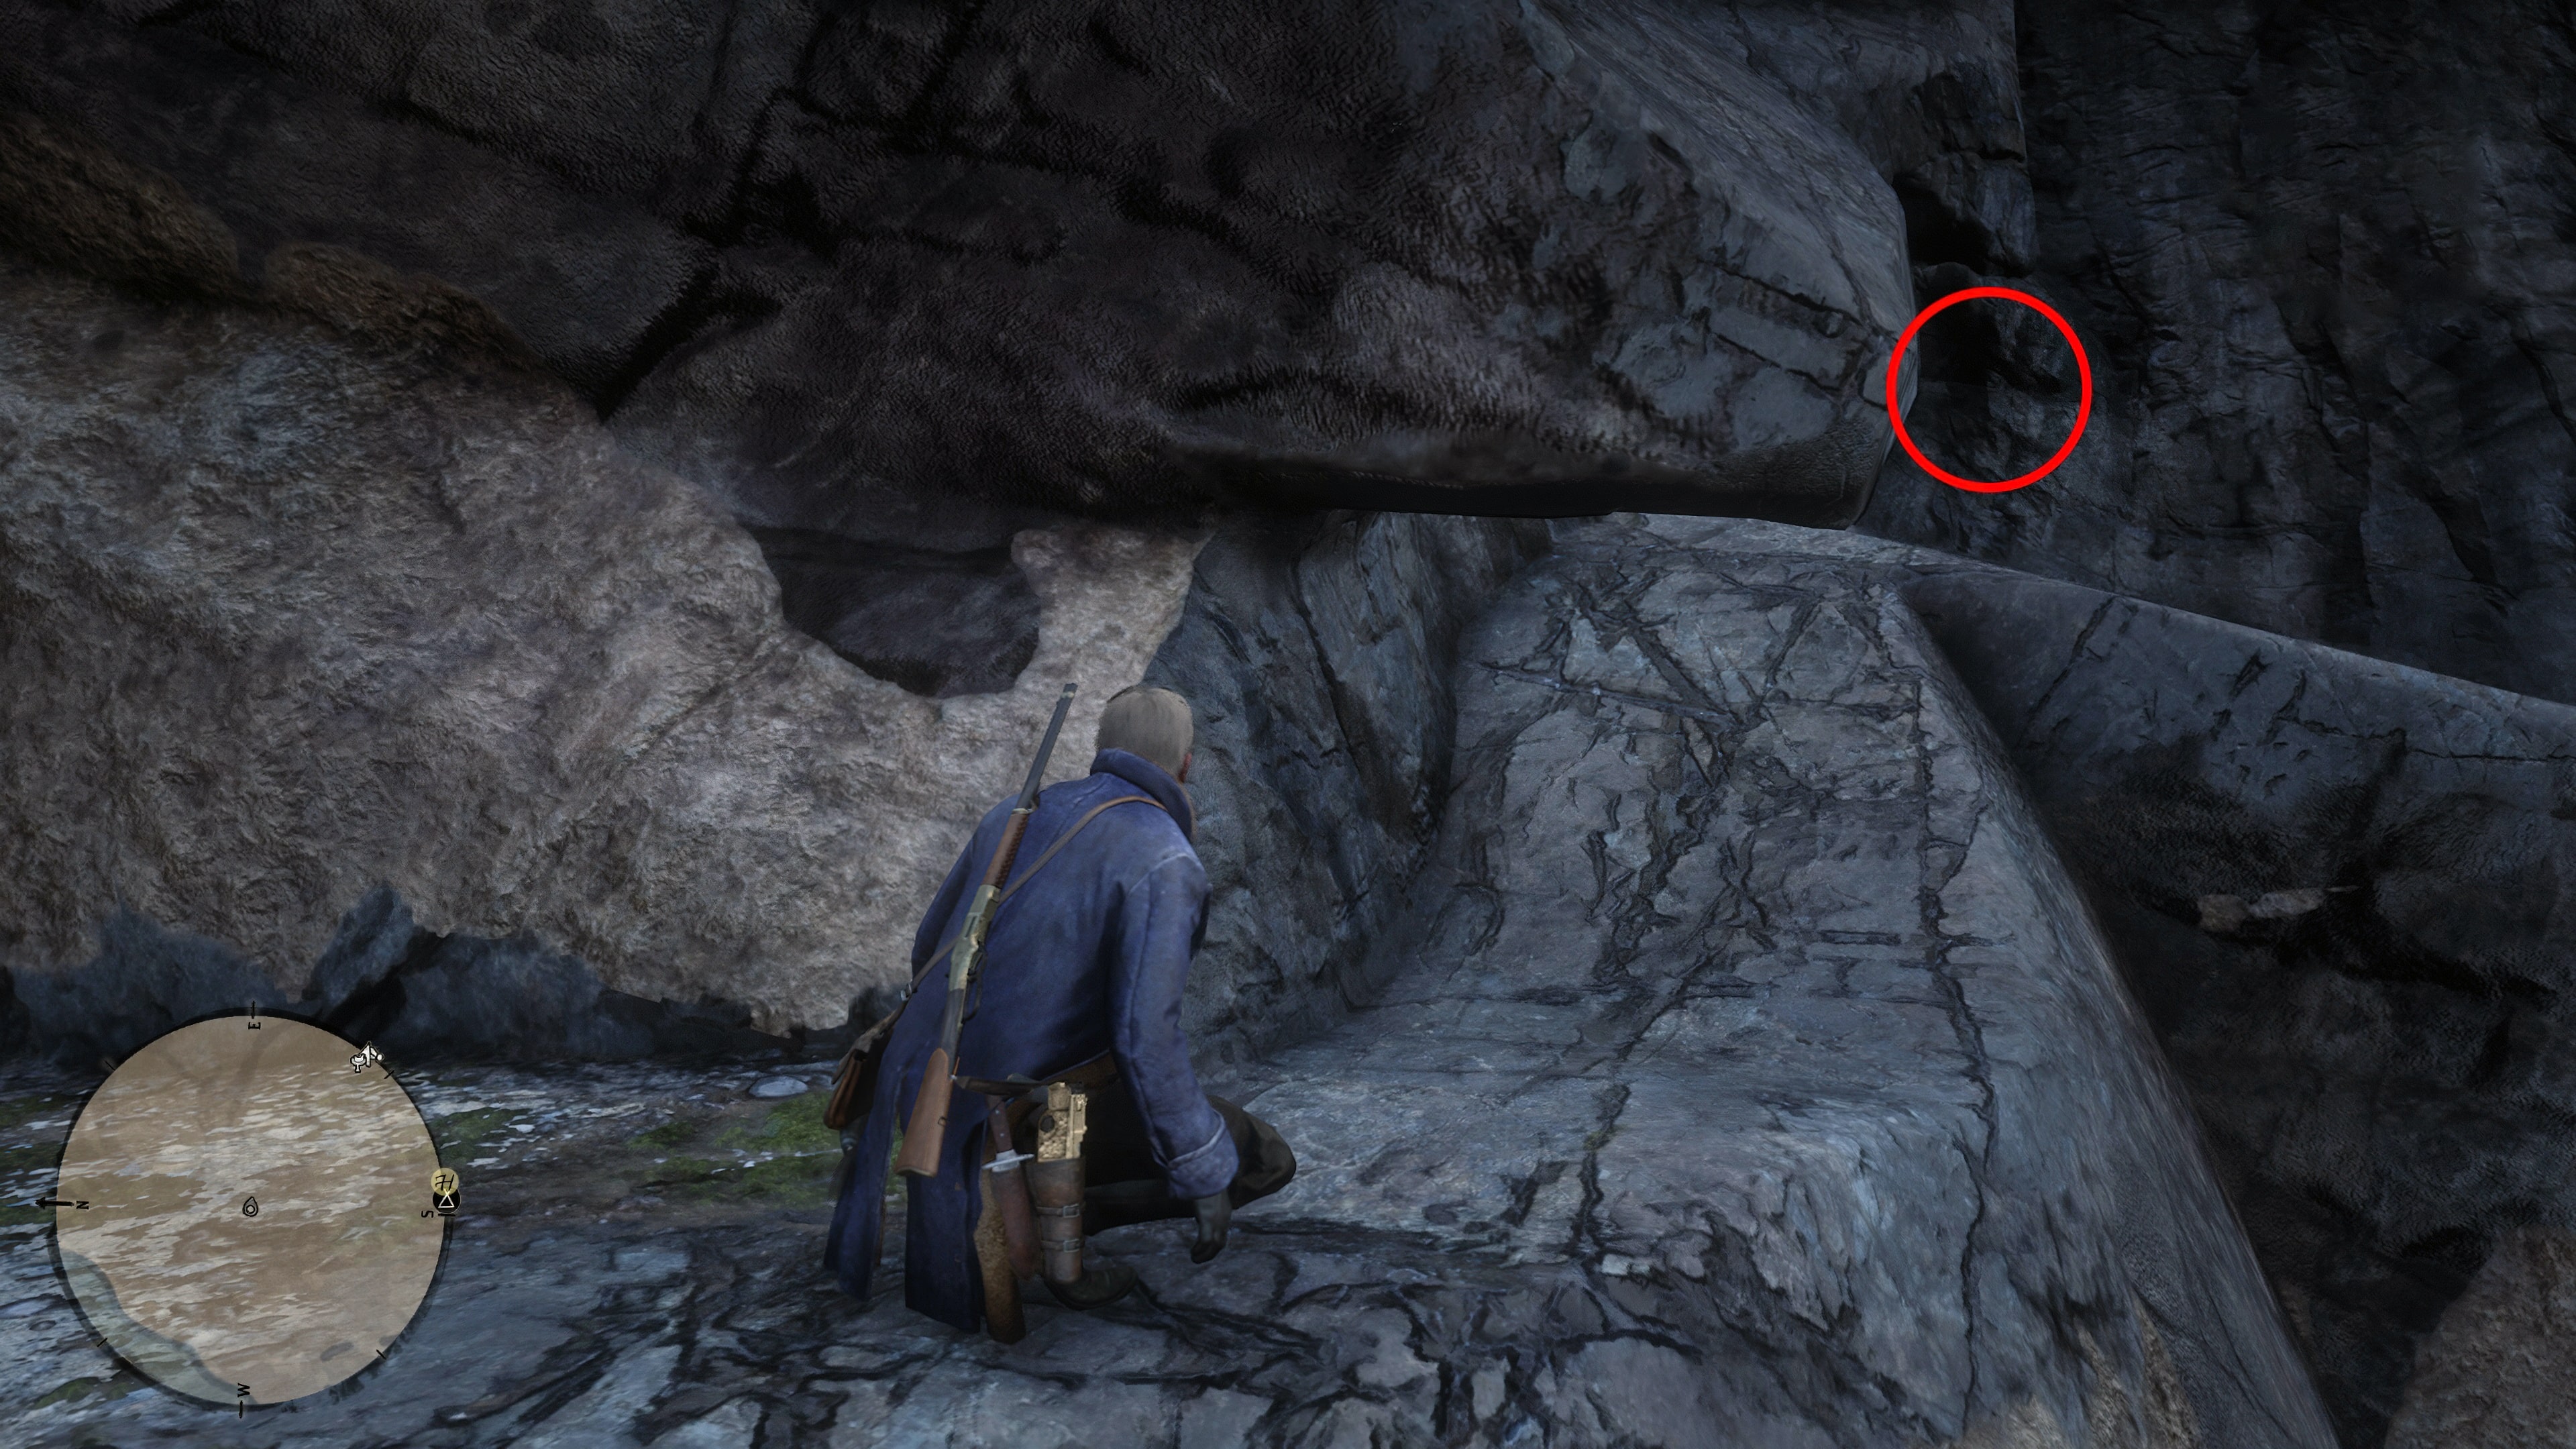
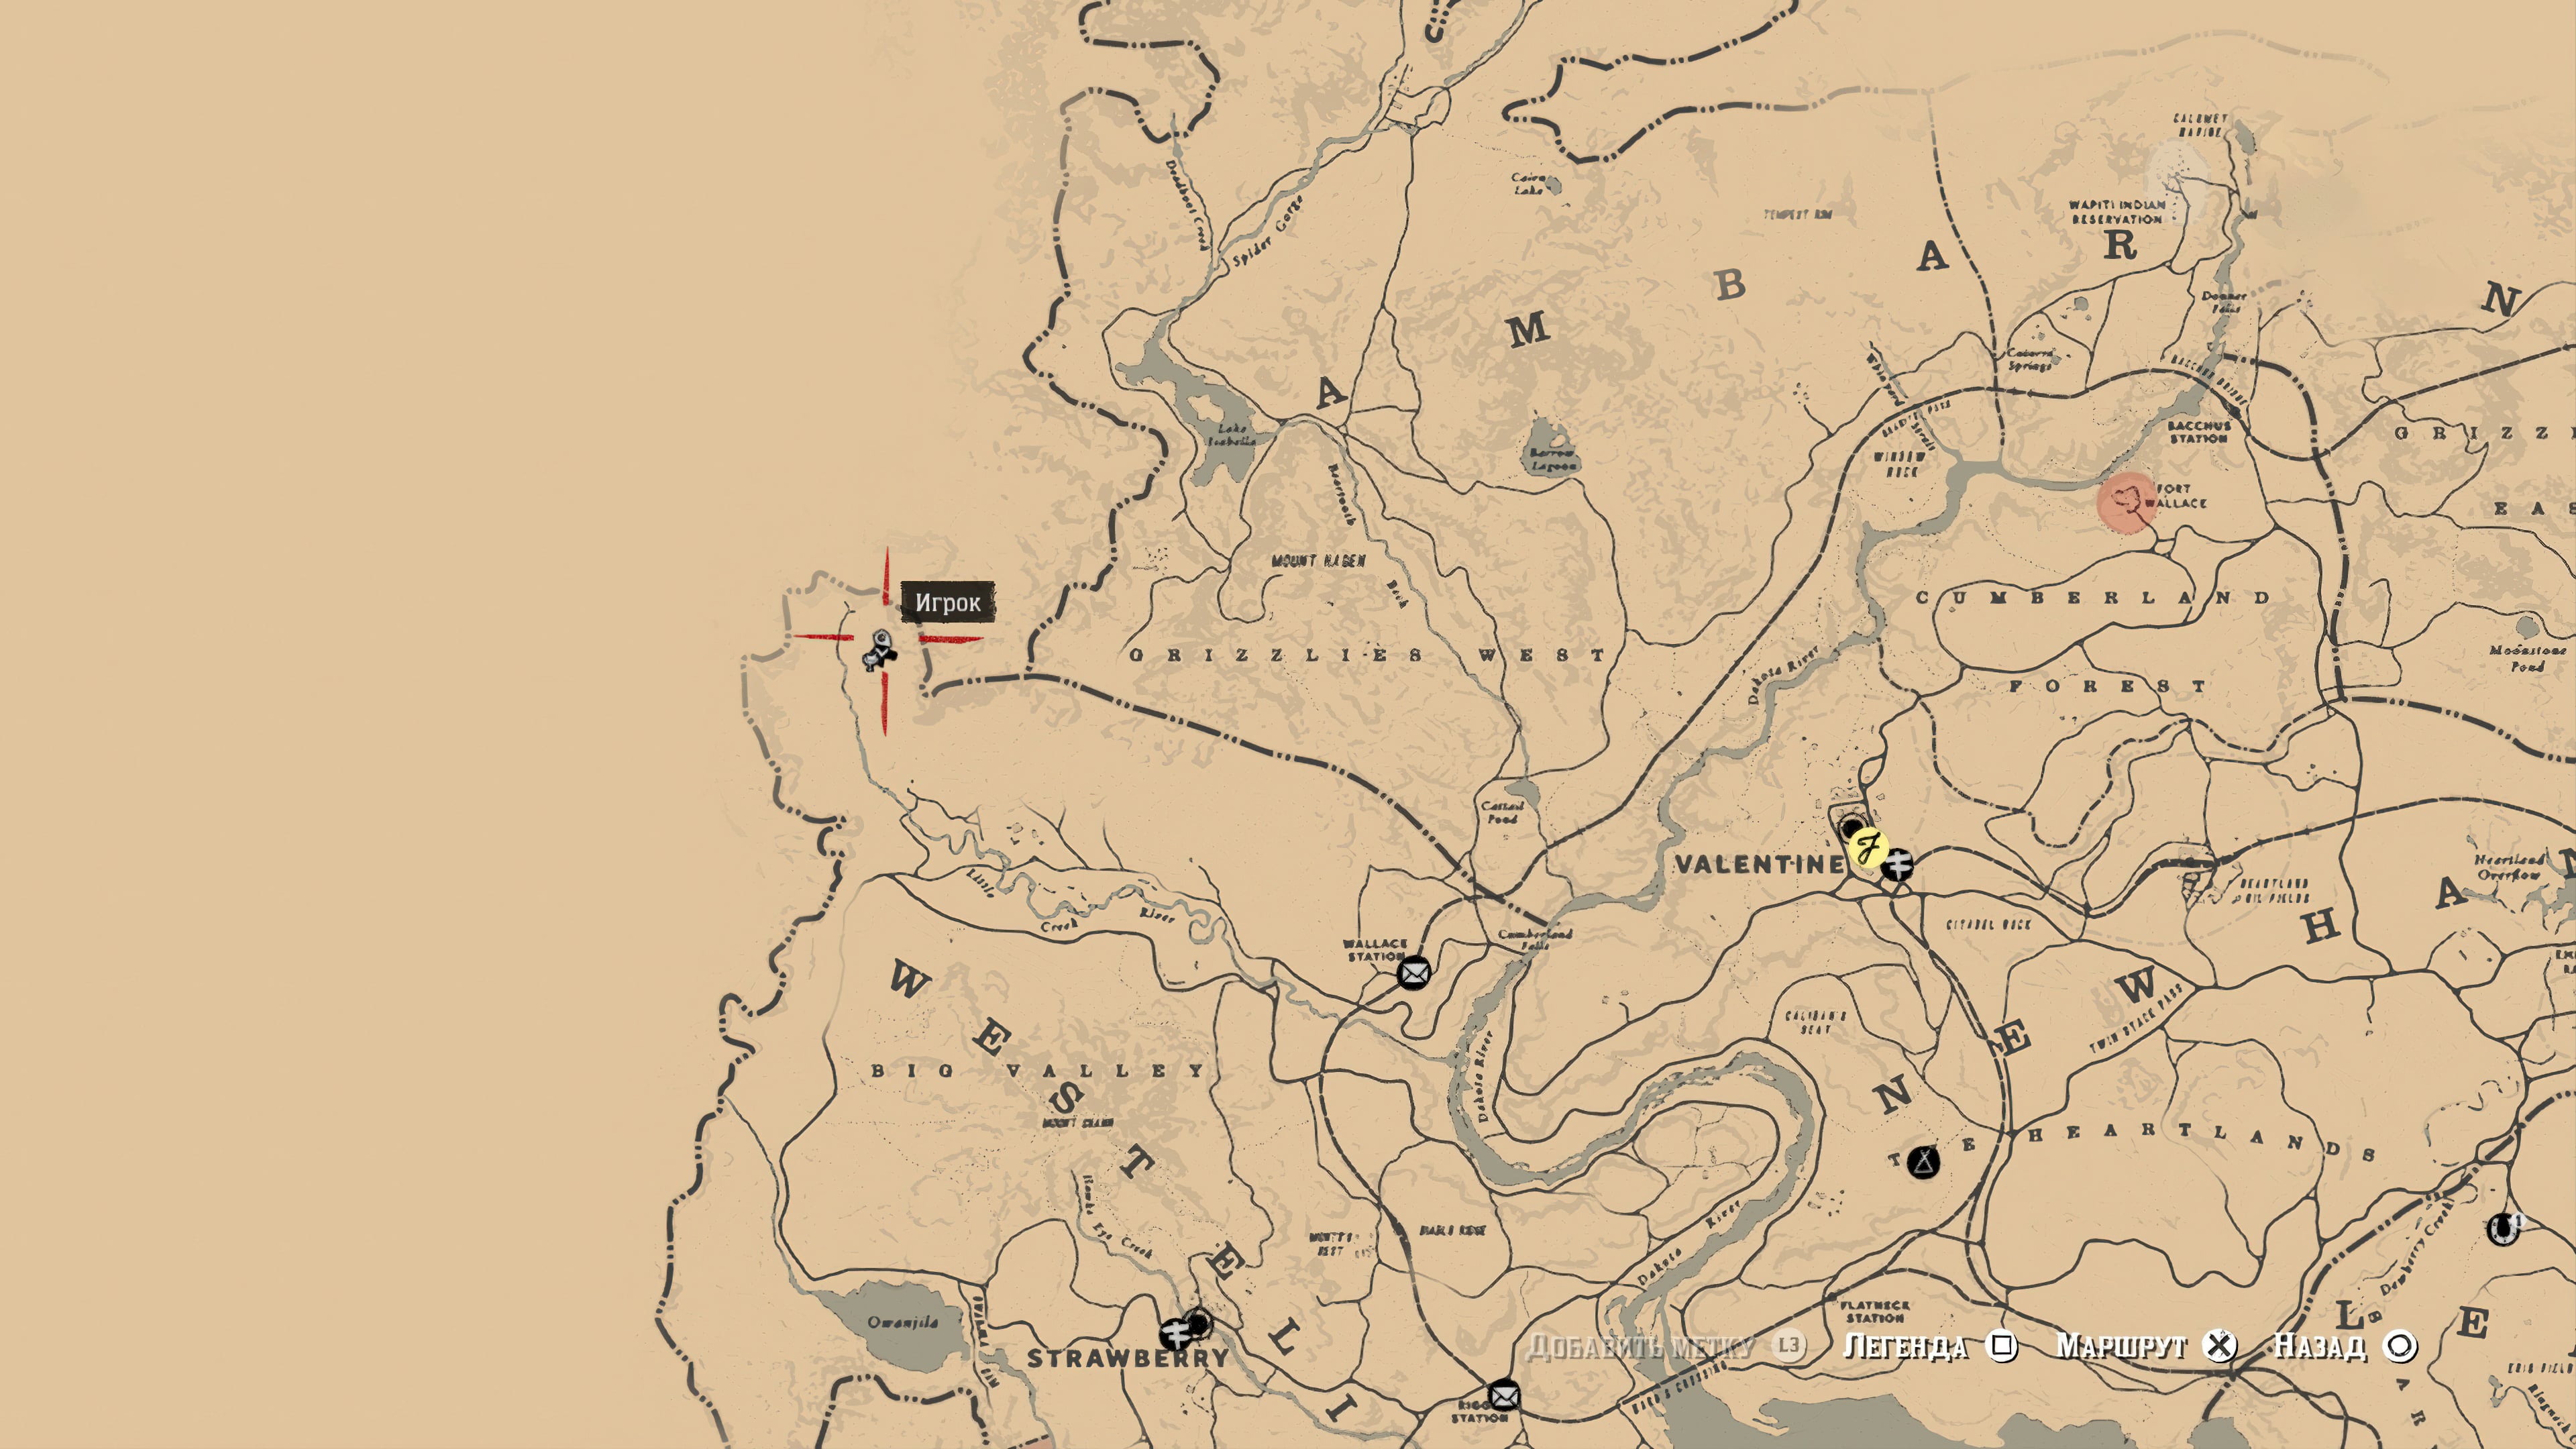
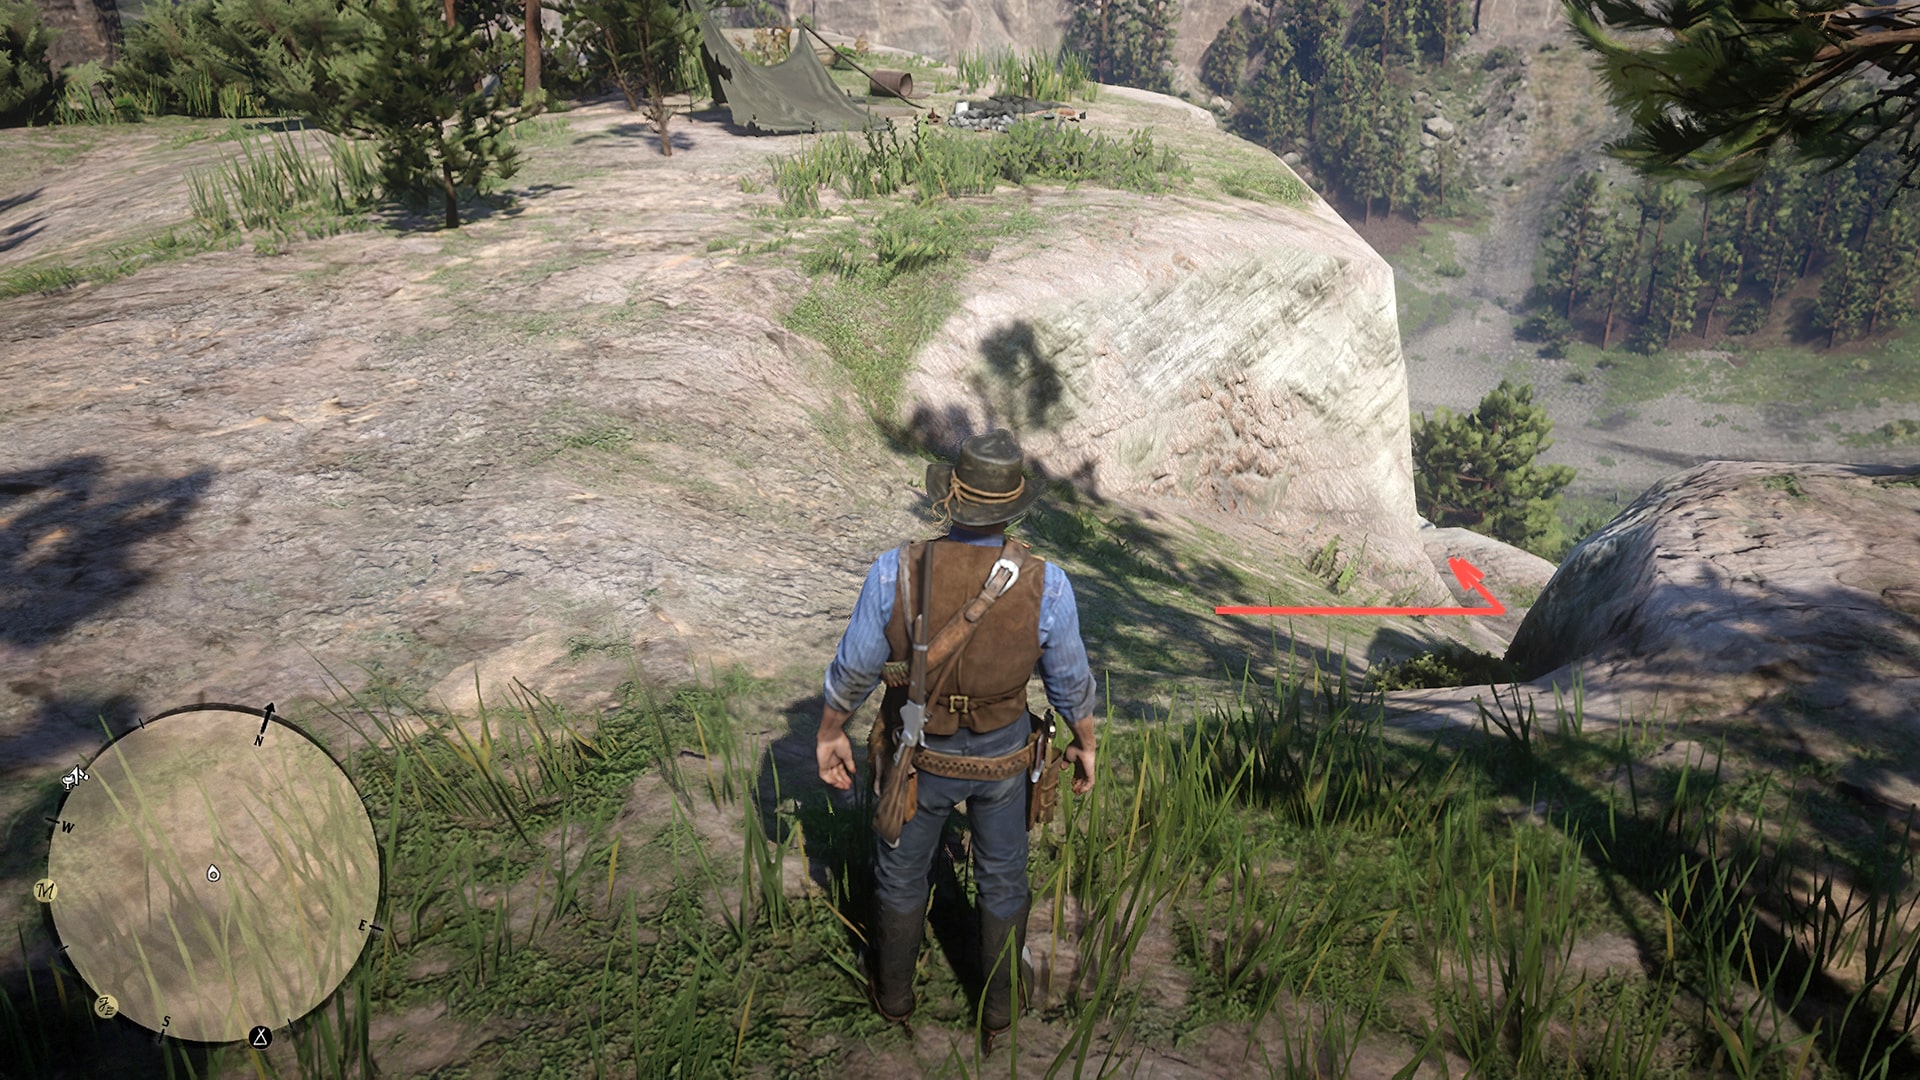
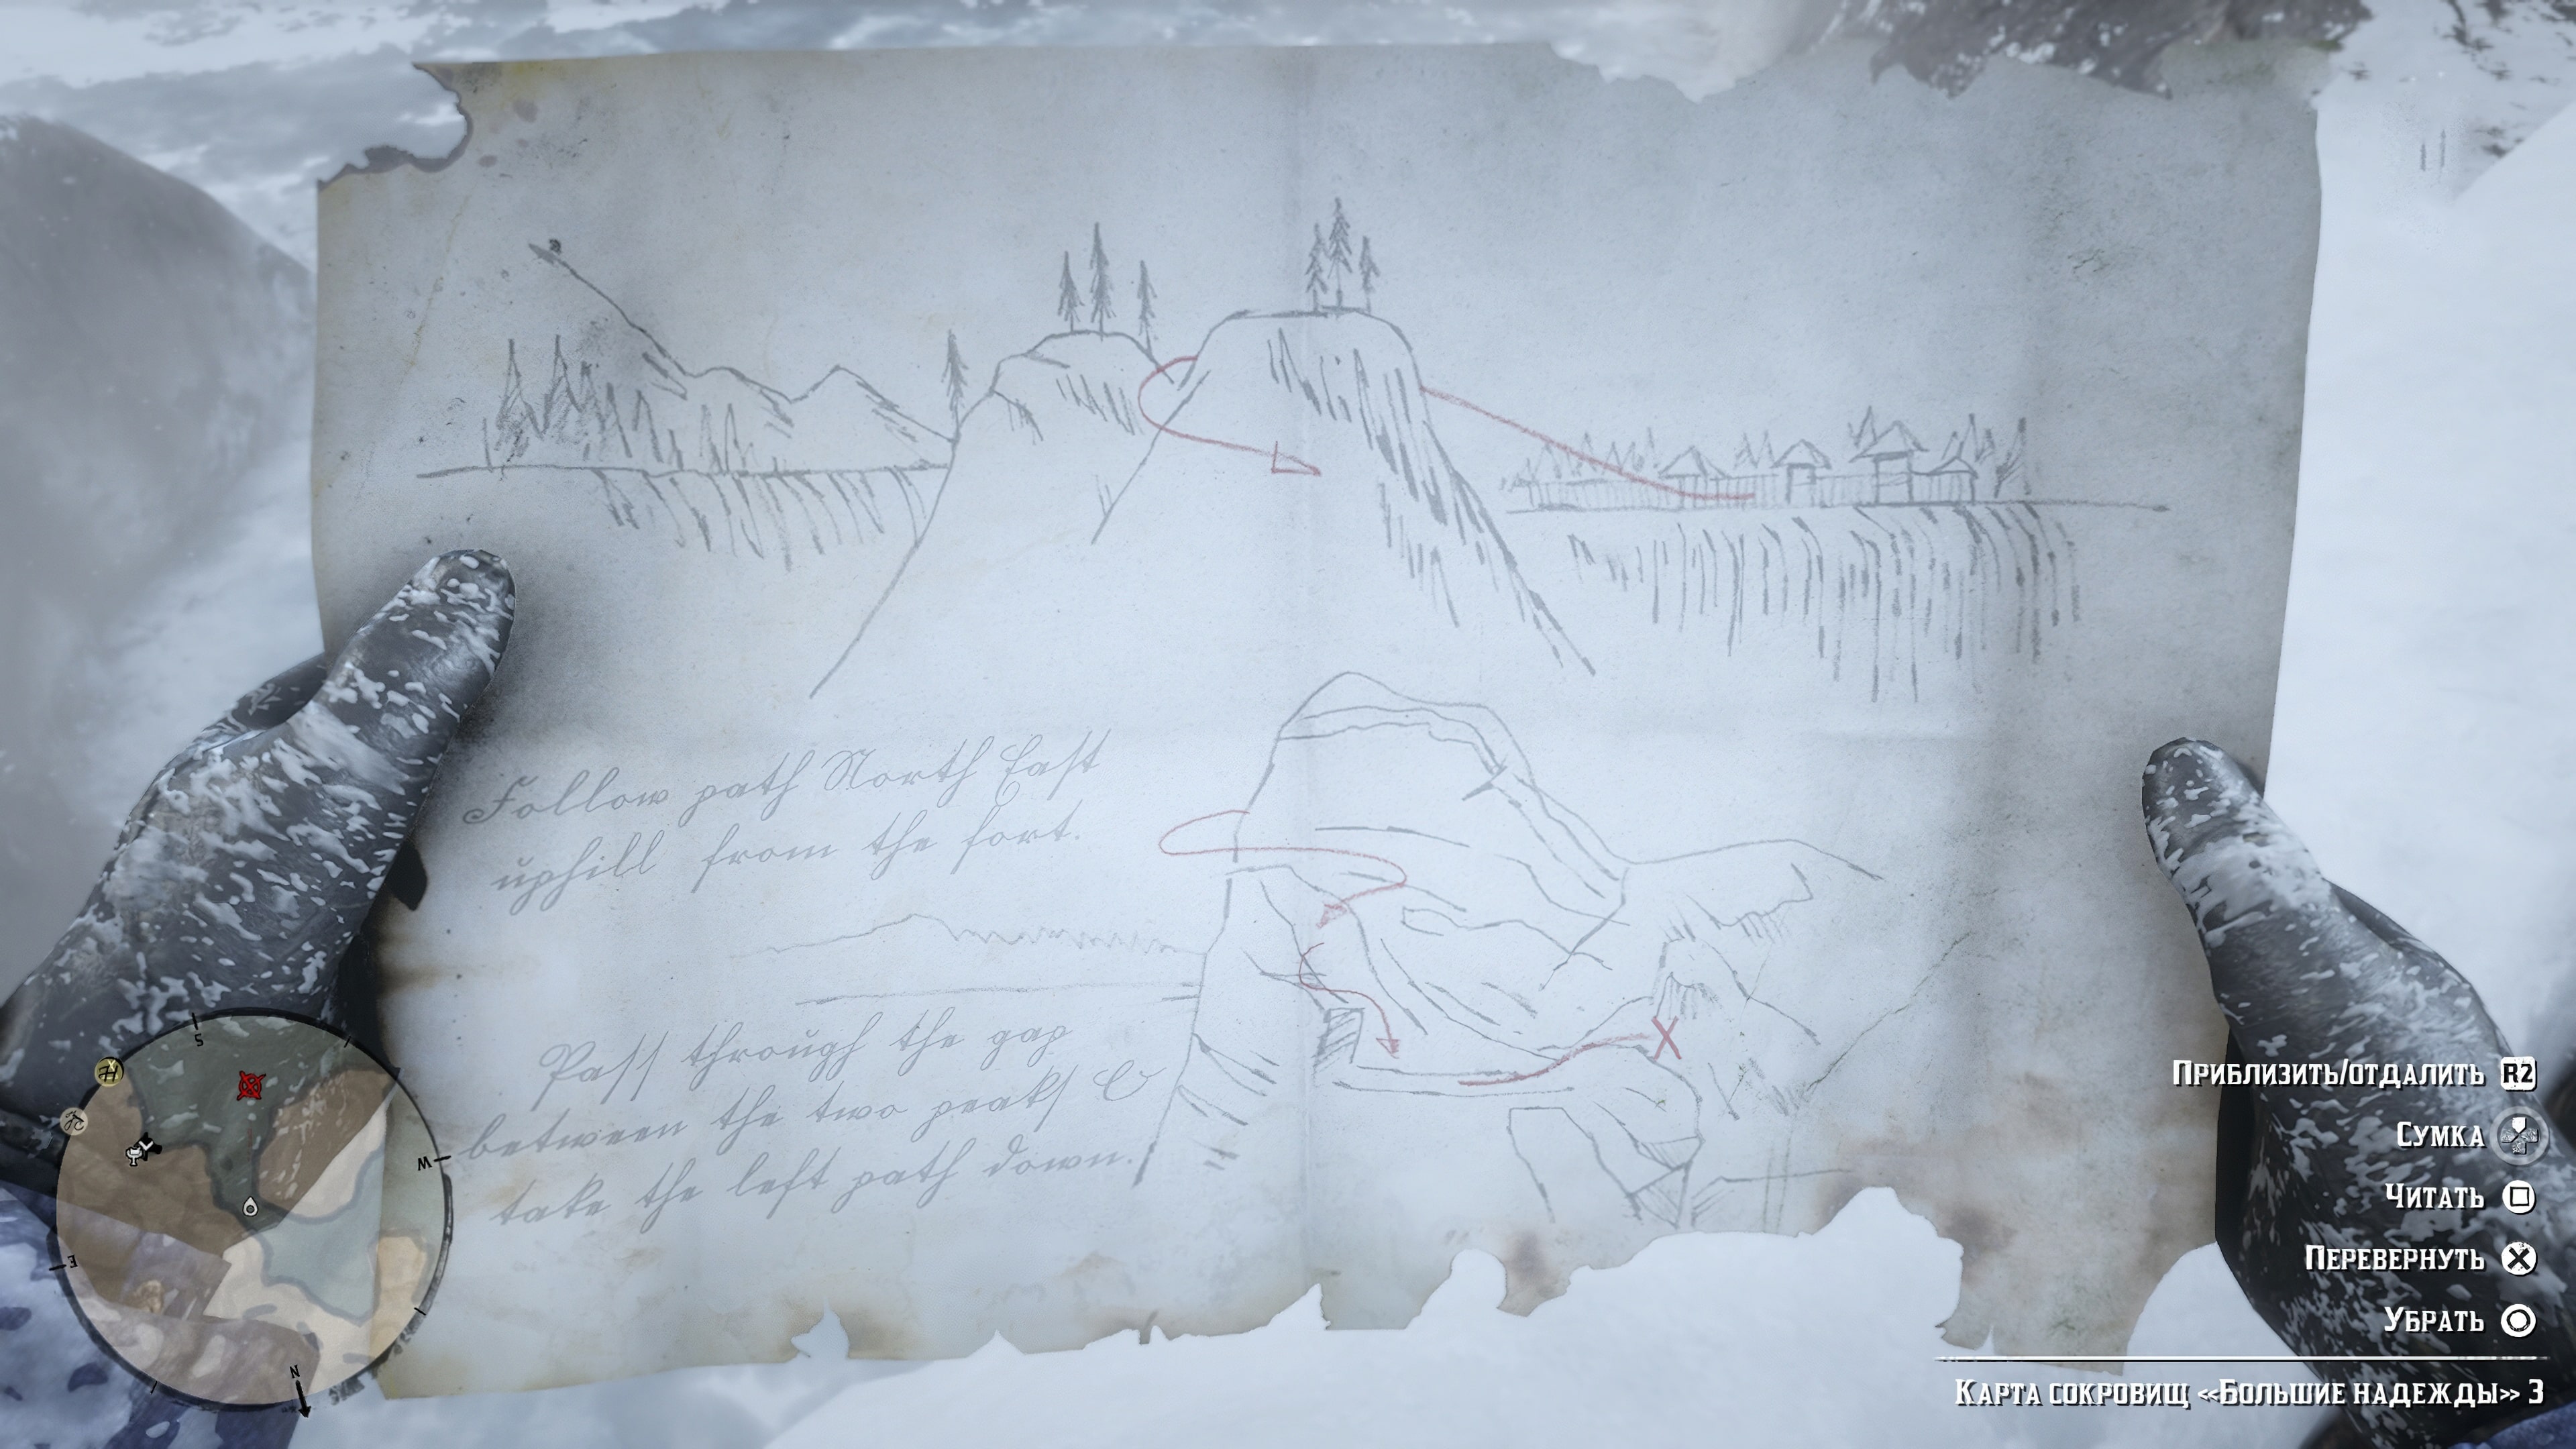
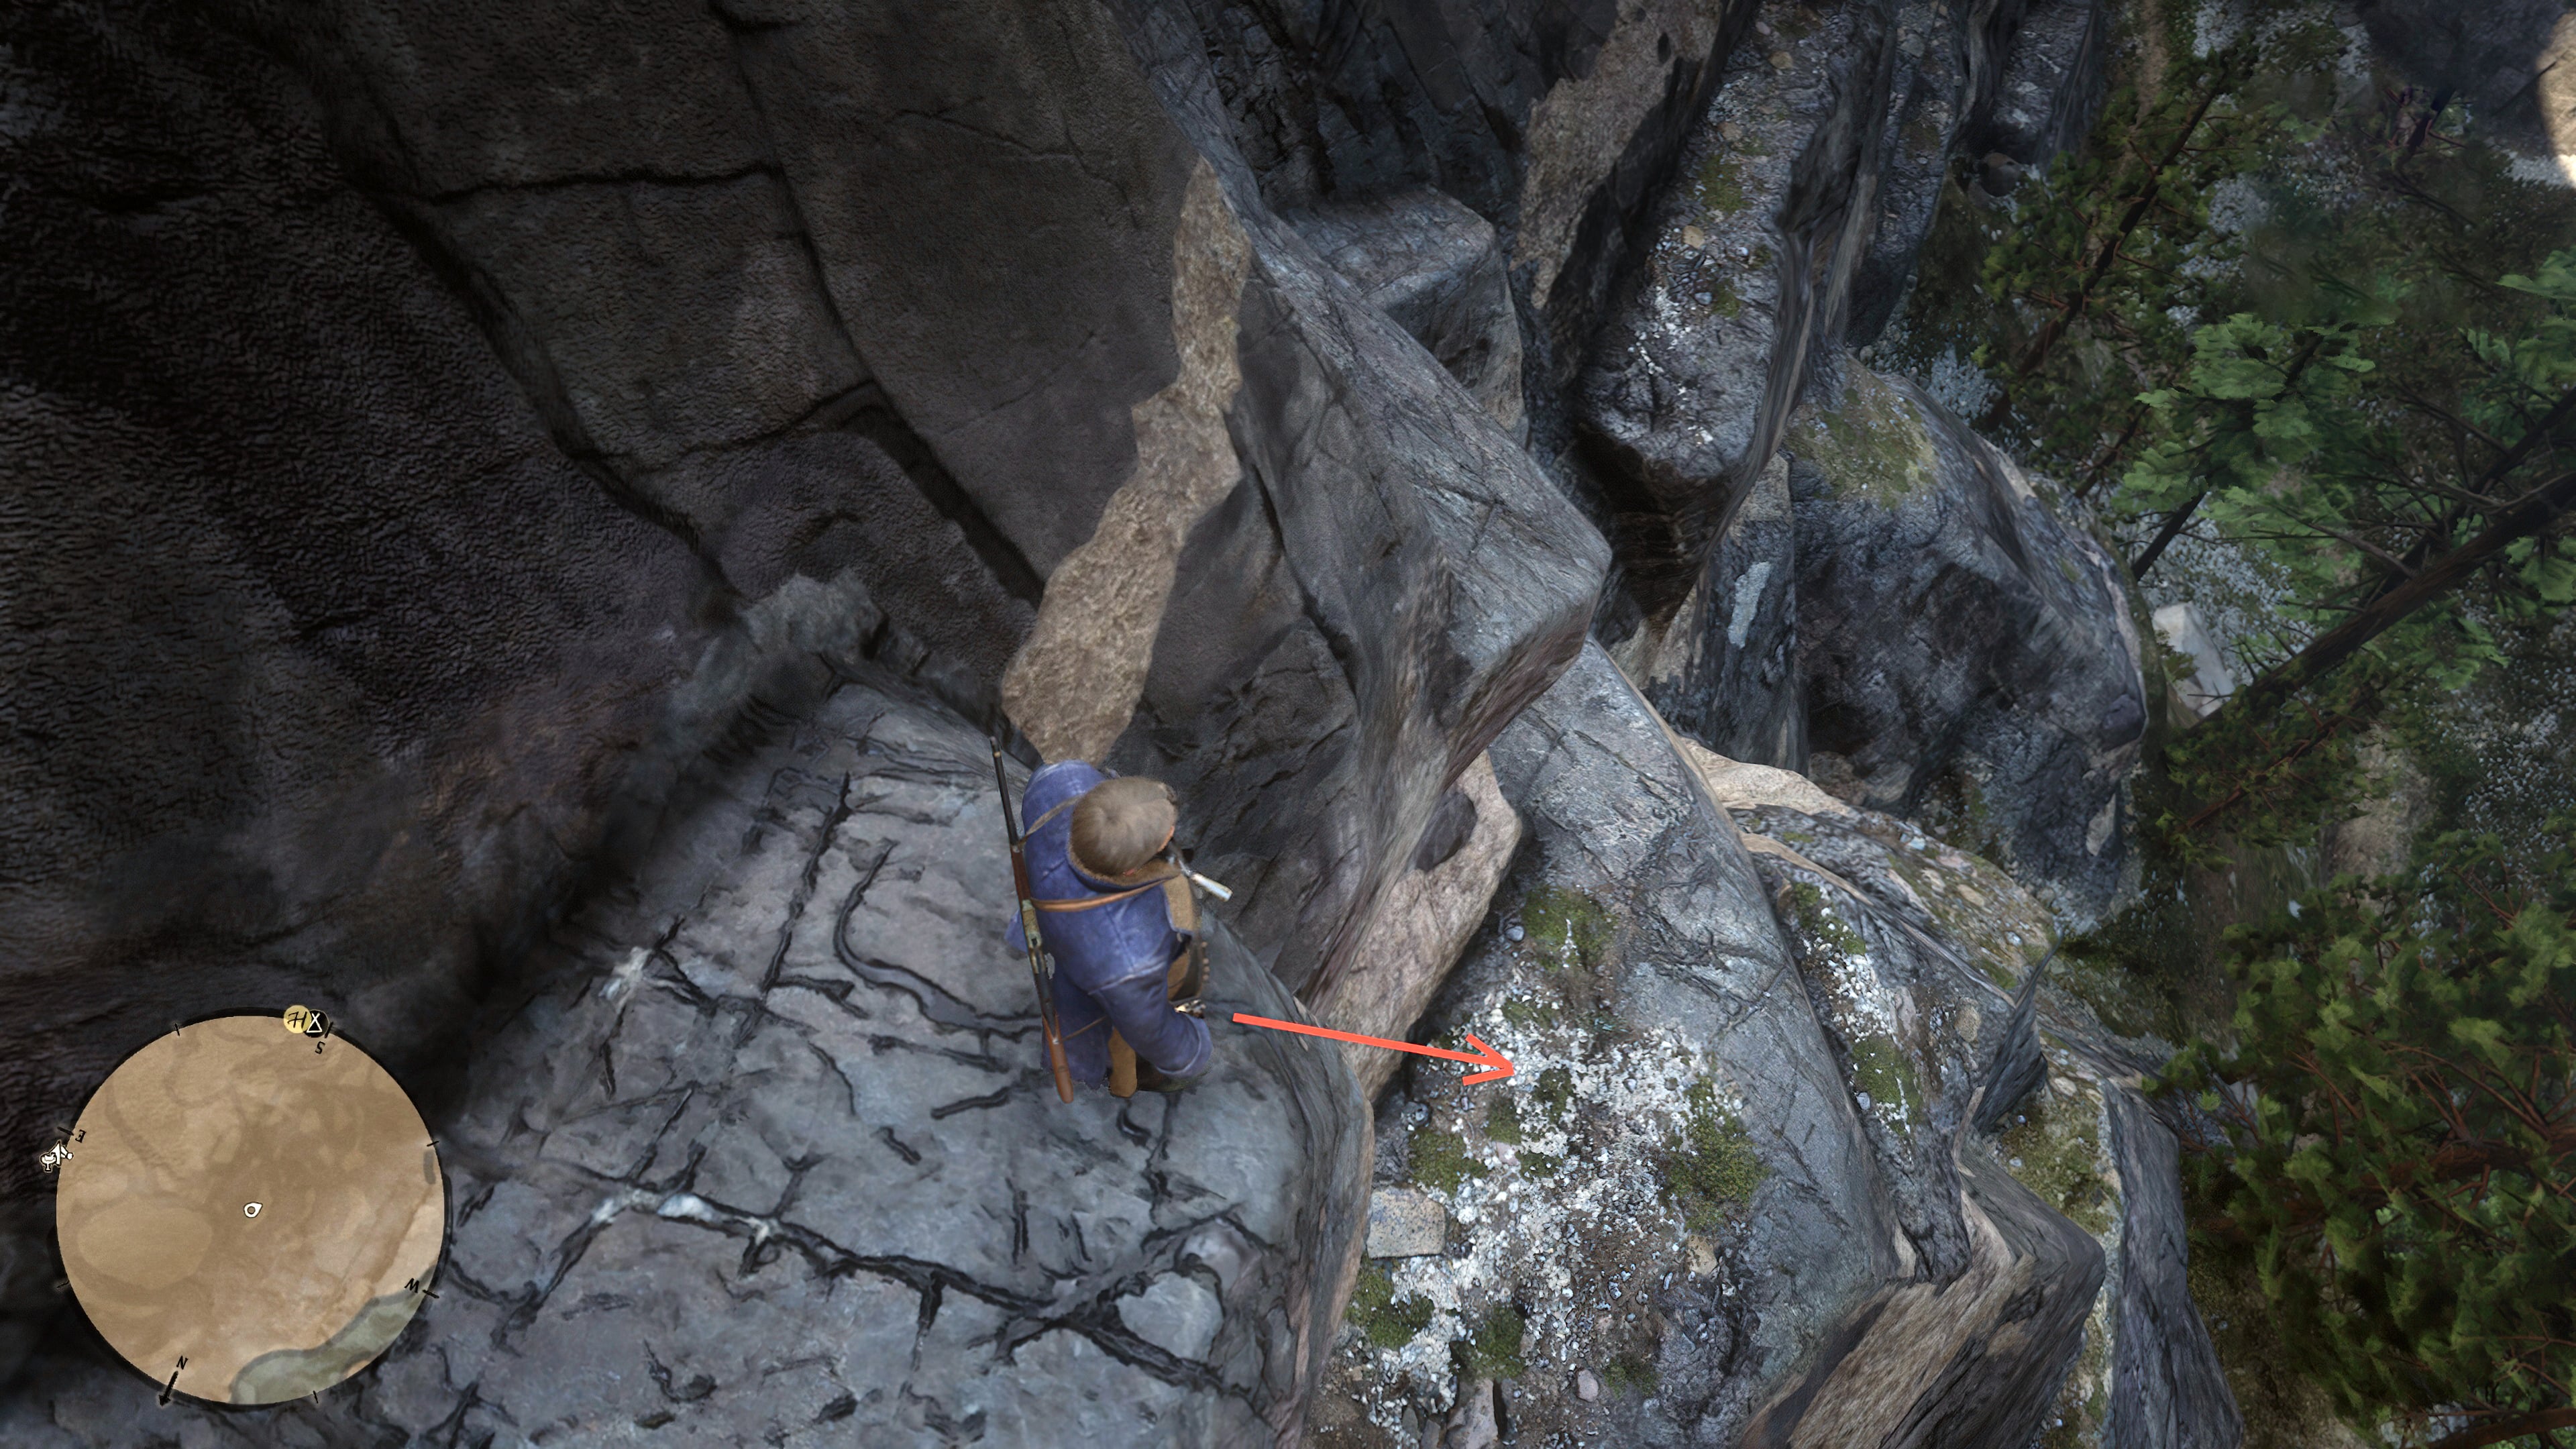
The third cache will be the hardest to find and is located in the mountains north of Fort Wallace. If you’ve searched for the rock art in this area before, it will be easier to retrace your steps. The player marker in the screenshot is at a location where it’s convenient to start climbing the mountain, with the red marker indicating the approximate direction.

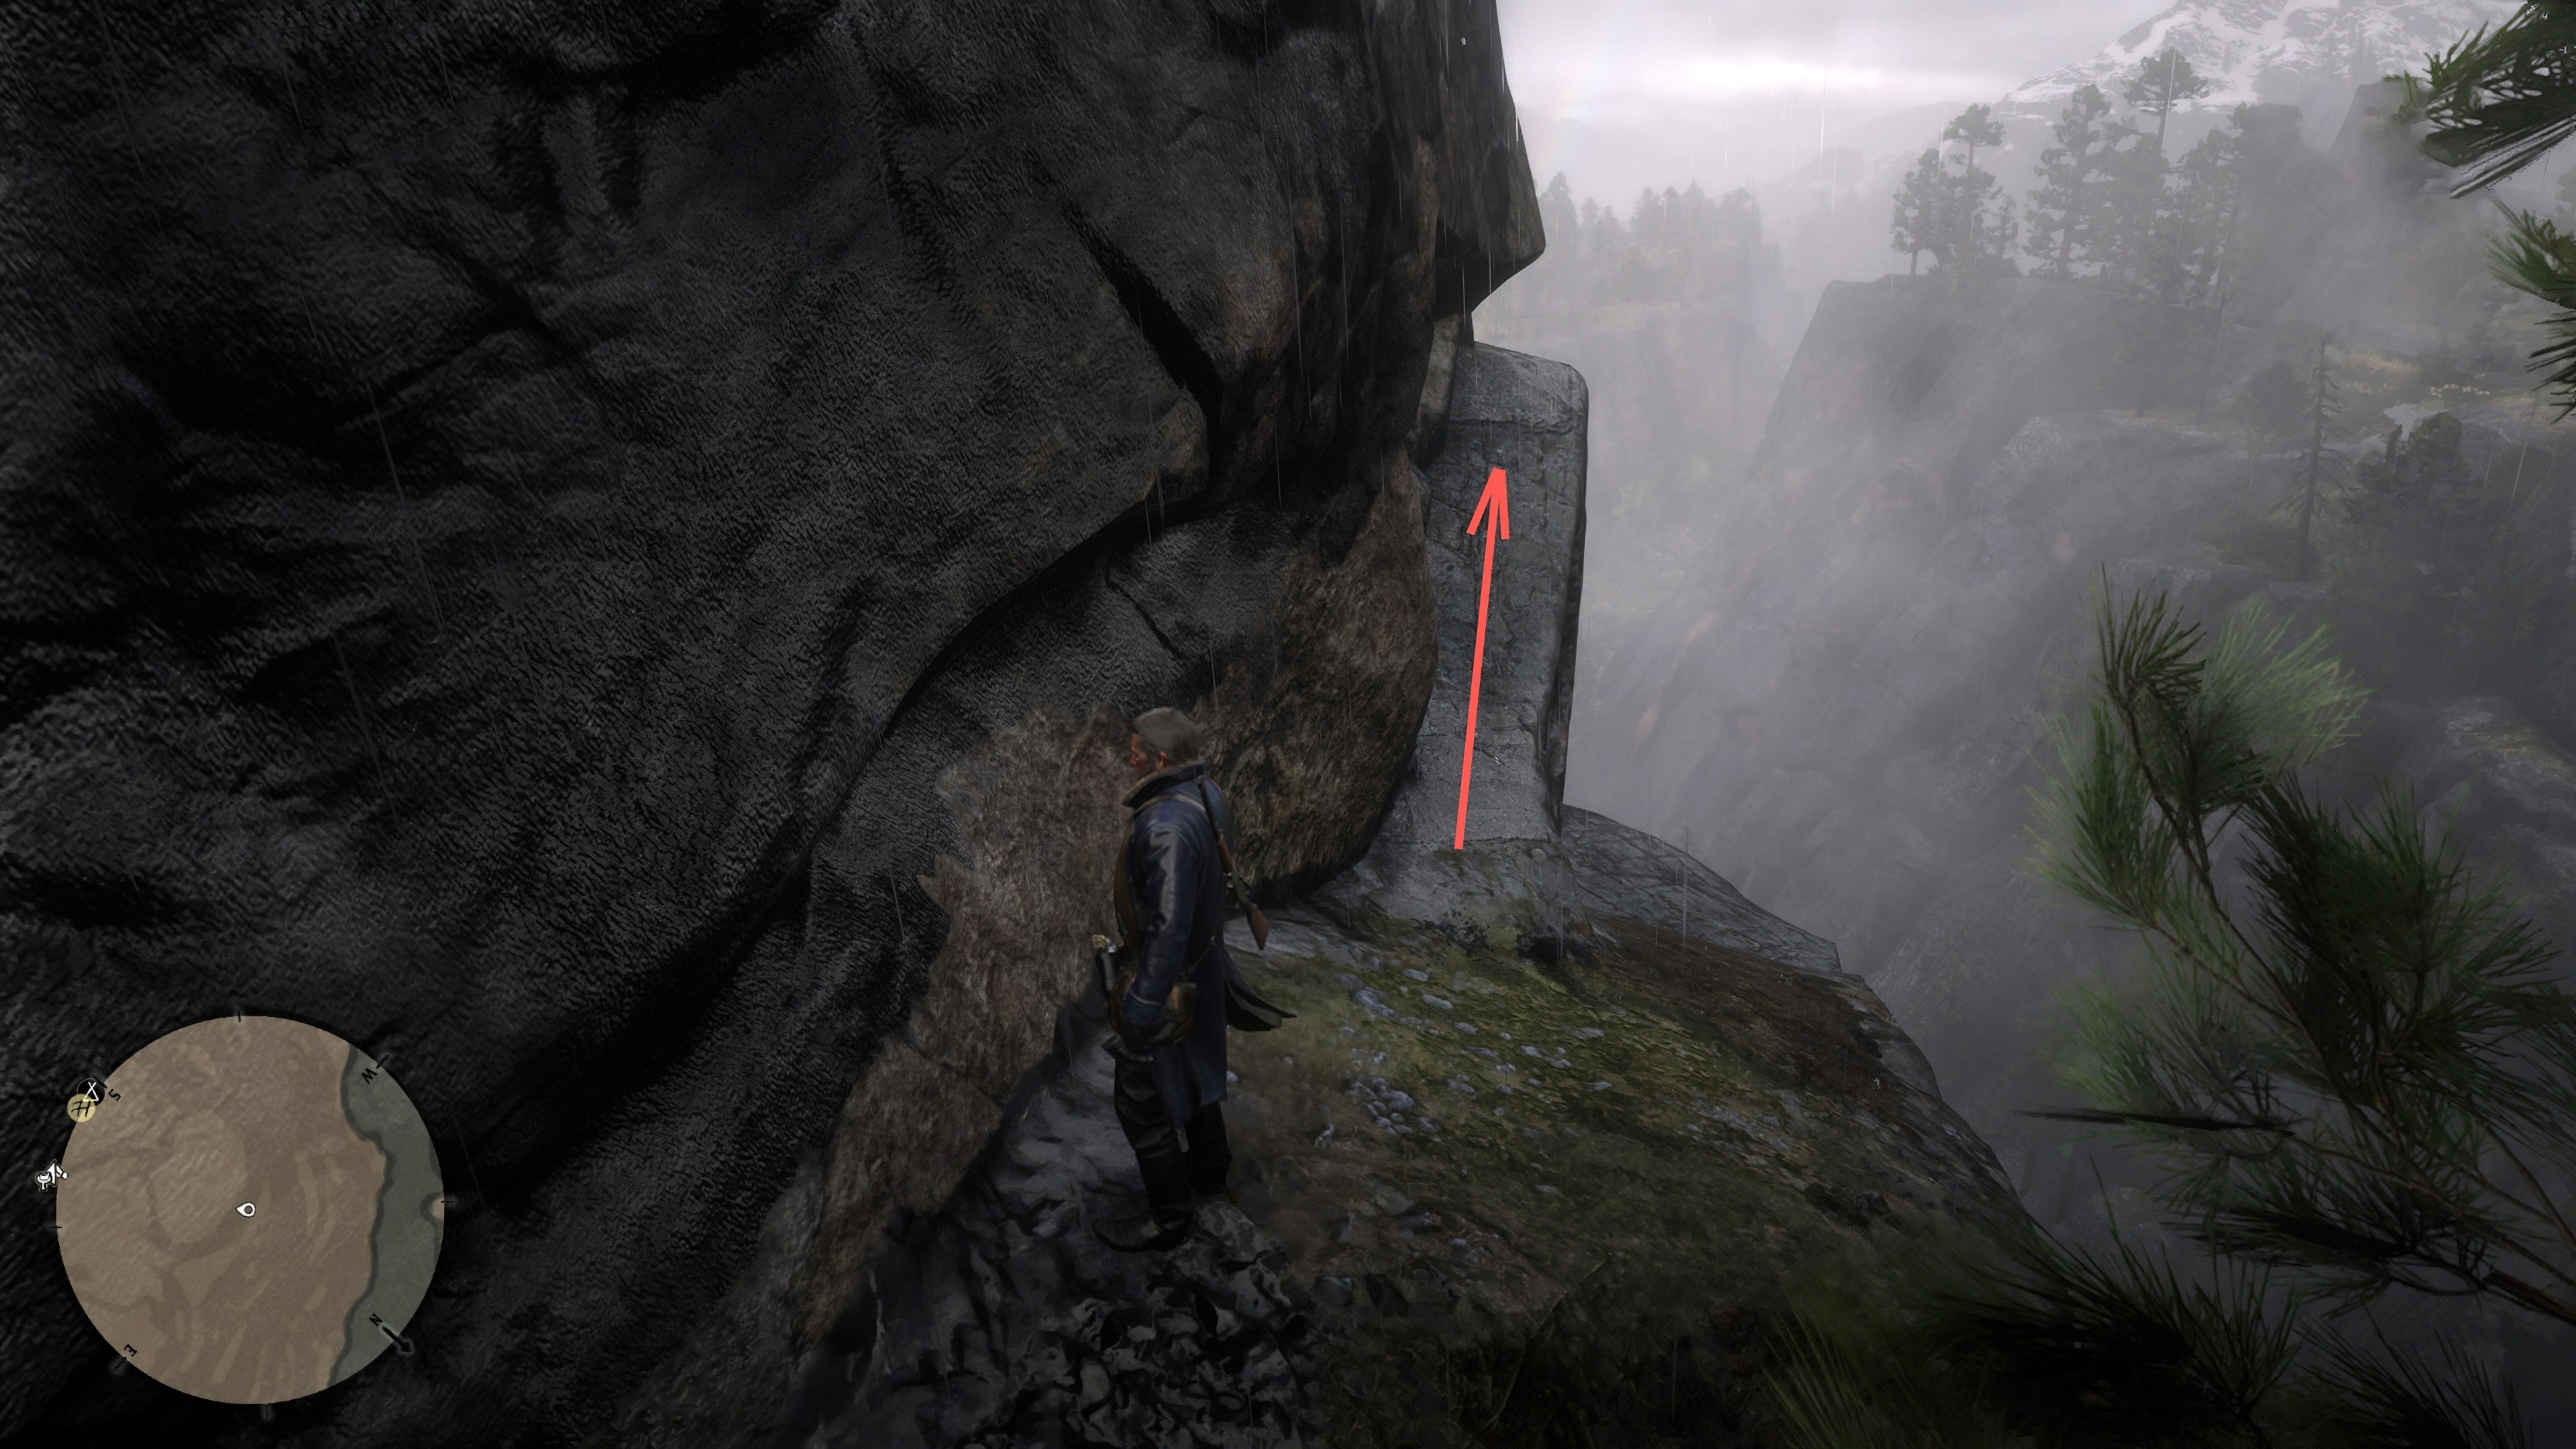
Climb almost to the top of the mountain and descend between two pine trees to a small ledge. Walk forward until the grass beneath you ends. If you go down, you’ll see a rock painting. Follow the treasure up a narrow stone ledge.

When the stone ledge under your feet ends, look down and carefully jump onto the stone platform below. Take a step forward and carefully drop onto the next one.

Now, all you have to do is crouch down and move forward on the stone ledge until the “Inspect” sign appears beside you. Congratulations, you now have three gold bars in your pocket.
Torn Treasure Map
The Torn Treasure Maps are slightly different from the other sets. To complete the map, you need to find two pieces and join them together to form one complete map. Once you’ve done that, you can read the text on the back and discover who the treasure belongs to.
Torn Treasure Map 1
The first half of the map can be found in the hermit’s hut located west of Valentine. The hermit won’t give up their territory without a fight, so be prepared. The map is located in the bedside table inside the wooden cabin.
Torn Treasure Map 2
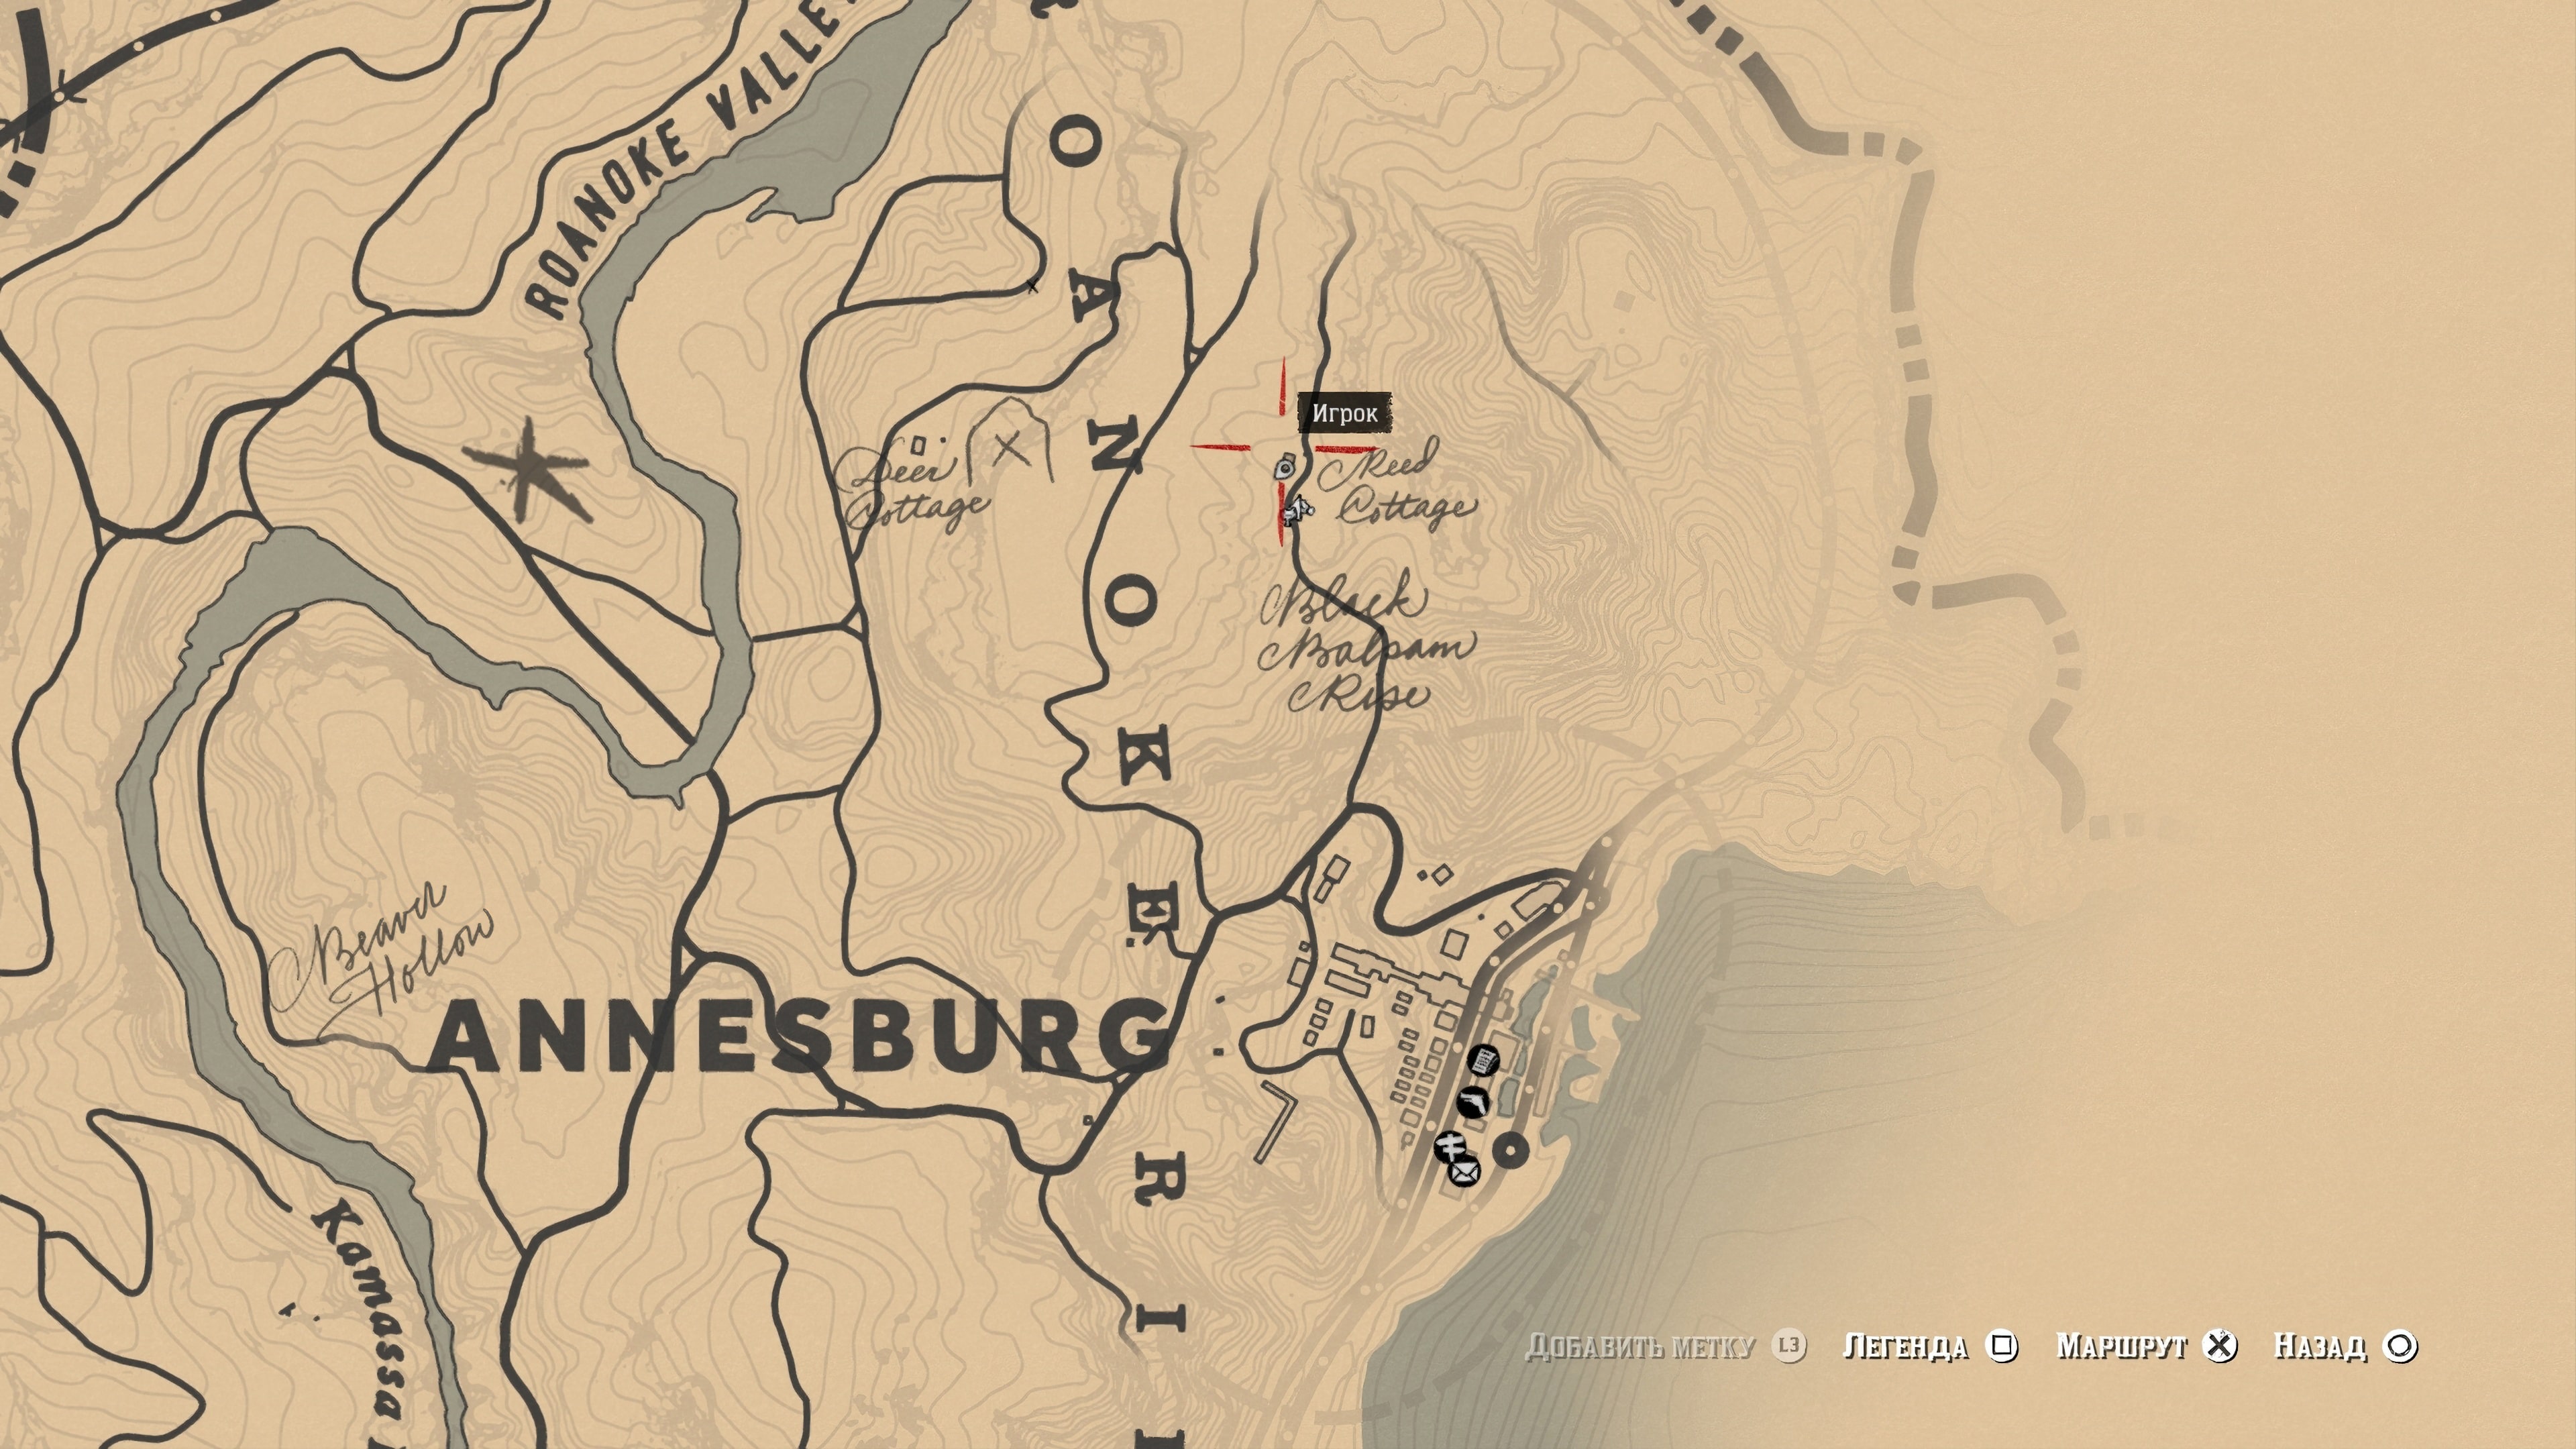
The first half of the map will show you where to find the second half. The second half can be found in the hermit’s hut located north of Annesberg. Don’t forget to grab the rare double-barreled shotgun while you’re there, or it will be lost forever. The map is located inside the house, in the nightstand, to the right of the fireplace under the window.

Restored Map
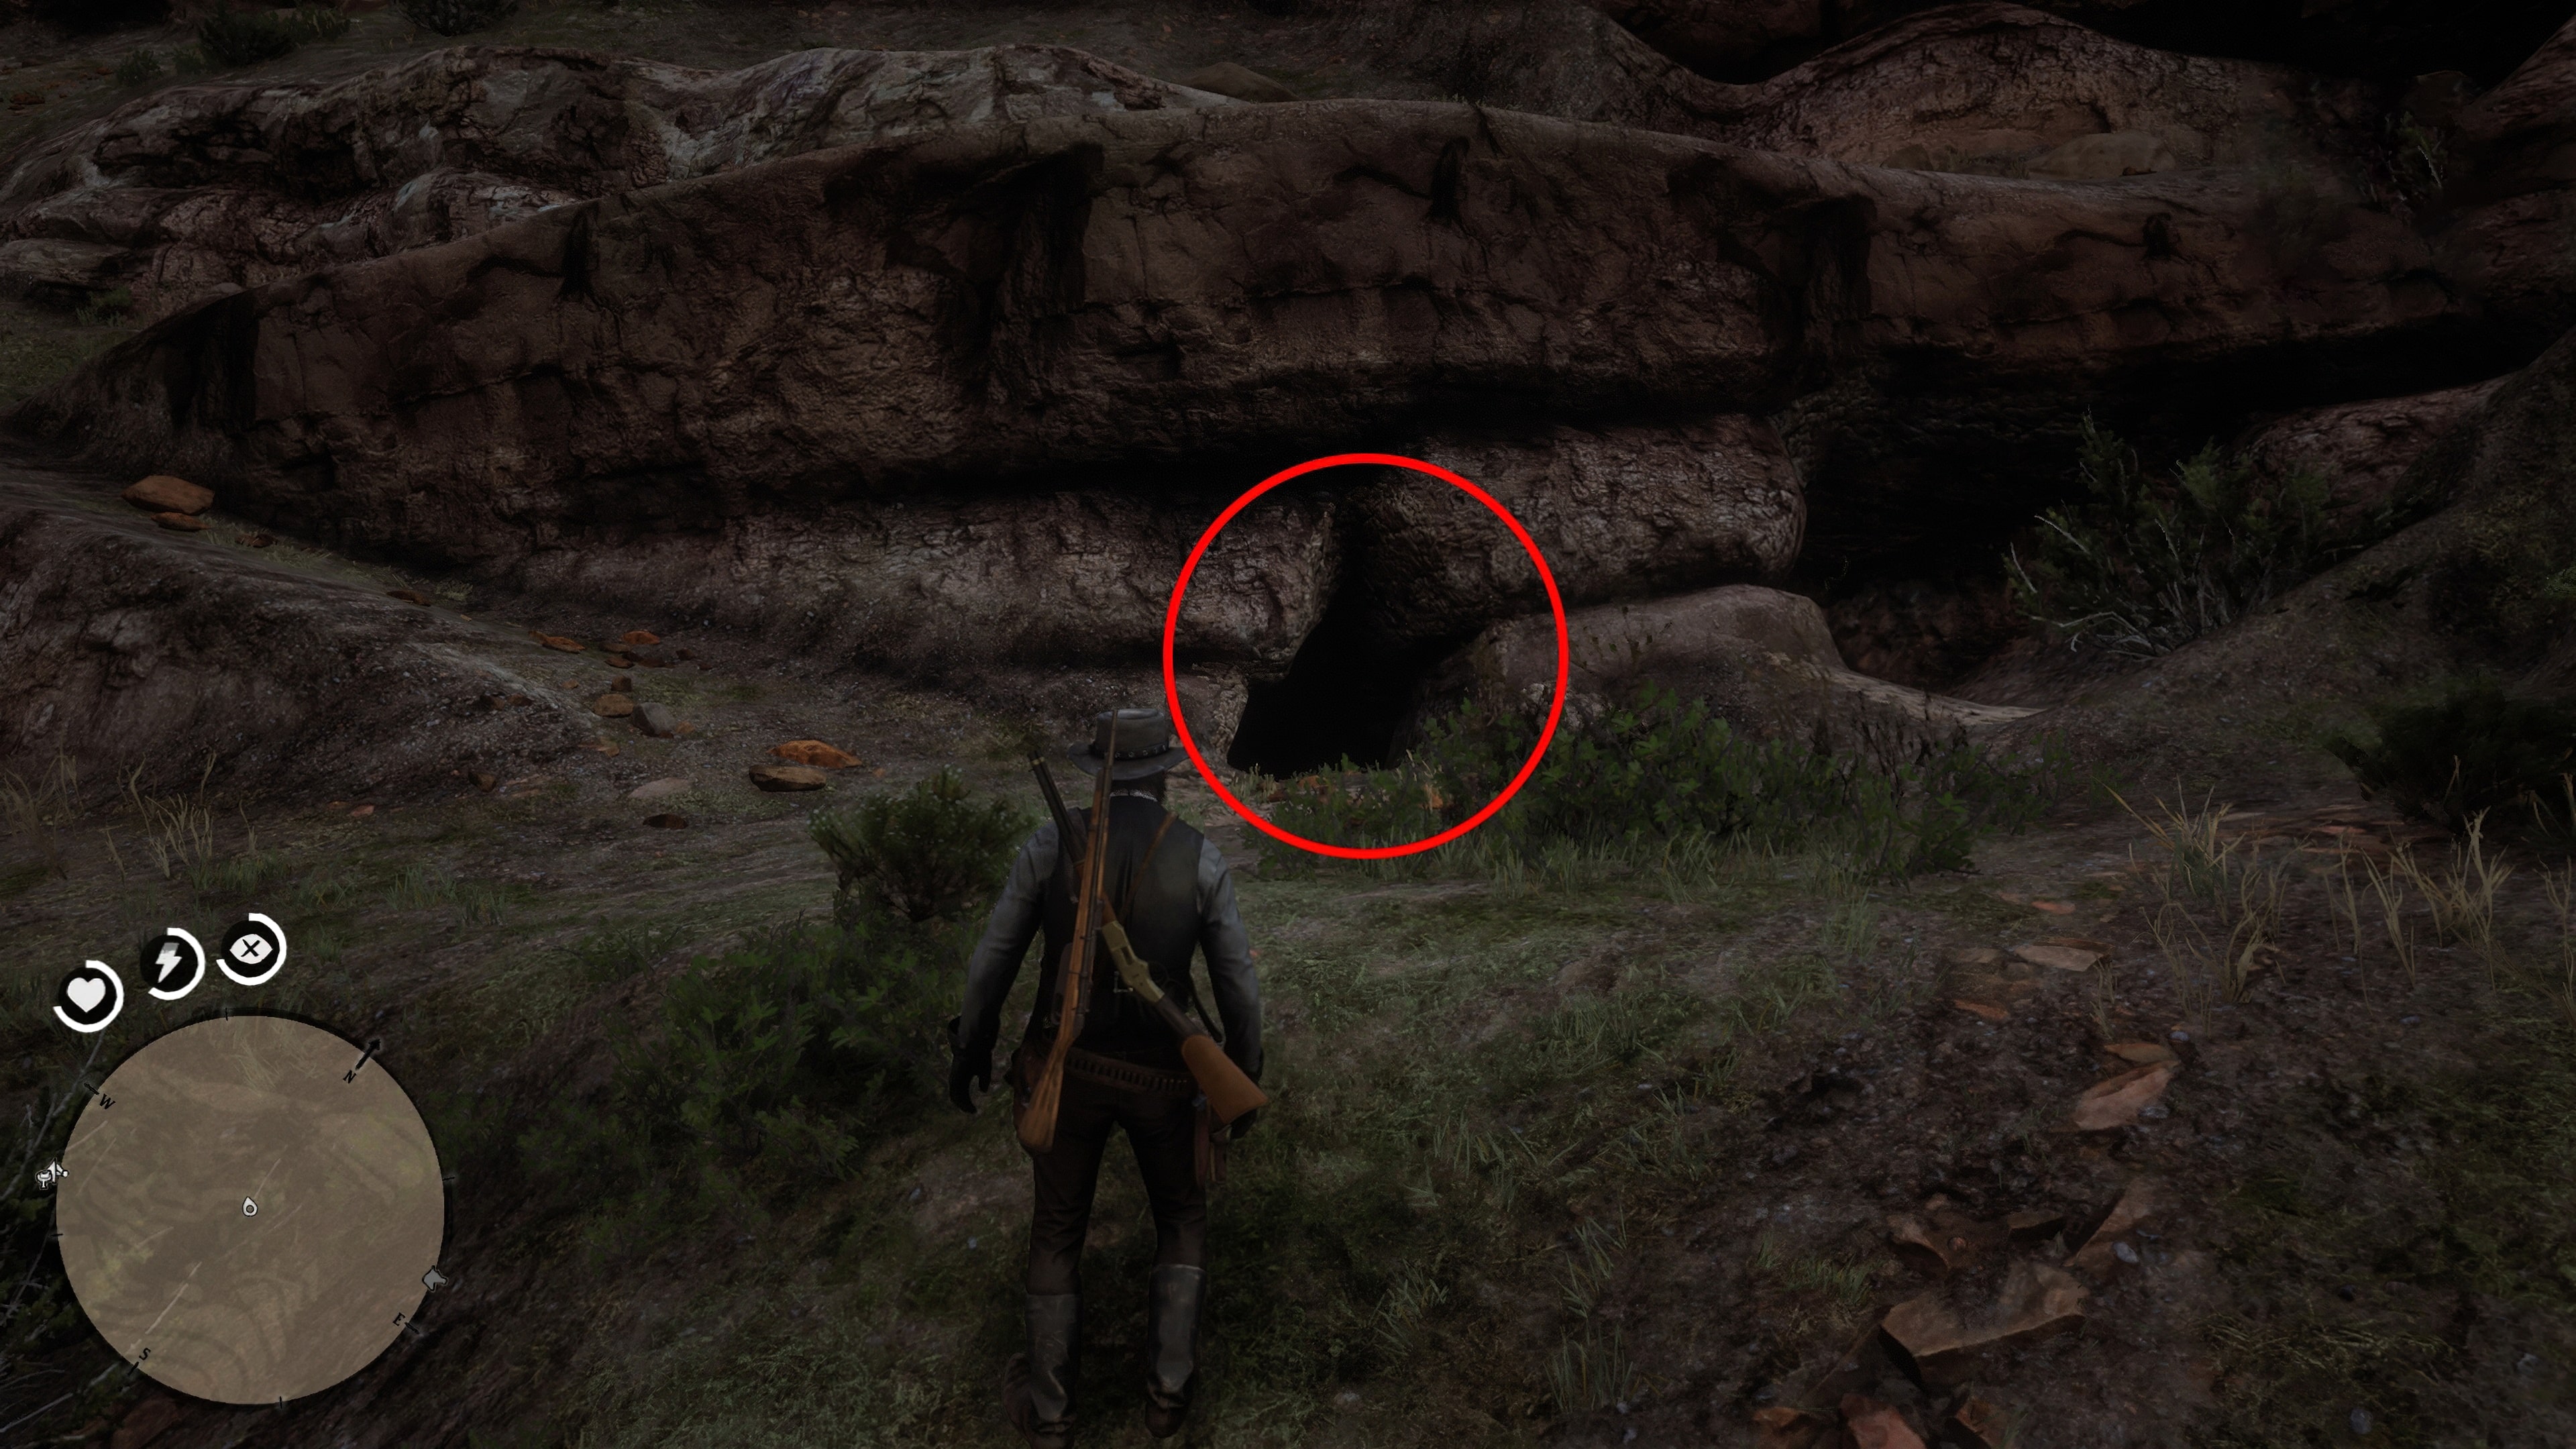
With both pieces of the map joined, you can now read the text on the back. The text will reveal that Otis Miller’s treasure chest can be found in a small cave at the south end of the map. Inside the chest, you’ll find a rare Otis Miller revolver and some erotic photographs.
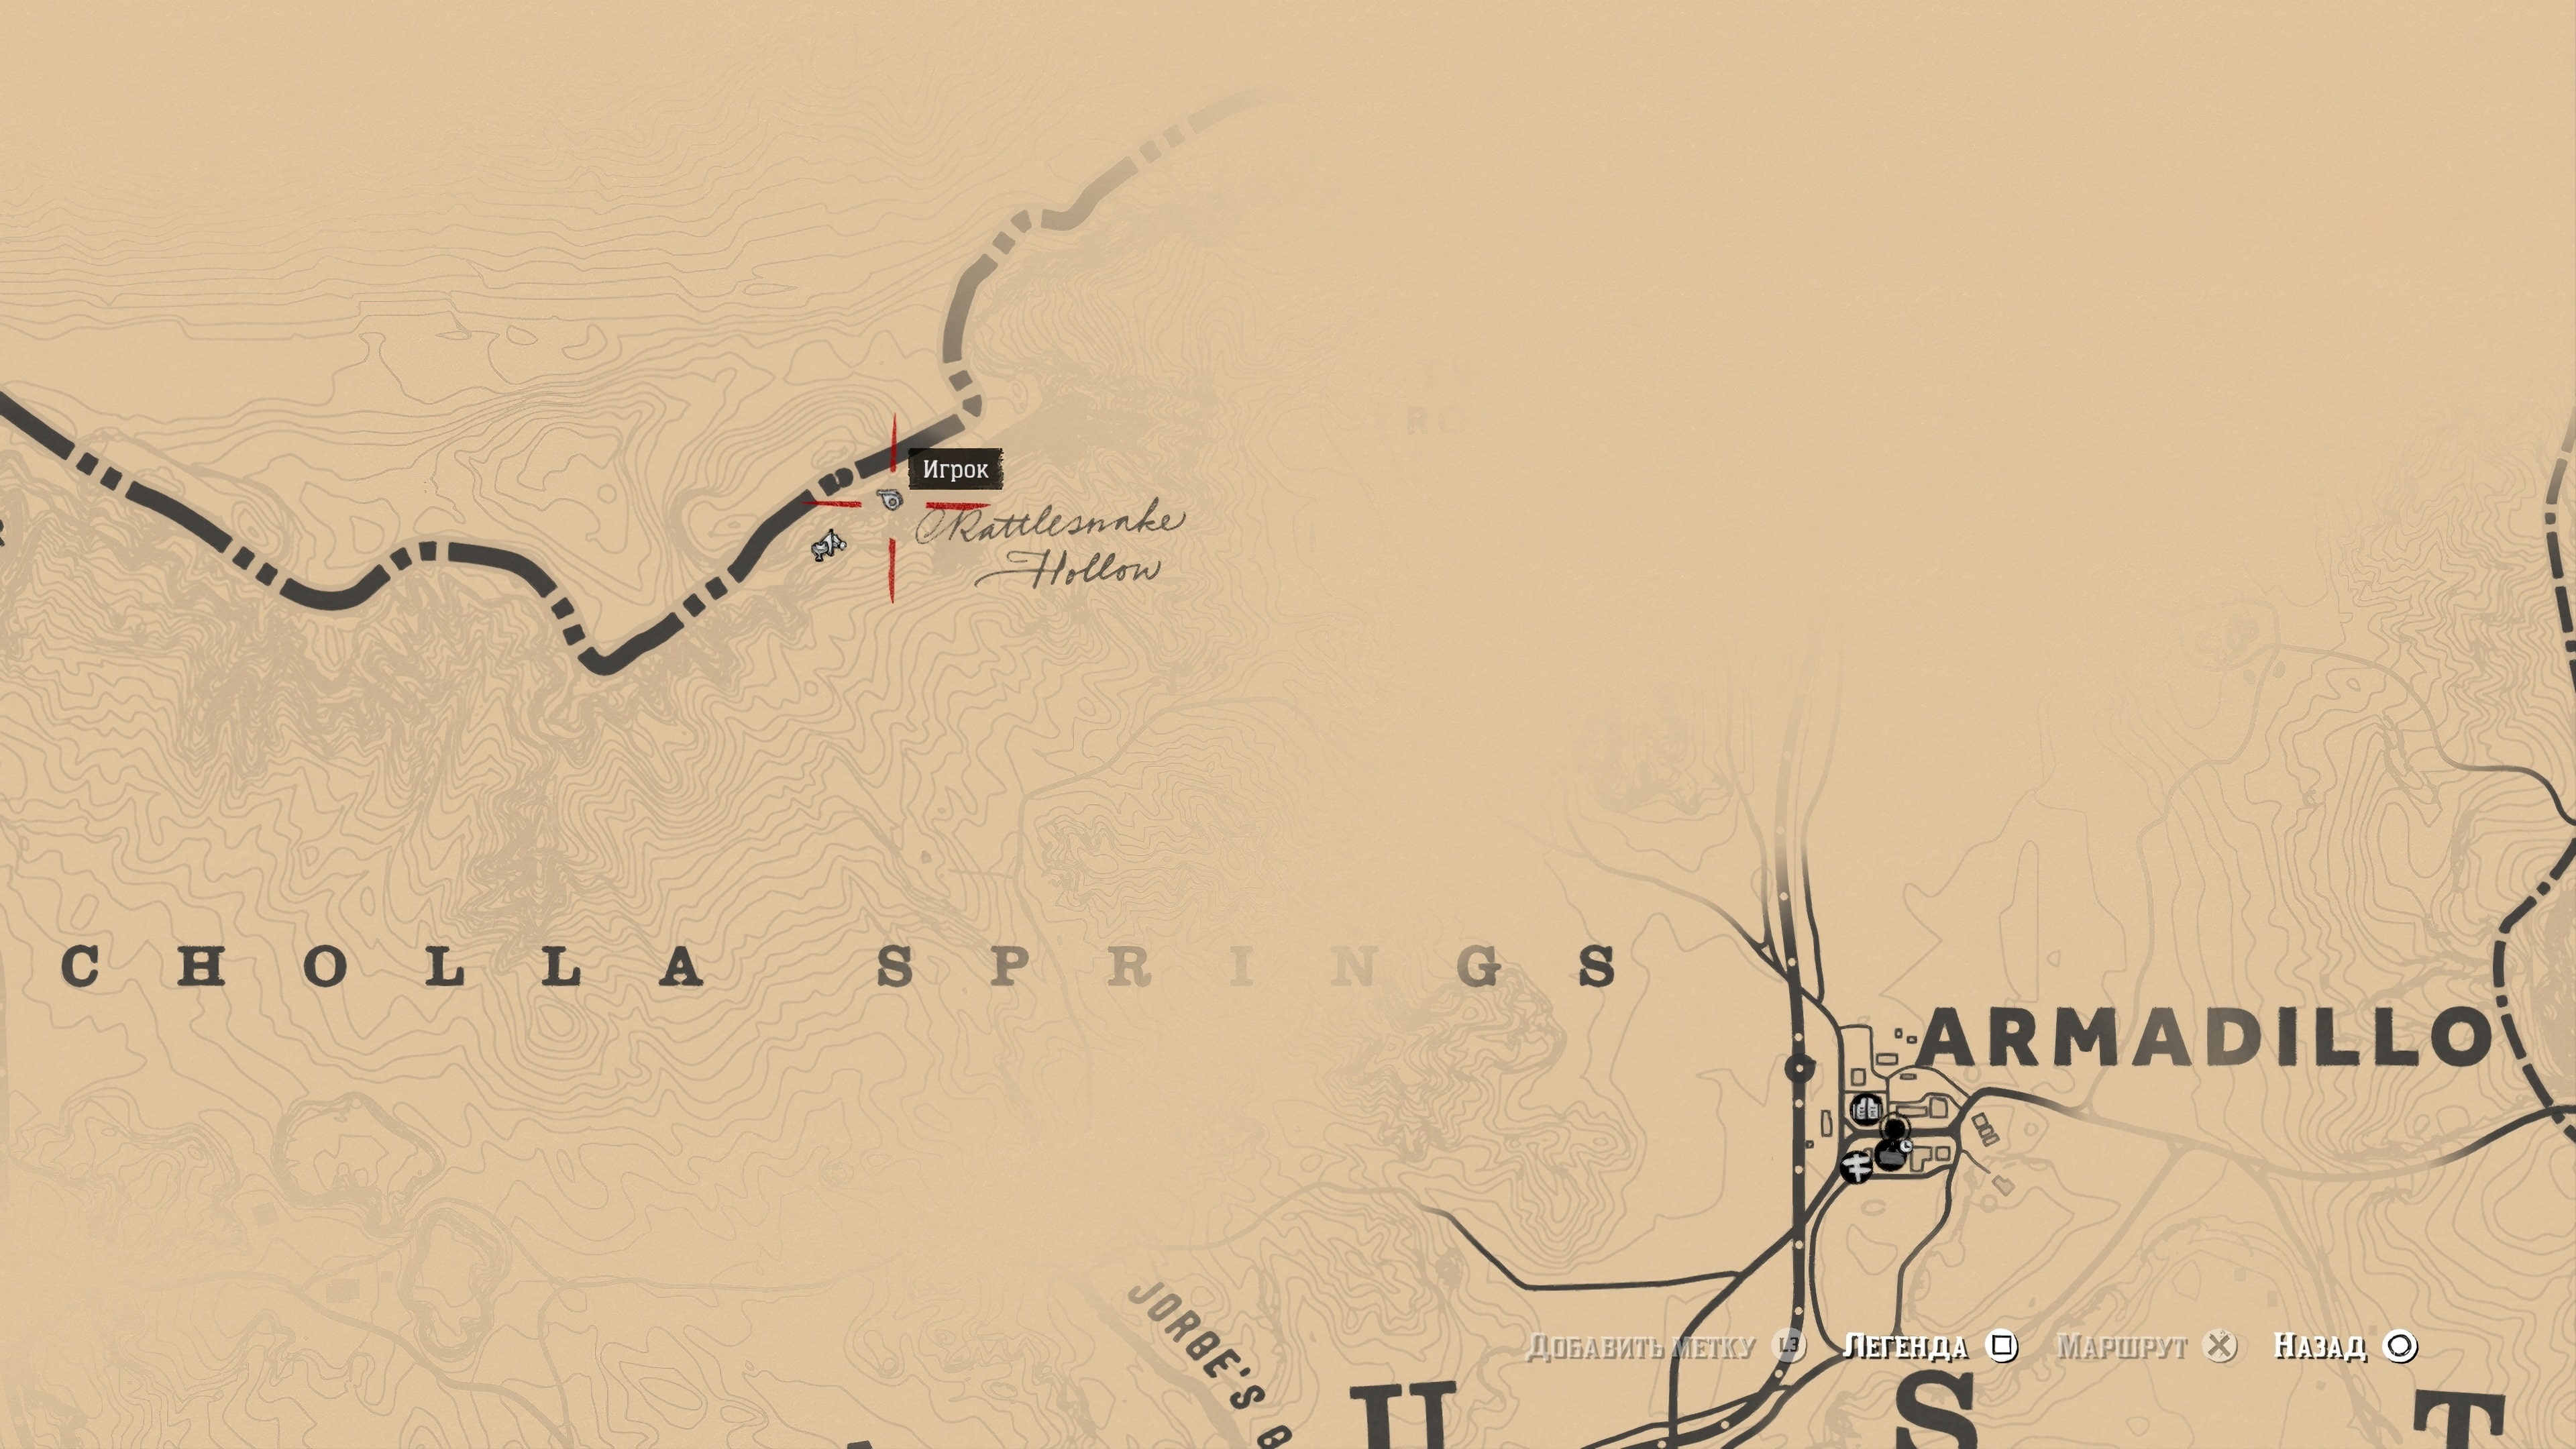
Note: You can only access this part of the map in the epilogue after completing Chapter 6. Orient yourself using the small town of Armadillo, which is located southwest of Blackwater.

Map Sketch
The outline of the map can be found inside a small cottage located just north of Annesberg. There was no one inside when we arrived, so we had no trouble searching the chimney and quietly exiting the cottage.
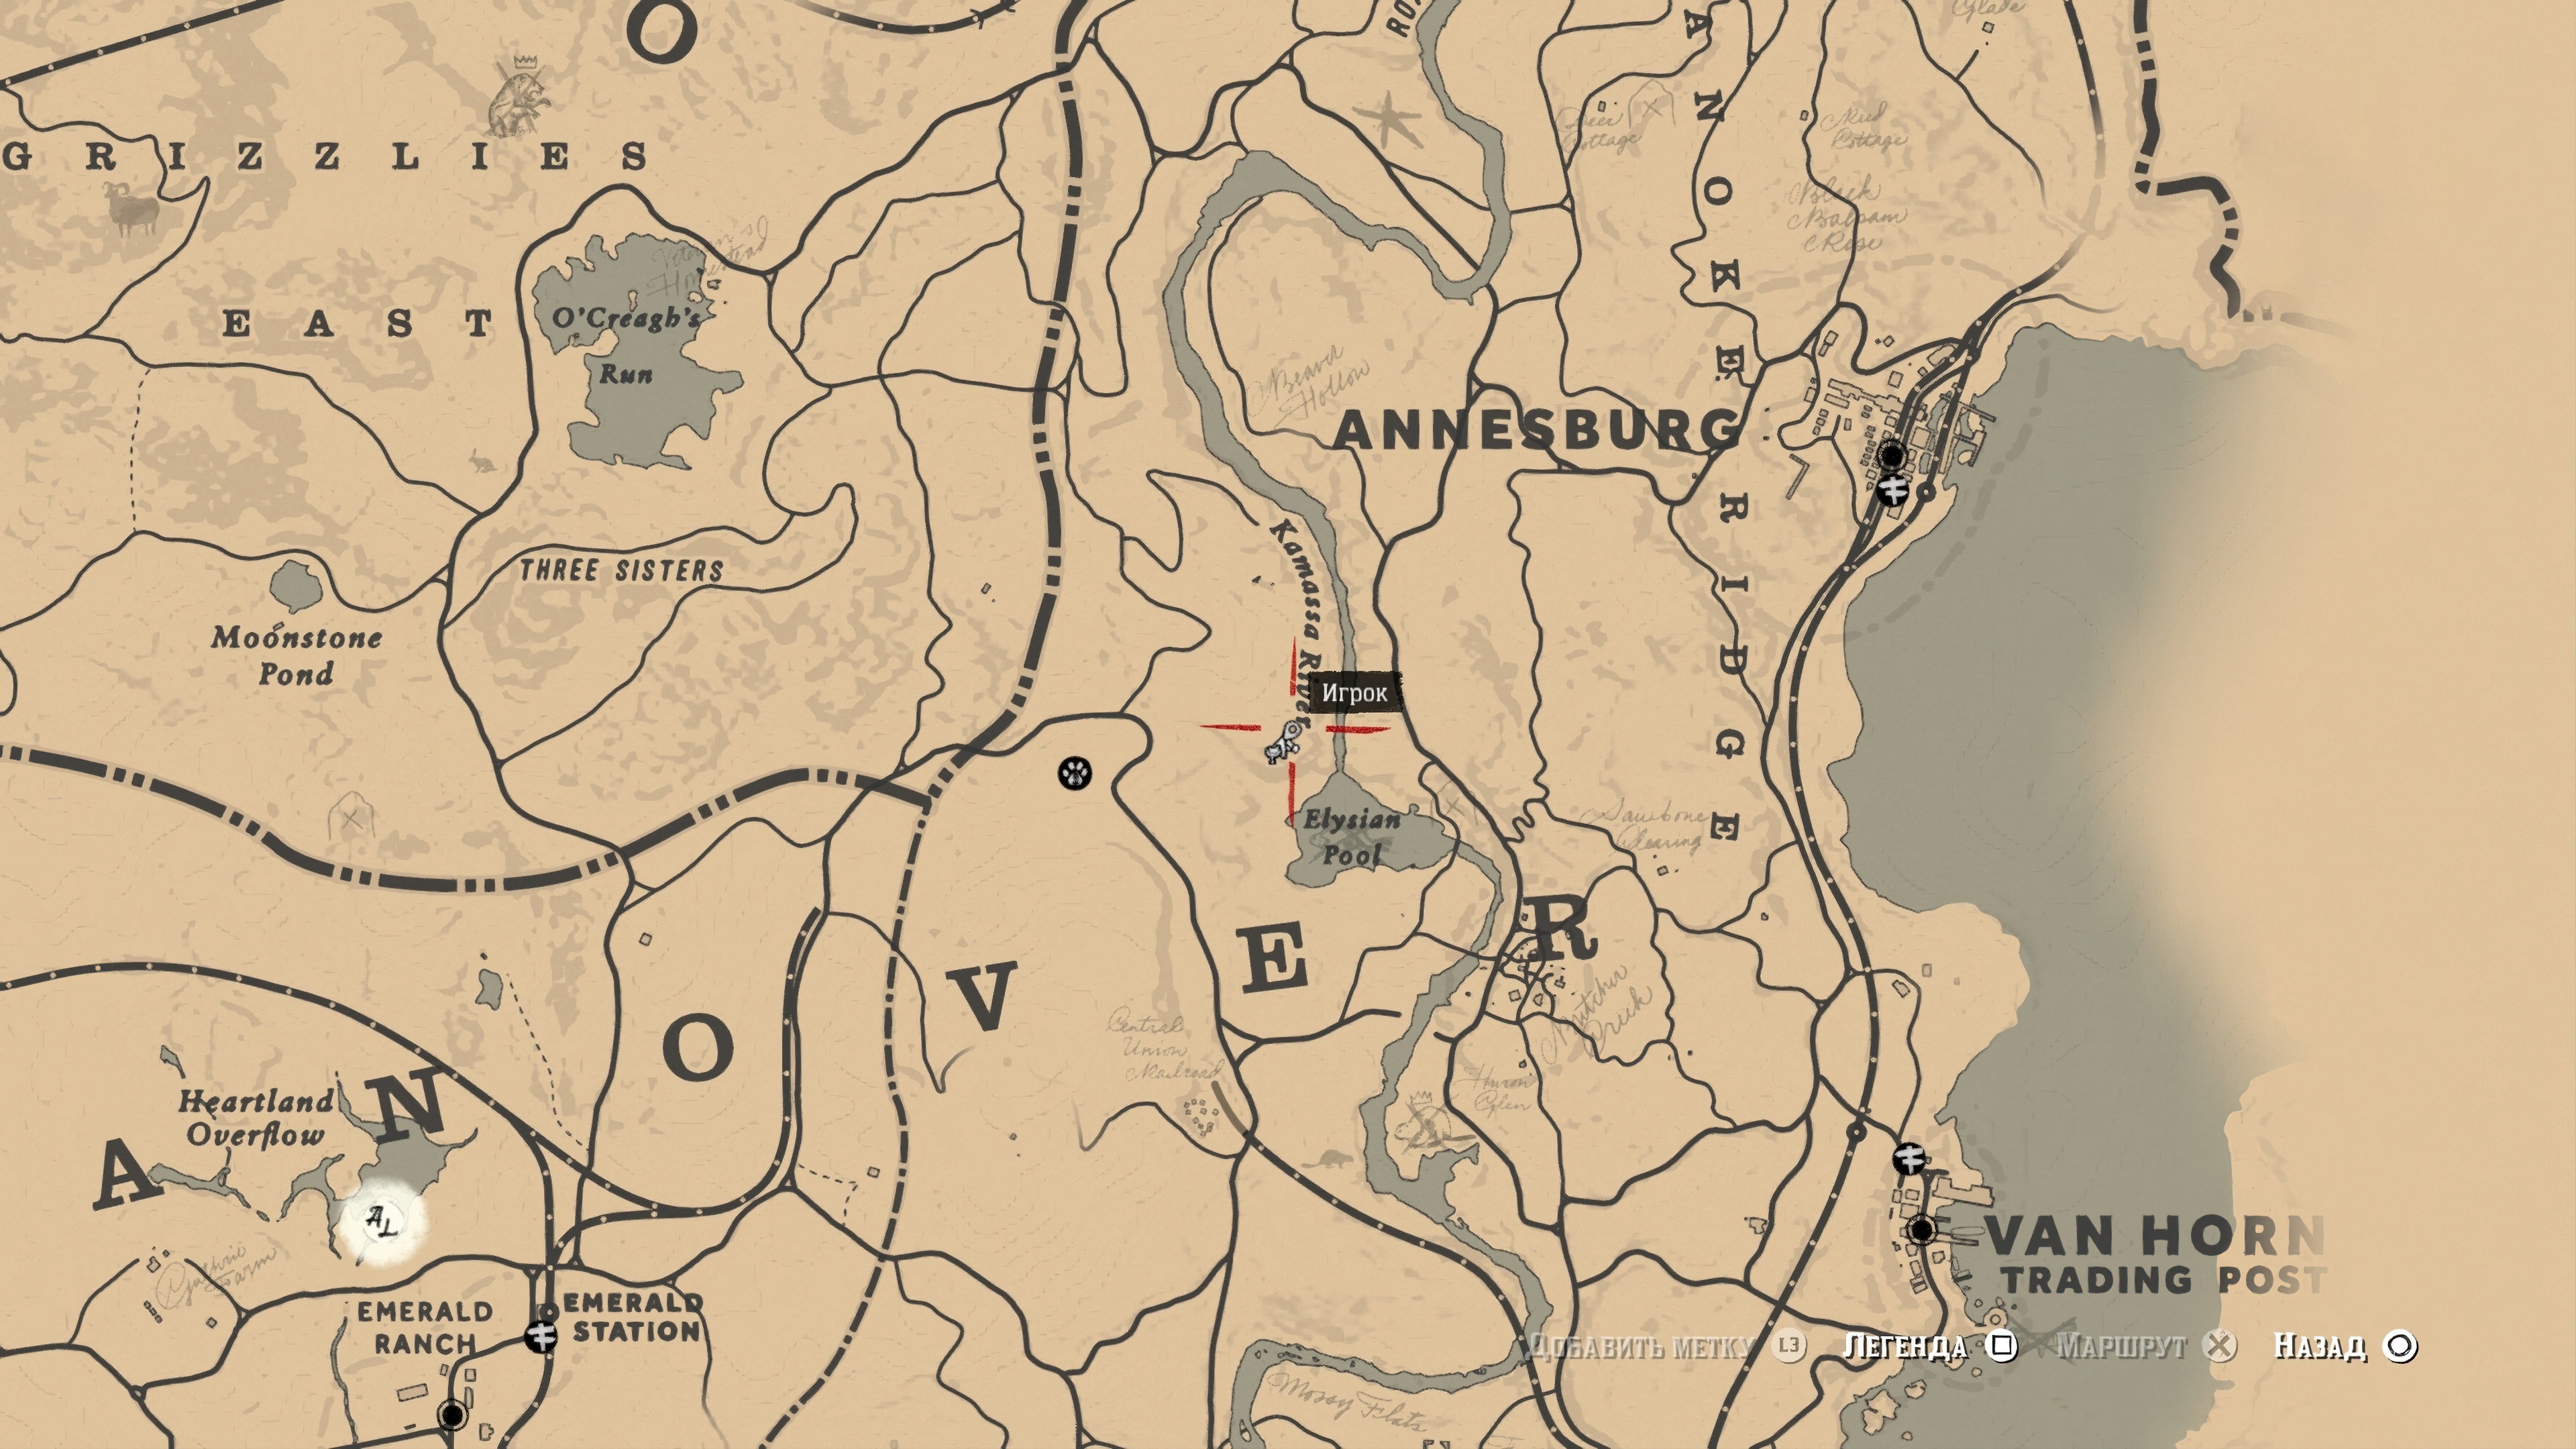
The Treasure at Annesberg
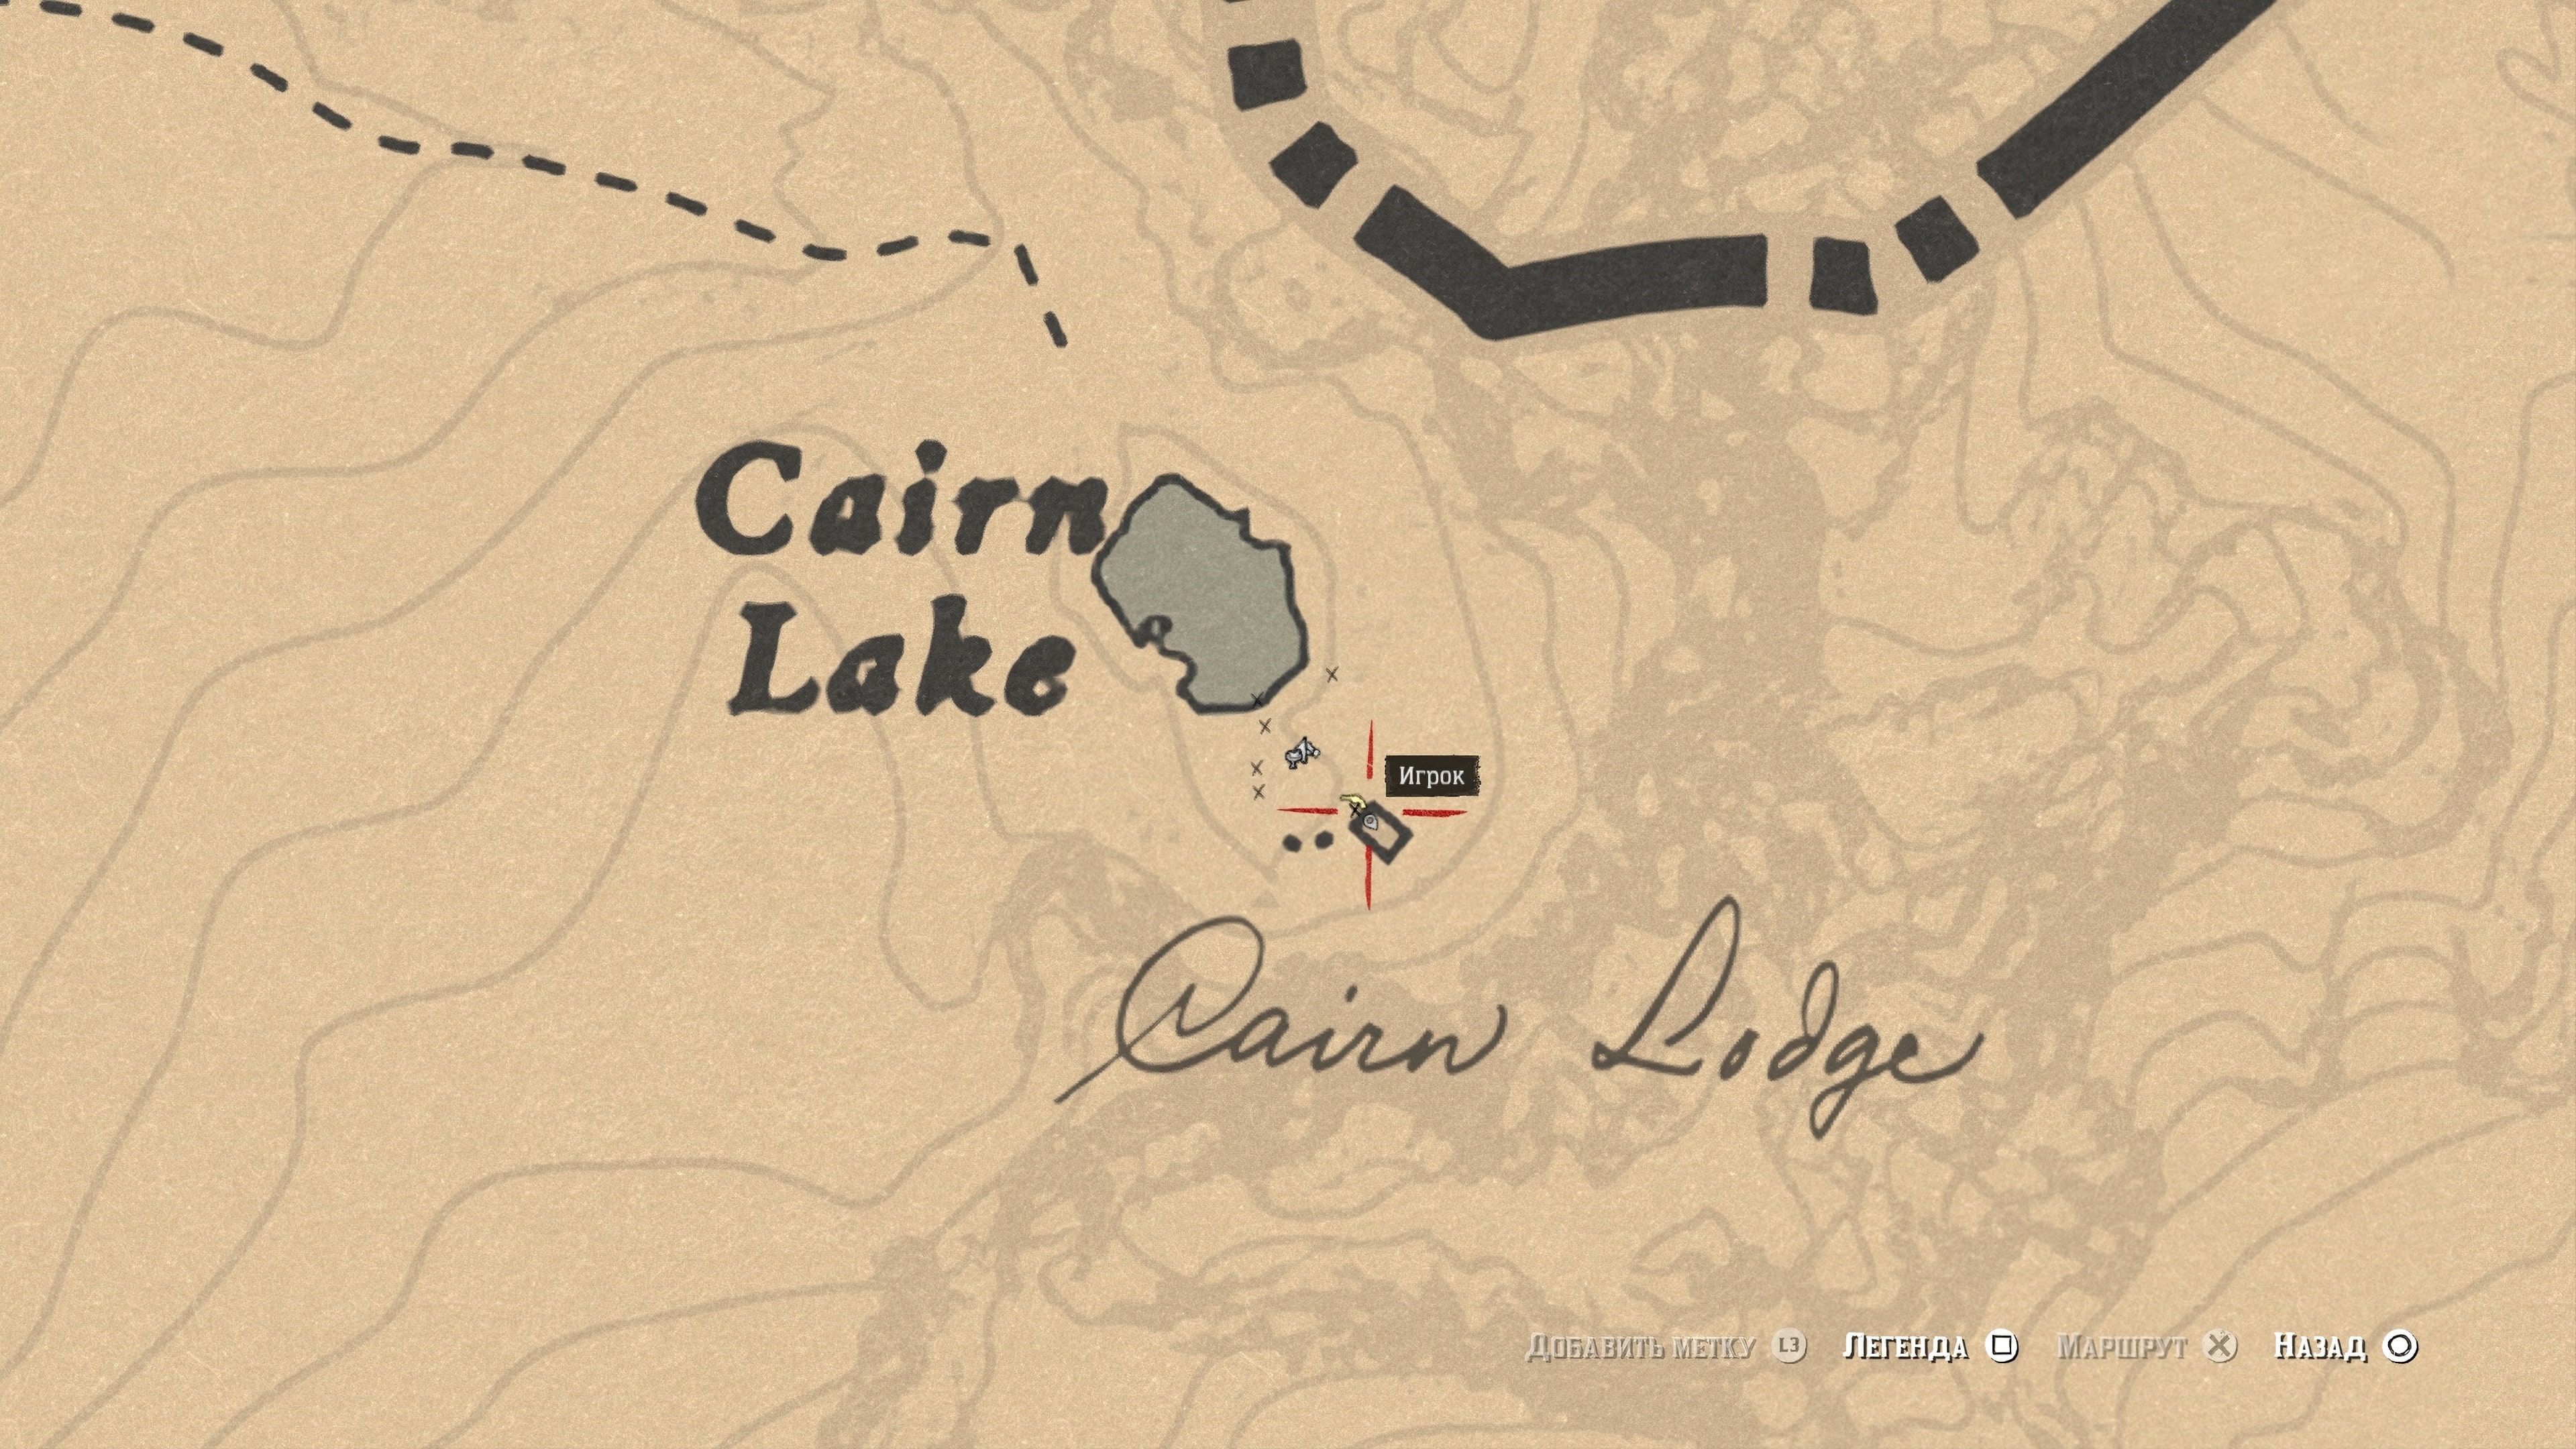
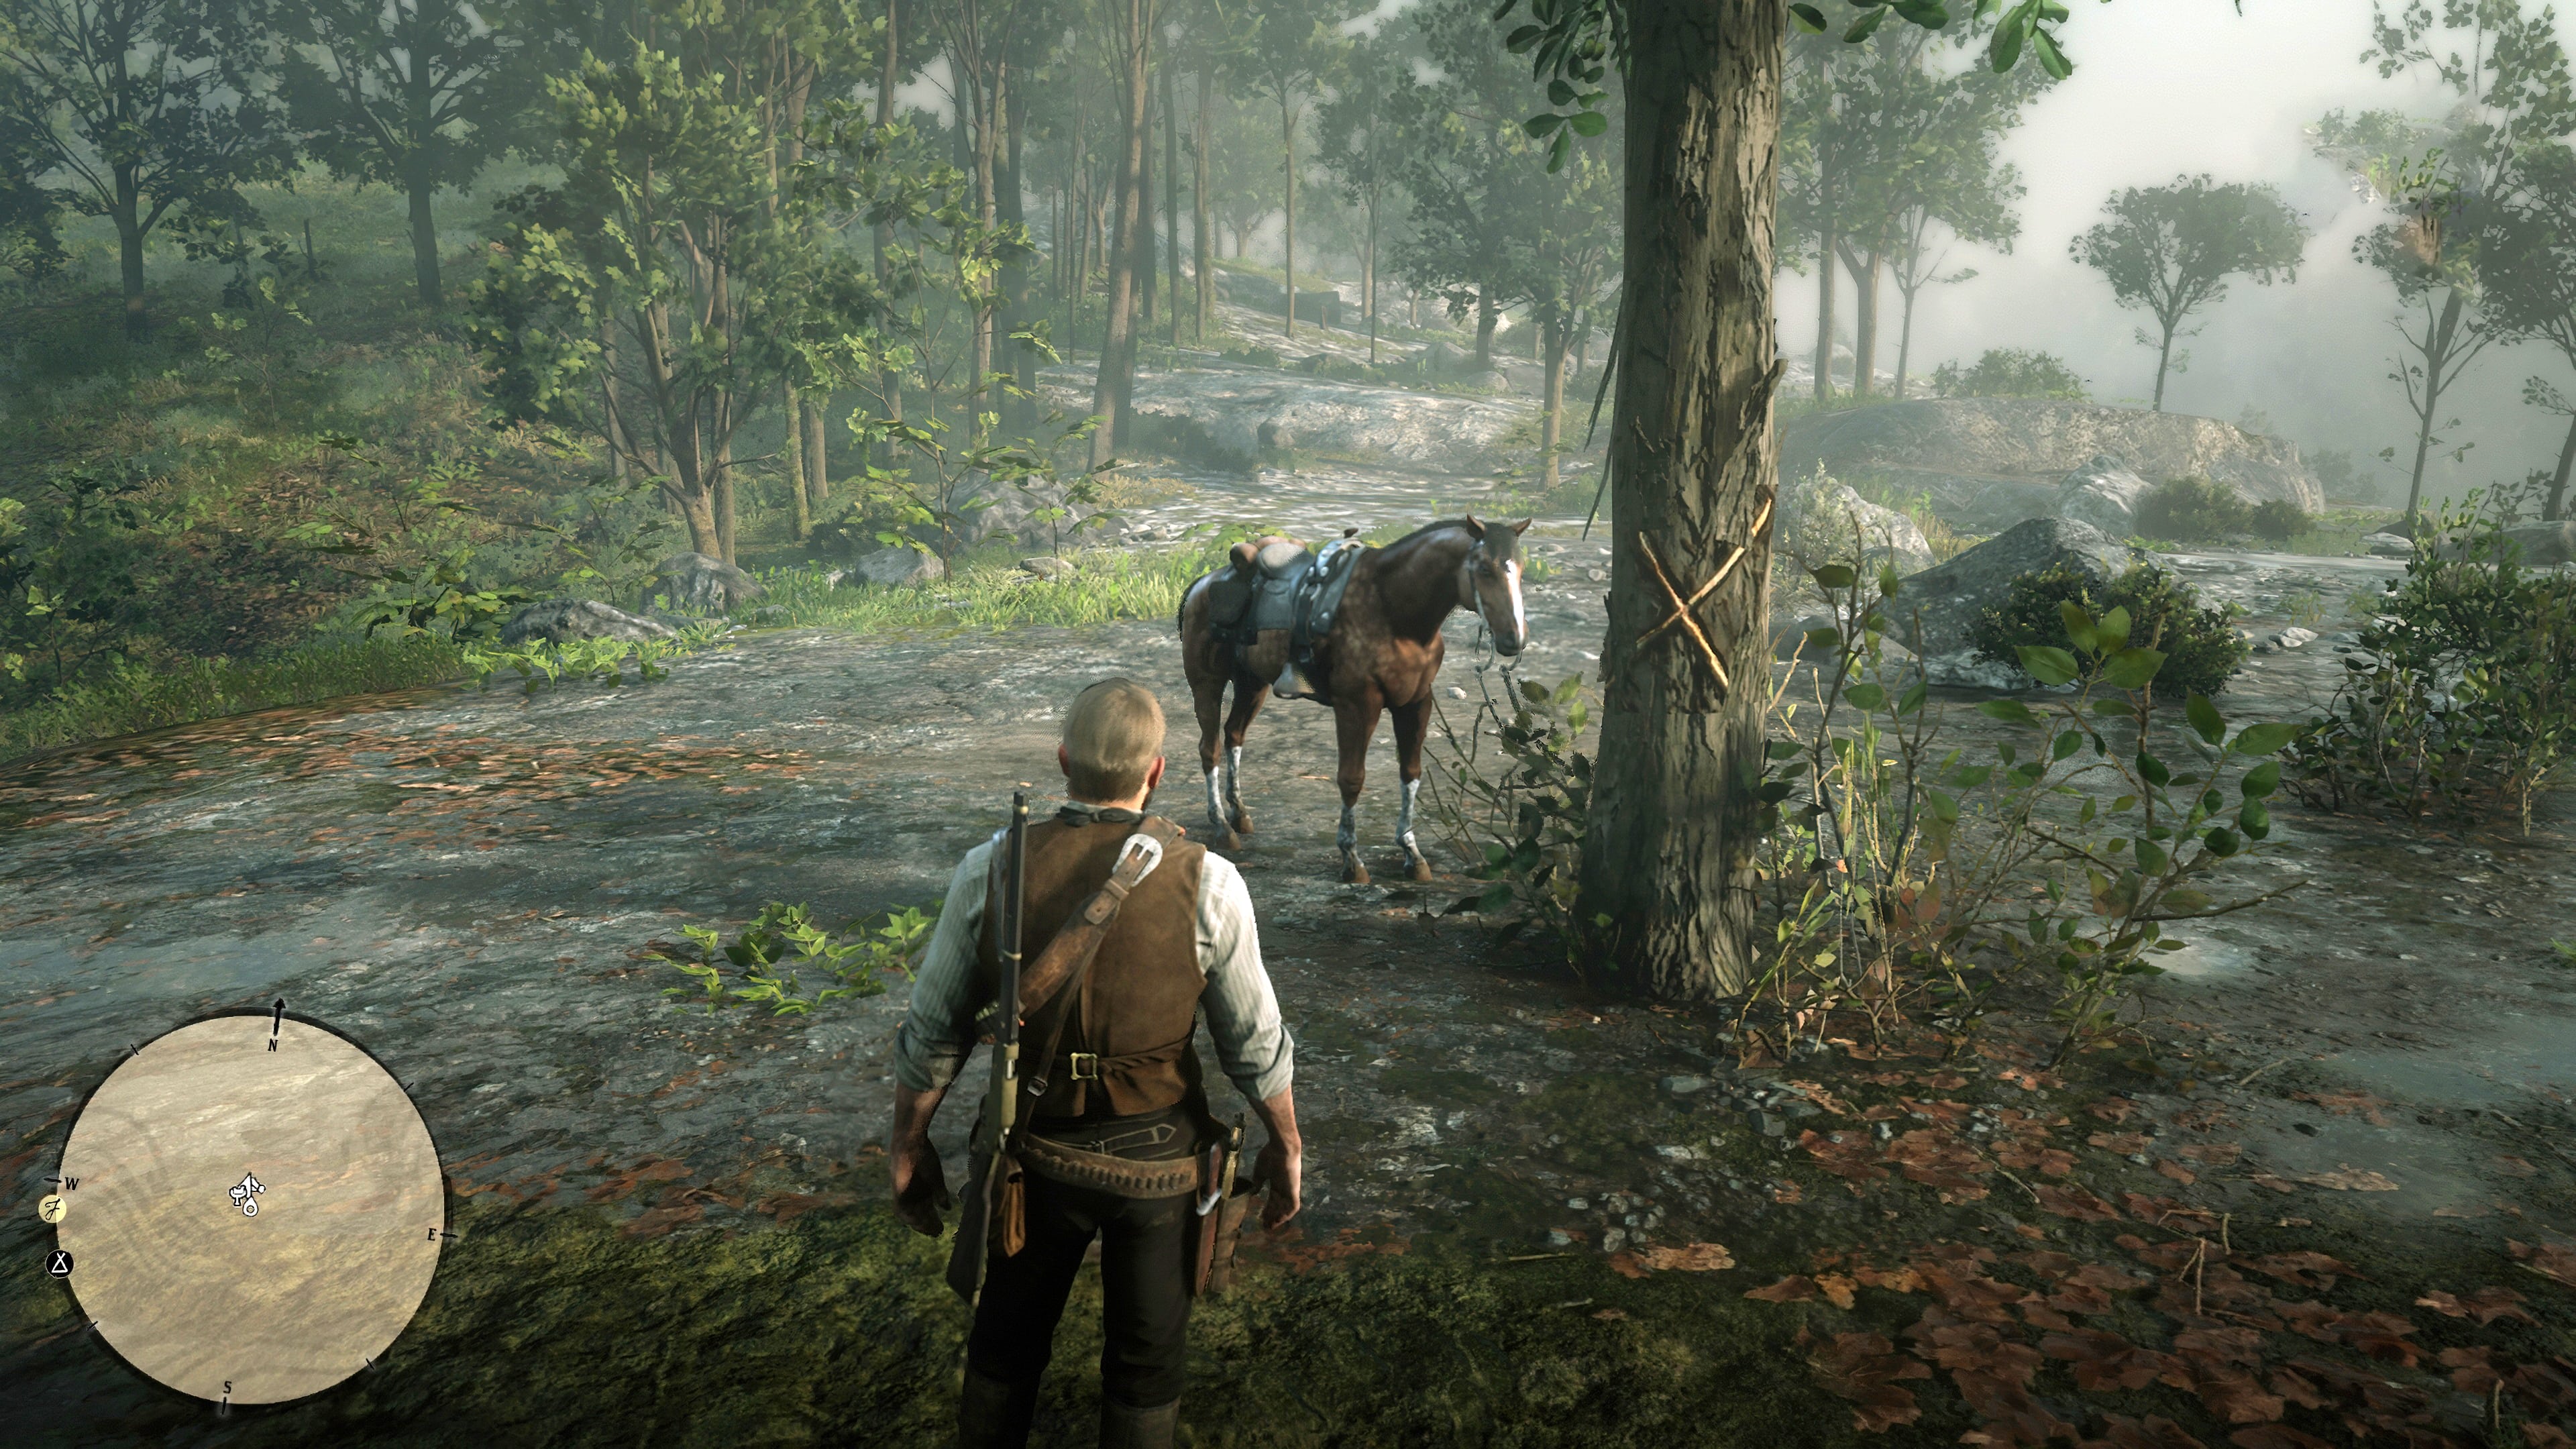
The treasure itself can be found southwest of Annesberg, near Elisian Pool Lake. Look for a conspicuous tree with an X carved into it, which can be used as a reference point (refer to screenshot 2). The treasure is located behind the second stone near the tree. At its base, you can lift a small boulder to find a small bar of gold (refer to screenshot 3).
In conclusion, the treasure maps in Red Dead Redemption 2 offer players a unique and exciting way to explore the game’s world and earn extra money. With four sets of maps, each with its own unique quest, players have plenty of opportunities to test their skills and discover hidden treasures. Whether you’re a seasoned player or new to the game, the treasure maps provide an enjoyable and rewarding experience. The thrill of the hunt and the reward of discovering hidden treasures make the treasure maps an essential part of the Red Dead Redemption 2 experience.