
How to Add Custom Assets
Hello, Mayors!
We’re excited to announce full support for custom assets in the Editor. This developer diary will guide you through creating your own buildings and props for Cities: Skylines II, and share practical tips to streamline the process. Our aim was to make asset creation more intuitive while giving you the tools to produce complex, polished content on par with official assets. The Editor is powerful and flexible — it takes patience to master, but once you do you can add genuinely distinctive elements to your cities. To help you begin, the Editor includes a series of tutorials that highlight features and tool locations, and tooltips supply contextual guidance. Technical details about textures, meshes, and other requirements are available on the official wiki.
Open the Editor from the Main Menu just as you would when creating a custom map — there isn’t a separate asset Editor. The scene can contain one or multiple objects that you place and edit together, so you can craft several assets in a single session. By default the scene is a simple green terrain, but you can also load a map with roads and foliage to check scale and visual fit for your asset.
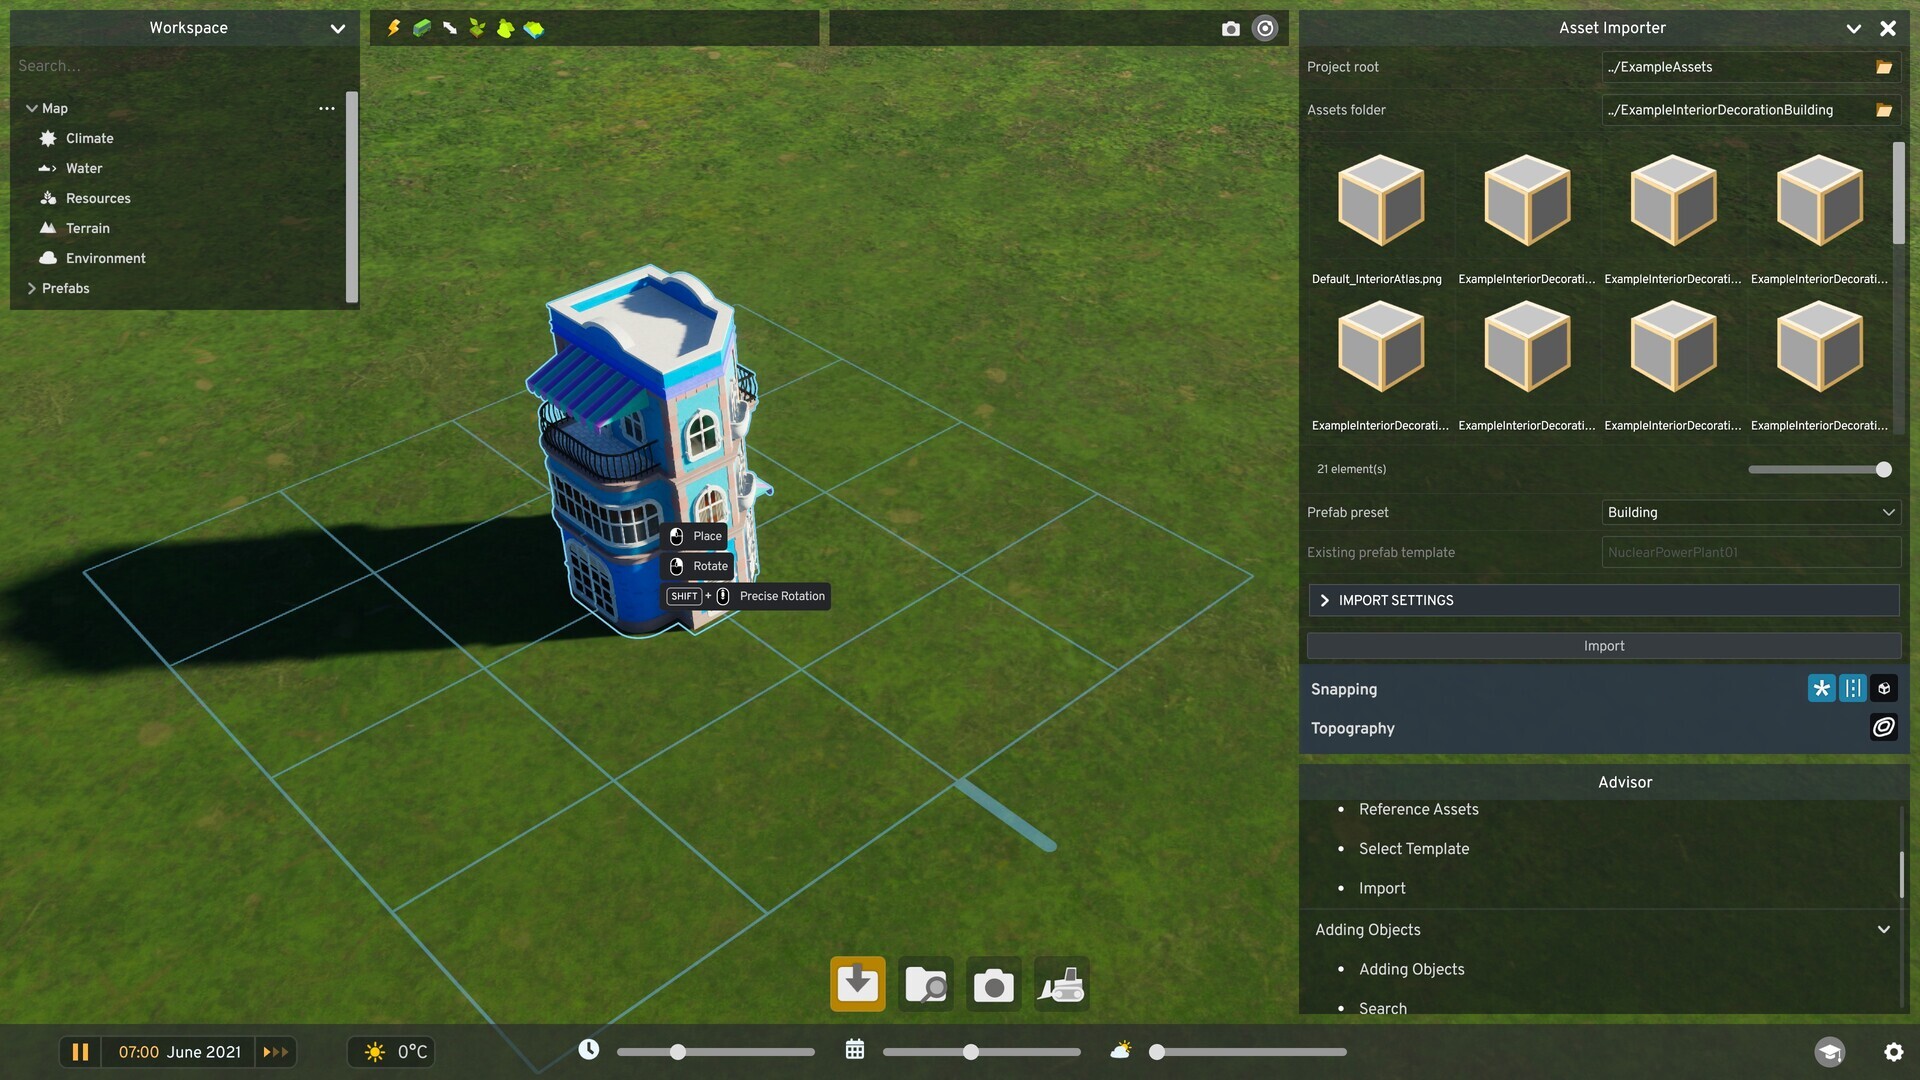
Importing your mesh and textures begins with the Asset Importer button, which reveals the Asset Importer panel on the right. Set the Project Root (the folder that houses your asset projects), then select the specific Assets Folder for the asset you’re importing. Choose a Prefab Preset to designate the asset as a building, a static prop, or copy settings from an existing in-game prefab using “Existing Prefab in Project.” Click Import and wait for the Editor to process your files.
 After import, place the asset in the scene to begin customization.
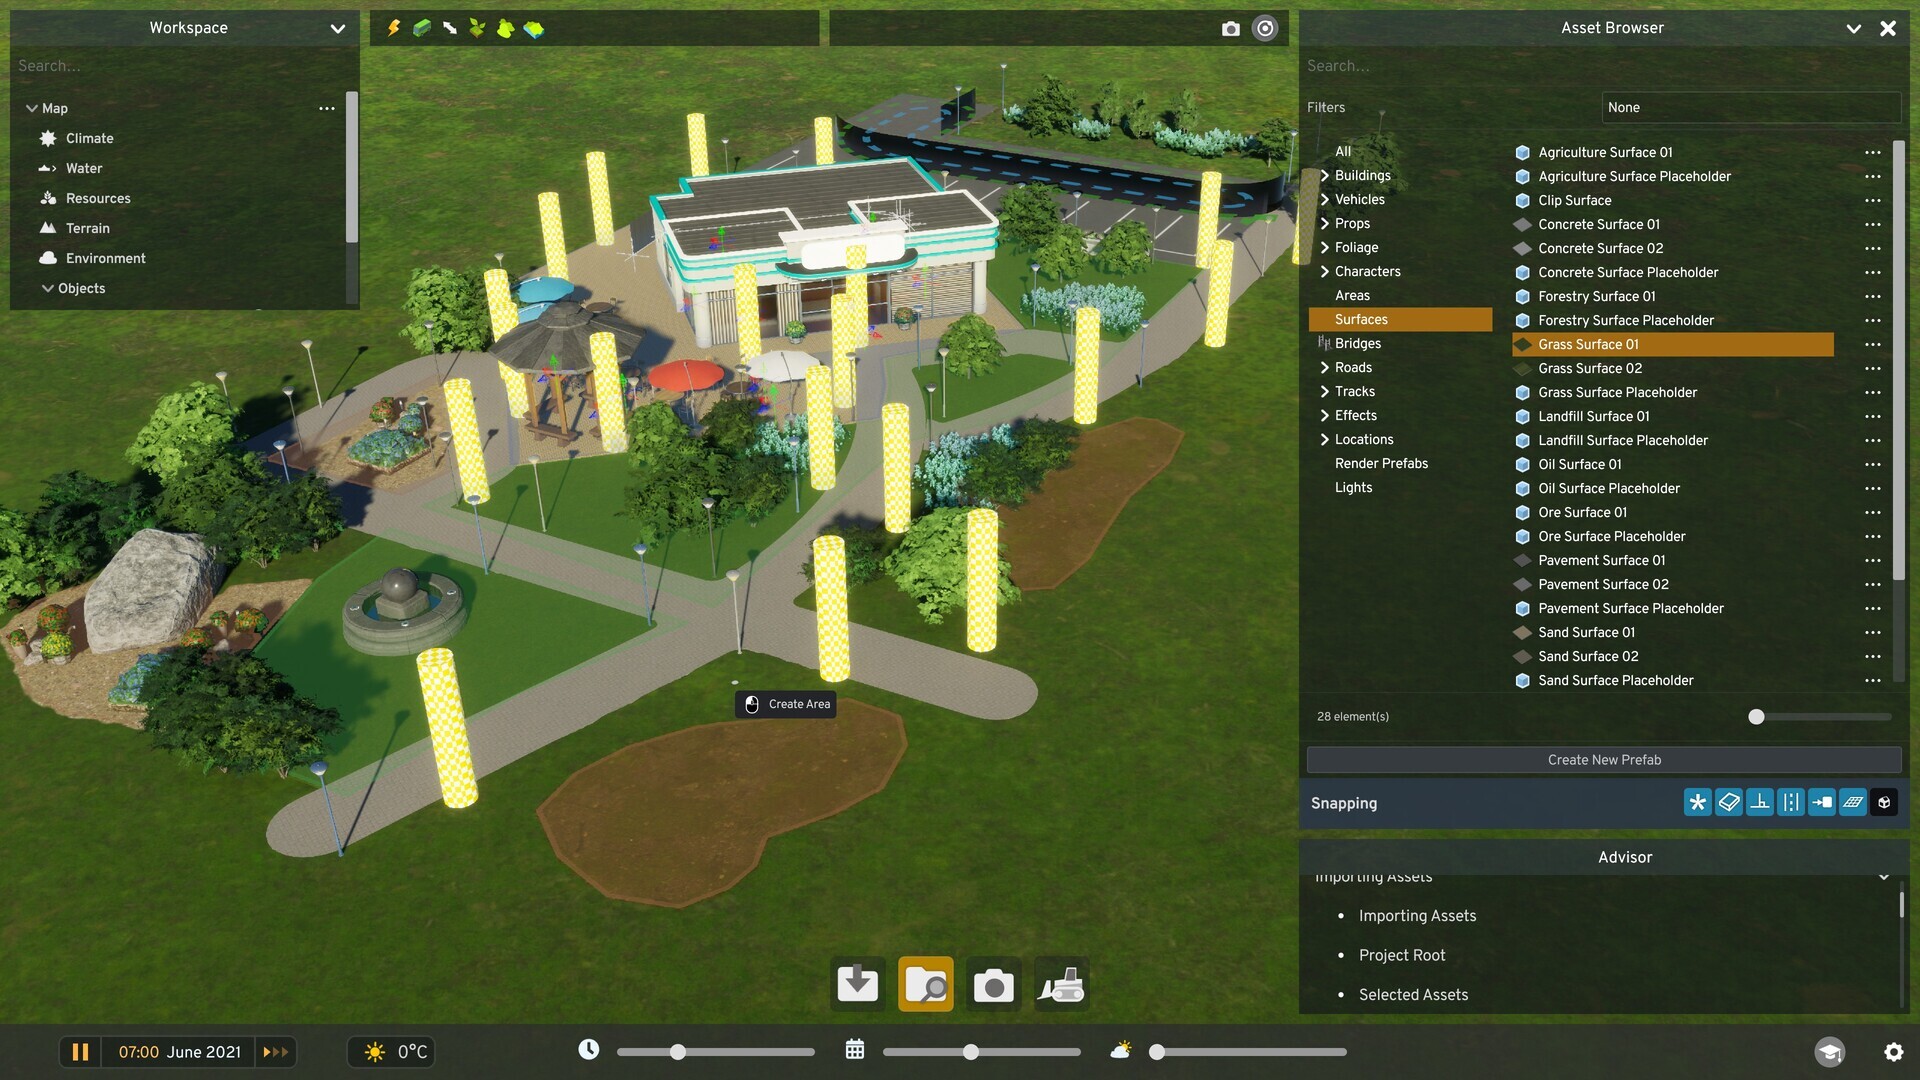
To modify an asset or add decorative elements, place it into the scene. Use the Asset Browser to open a searchable list of all assets available in the game. With thousands of entries in the base game, the search field and category filters make locating items efficient. Recent searches are saved and can be bookmarked with the star icon; individual assets can be pinned to the top of the list by right-clicking—handy for quick access while you work.
Enable the snapping option “Binds overlapping items to a building” to attach decorations to your building. There’s no strict cap on the number of props you can assign to an asset, so you can add hundreds or even thousands — but be mindful that excessive props may affect performance. Propping is no longer limited to buildings: props and vehicles can themselves be adorned with other assets.
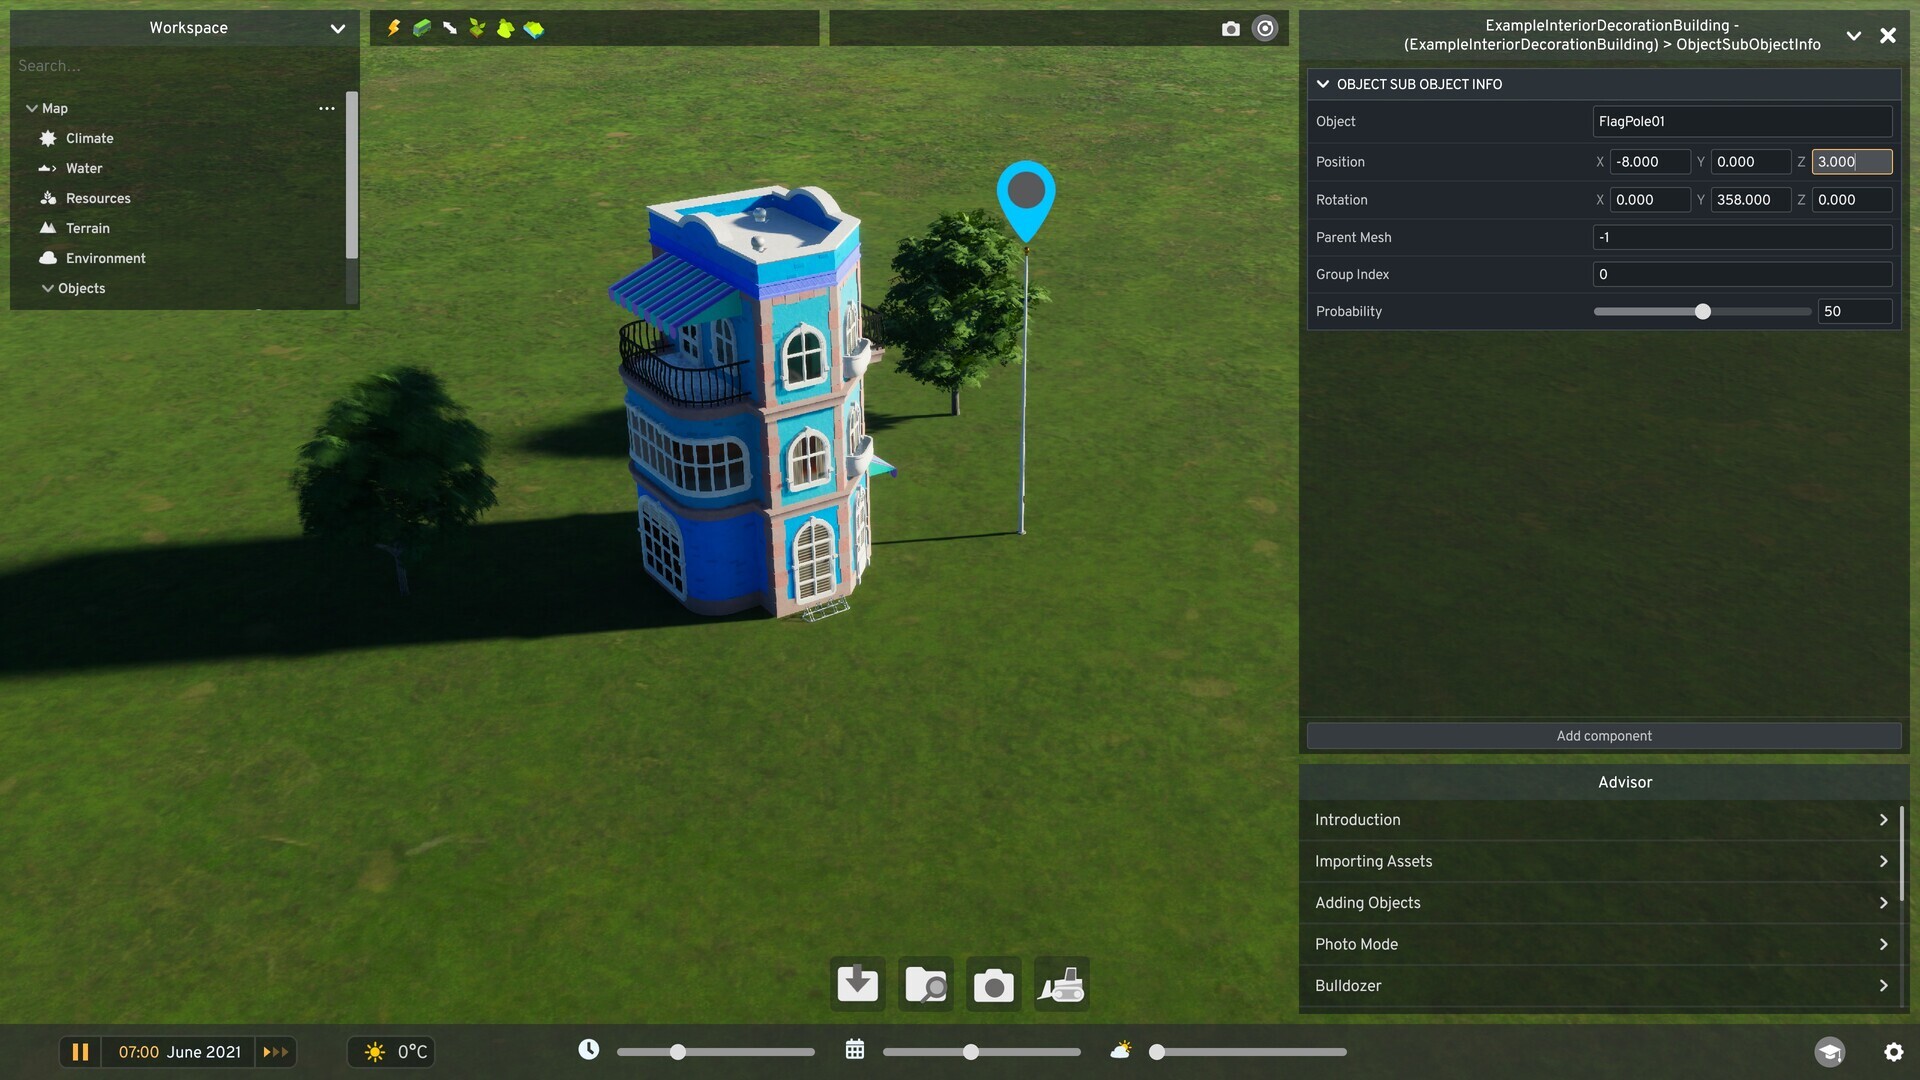 Adjust props after placement using the Object Info Panel or press M to move them freely.
Once placed, props remain fully adjustable. Selecting a prop opens its Object Info Panel on the right, where you can edit position and rotation numerically. You can also use keyboard shortcuts to speed up editing: press M to move a prop freely, X/Y/Z to align a selected prop to a target along the chosen axis, and C to copy a prop for quick duplication.
Building lots are also much more flexible now. Instead of juggling multiple assets to create large complexes, you can specify lot dimensions directly — width and depth — up to a maximum of 1000×1000 tiles for truly expansive constructions. Surfaces can be drawn with a polygonal tool, and several snapping options are available to create precise and complex shapes quickly.
 Use the polygonal surface tool to create unconventional lot shapes.
Color masking supports up to three separate mask textures applied to different mesh regions. Each mask corresponds to its own color property, and the three properties combine to form the asset’s color variations. This system opens up nearly limitless combinations for variety within a single asset. Find the Color Properties component on the asset mesh in the Workspace; if it’s not present, add it with the Add Component function and configure your variations there.
 You can define up to three colors per variation, matching the three mask textures on your mesh.
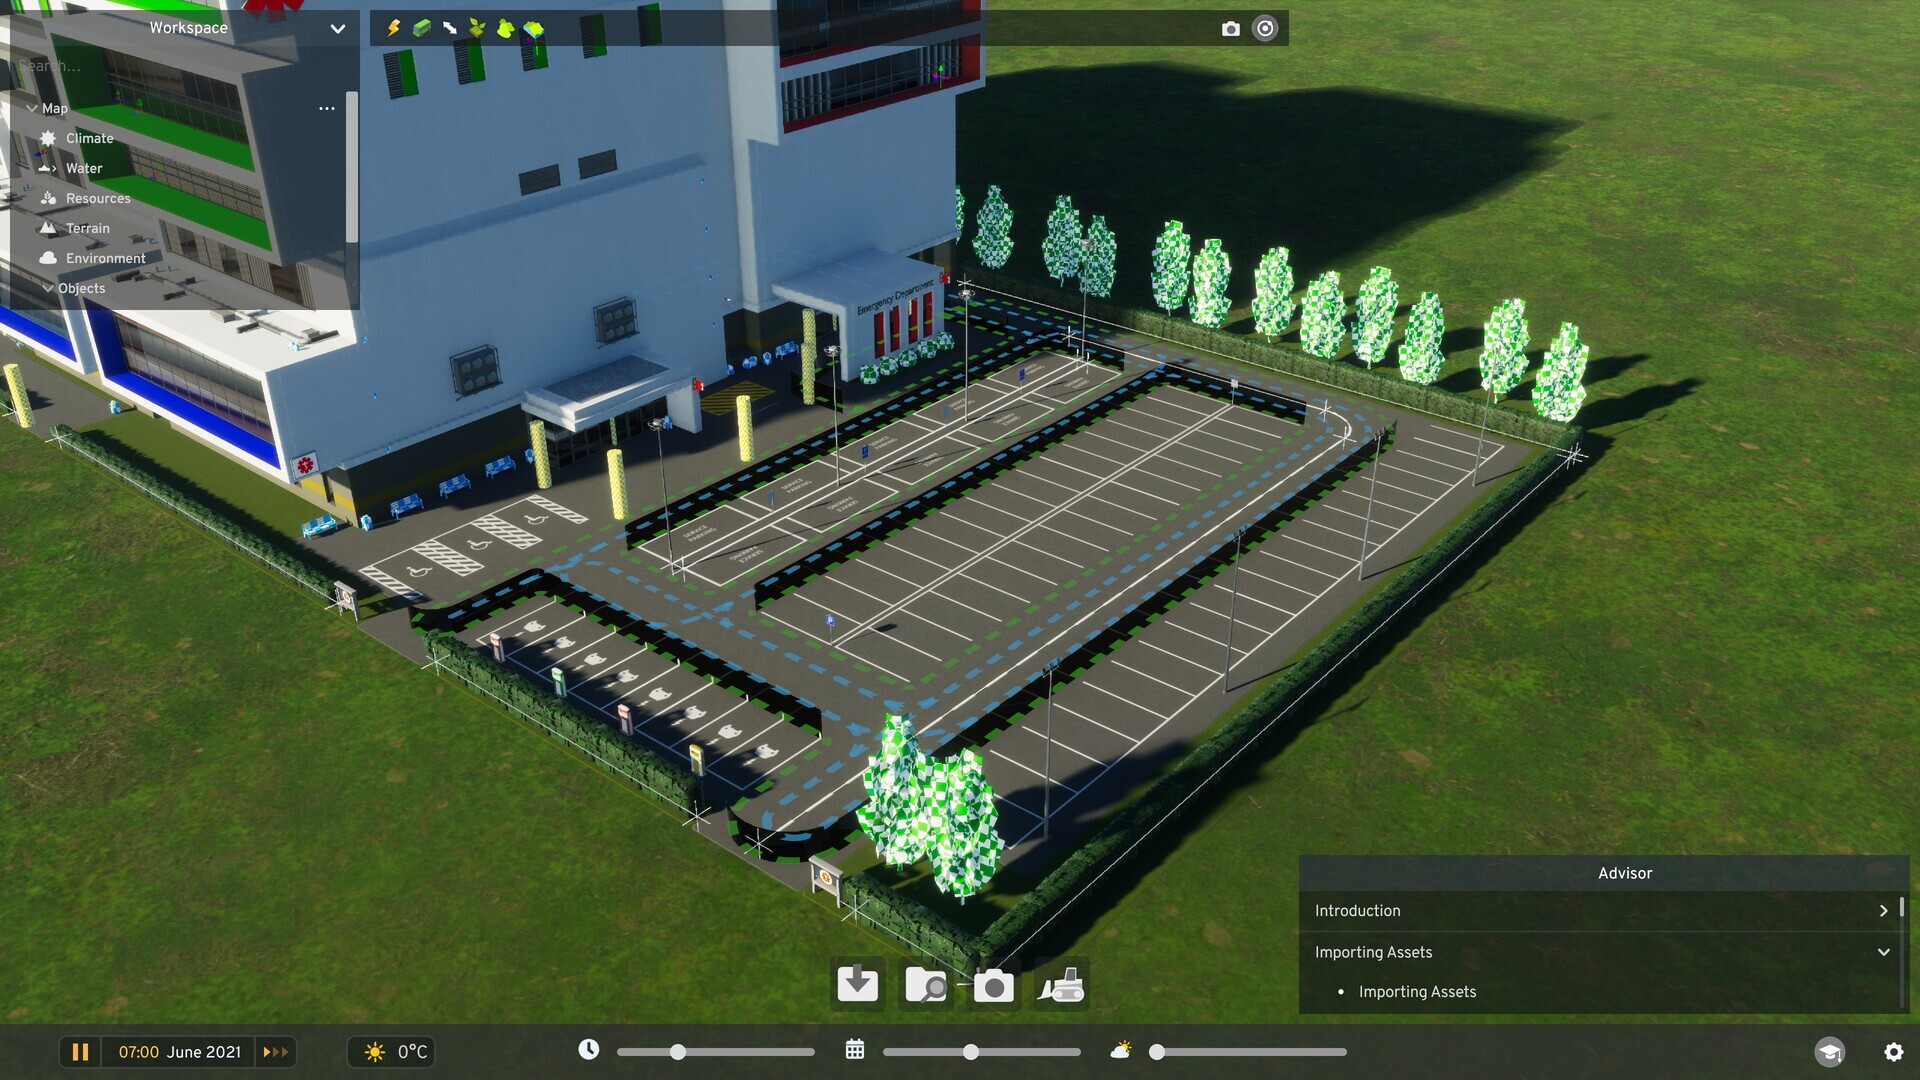
Aesthetic quality is important, but assets also need to function in the game world. Provide access for citizens and vehicles using two systems: invisible paths and pathfinding areas. Invisible paths are drawn with tools similar to road/path building and can be linked to each other or to specific spots on the lot with snapping options; they include one-way and two-way vehicle variations as well as pedestrian-only paths. Pathfinding areas are constructed with the polygonal tool and define navigable surfaces where citizens can move, gather, or perform activities. Don’t forget to place a Pedestrian Access Location marker so citizens know where to enter and exit the area.
 Example of a yard that includes both one-way and two-way vehicle paths.
To edit functional properties such as cost, capacity, or consumption, use the Object Info Panel after selecting the asset. If you based your asset on an existing prefab, its components will be copied into your new asset, but you can modify or extend them to craft a truly unique behavior. The panel also lists sub-objects like props, areas, and effects, which you can edit, duplicate, or remove.
All assets present in the scene appear in the Workspace panel on the left, where you can locate, edit, or delete them. This is also where you save your custom asset and publish it to Paradox Mods so others can use it. Add a descriptive summary and screenshots to showcase your work, then press Submit to serialize and share the asset.
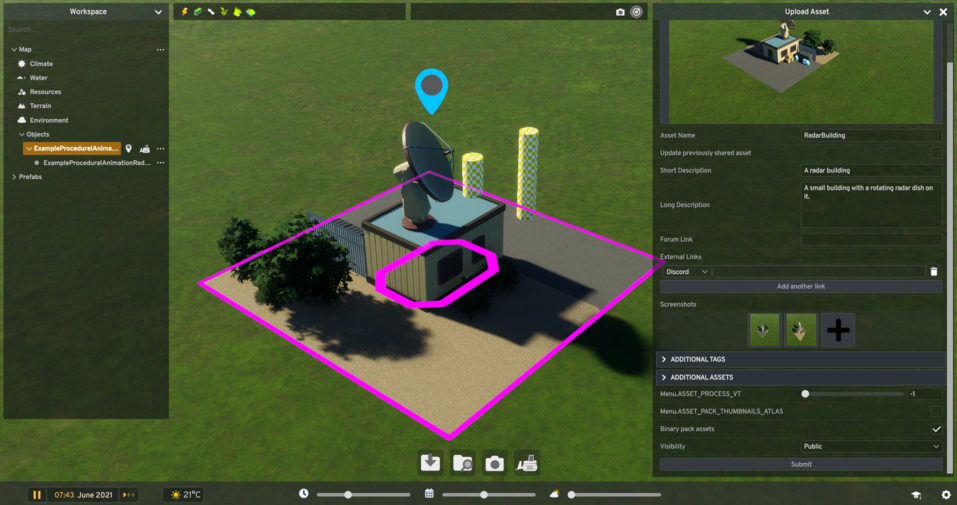 When you’re satisfied, submit your asset to Paradox Mods for the community.
And that’s it — you’ve imported, customized, and shared a custom asset. We can’t wait to see the inventive and diverse creations the community produces using the Editor’s expanded feature set. Modding has always been integral to the Cities franchise, and this update brings even more possibilities to Cities: Skylines II.
*Note: Asset Mods support is in its initial release and the Editor is currently in Beta.*
 City Corner #9 – Happy Six-Month Anniversary!
 Patch 1.6.0f1 – Summer Solstice
 City Corner #8 – Reshaping the Landscape
 Hotfix: Patch 1.5.10f1
 Saving Bug Fix
 Patch 1.5.9f1: Morning Dew
 City Corner #7: Morning Dew
 City Corner #6: Community Chat