
Risk of Rain 2 would have fallen somewhat in need of the expectations set by its predecessor if it didn’t characteristic a vibrant and expansive solid of horrible monsters to deal with. From tiny wisps that hover within the sky and zap you from above to roaring bison that cost at you from the opposite facet of the map, every enemy presents a singular set of stats and behaviours which you will need to study if you’re to defeat them. Our Risk of Rain 2 enemies information will stroll you thru these enemies separately, explaining how they work and the right way to cope with them. We’ll additionally offer you some helpful information concerning the Elite variants which you can come throughout and why you need to be cautious of those lethal upgraded monsters.
If you’re after some extra normal info on Hopoo’s newest roguelite survival game, you’d finest try our Risk of Rain 2 guide, which we’ve filled with tonnes of beginner-friendly explanations and sensible ideas, together with hyperlinks to the opposite areas of our increasing Risk of Rain 2 guides sequence. If you’re searching for tips about the assorted bosses of the game and the right way to defeat them, look no additional than our upcoming Risk of Rain 2 bosses web page.
Risk of Rain 2 enemies listing – stats and techniques
We’ve obtained a good quantity to cowl with every of the 12 common enemies at present in Risk of Rain 2, together with our explanations of the Elite variants of every enemy. To try to create a little bit of order out of this chaos, we’ve made it so you may skip to any part or enemy of your alternative by clicking on the corresponding hyperlink just under.
Risk of Rain 2 enemies information – contents
| Elite variants of enemies – Blazing, Glacial, Overloading | |||
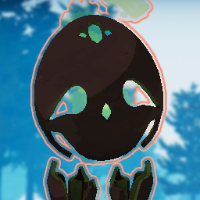
| Beetle | Lesser Wisp | Lemurian | Stone Golem |
| Beetle Guard | Greater Wisp | Elder Lemurian | Brass Contraption |
| Jellyfish | Imp | Hermit Crab | Bighorn Bison |

Elite variants of enemies
Before we get caught into every enemy’s stats and traits, you need to be conscious that every enemy has an opportunity of spawning as an Elite variant. These Elites are a lot more durable than regular, and might apply each to common enemies and to bosses. The chance of an enemy spawning as an Elite, fairly predictably, begins off low however will increase the longer you survive in a run.
There are three kinds of Elites which you can come throughout, and every are recognisable by their distinct color (see beneath). Regardless of the variant, all Elites get pleasure from 4.7x the Health and 2x the harm of their common counterpart, so they aren’t to be trifled with – notably on the later levels of a run, when enemies are getting fairly beefy anyway.
The three kinds of Elites that may spawn are as follows:
- Blazing Elites are colored purple, go away behind a hearth path that damages gamers that come into contact with it, and their assaults can ignite the participant for Four ticks of the Elite’s harm.
- Glacial Elites are colored white, and their assaults considerably sluggish the participant upon every hit. They will explode shortly after loss of life, so be sure to are out of its vary earlier than that occurs.
- Overloading Elites are colored blue and have 50% of their Health transformed into quickly recharging Shields; and their assaults deal an electrical explosion on every hit.

Complete listing of Risk of Rain 2 enemies
The beneath desk lists each enemy at present in Risk of Rain 2. More enemy sorts will probably be added at later levels of the game’s journey via early entry, however we’ll make sure to maintain this web page as updated as attainable.
Next to every enemy you’ll discover descriptions of every enemy, in addition to their pace, well being, and harm stats. It’s price noting how the Health and harm stats scale up over time: every issue degree via a run (“Easy”, “Normal”, and many others.) is damaged in to a few sections, and every time you progress to the subsequent part, the enemies transfer up a “level”, giving them an additional 30% Health and 20% harm (based mostly on their unique values). An improve in degree additionally will increase the speed at which they spawn. Check the desk for all of the related values.
Note: enemies restricted to a particular Environment can nonetheless spawn in others when you’ve accomplished a “Loop” of all Environments – for instance, you might discover Hermit Crabs within the Titanic Plains when you’ve accomplished Abyssal Depths and returned full-circle to the beginning Environment.


And with that, we conclude our Risk of Rain 2 enemies information. Hopefully this has helped provide you with the knowledge and confidence you wanted to get again on the market and full the subsequent Loop or 5. And make sure to test again right here for all the newest and most up to date info on the enemies of Risk of Rain 2. We’ll be ready, survivor.


