The new Lost on Mars comes with its personal set of missions set on the desolate, arachnid infested floor of Mars. It could also be robust on the market, so we created this information to every of the missions, whether or not they’re story missions or among the numerous aspect missions out there to finish.
Far Cry 5 – Lost on Mars mission walkthroguh
Missions are damaged down into 4 differing types, particularly Story based mostly missions, ones that unlock terminals, these for Hurk, and aspect missions. In the record beneath, we’ll break down every mission into its personal devoted web page so all you might want to do is click on the mission you’re on. Since these are only for the missions, for extra on the collectables equivalent to Hurk’s physique components which can be required to go away Mars, then try our foremost Far Cry 5 Lost On Mars guide that additionally has info on the place to search out among the gadgets and upgrades that can assist you survive on Mars.
Far Cry 5: Lost On Mars story missions
- Lost on Mars
- Control Center Antenna
- Dismembered
- Brobot
Far Cry 5: Lost On Mars Terminal Missions
- Transference Center
- Midnight Mountains Antenna
- Midnight Mountains Mine
Hurk Missions
Far Cry 5: Lost On Mars Side Missions
Lost on Mars
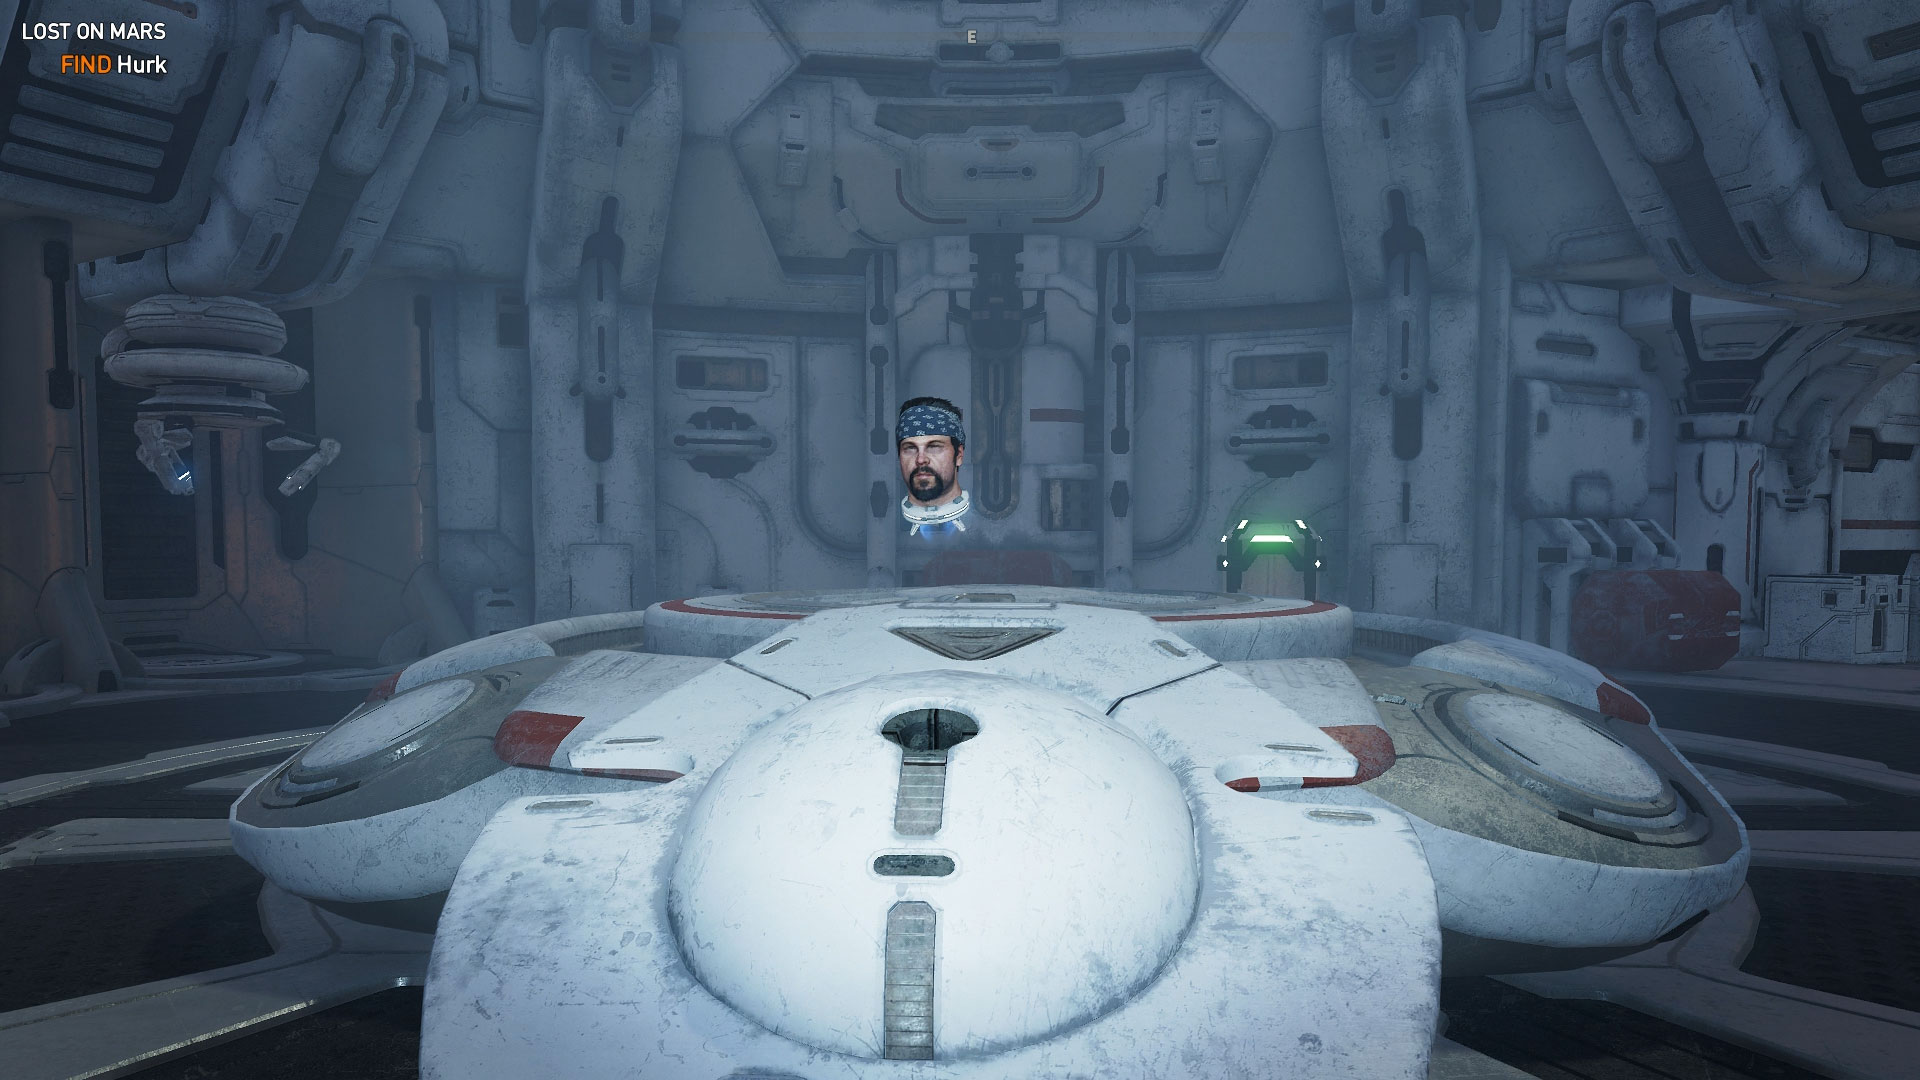
As you achieve management of Nick, simply stroll straight ahead and soar. Gravity shouldn’t be as robust right here, so your leaping is a bit larger than regular. Continue strolling via till you cross via some doorways to search out Hurk’s floating head.
You will then be directed to 2 power cores within the room behind you and to the left as you exit Hurk’s chamber. Once you’ve collected them, head again to Hurk and place one of many power cores into the slot proven. This will revive the AI that Hurk has the hots for.
Control Center Antenna
After awakening the AI, you’ll be instructed to gather some supplies from barrels. This is with the intention to 3D print your self a brand new gun. This pistol-like weapon doesn’t have an ammunition depend, however it does have a settle down time if fired too typically. Upon completion of this new weapon, it’s time to enterprise into the nice outside, and by that I imply the desolate arachnid-infested wasteland of Mars.
Hurk warns you to not stroll into the sand. This is invaluable recommendation, as this attracts the arachnids that may spawn from beneath you. Keep to the rocks for now, however ought to you might want to have interaction any arachnids, goal for the crimson vertebrae as that’s their weakest level.
Unfortunately, Ubisoft are going to make us climb this tower the exhausting method, so that you’ll want to leap up every platform. None of the platforms are significantly tight, however it’s vital to plan your jumps forward. At this stage, fall injury is a factor, so a mistimed soar could be deadly. Once you attain the highest, plonk that power core in to finish the mission. This will unlock the rifle for building within the printer, in addition to well being packs.
Dismembered
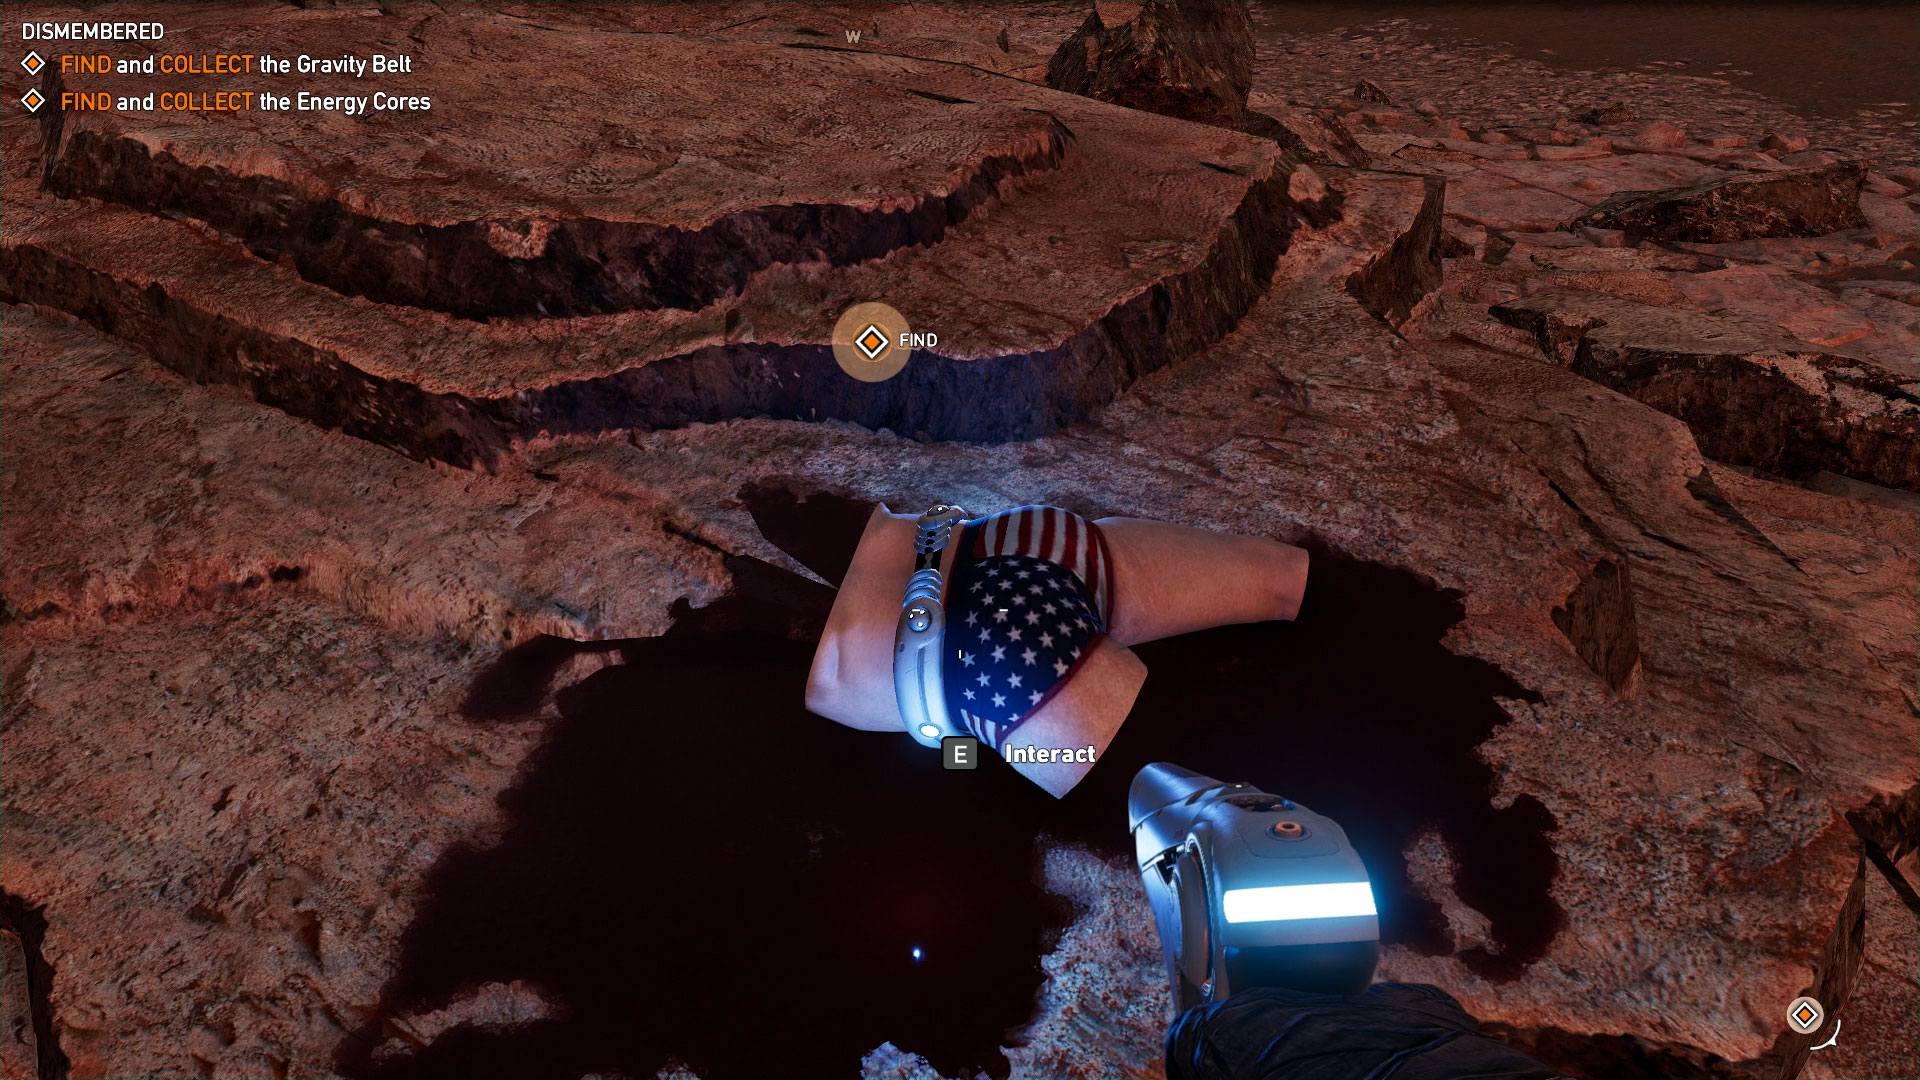
What goes up should come down, so fastidiously make your method again down the antenna. You might take some falling injury alongside the best way, so be cautious of that. Once you’ve descended, head to the waypoint indicated on the map. Upon reaching the doorways, you’ll be prompted to gather Hurk’s proper hand, which is the primary physique half you might want to get off Mars.
The doorways will quickly open up and there shall be an enormous expanse of sand. To keep away from any preventing, leap over the sand onto every of the safer floor spots. As you edge nearer, Hurk will discover his pelvic area within the distance, so head over there to gather his pelvis. This unlocks the gravity belt which may make you float, hover, or descend quickly. It additionally makes you lastly proof against fall injury.
From there, hover over to the following waypoint to search out the following Energy Core to finish the mission, as Hurk complains a couple of lack of junk on his pelvis.
![]()
Transference Center
Hover above the construction forward of you to climb over the precipice. You’ll probably encounter some extra of the arachnids alongside the best way to the large Transference Center up forward. There are some sand pits close by, so be cautious of the place you land. If you will have been killing aliens and looting containers, you’ll have already unlocked the rifle, so make sure to swap between the pistol and rifle as soon as one gun turns into drained.
Eventually you’ll come as much as the construction. There are two aspect entrances on the bottom stage, so head in and to the again. Then do a u-turn and hover to the ground above to search out the terminal to revive the Transference Center. This will unlock one other gun to make, in addition to armour for crafting within the printer.

Brobot
Welcome to the primary boss struggle of the sport, although to name it that might be a little bit of a disservice to bosses. When the mission begins, head over to the transference chamber marked in your HUD. Upon attempting to plonk Hurk’s head onto the machine, a “space crab” will rise from the bottom in entrance of you.
On prime of this, three extra arachnids will seem within the pit behind you, which means you will have 4 targets. Firstly, since the weak spot of the usual arachnids, attempt to handle them first by capturing up their crimson stomach. As lengthy as you don’t fall into the sand, you must then be capable of unload into the house crab.
This isn’t a very troublesome struggle because it solely has shut vary assaults. If it will get too shut, hover away to security. It can bury below soil and ambush you, so be ready for that. Eventually it should explode, forsaking some supplies so that you can acquire. You can then place Hurk’s head onto the transference chamber to unlock the Brobot as a companion. He acts identical to your companions in Far Cry 5’s foremost marketing campaign, so will must be revived if he takes an excessive amount of injury. Collect Hurk’s head as soon as extra to finish the mission.
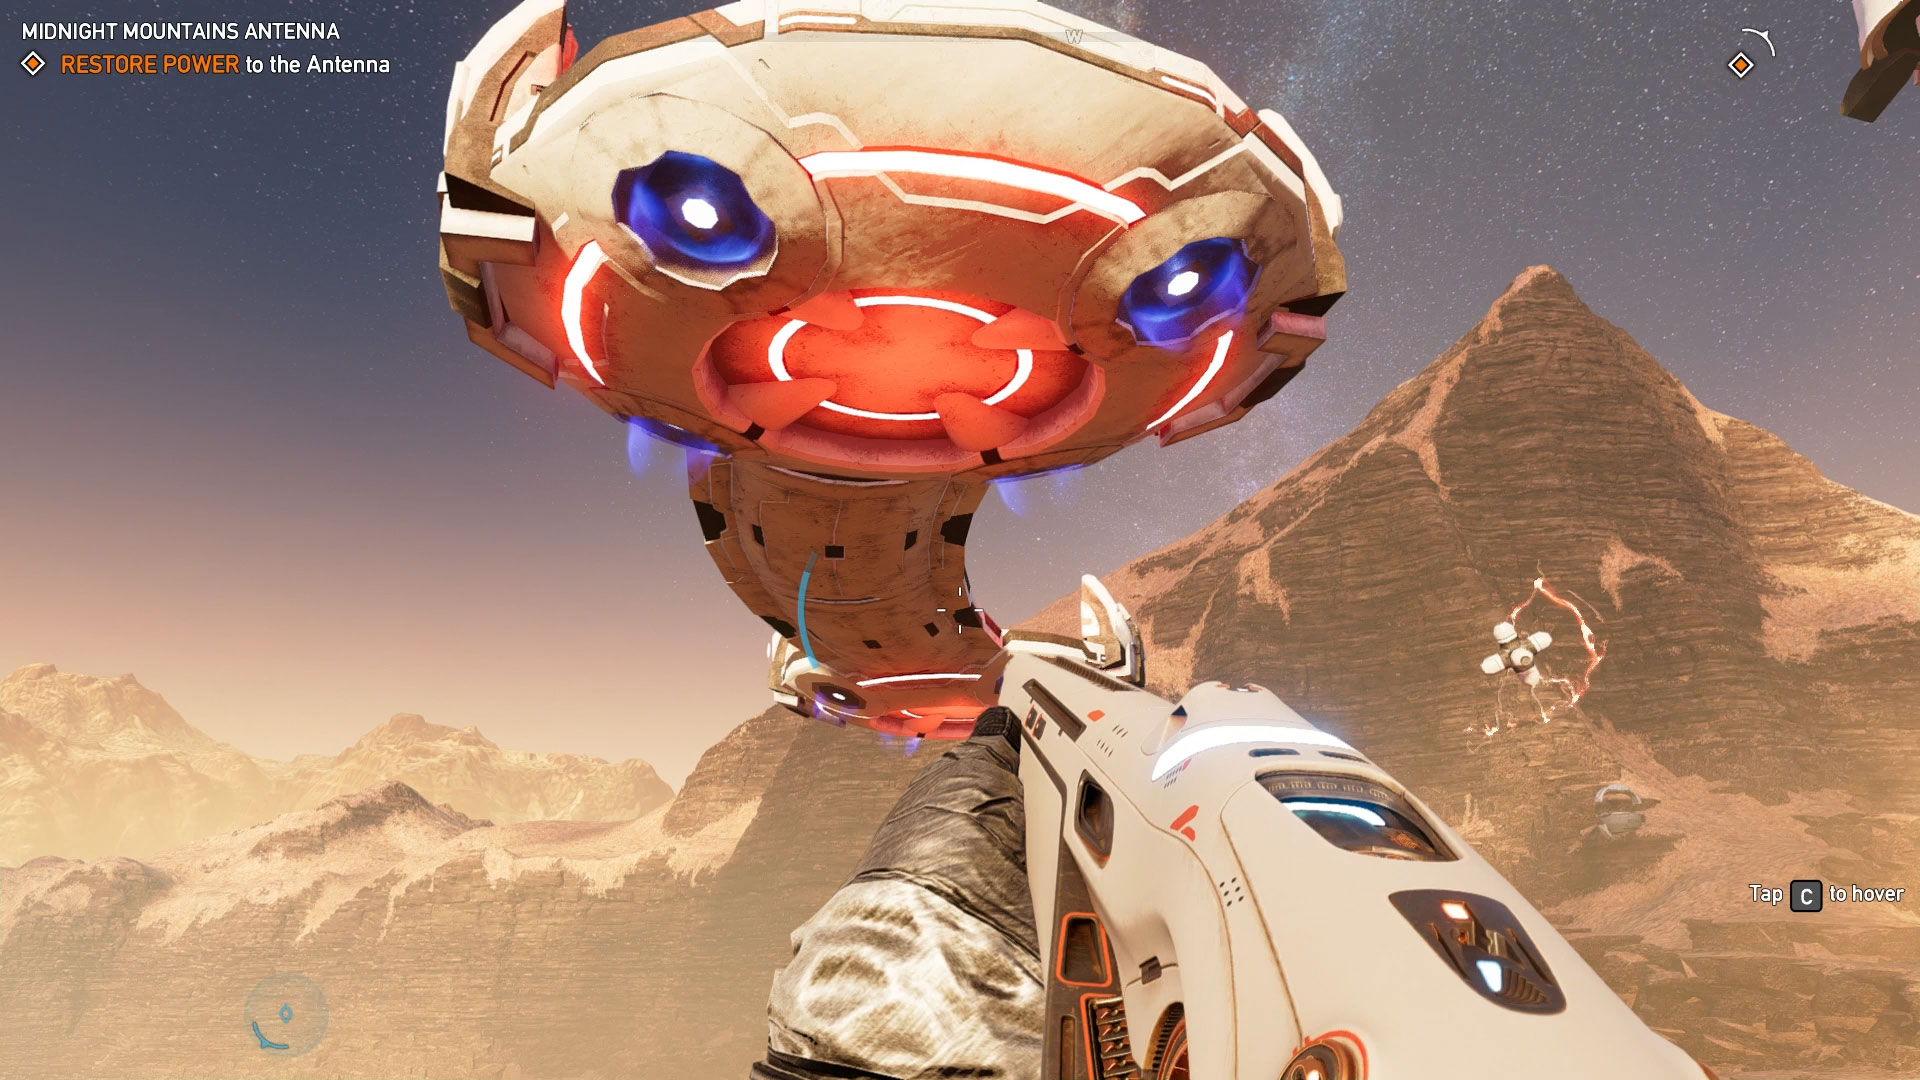
Midnight Mountains Antenna
The subsequent merchandise on the record is to activate the midnight mountains antenna. This is north-east of the Transference Center and has a couple of large leaps up the crags close by to entry it. Upon rising to the north, there are a couple of containers to choose up sources, in addition to a couple of enemies to dispatch.
Hurk’s Brobot can help you in taking these out, however solely as a distraction. As you get nearer, there shall be numerous spires that comprise eggs. Throwing these at enemy arachnids will confuse them, inflicting them to struggle amongst themselves, so make sure to reap the benefits of this. You is not going to unlock them at this stage, so hold a watch out for them.
Once you’ve handled close by threats, it’s time to ascend the tower. Thanks to the gravity belt, it is a little much less worrying as falling injury isn’t an element, however there at the moment are electrified nodes that upon getting shut will deal a ton of harm to you. They can’t be shot down, so simply avoid these and climb up every section to achieve the highest. Activating the antenna will unlock each the shotgun and “More Hellsplosions” improve for building within the printer.
That’s it thus far for our Far Cry 5 – Lost on Mars DLC walkthrough, however make sure to verify again steadily as this shall be up to date often. If you’re searching for extra info on the place the assorted collectables are, such because the gadgets and Hurk’s physique components, head over to our foremost Far Cry 5 Lost On Mars guide for extra on that.


