
Creator Development Journal
Join us for a behind-the-scenes look and some insights into the process that might be useful for budding Cities: Skylines II asset creators.
You can download the Japanese Region Pack here: https://mods.paradoxplaza.com/mods/94094/Windows
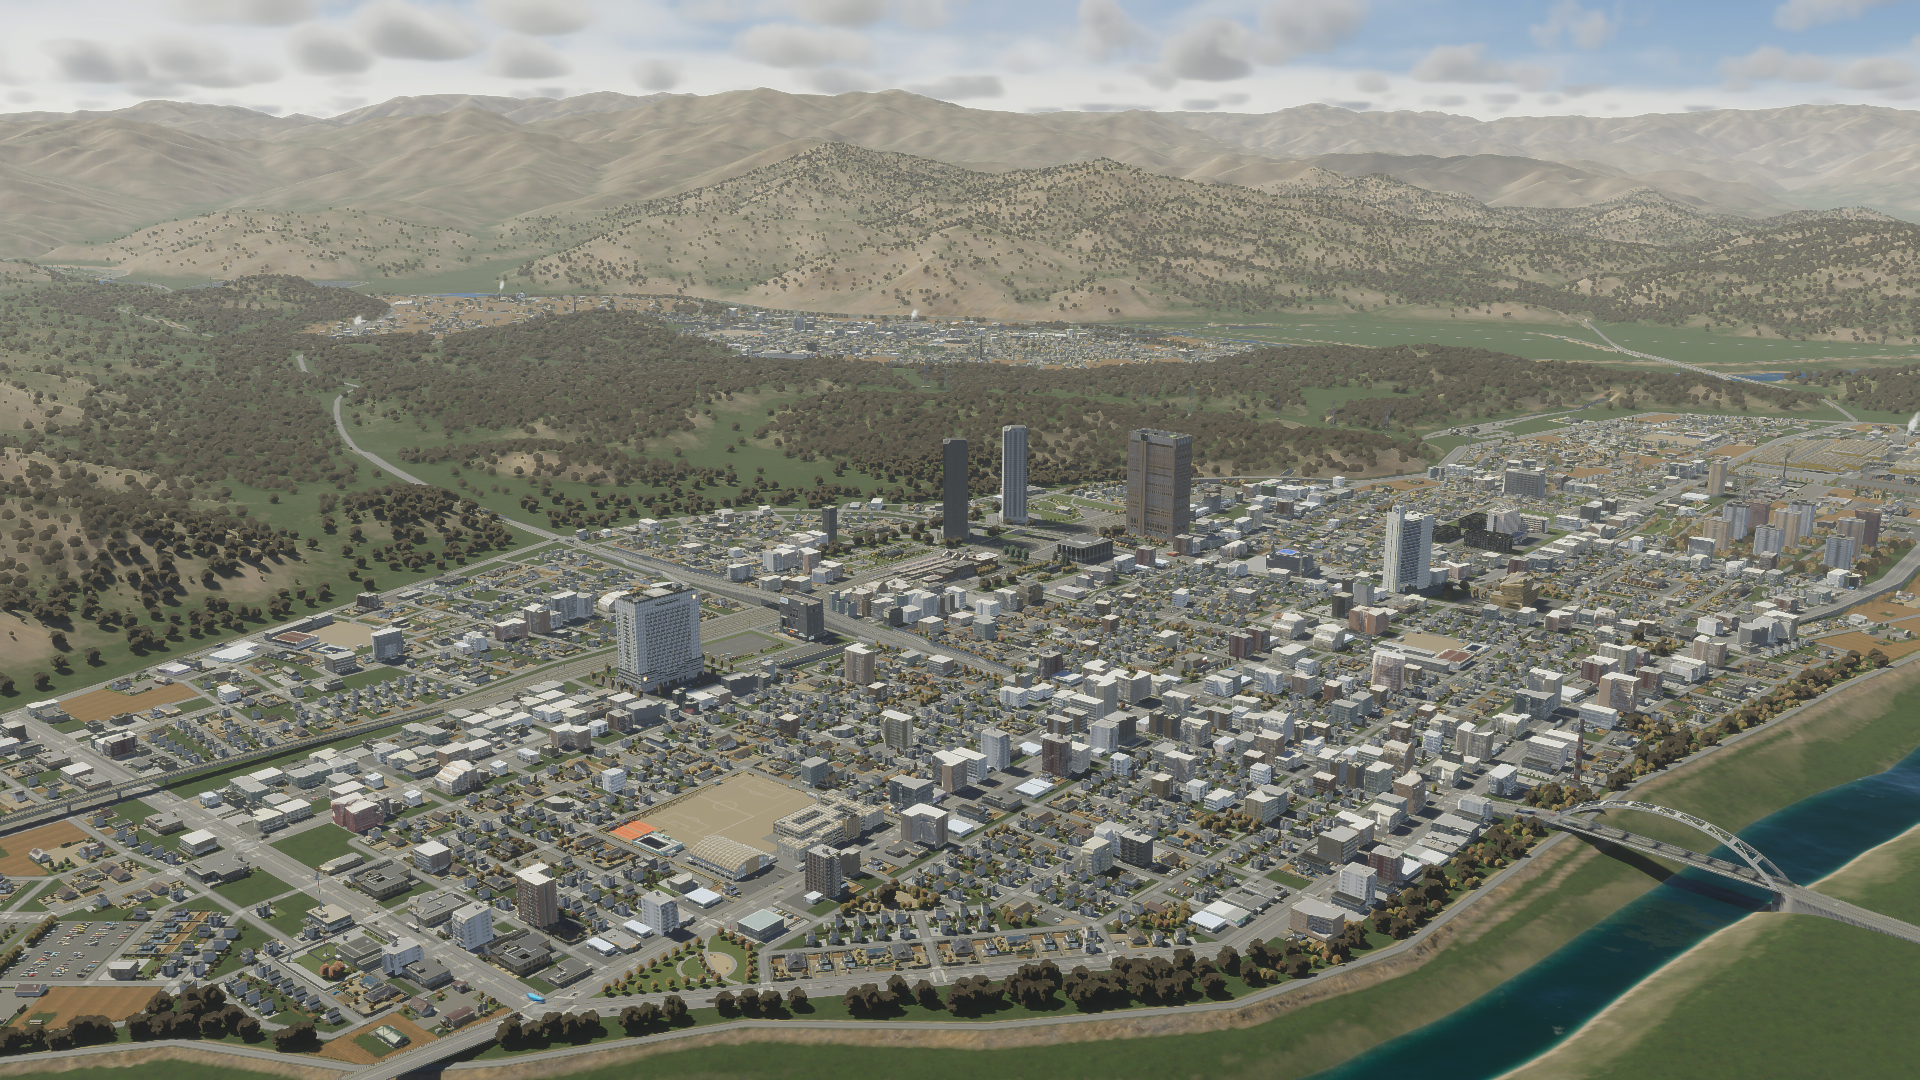
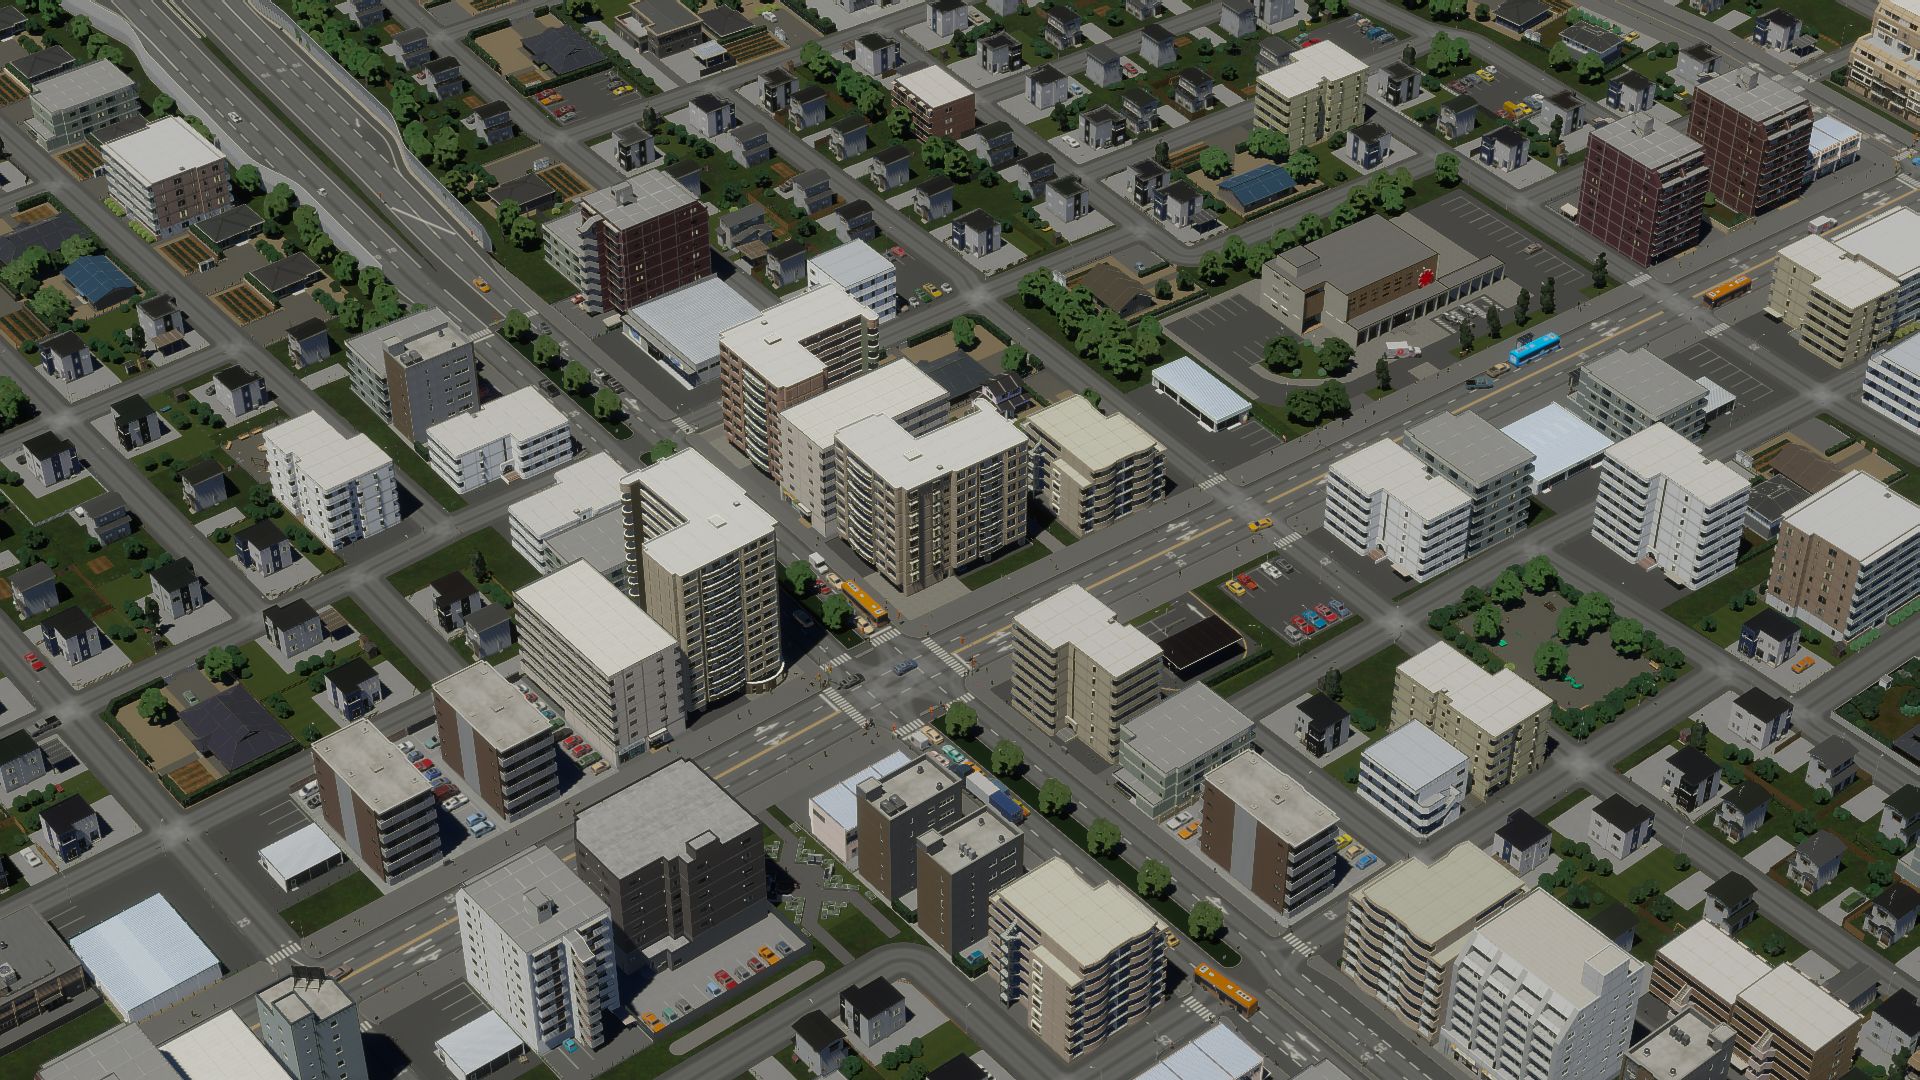
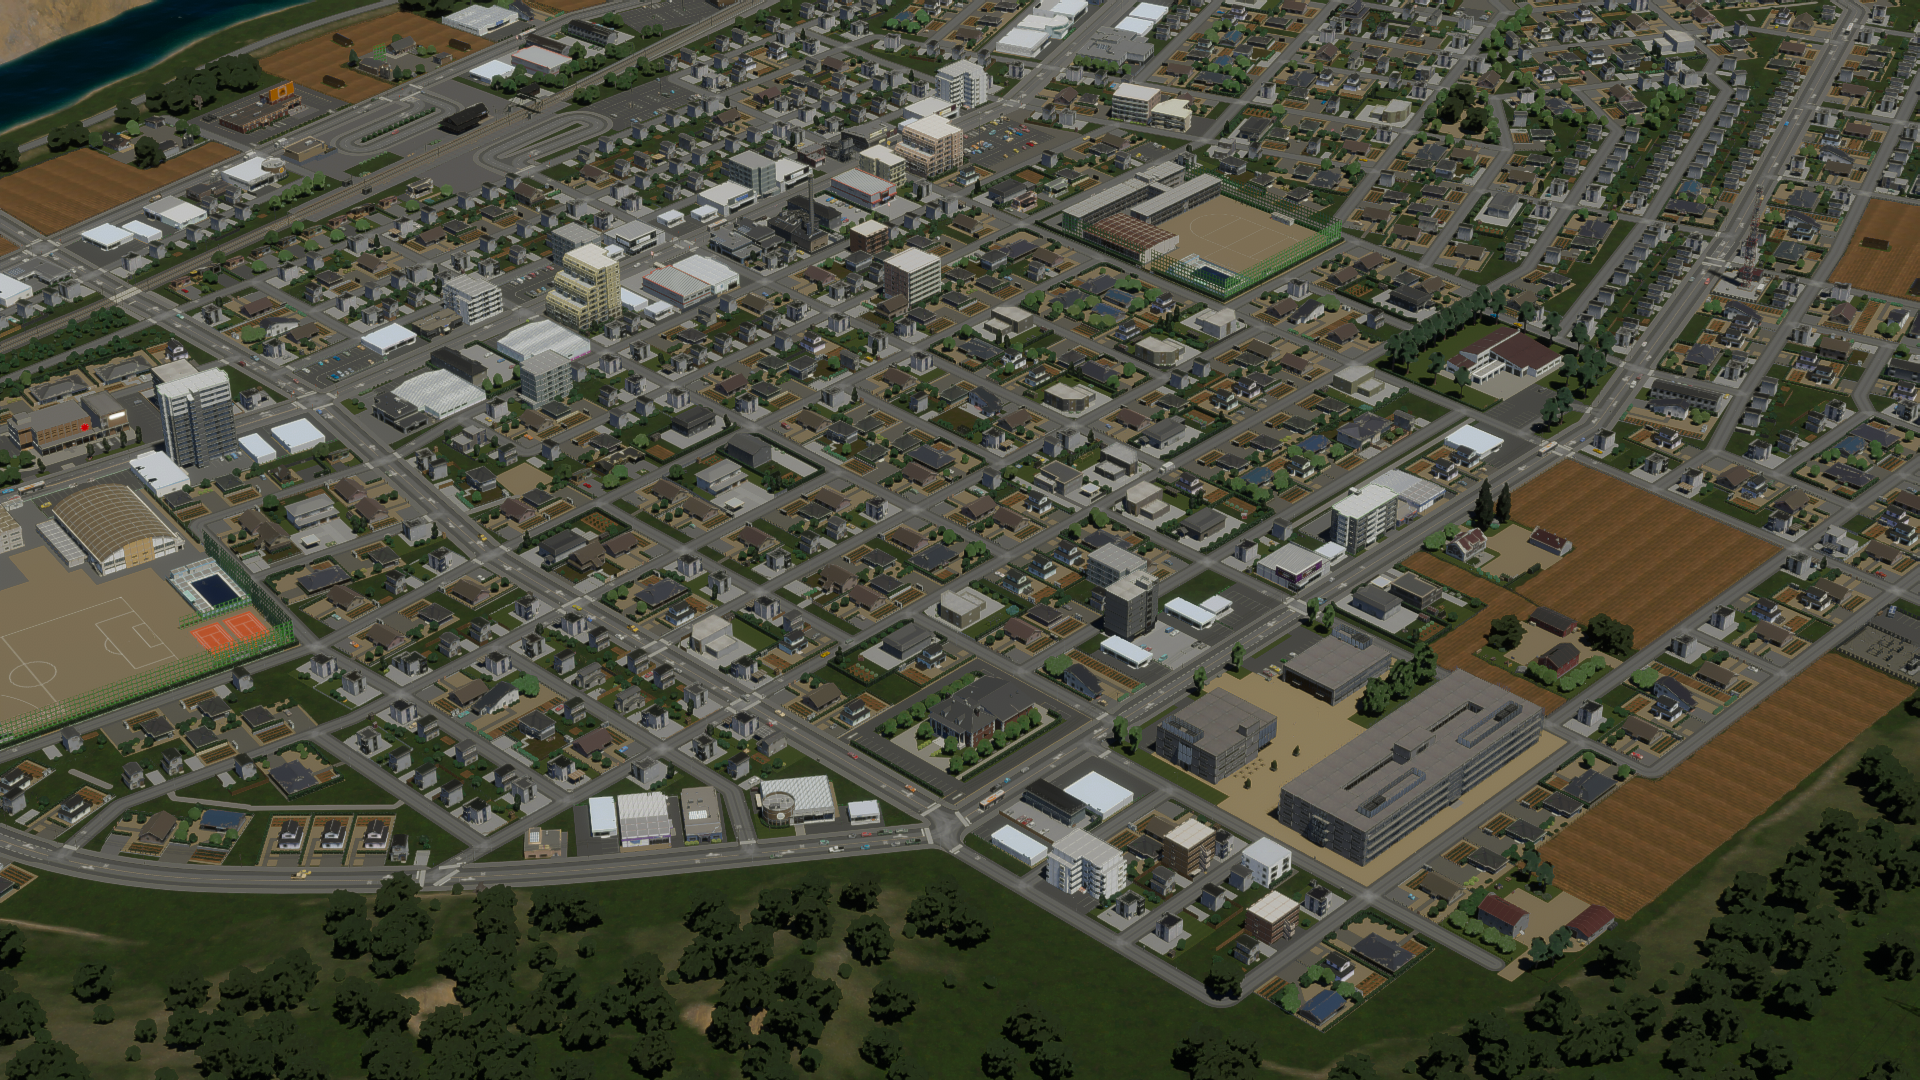
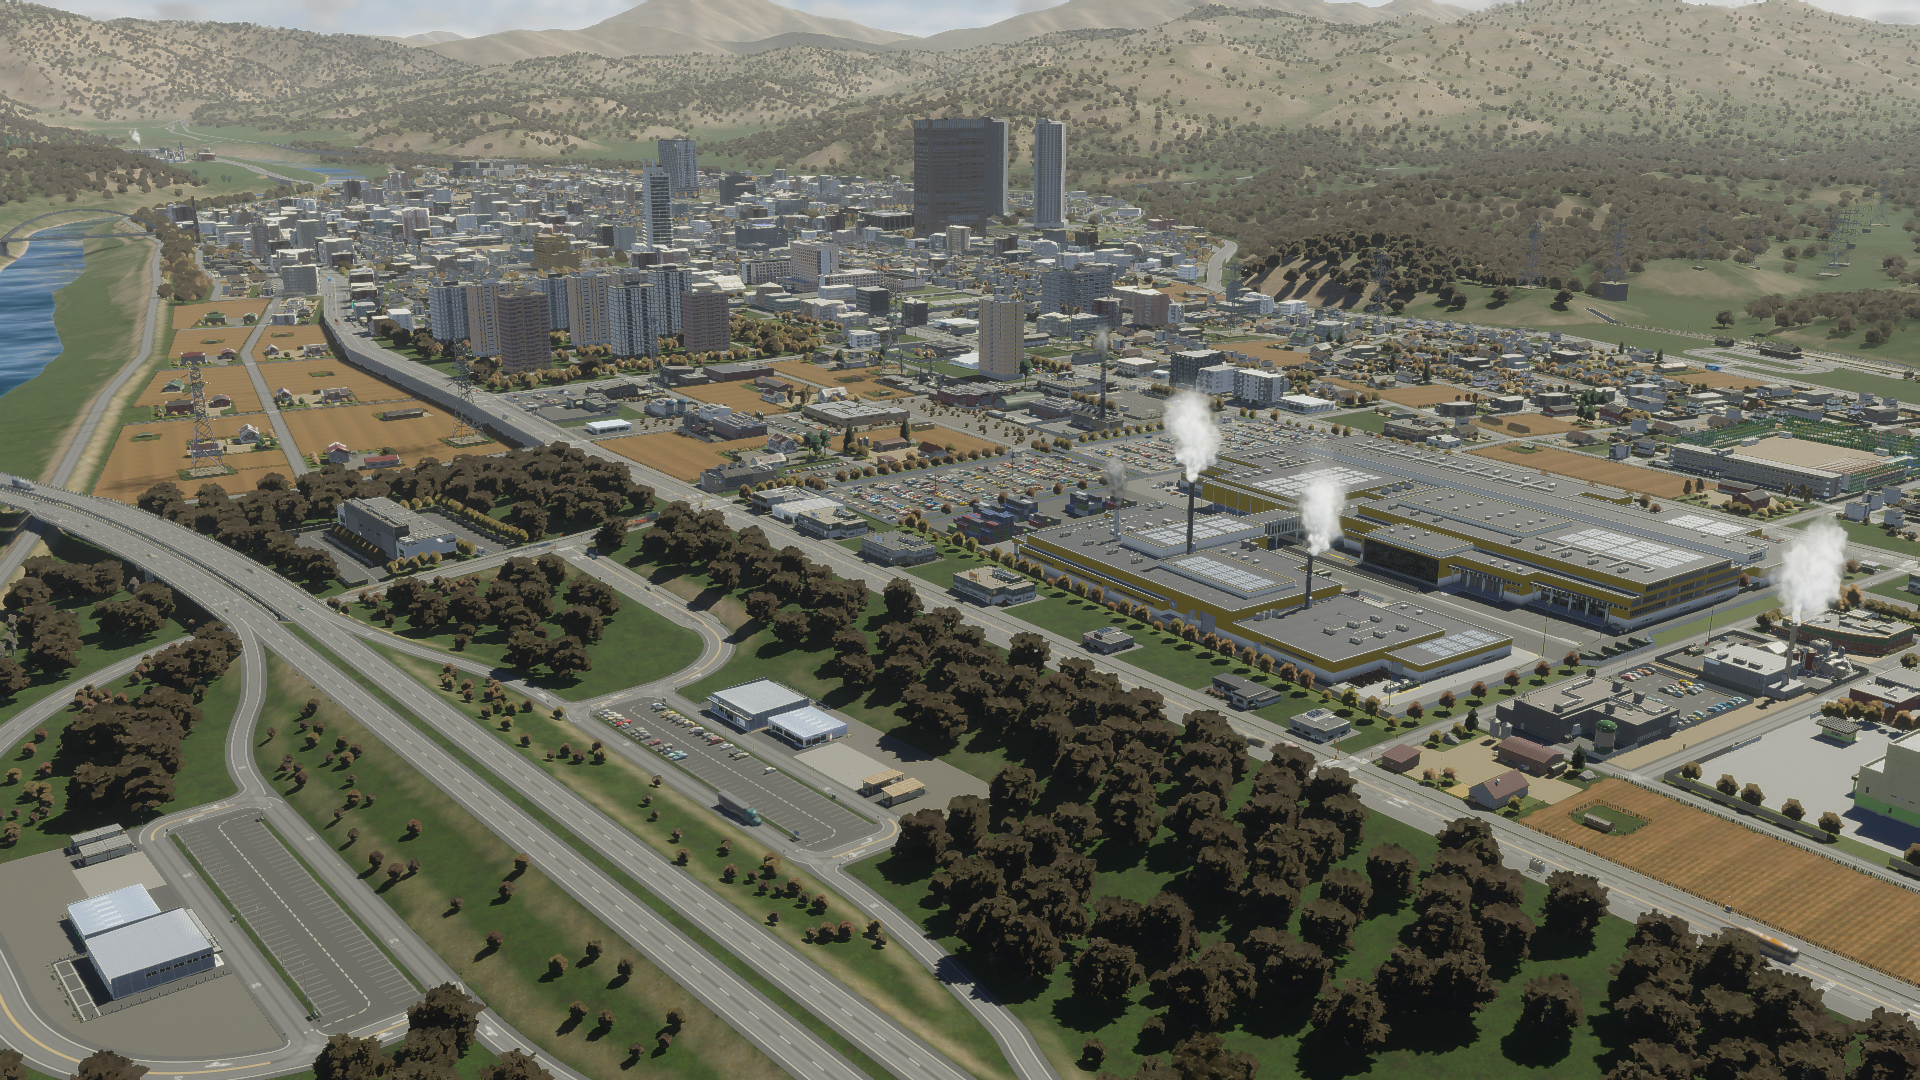
The city of Miwa is our base of operations for today.
With a project of this nature, the initial step involves delineating the scope. What exactly do we intend to achieve here? There were numerous potential directions we could have taken. This region pack is designed to function as an introductory kit for Japanese content. Our intention is that it can serve both as a standalone playable pack and as the foundation of a collection for detailers, which will eventually be enhanced by mod assets on Paradox Mods when they become accessible.
Our focus was chosen by balancing several factors:
- Base Game mechanics. Certain game limitations don’t always harmonize with the real-world usage or design of buildings, particularly in Japan. For instance, the minimum plot sizes for low-density residential areas are 2×2 grid sizes, whereas a significant portion of Japanese single-family homes measures around 8m x 8m (1×1 grid size). How does one reconcile this?
- Importance. How critical is this type of building in shaping a functional and authentic Japanese city?
- Is it a match? Will the base game buildings stand out or do they blend in well with the style?
- The modding community. How probable is it for someone to upload a building of this type to Paradox Mods either now or in the foreseeable future?
- Technical constraints. Will any component require a feature not yet programmed into the game? Will it appear incorrect if that part has to be omitted due to technical reasons?
We aimed to cover as much as possible, yet naturally, we can’t do everything. Allocating time for the project was challenging for our team. The time commitment for a venture like this can change drastically, particularly when spanning multiple years.
In the end, we decided to initially concentrate on smaller scale elements — the assets are more inclined toward smaller cities. However, this does not preclude constructing a metropolis. Quite the contrary. The assets included are versatile enough to be used in settings ranging from the countryside to the urban core, providing ample options to craft an authentic Japanese city ambiance. We chose to build from the grassroots up rather than the pinnacle down. Our objective was to create a comprehensive experience spanning from level 1 to a sizeable city, encompassing as much as reasonably feasible.
Aligning with base game functionality was a primary consideration. The development of the region pack commenced years ago, at a time when the game features were neither final nor immune to change. We opted to adhere to what we knew would be included instead of what we hoped, limiting ourselves to crafting elements that strictly aligned with the zone types and utilities known to be part of the game. We anticipated some people might be disappointed by the absence of buildings that are commonplace in reality but fit awkwardly within the existing zone type framework. We chose to address those when the editor is released, at which point we will determine the direction to take.
What’s new with the asset creation pipeline? Though much of it is familiar, the intricate details have evolved. Before embarking on your first mesh for this game, it’s imperative to peruse the Asset Creation Guide on the Cities II Wiki. The new mesh creation guidelines necessitated altering my customary modeling technique. Initially, I envisioned repurposing segments of meshes developed for the prior game. However, my first venture disillusioned me of that notion.
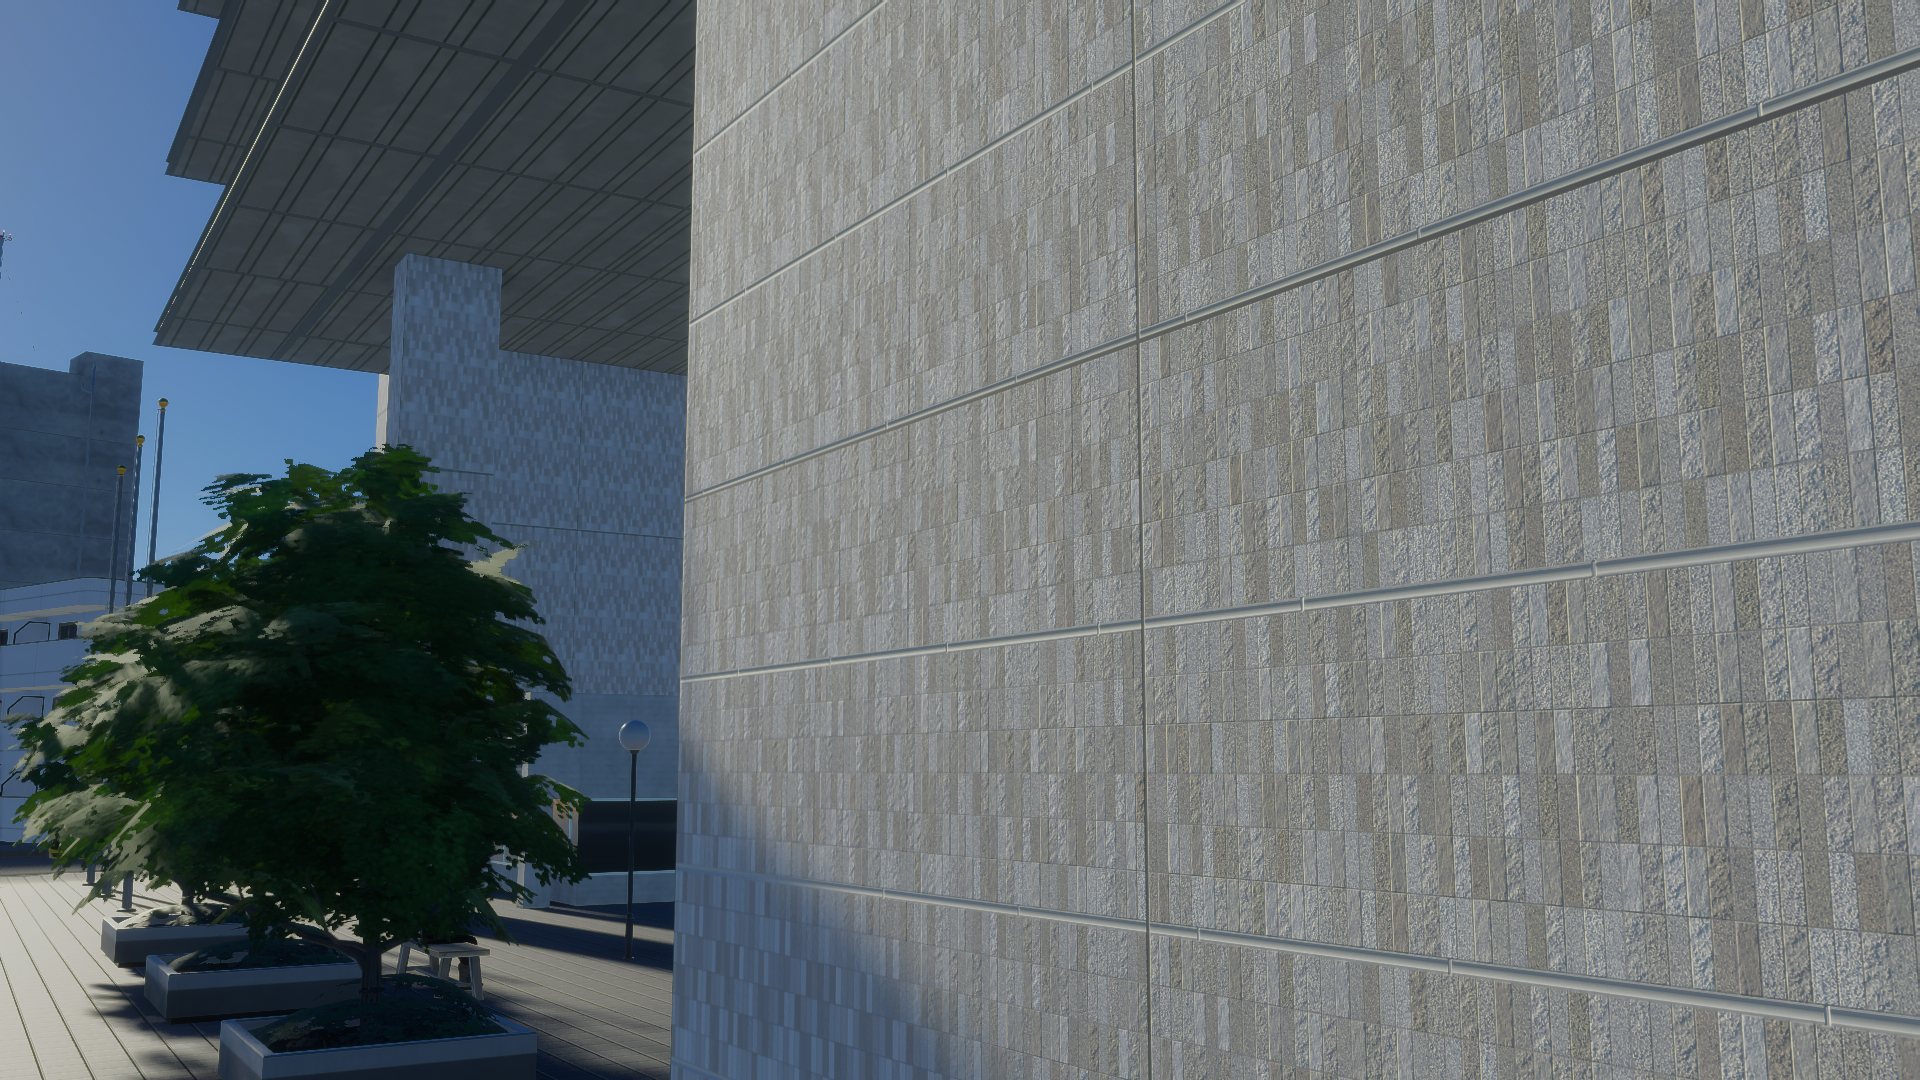
Textures for this game must remain within the 0-1 U.V. range, necessitating revisions of those that utilized beyond this range. These meshes need to be divided and their U.V.s layered. Even if this doesn’t apply to your meshes, windows still need appropriate detailing to effectively use the window submesh. To align with the updated standards for this game, elements like door handles had to be incorporated too. Furthermore, I found possibilities to smooth a curved surface here and enhance a feature’s detail there… I spent considerable time attempting to preserve previous work instead of simply starting anew.
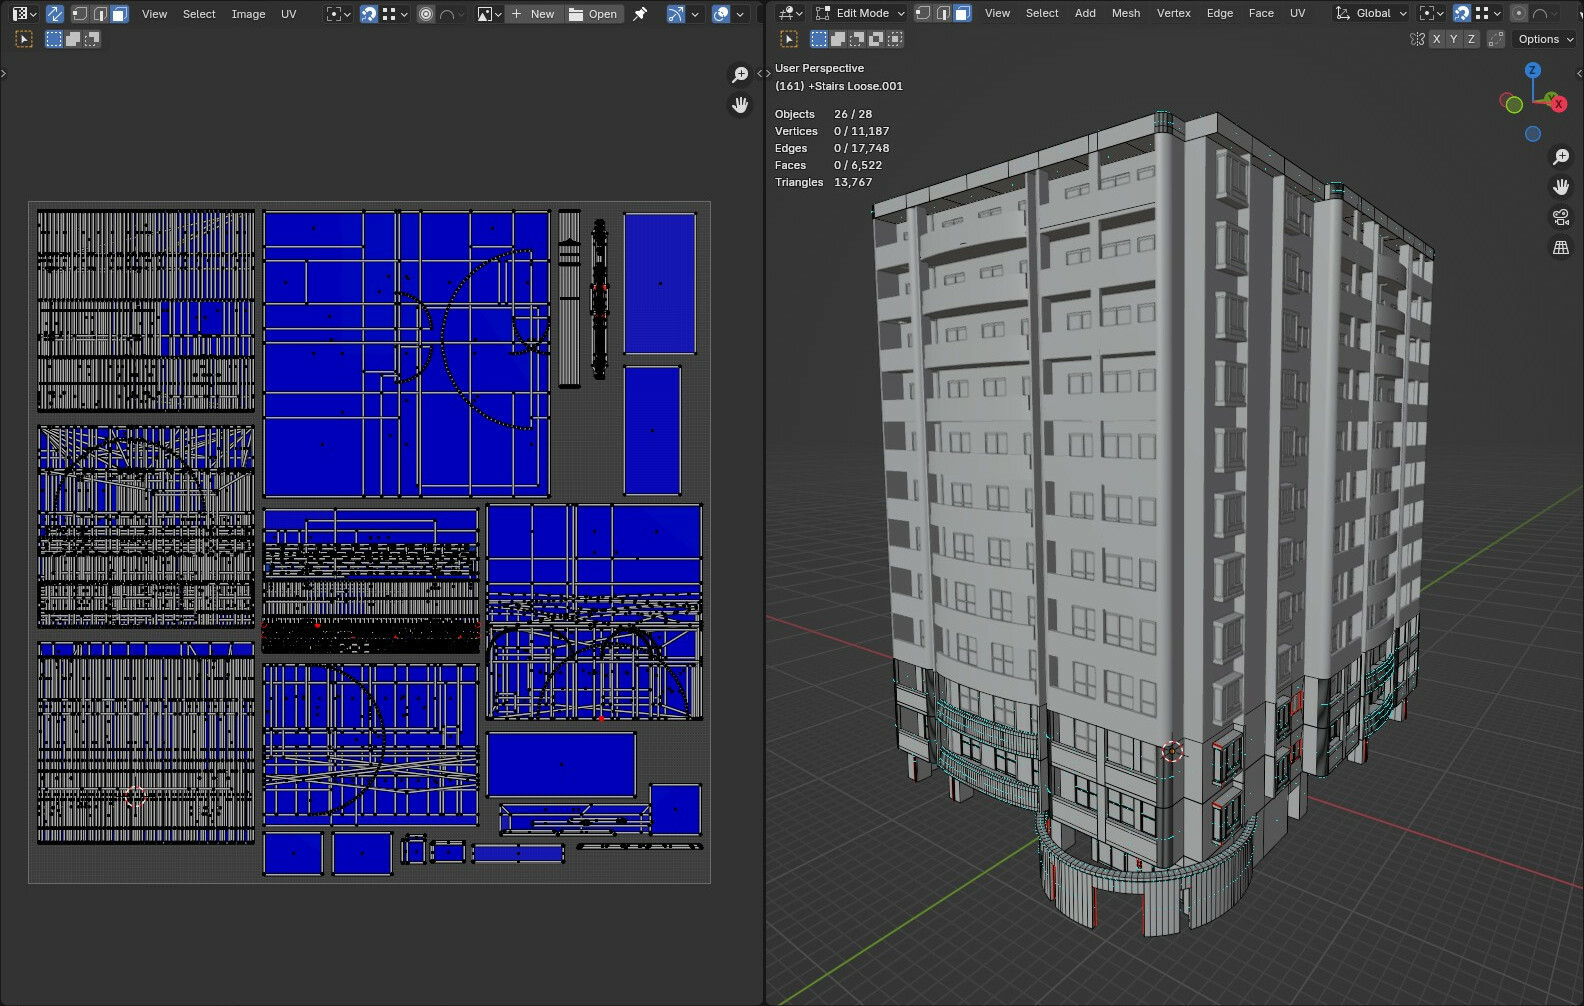
Mapped UV. Oriented in 0-1. Only square textures, no wraparounds.
That being said, I truly appreciate the changes. I’m reluctant to echo the words of other region pack developers but must express my admiration for the window submeshes. The saved time and texture space they offer are unparalleled. The increased texture sizes have facilitated more intricate patterns, indispensable for Japanese assets due to their frequently used small tiles.
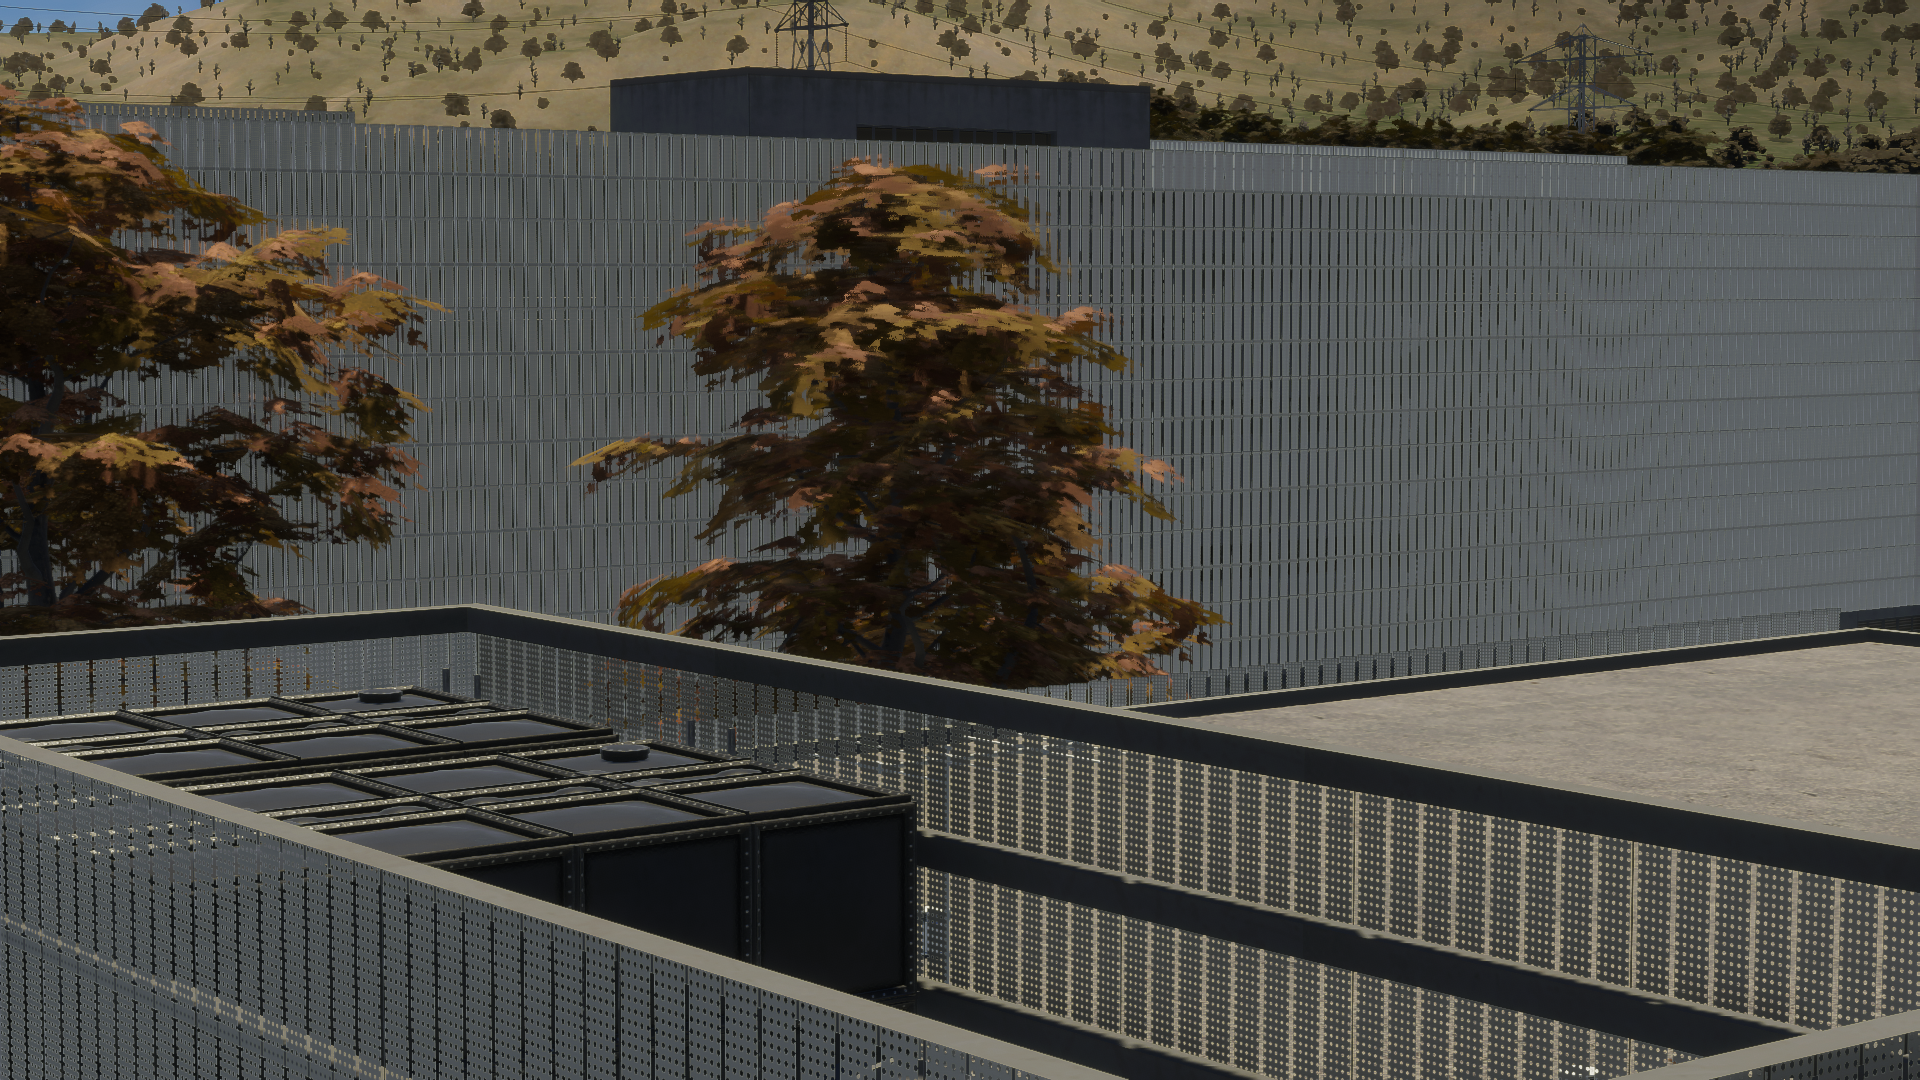
Exquisite fine, normal, and alpha textures from the pack.
The open architectural design of certain apartment complexes can strain the triangle budget. Many builders opt for open staircases and corridors as a measure to cut costs, as per fire code regulations. These features can consume substantial triangle counts and necessitate considerable propping. Initially, I considered making minor, frequently reused items such as doorbells and nameplates into props. After contemplating the sheer number of props that involved, I quickly revised my approach. They were then directly incorporated into the meshes. Unfortunately, certain features, like corridor lights, could not be directly integrated into the mesh. Believe me, there were numerous lights…
…upwards of a hundred for even growable structures.
The Substance Suite might seem a daunting investment for those merely seeking to dabble in asset creation, but I can assure you it’s worth every penny. It’s not solely for those wanting to undertake advanced tasks such as painting directly on the model. With smart textures, I can scale them losslessly to any dimension, adjust the options to meet my meticulous standards, and preview them on the model in real time. It’s proved to be a monumental change.
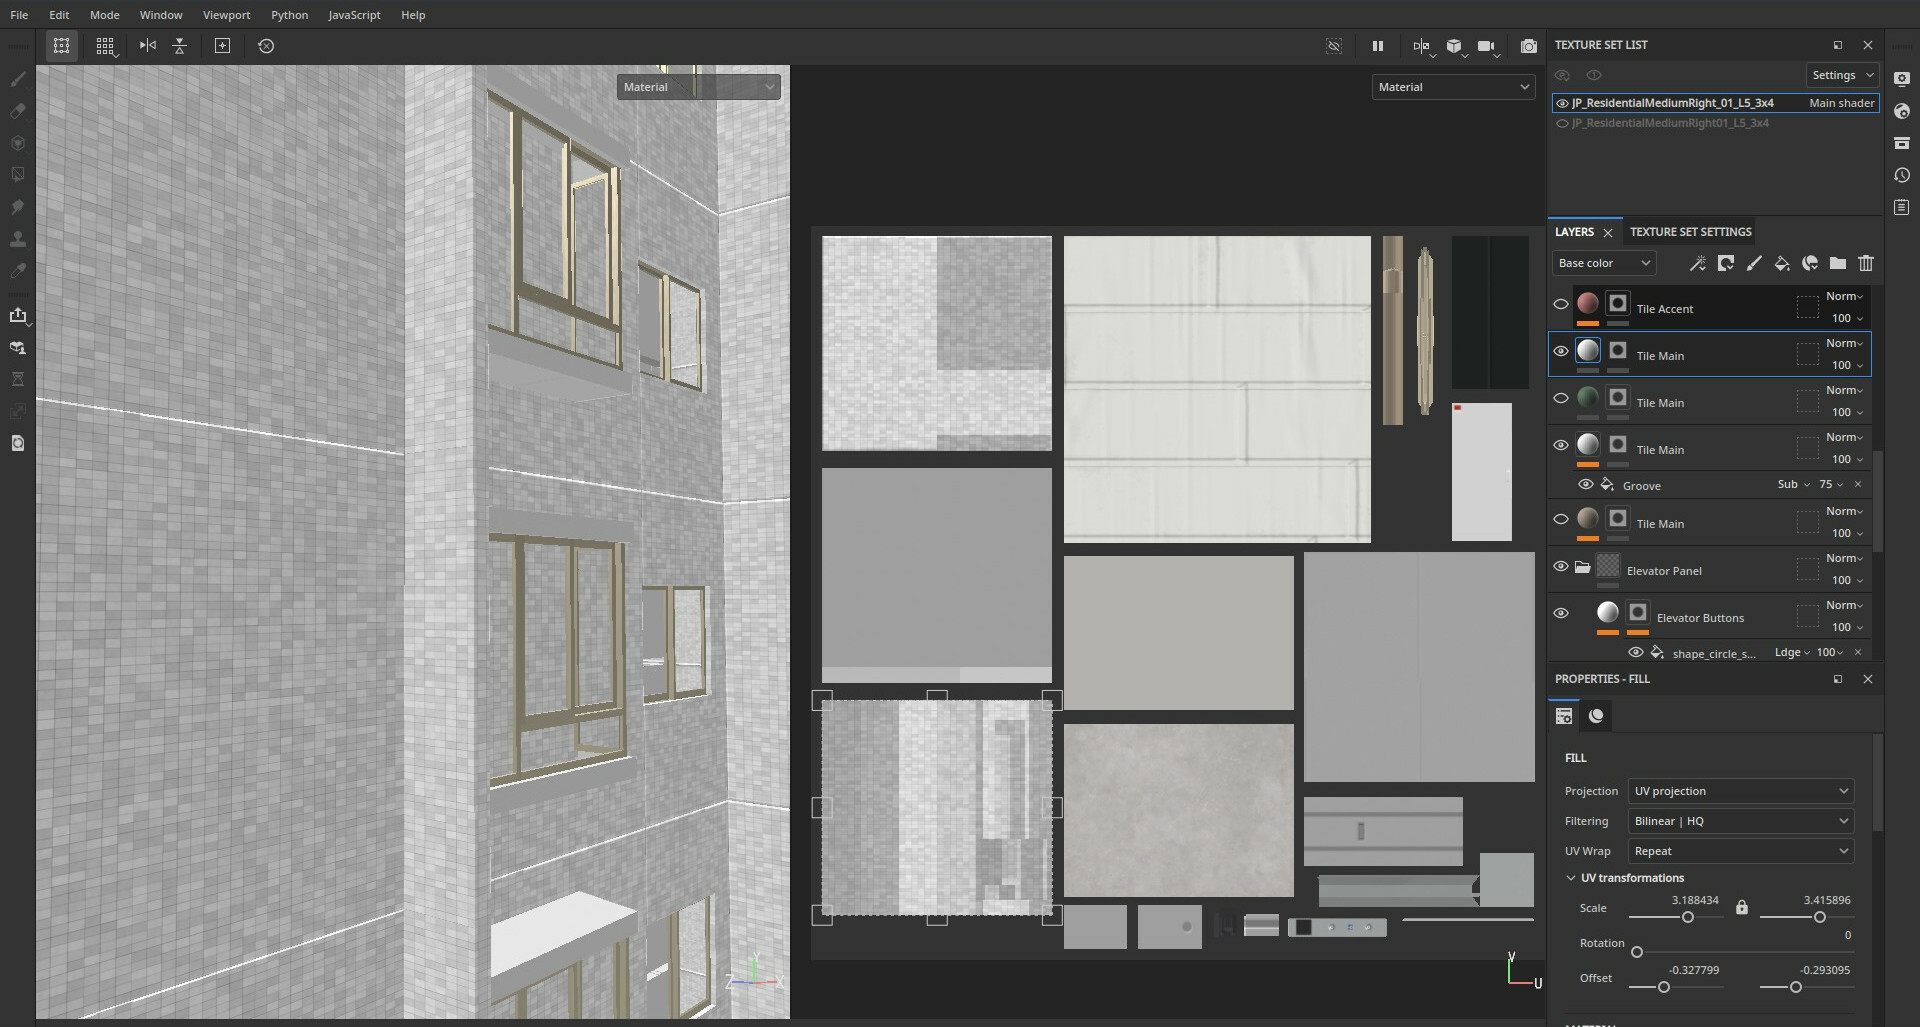
Substance Painter in action. The base color is left white for the option of “repaintability”.
The true gem for me, however, is Substance Designer.
In contrast to raster image editors like Photoshop, crafting (or modifying) textures requires amalgamating layers, which often causes them to interact in undesirable, unpredictable, or untrackable manners. Updating changes across a diffuse texture alongside specular, normal, color, and others quickly becomes a cumbersome chore. Upon finishing, one often ends up with raster layers that lack reusability across other textures.
Designer, nonetheless, allows the creation of a procedural, lossless texture through a straightforward node workflow. For a very basic illustration, a simple brick wall can be fashioned from a repetitive white rectangle on a black pattern, serving as a height map for autogenerated normals. It can be brightened to yield a specular, or the white parts can be colorized to create a diffuse texture. Here’s the beauty: Variables can be exposed to adjust the number of bricks in the pattern, modify their relative sizes, or apply different colors, all with a simple button click in Substance Painter. Given its mathematical foundation, the texture can be losslessly scaled to any resolution.
Consider elevating complexity. Tools are available to generate rectangles having random tilts, height variations, and offsets. A fine noise pattern can be applied to augment texture to the bricks or mortar. Filters can be added to smudge dirt and grime based on the height map calculations, leading to accumulation at hard edges. All these are merely a few nodes away.
I strongly advocate for asset creators to try it. It appears more daunting than it is. Mastering its use is a worthy pursuit, especially if, like me, you’re fussy about minutiae.

An example of a shutter texture I designed. Versatile for use on different walls.
What’s included?
Firstly, the growables. The incorporated zone types are:
- Low-Density Housing
- Low-Density Business
- Medium Density Housing
- Mixed Housing
Take note that all four zone types, akin to the base game mixed zone, feature corner lots!
Low-Density Housing, considering the larger minimum lot sizes previously mentioned, emphasizes sizable properties in agricultural regions. The level 1 lots start with farm-style gardens, evolving to more suburban-style lawns as they ascend levels. This progression delivers a gratifying sense of wealth build-up and development without altering the lot sizes.

Low-Density Housing, center lots. From front to back: L1, L3, L5.
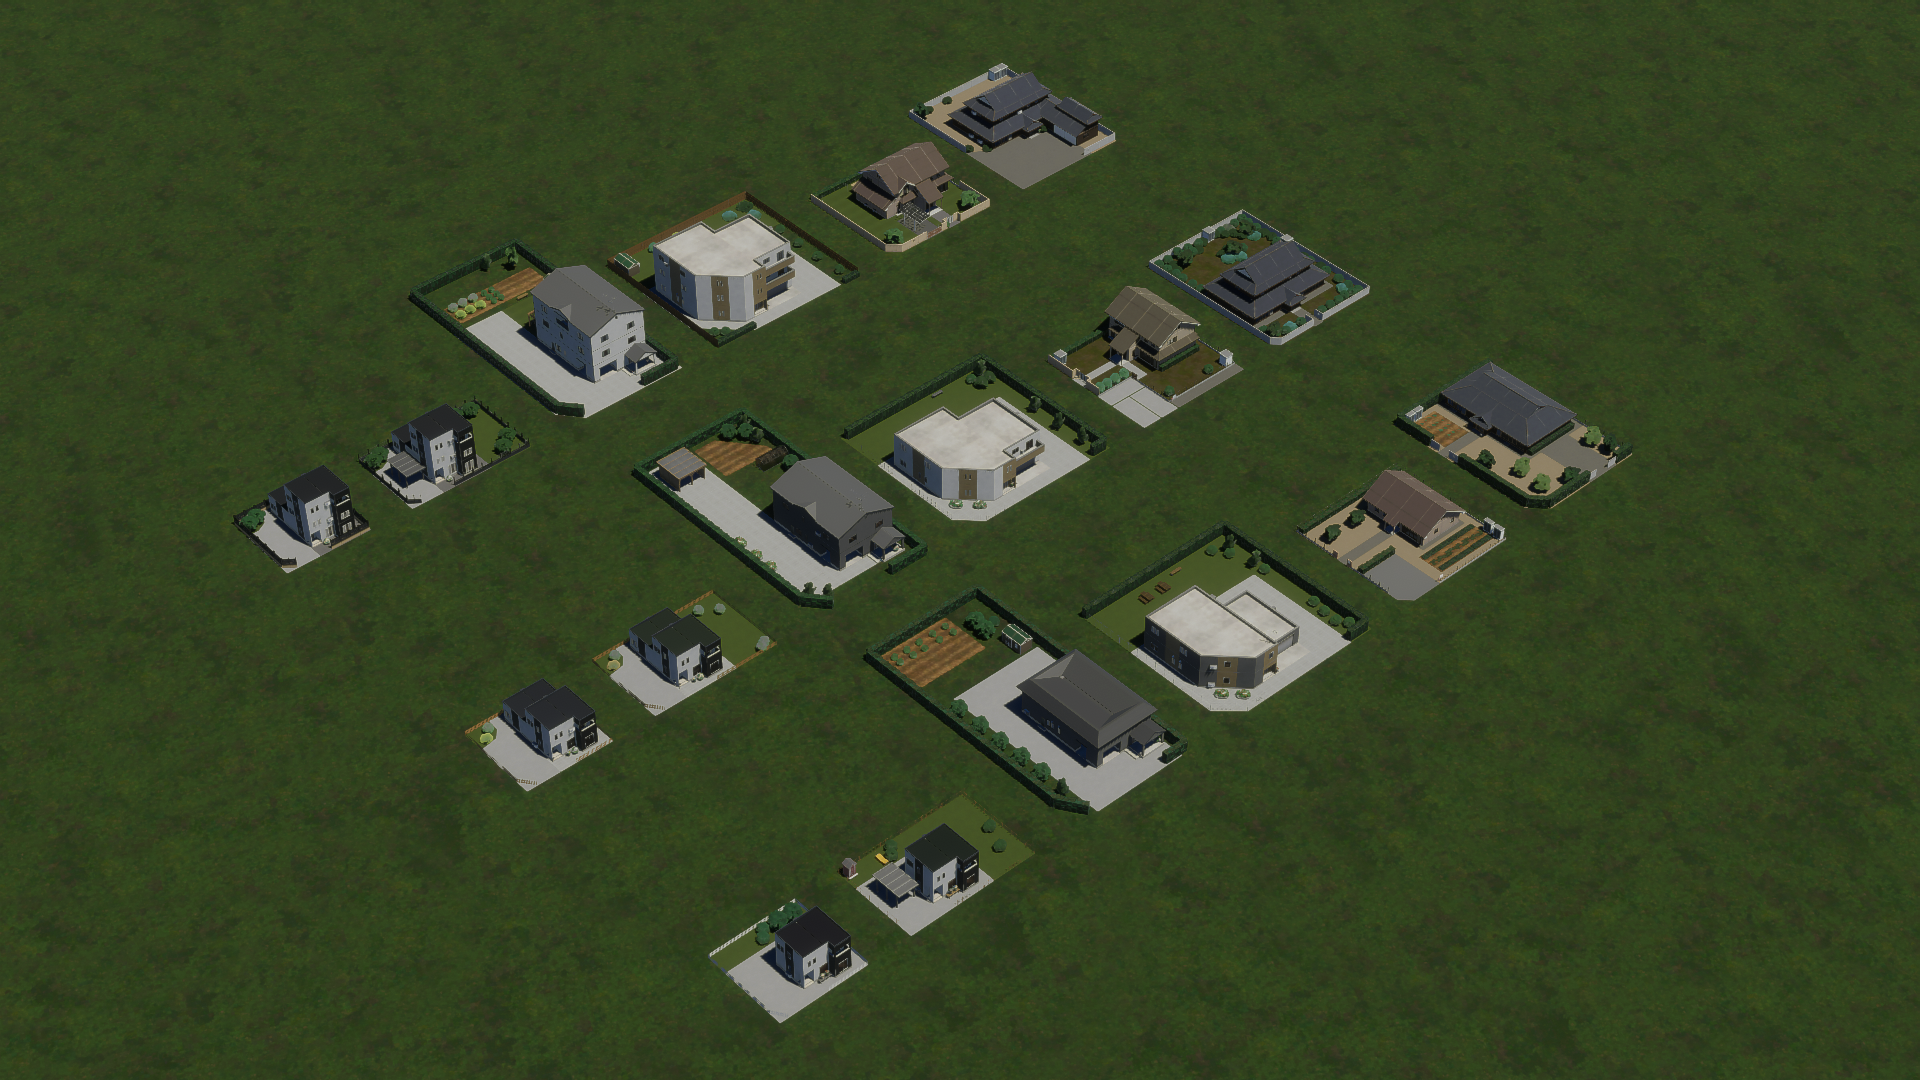
Low-Density Housing, left corner lots. From front to back: L1, L3, L5.
Low-Density Business draws inspiration from car-centric enterprises commonly found along major roadways in rural and suburban locales, notably national highways. Large chain retailers and parking areas… a familiar sight for Americans! (Note: American-sized parking spaces are available separately.)
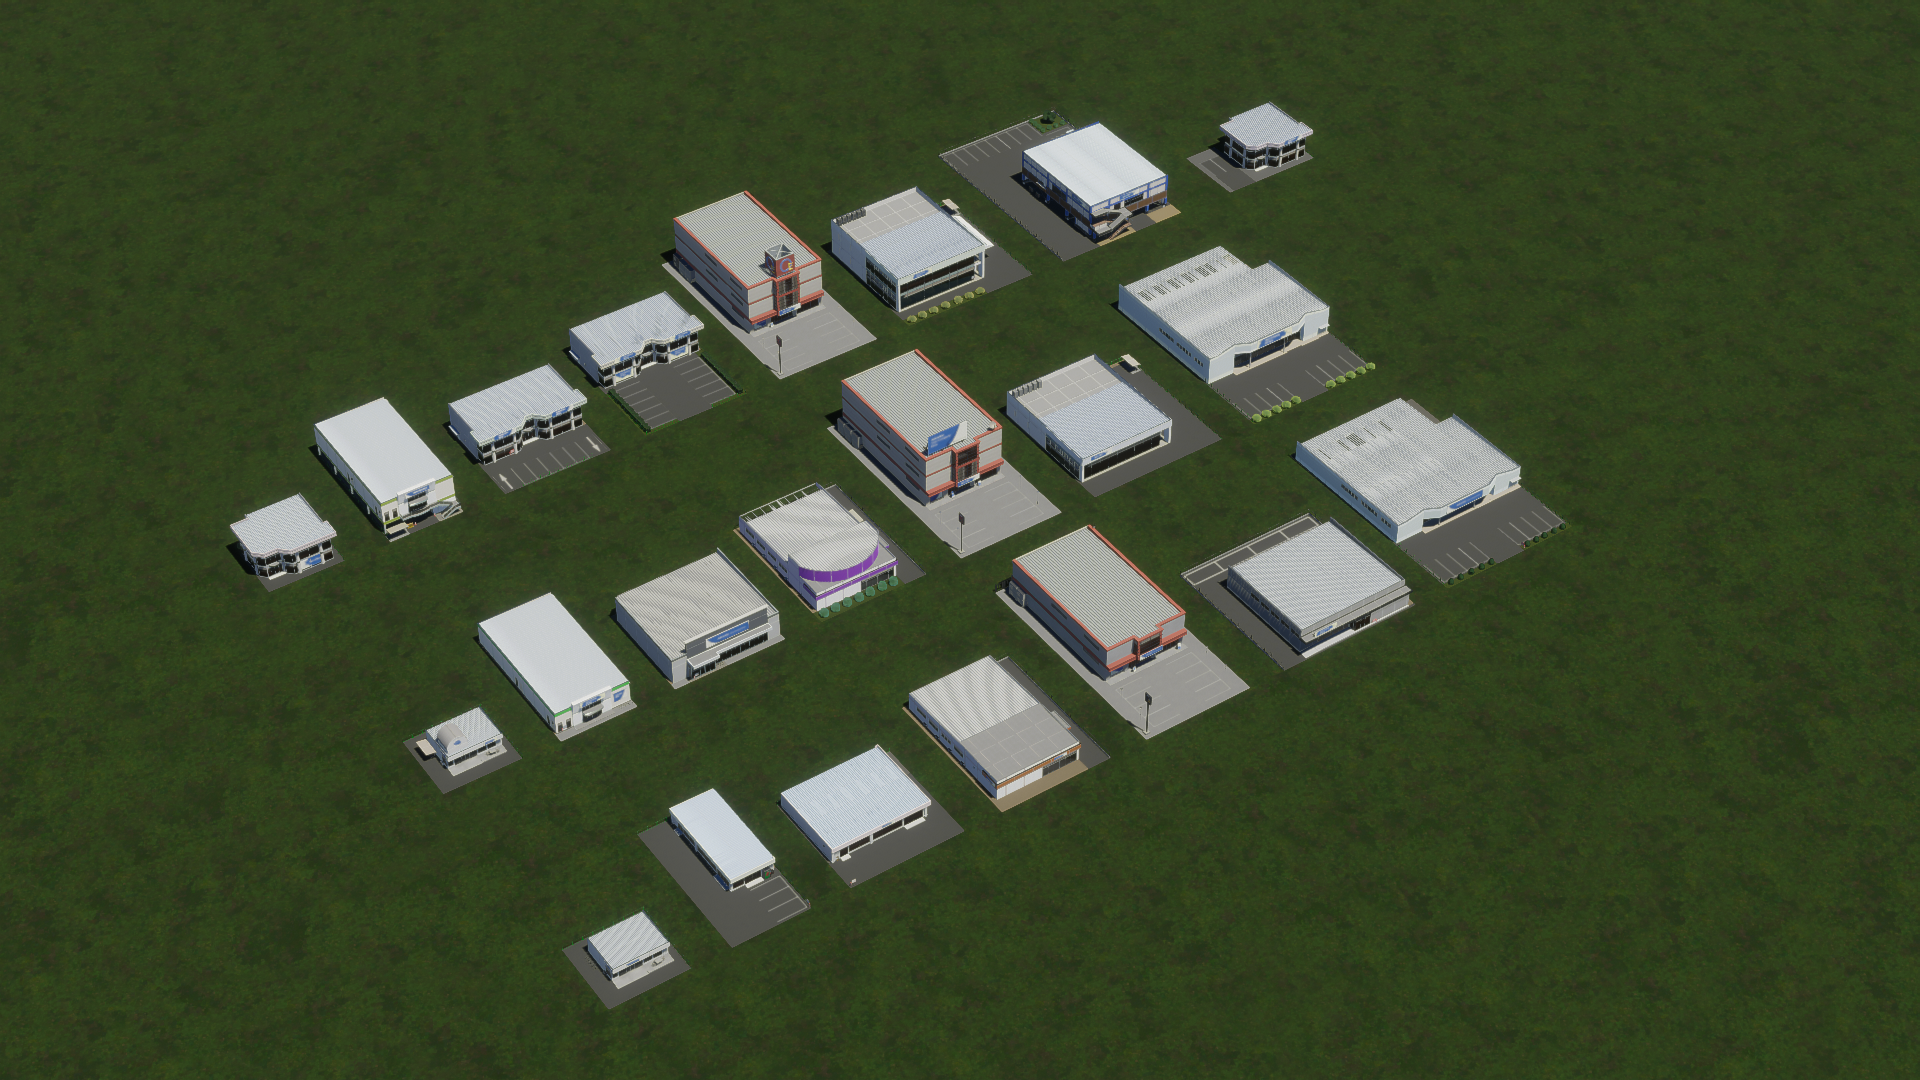
Low-Density Business, center lots. From front to back: L1, L3, L5.
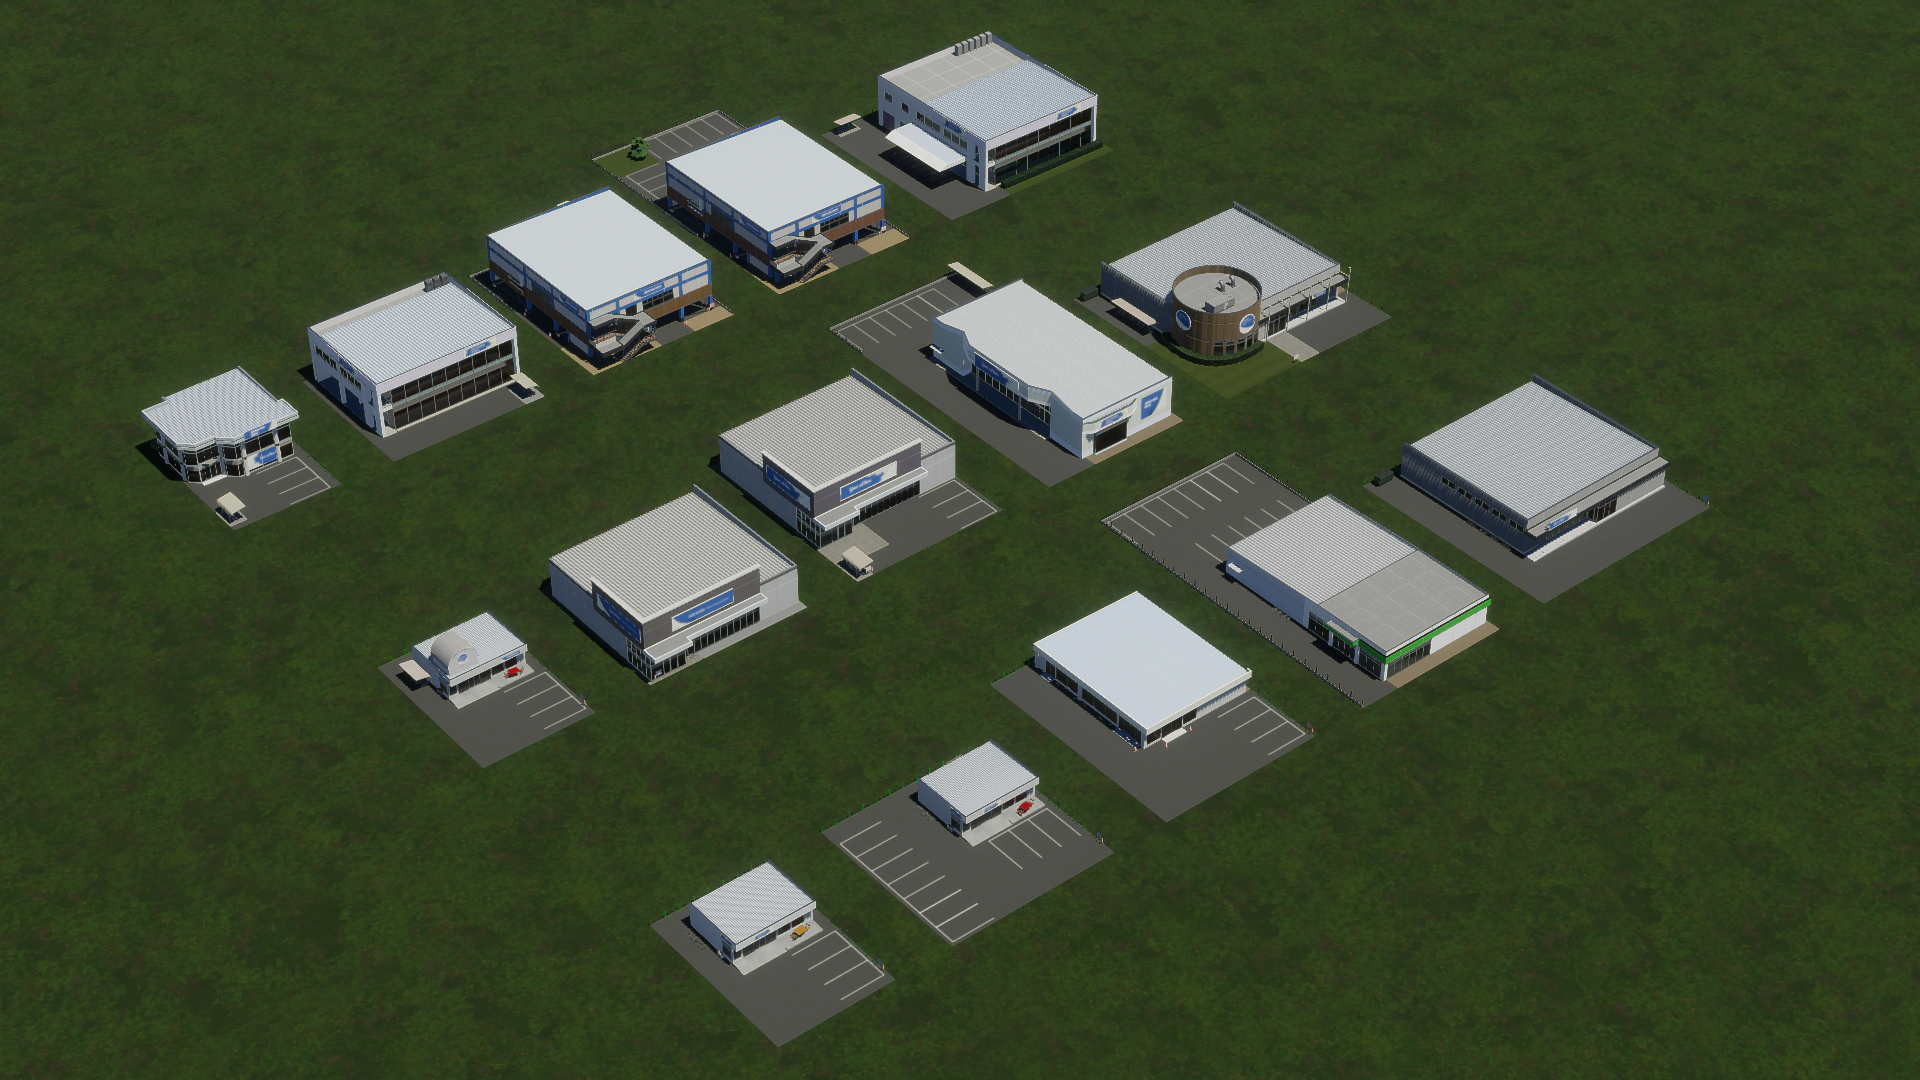
Low-Density Business, left corner lots. From front to back: L1, L3, L5.
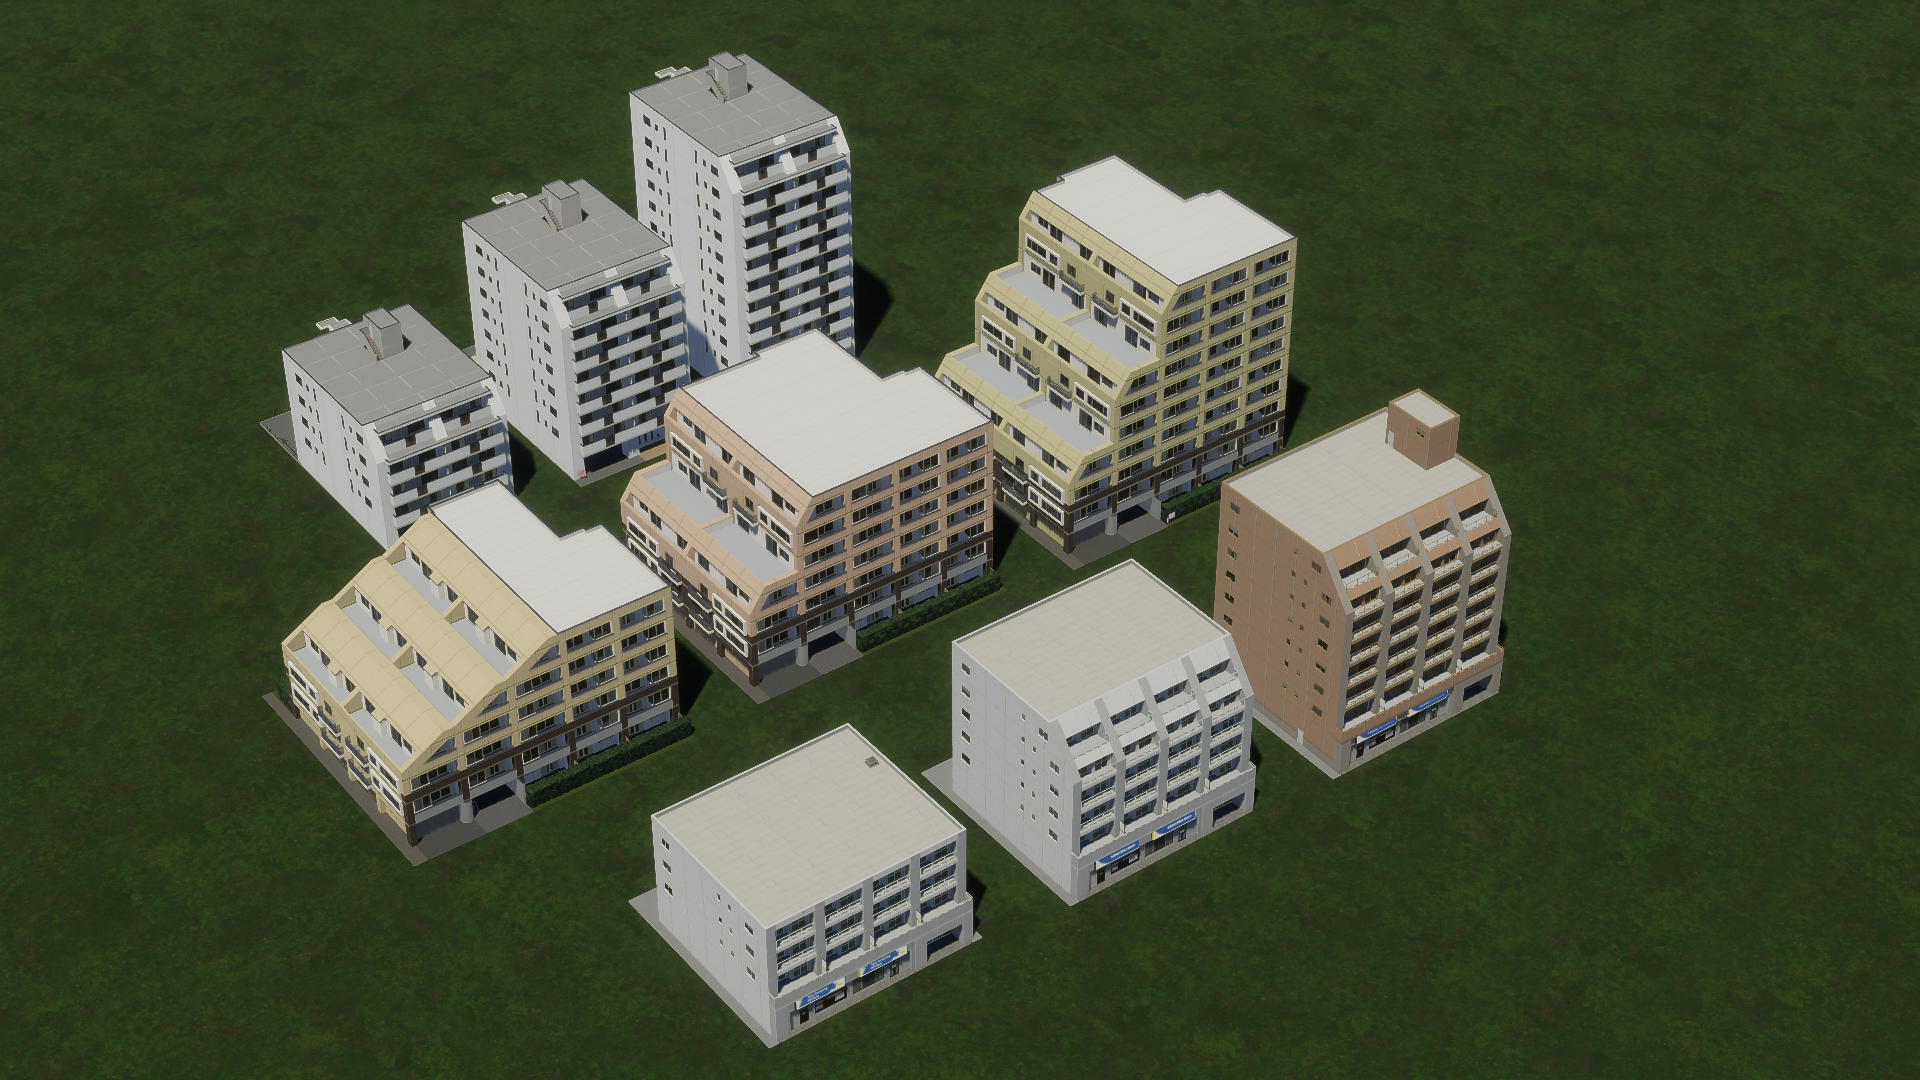
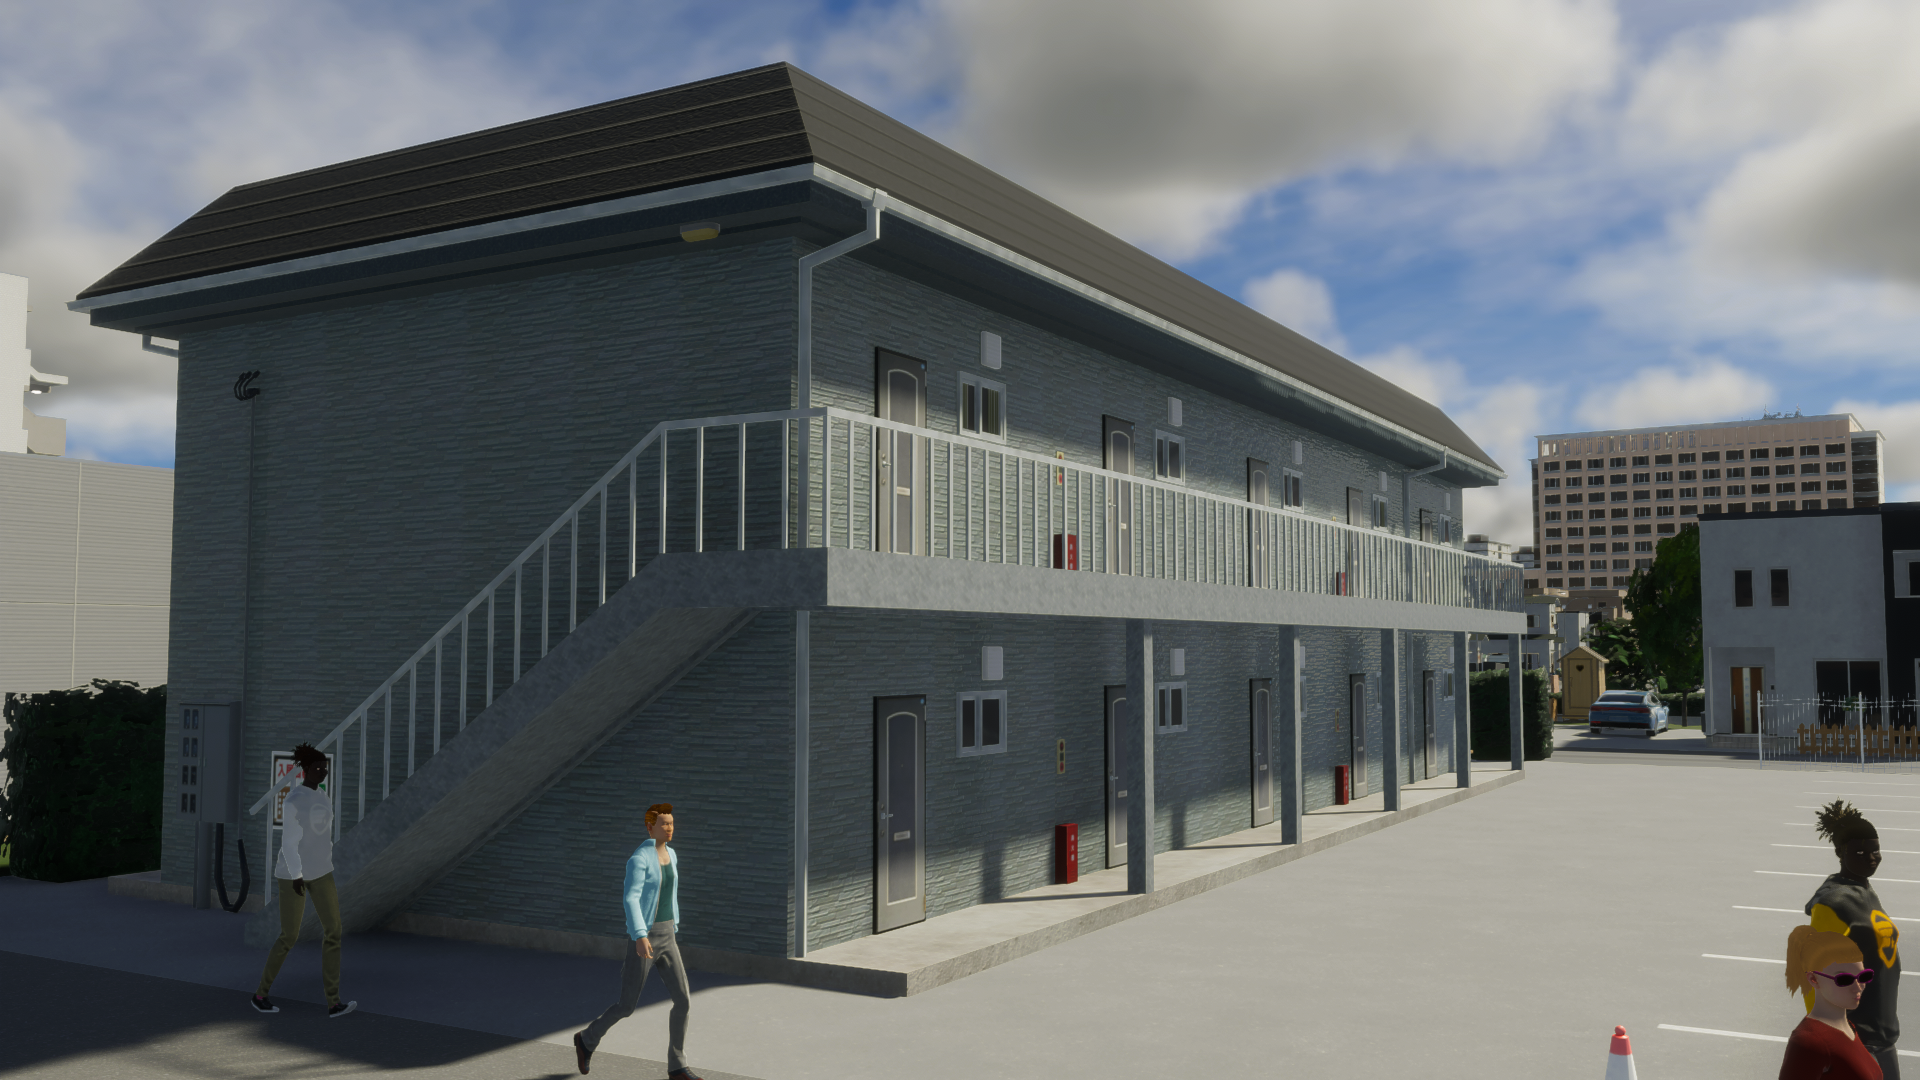
Conversely, the medium-density housing zones are less thematic. From the “mansion” (condo tower) to the “aparto” (two-story studio apartment building) to the “ubiquitous residential-over-commercial mixed building” often seen; these two zone types host a wide assortment of structures.
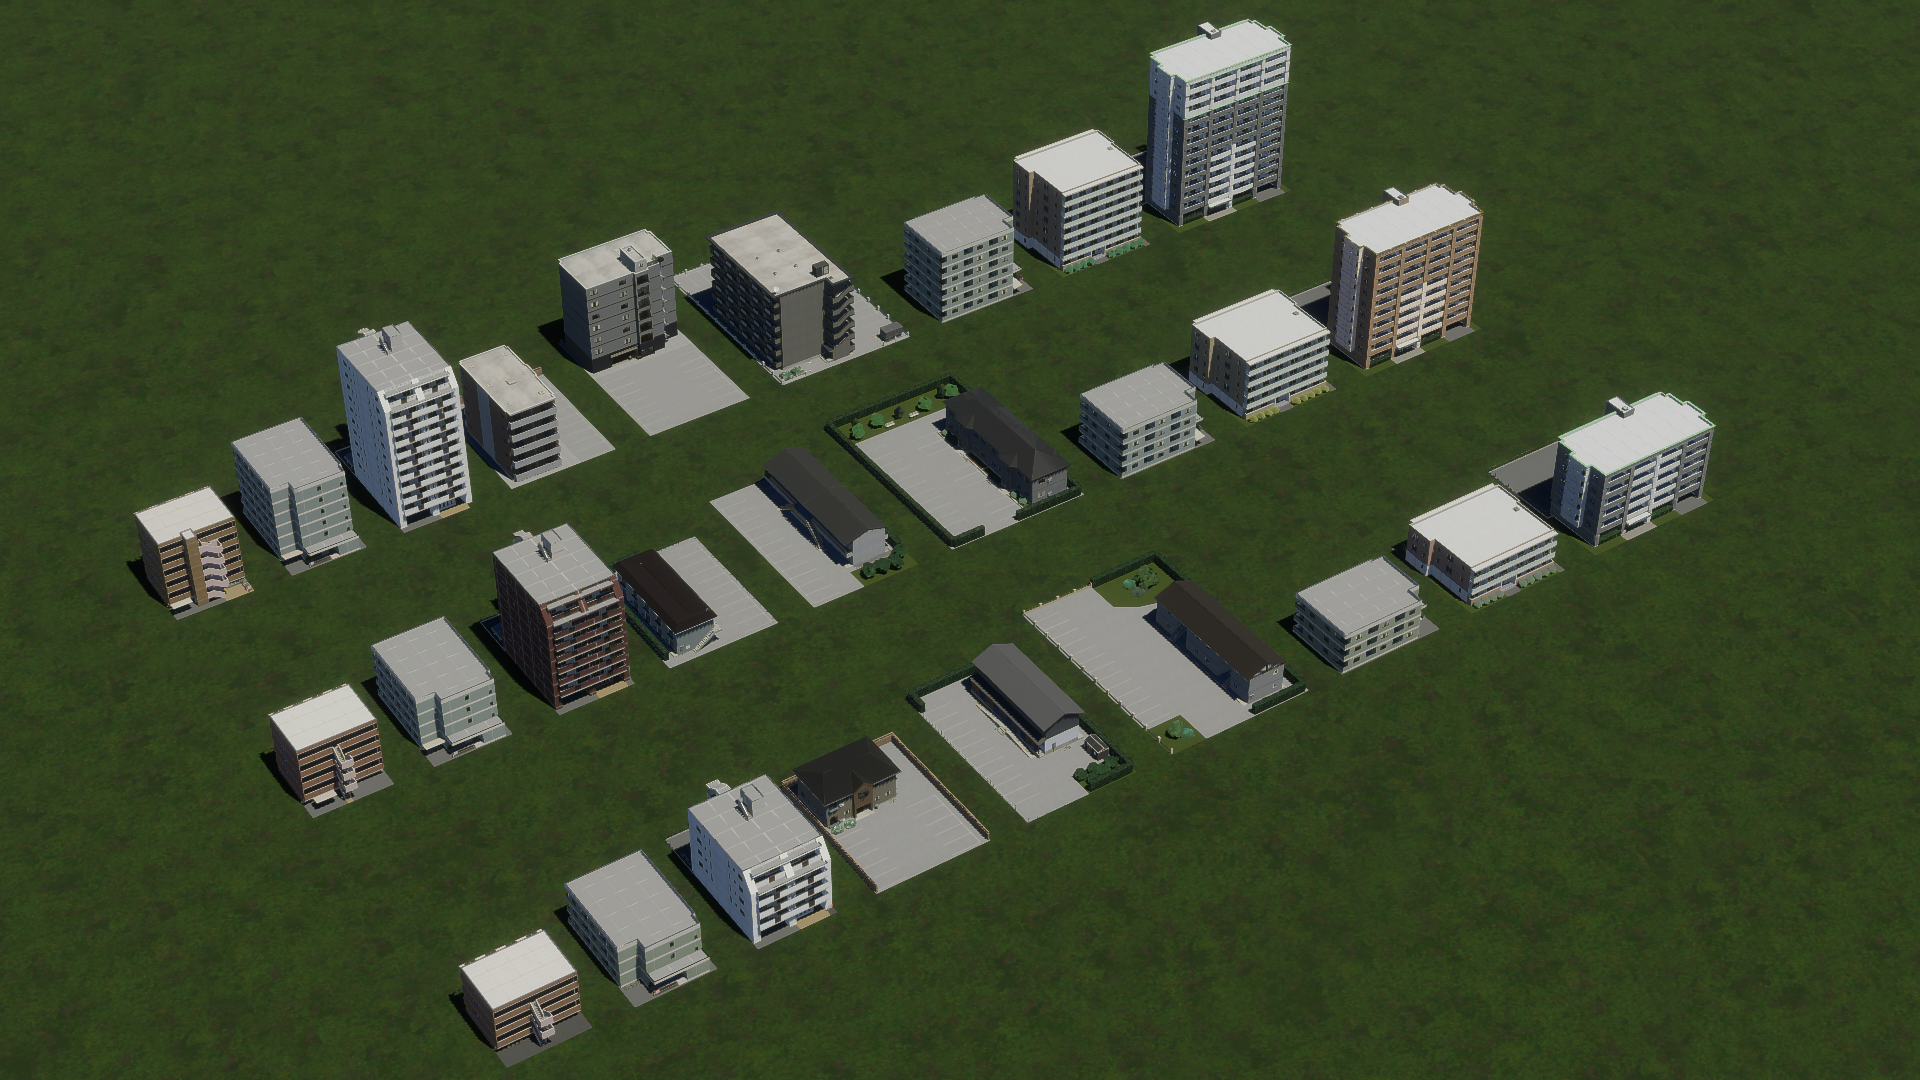
Medium-Density Housing, center lots. From front to back: L1, L3, L5.
Medium-Density Housing, left corner lots. From front to back: L1, L3, L5.
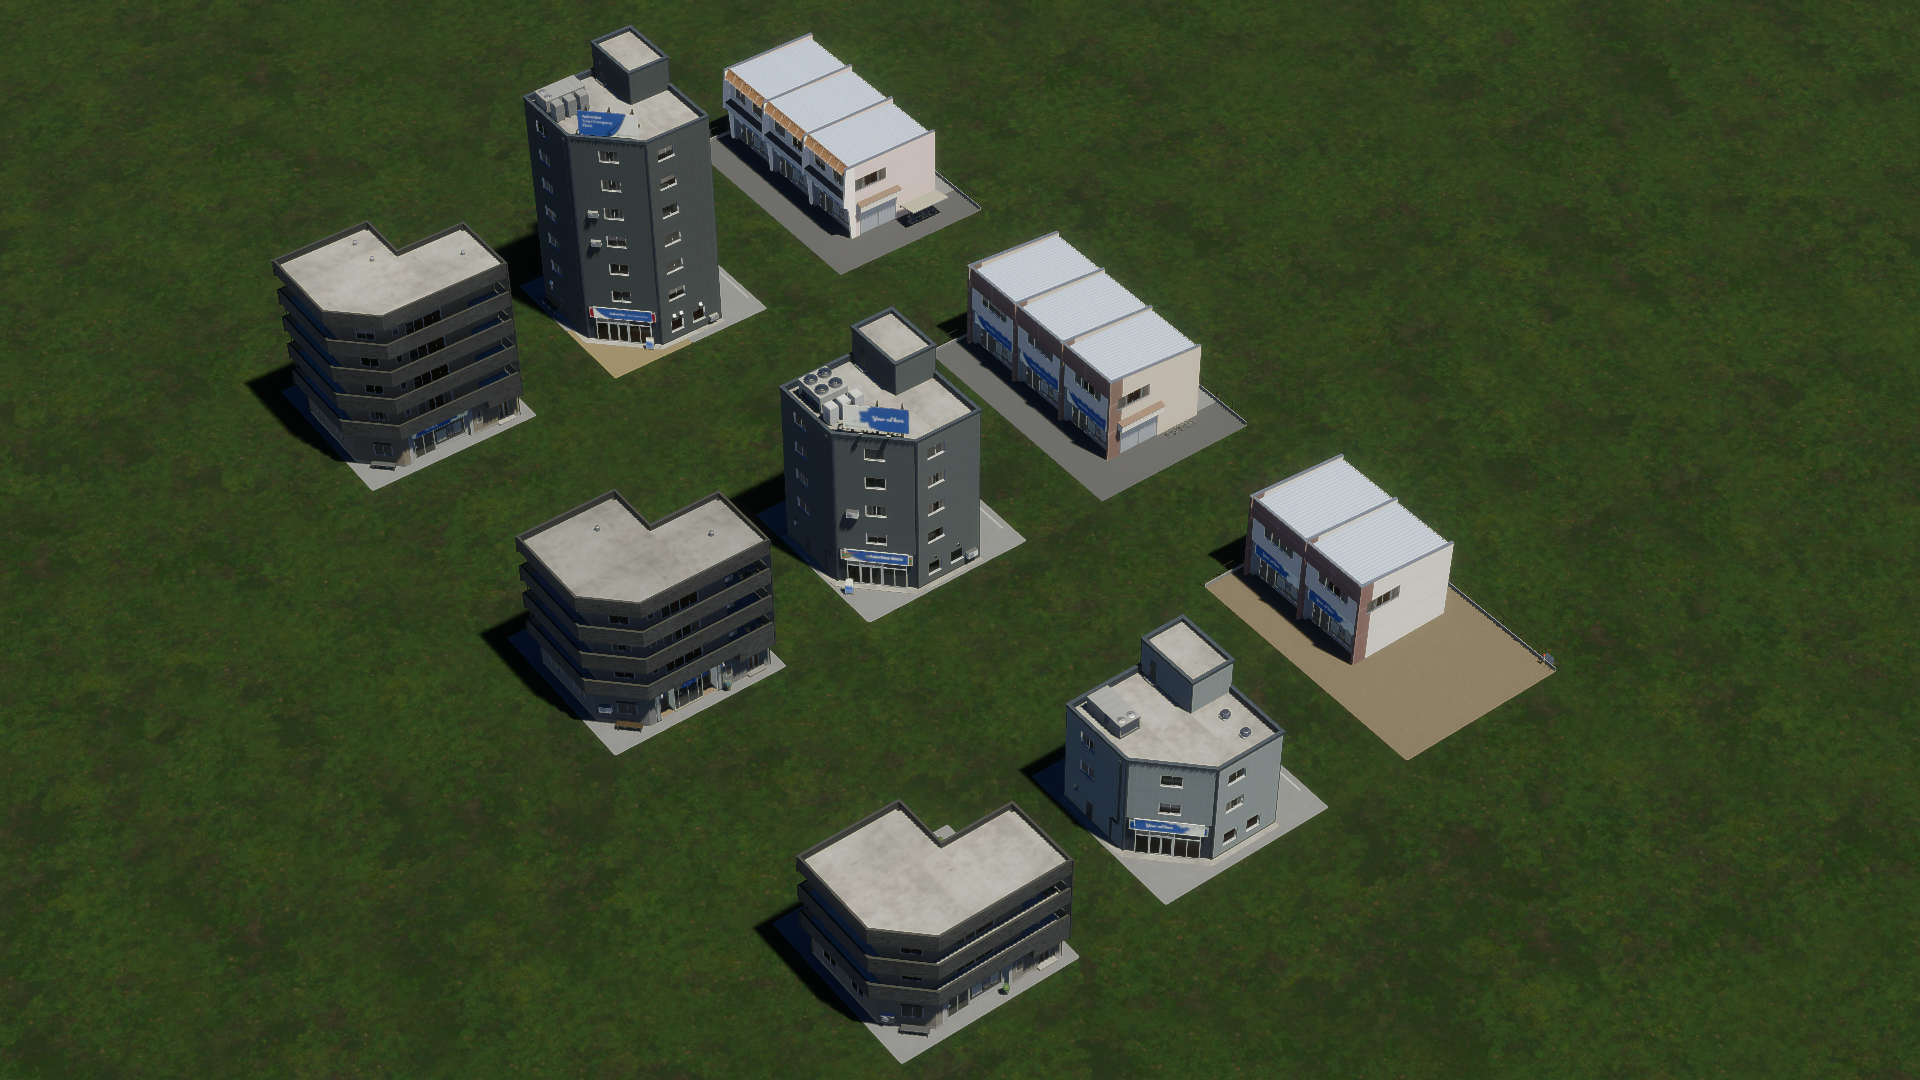
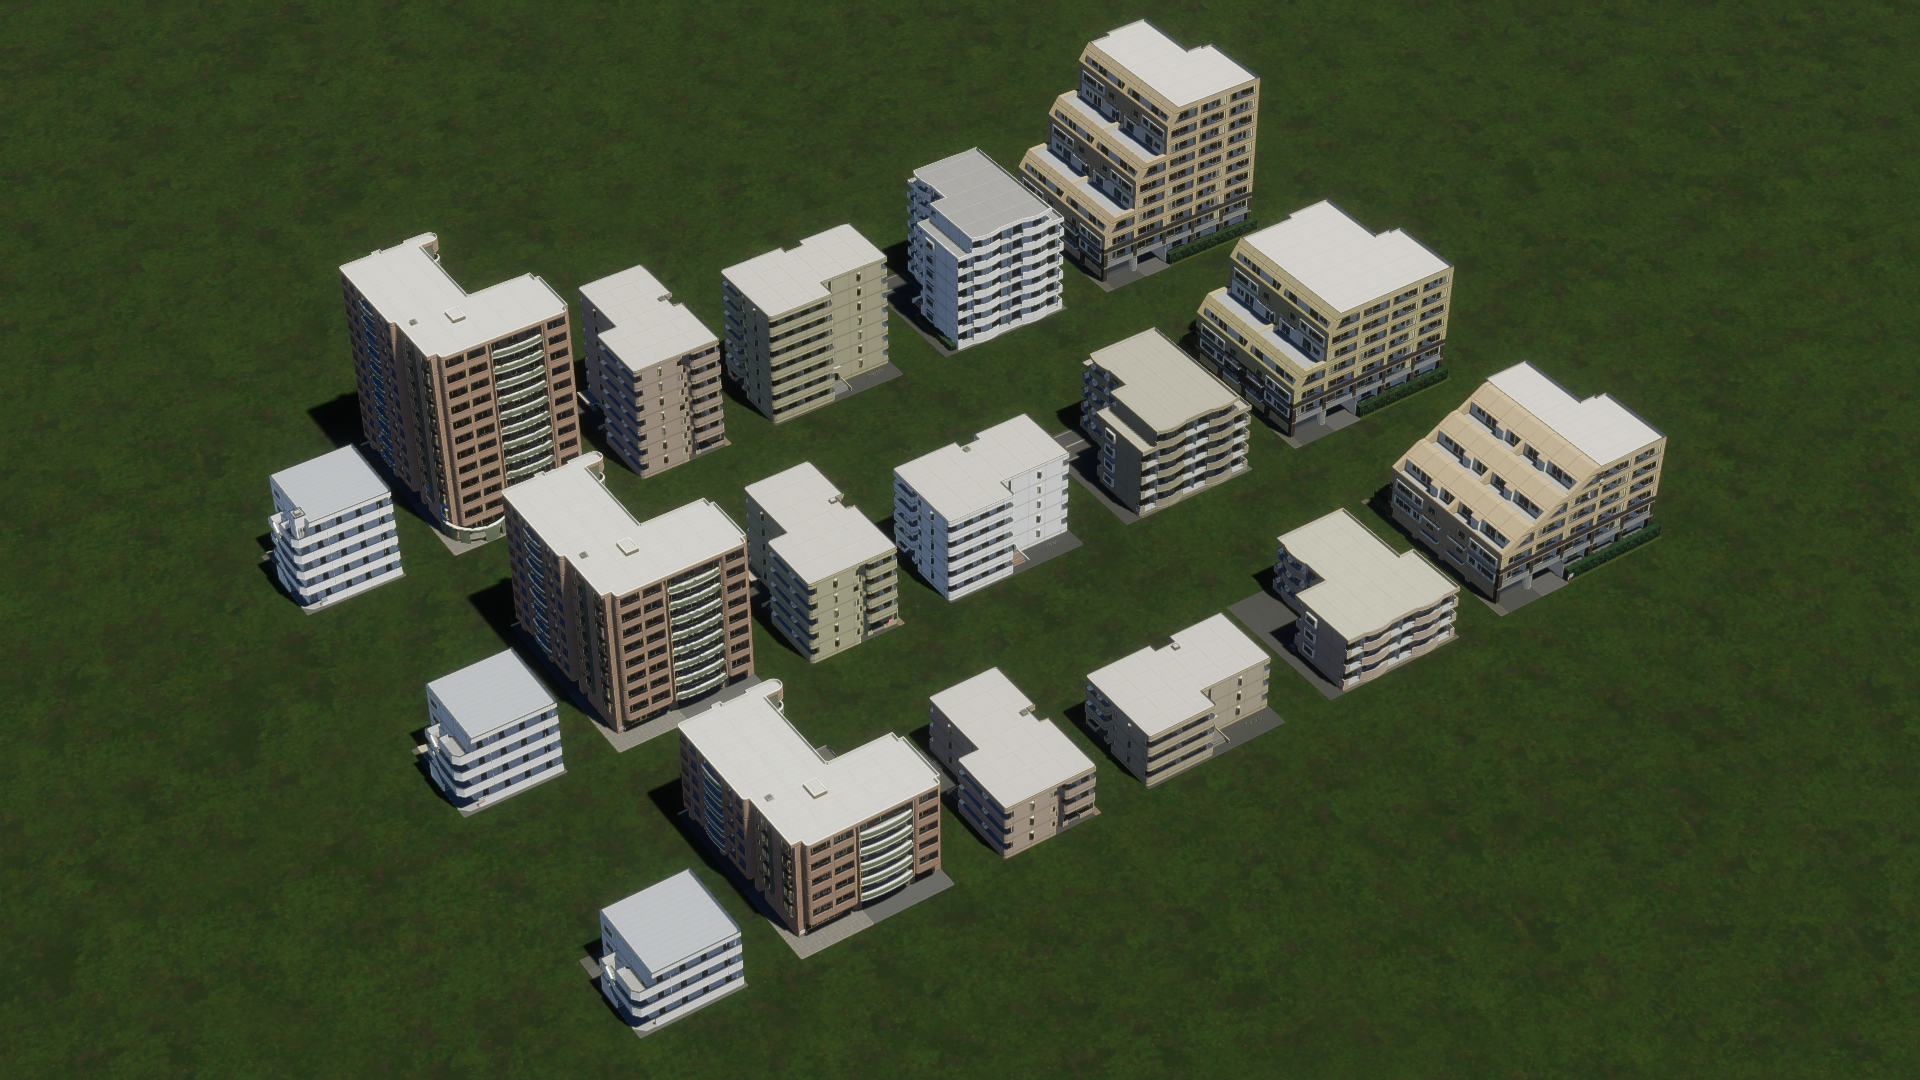
Mixed Housing, center lots. From front to back: L1, L3, L5.
Mixed Housing, left corner lots. From front to back: L1, L3, L5.
Additionally, the following service buildings are available:
- City Hall
- College
- Elementary School
- Fire House
- Fire Station
- High School
- Hospital
- Medical Clinic
- Police Station
- Police HQ
- Post Office
- Radio Mast
- Recycling Center
- University
- Water Treatment Plant
- Welfare Office
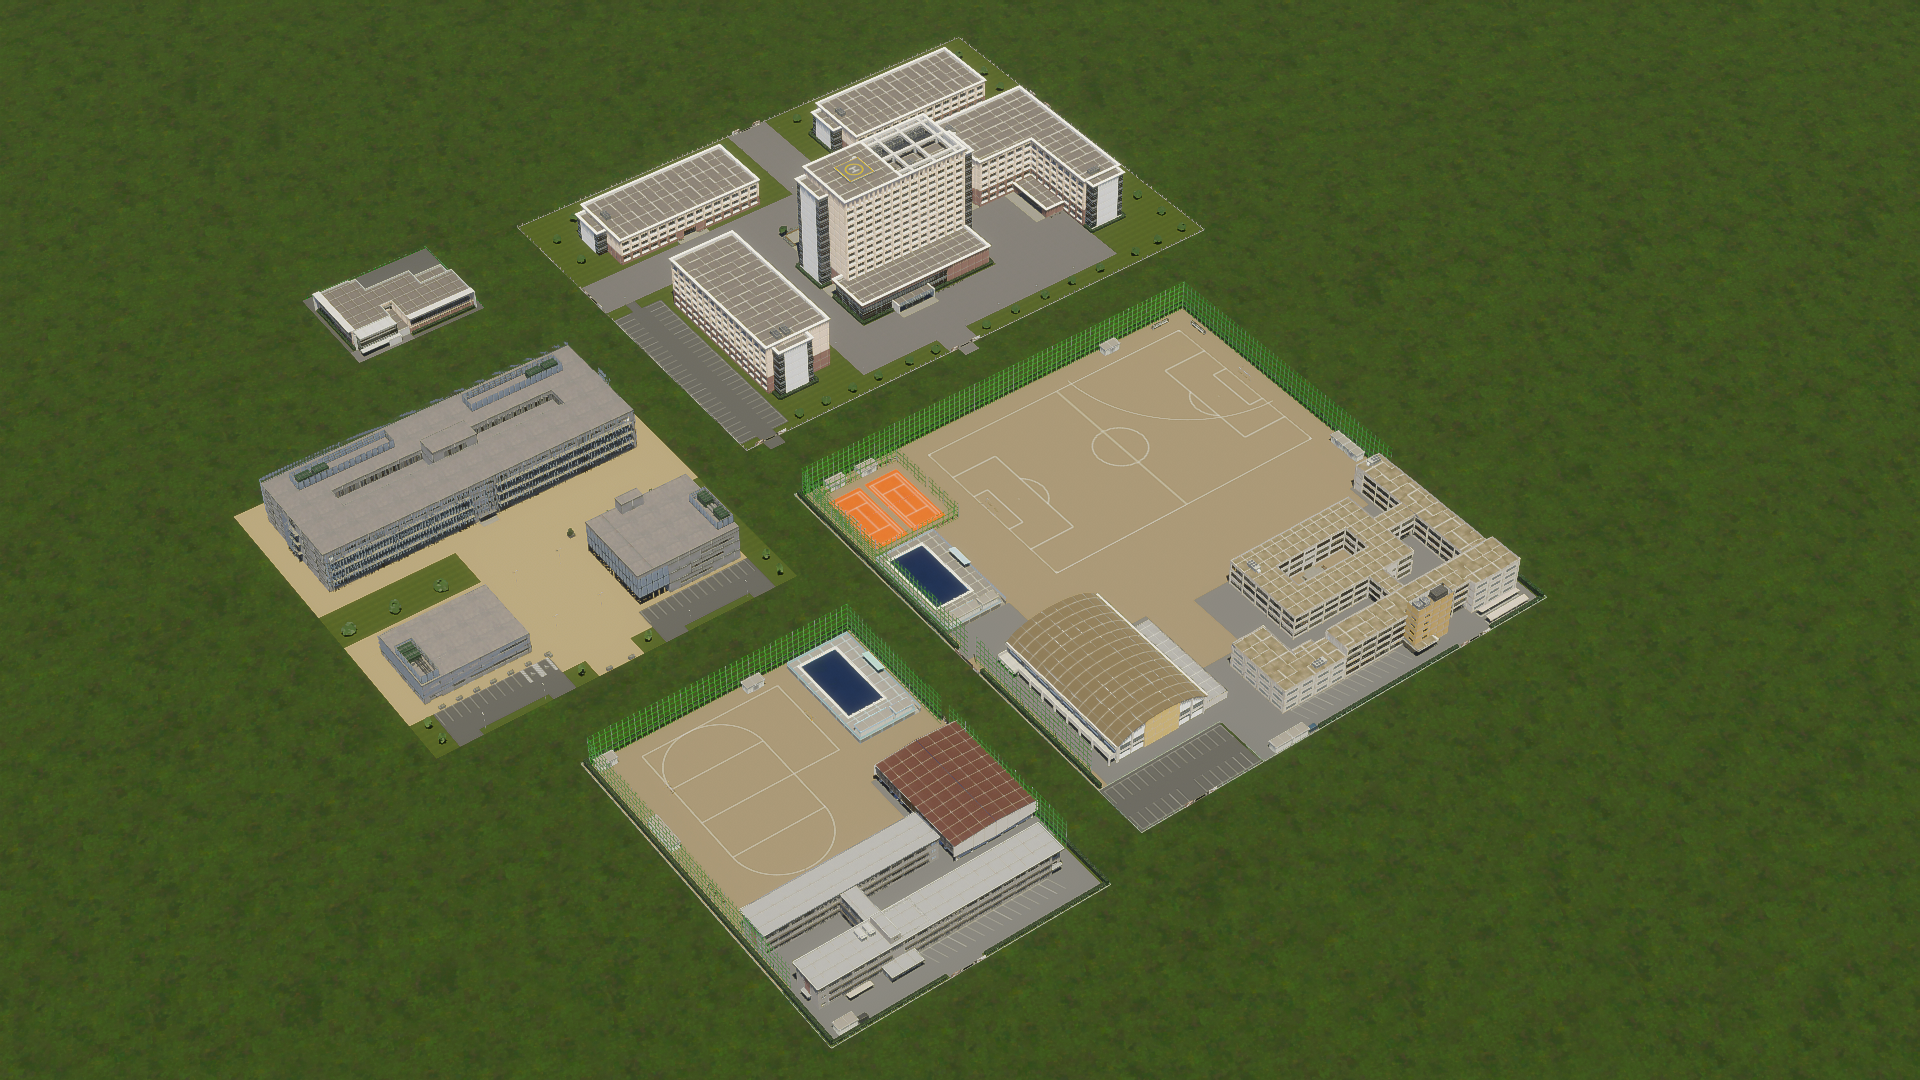
Educational buildings, clockwise from top: University, high school, elementary school, college,
university library.
City hall (left) and welfare office (right).
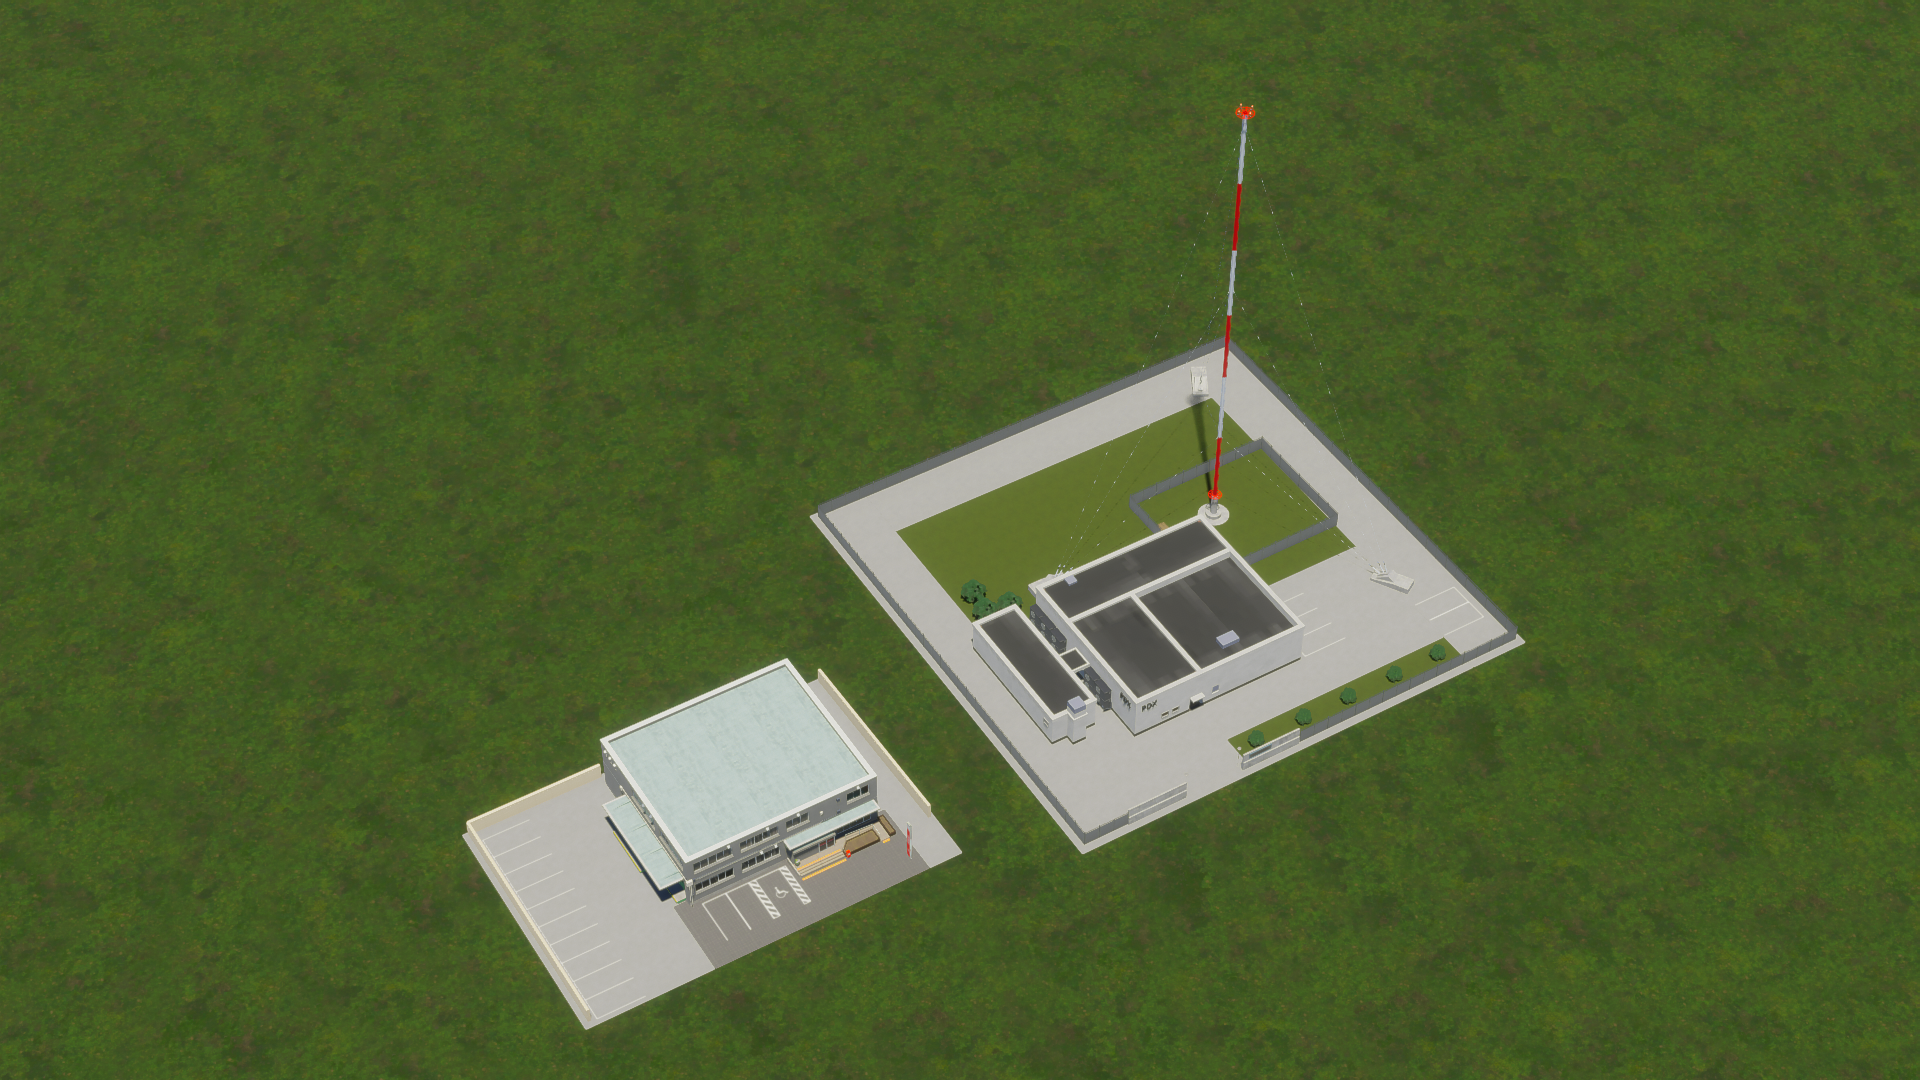
Post office (left) and radio mast (right).
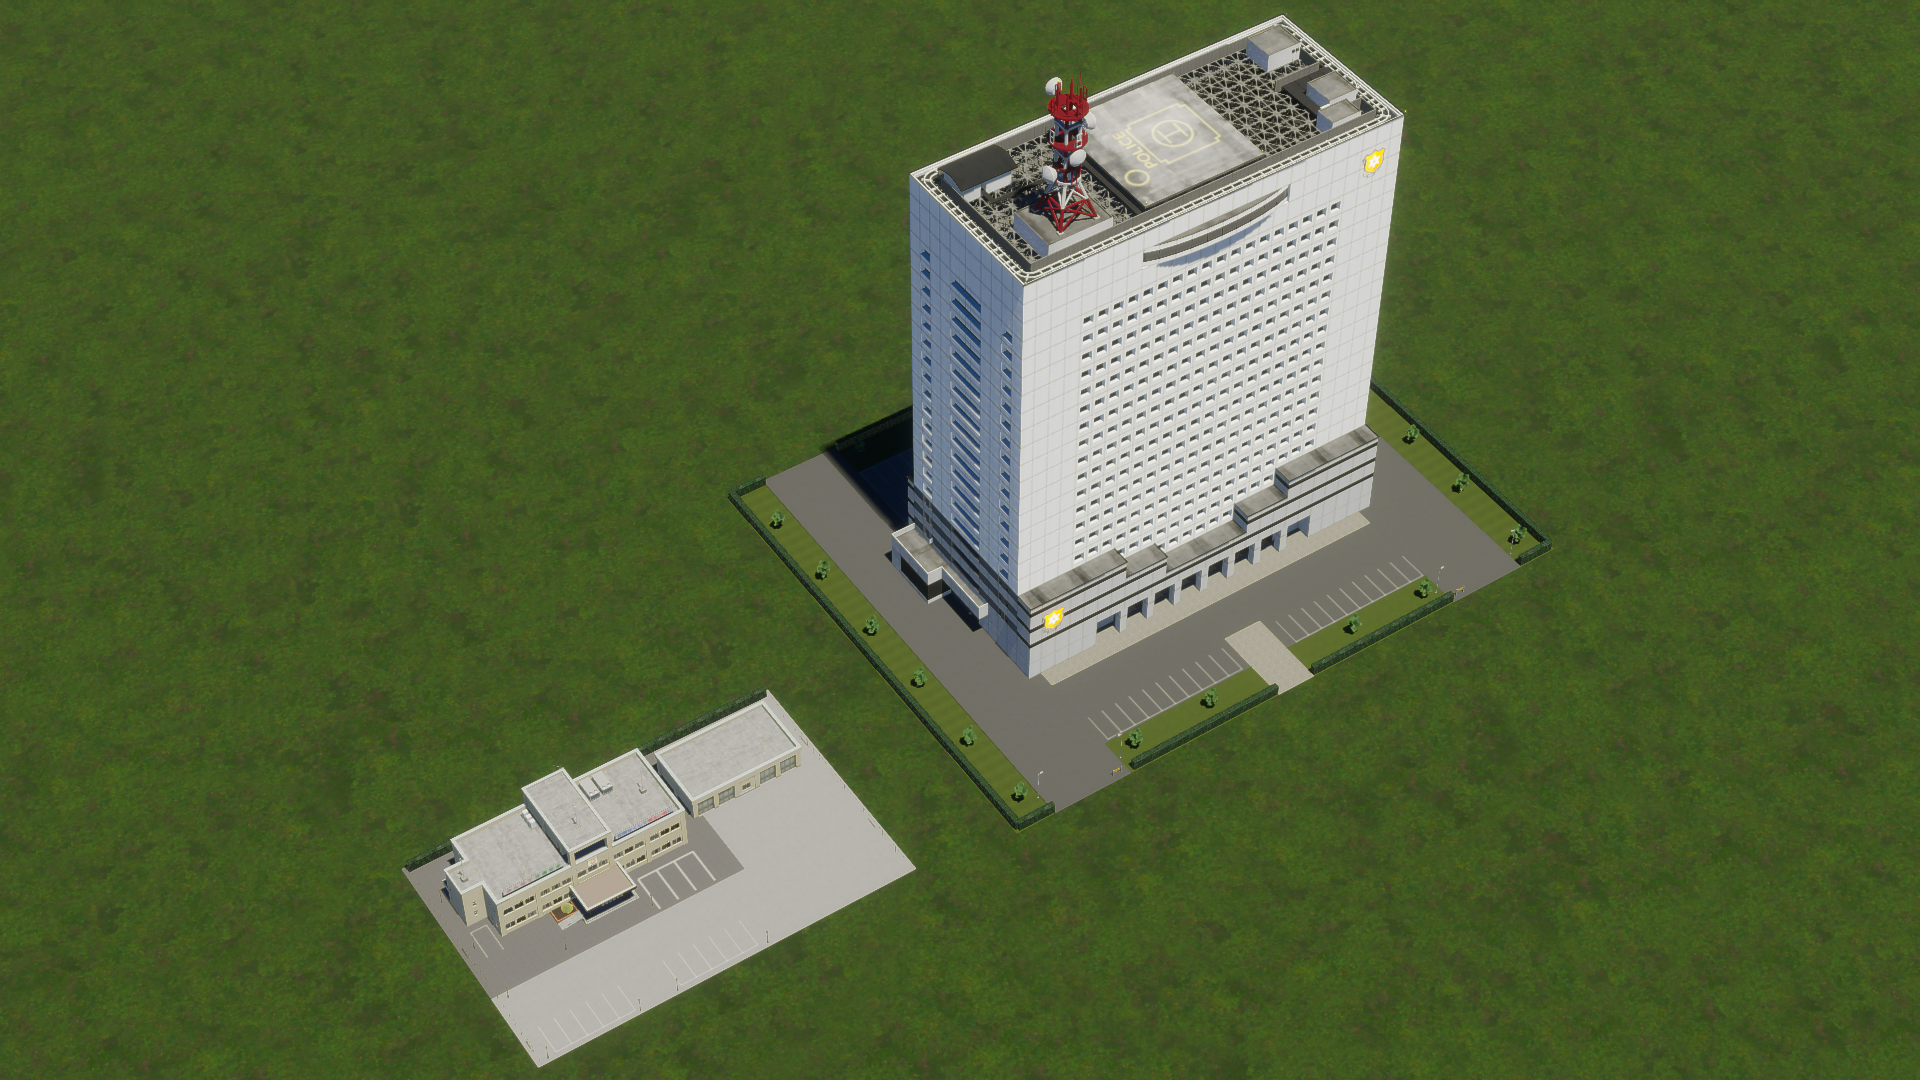
Police station (left) and police HQ (right).
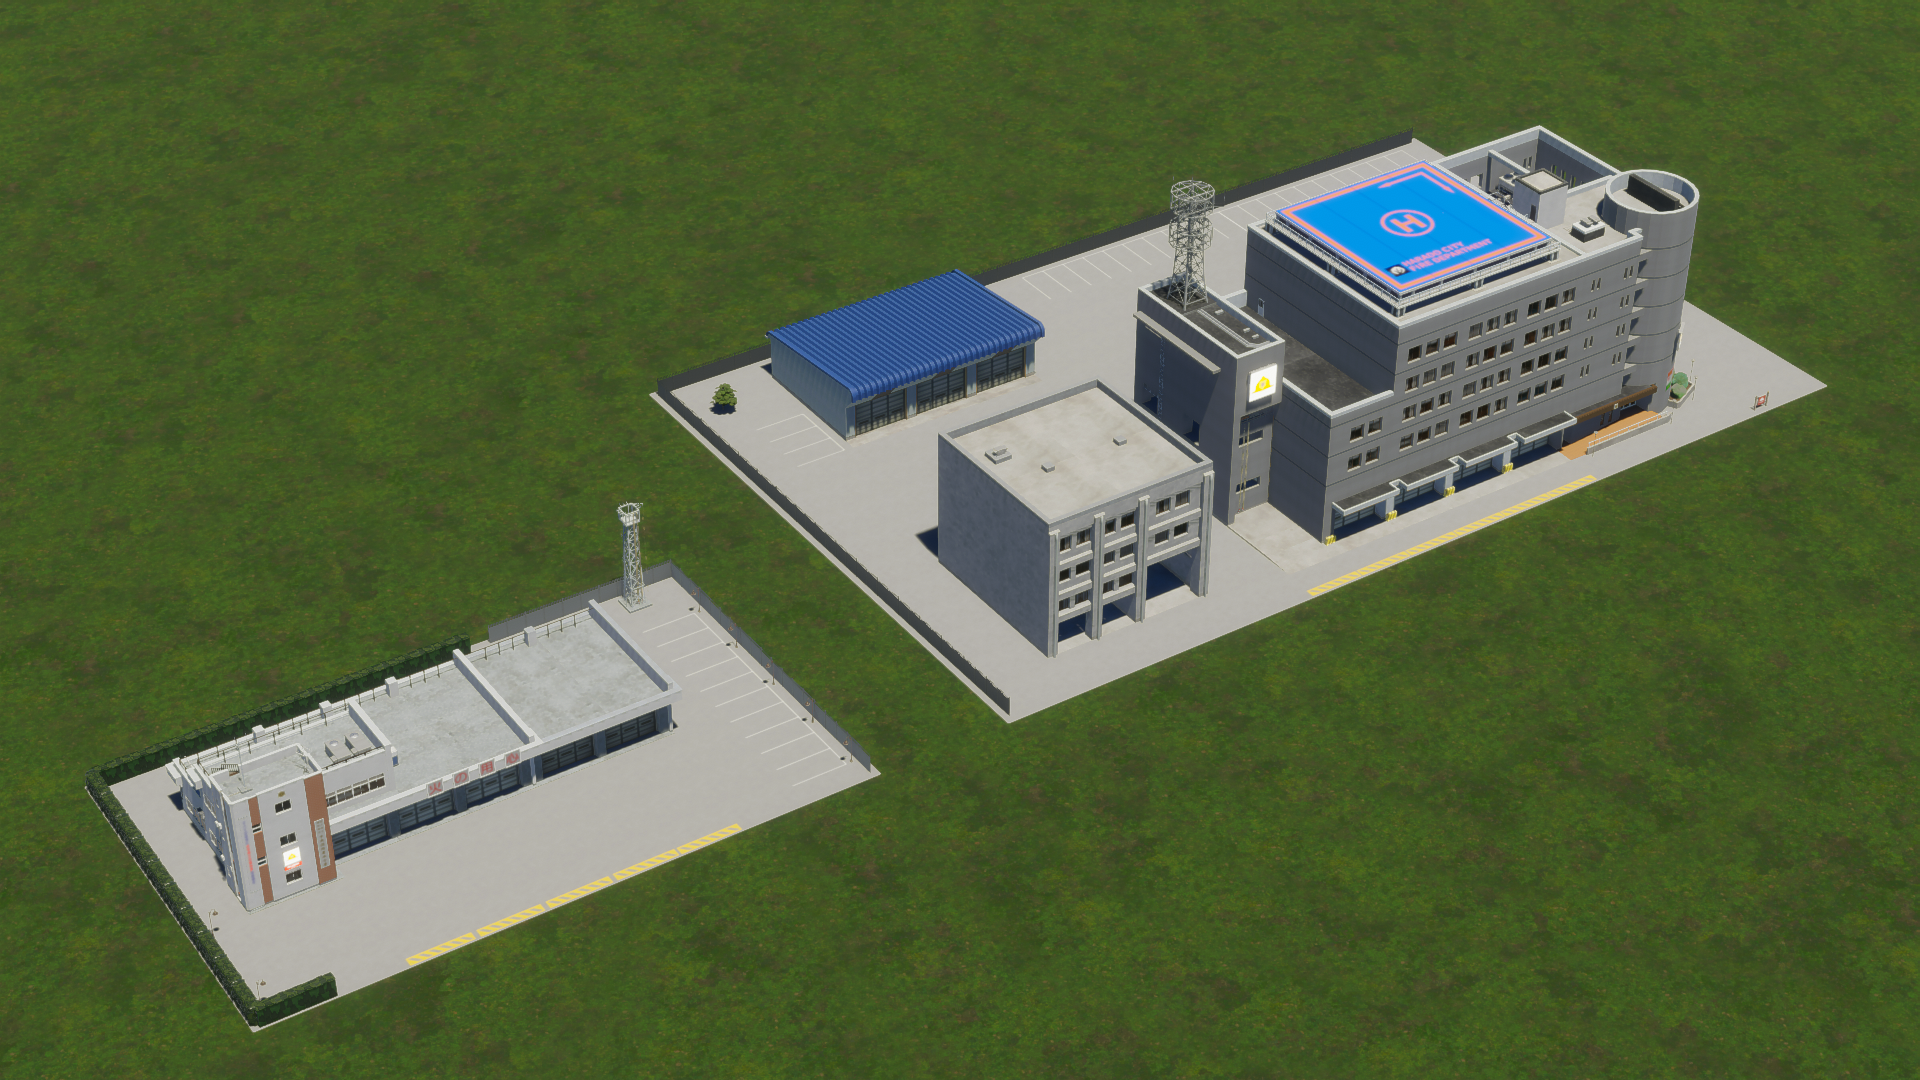
Firehouse (left) and fire station (right).
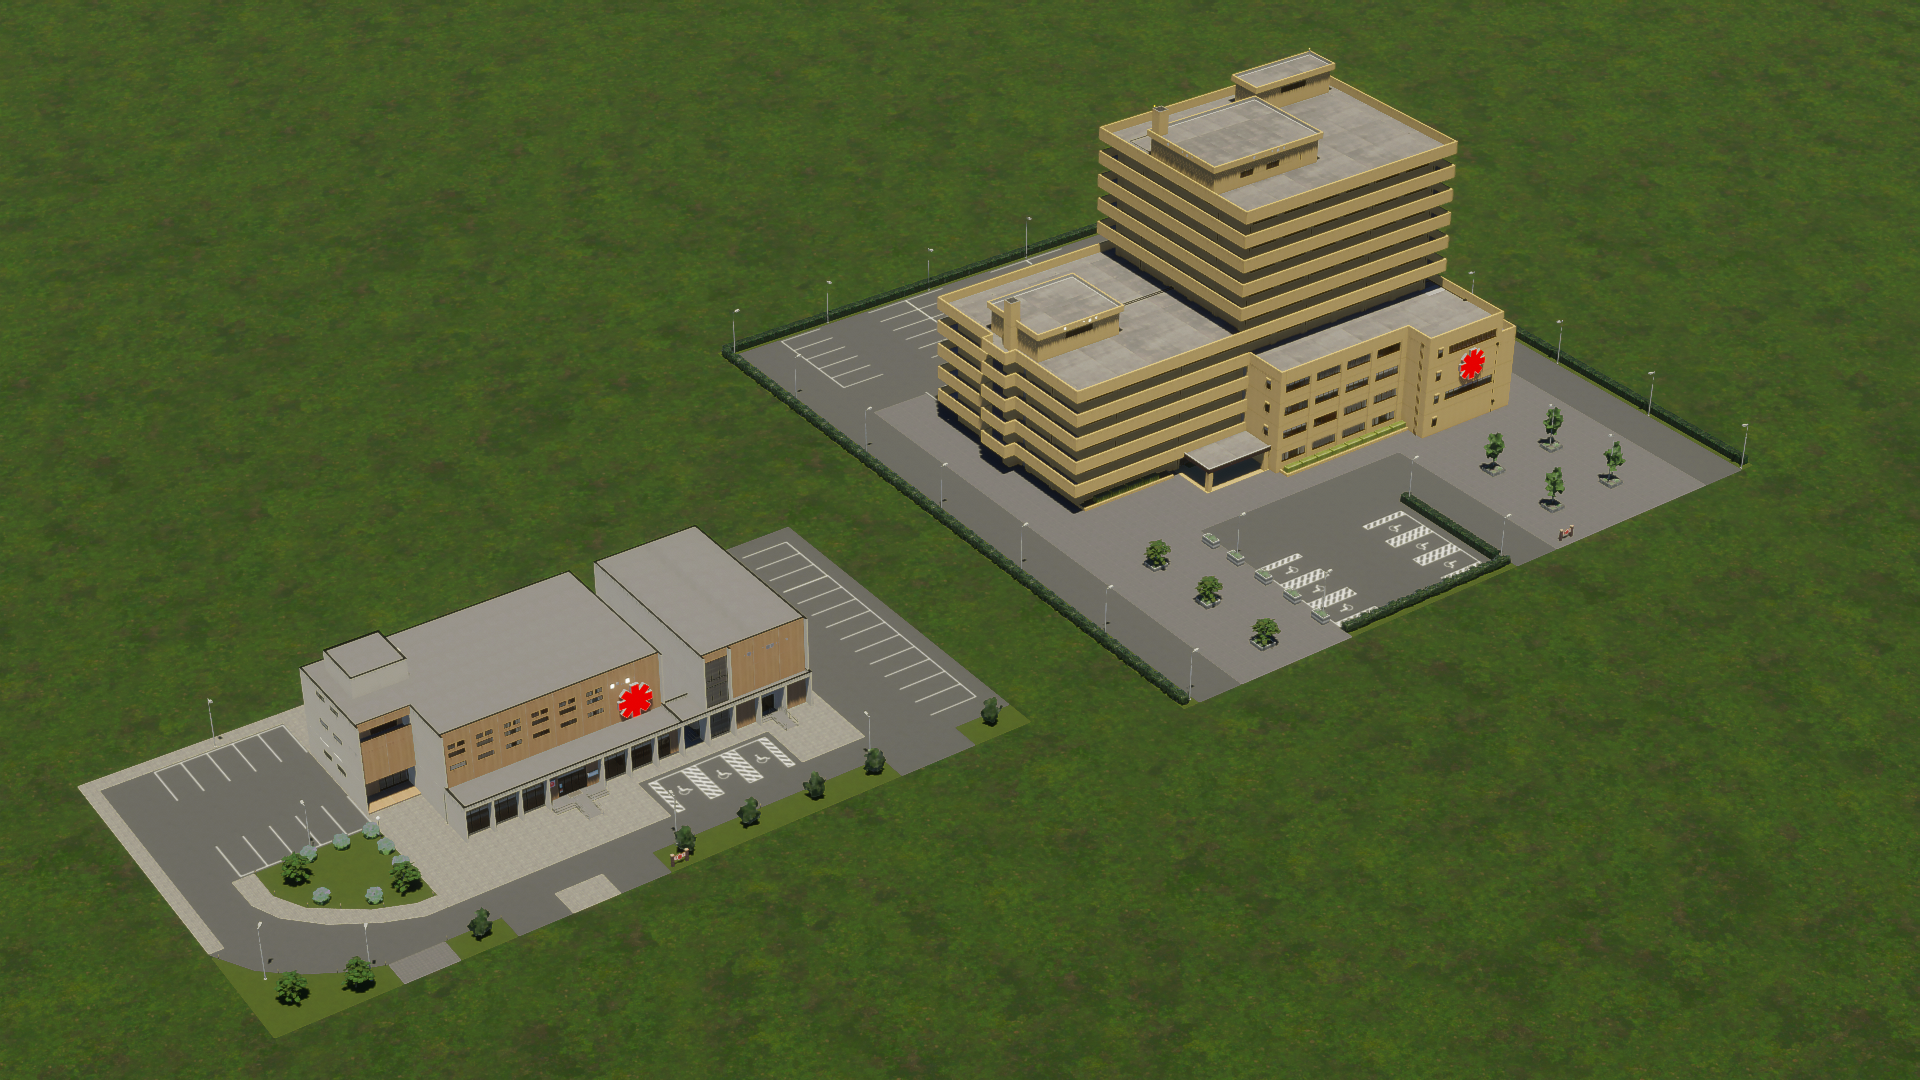
Medical clinic (left) and hospital (right).
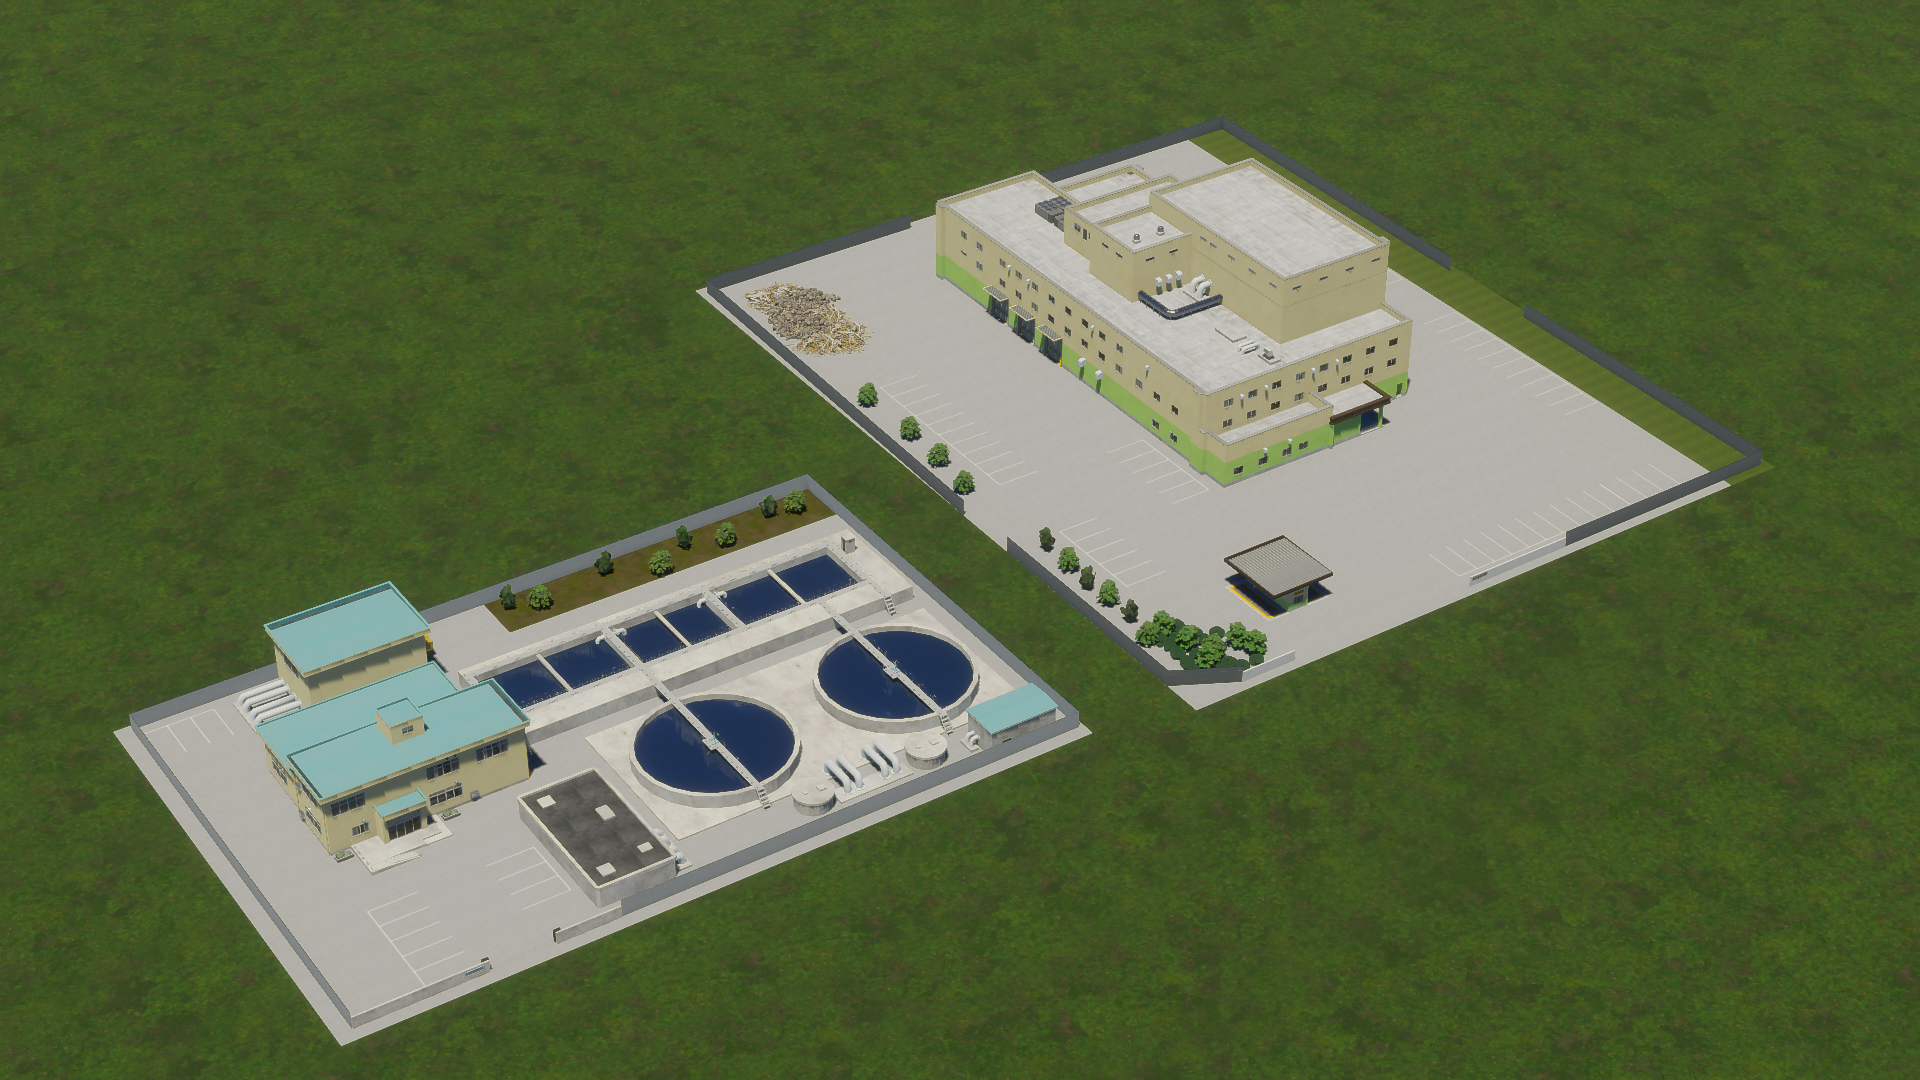
Water treatment plant (left) and recycling center (right).
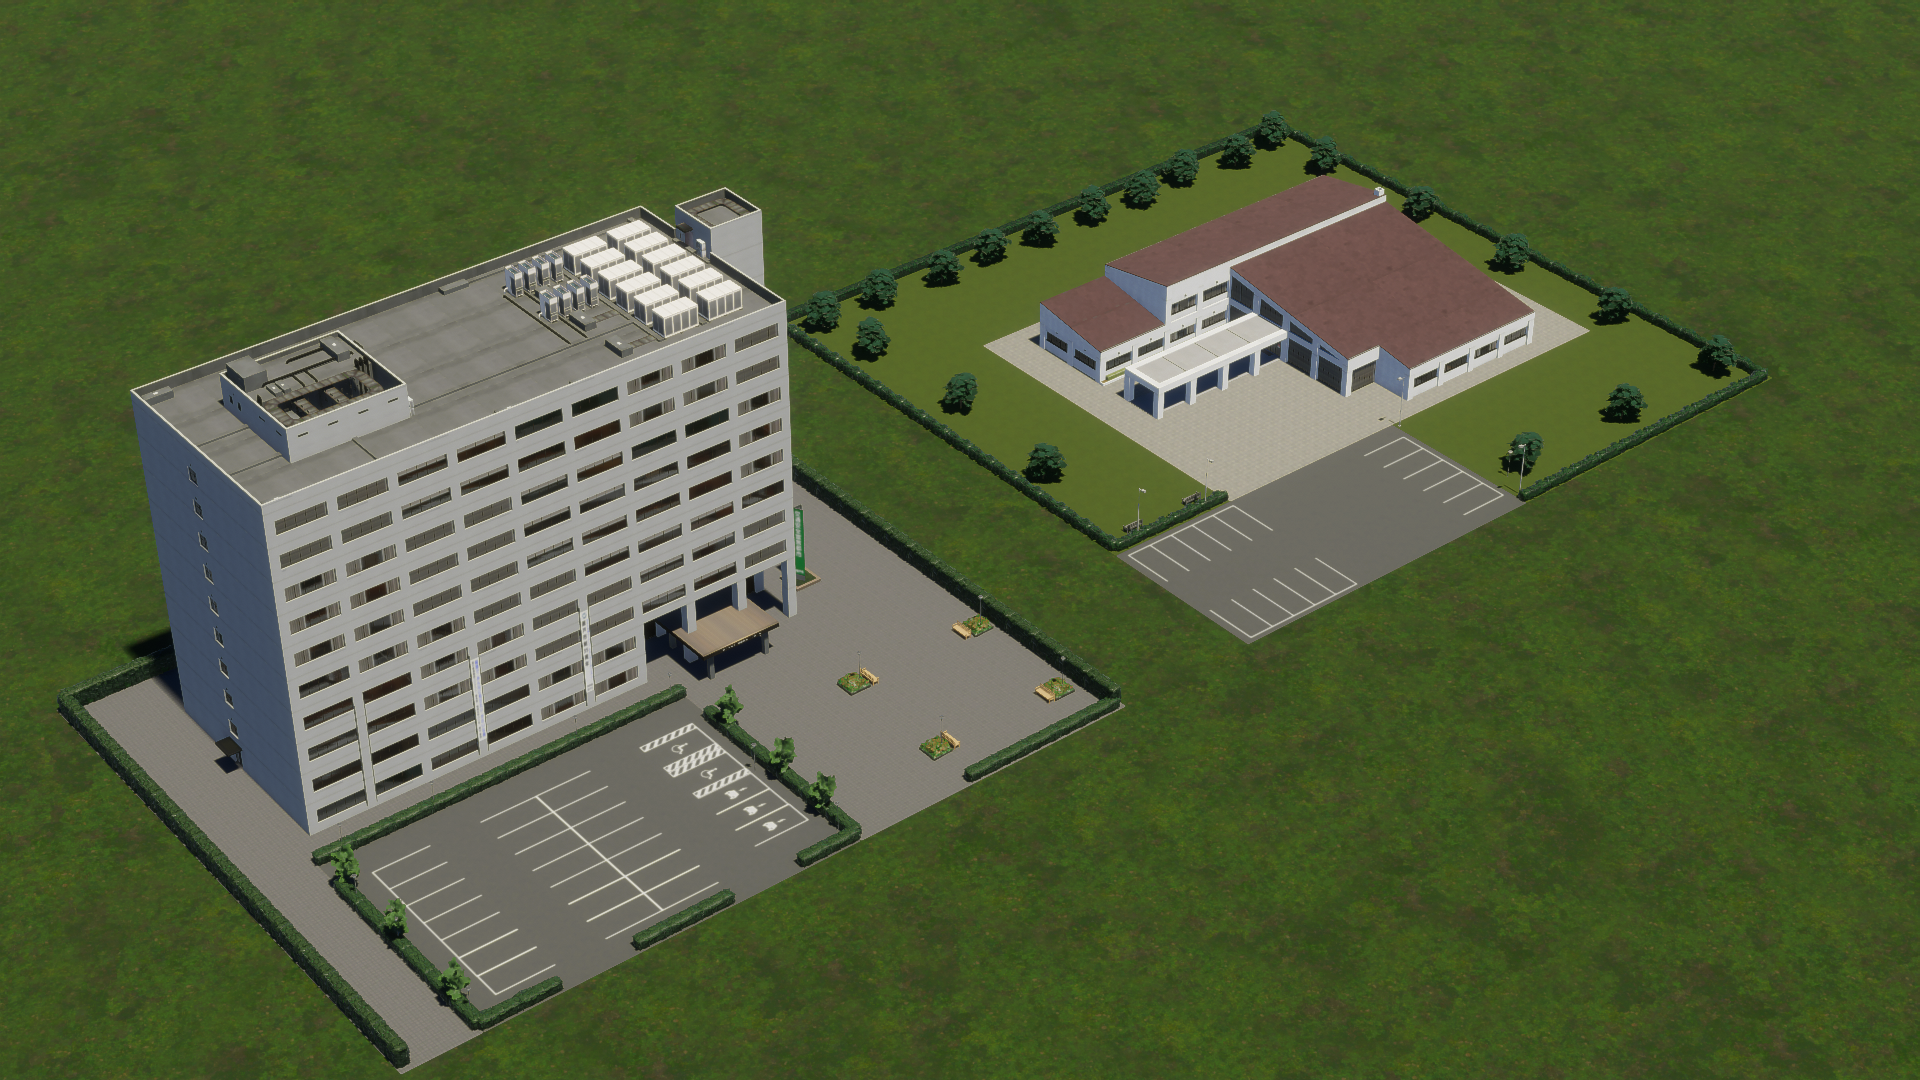
There are also two noteworthy High-Density Offices included.
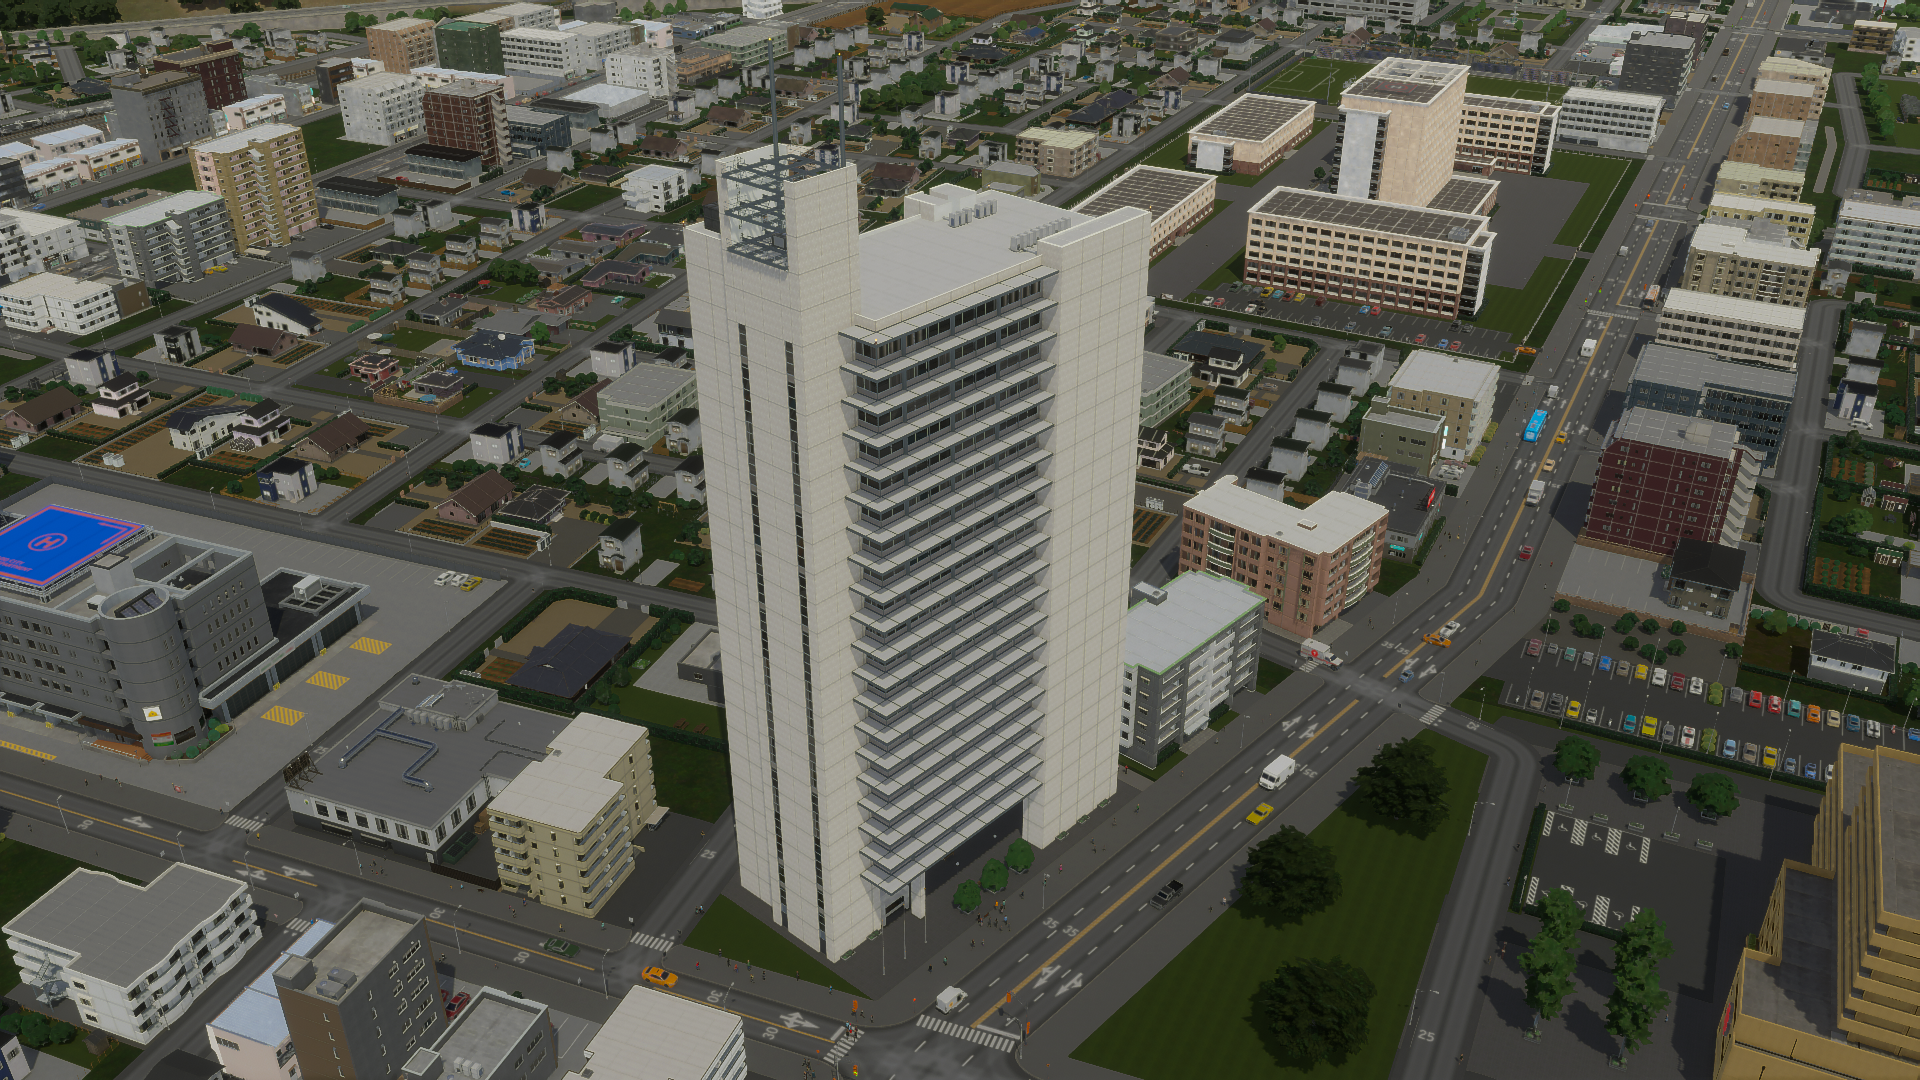
Newspaper head office.
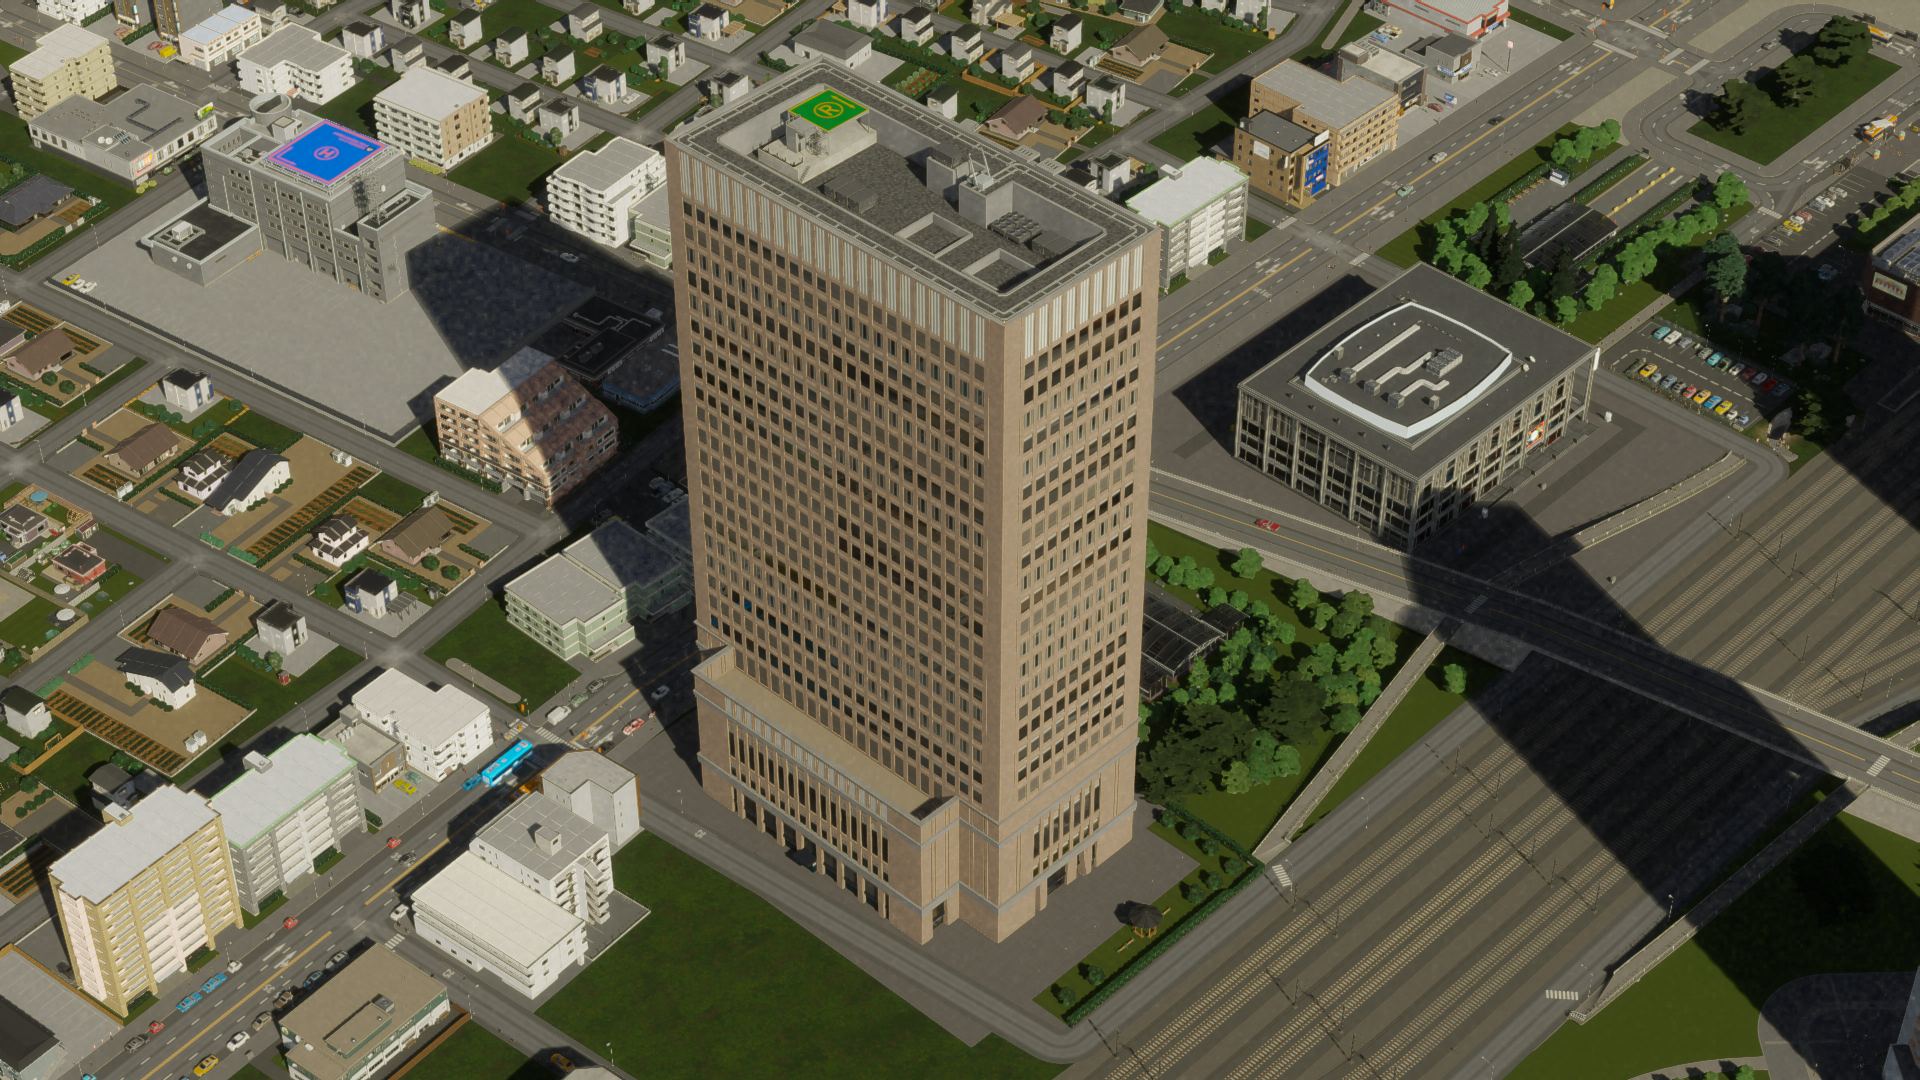
Sushi chain head office.
And lastly, some props which can be freely placed from the new prop menu.
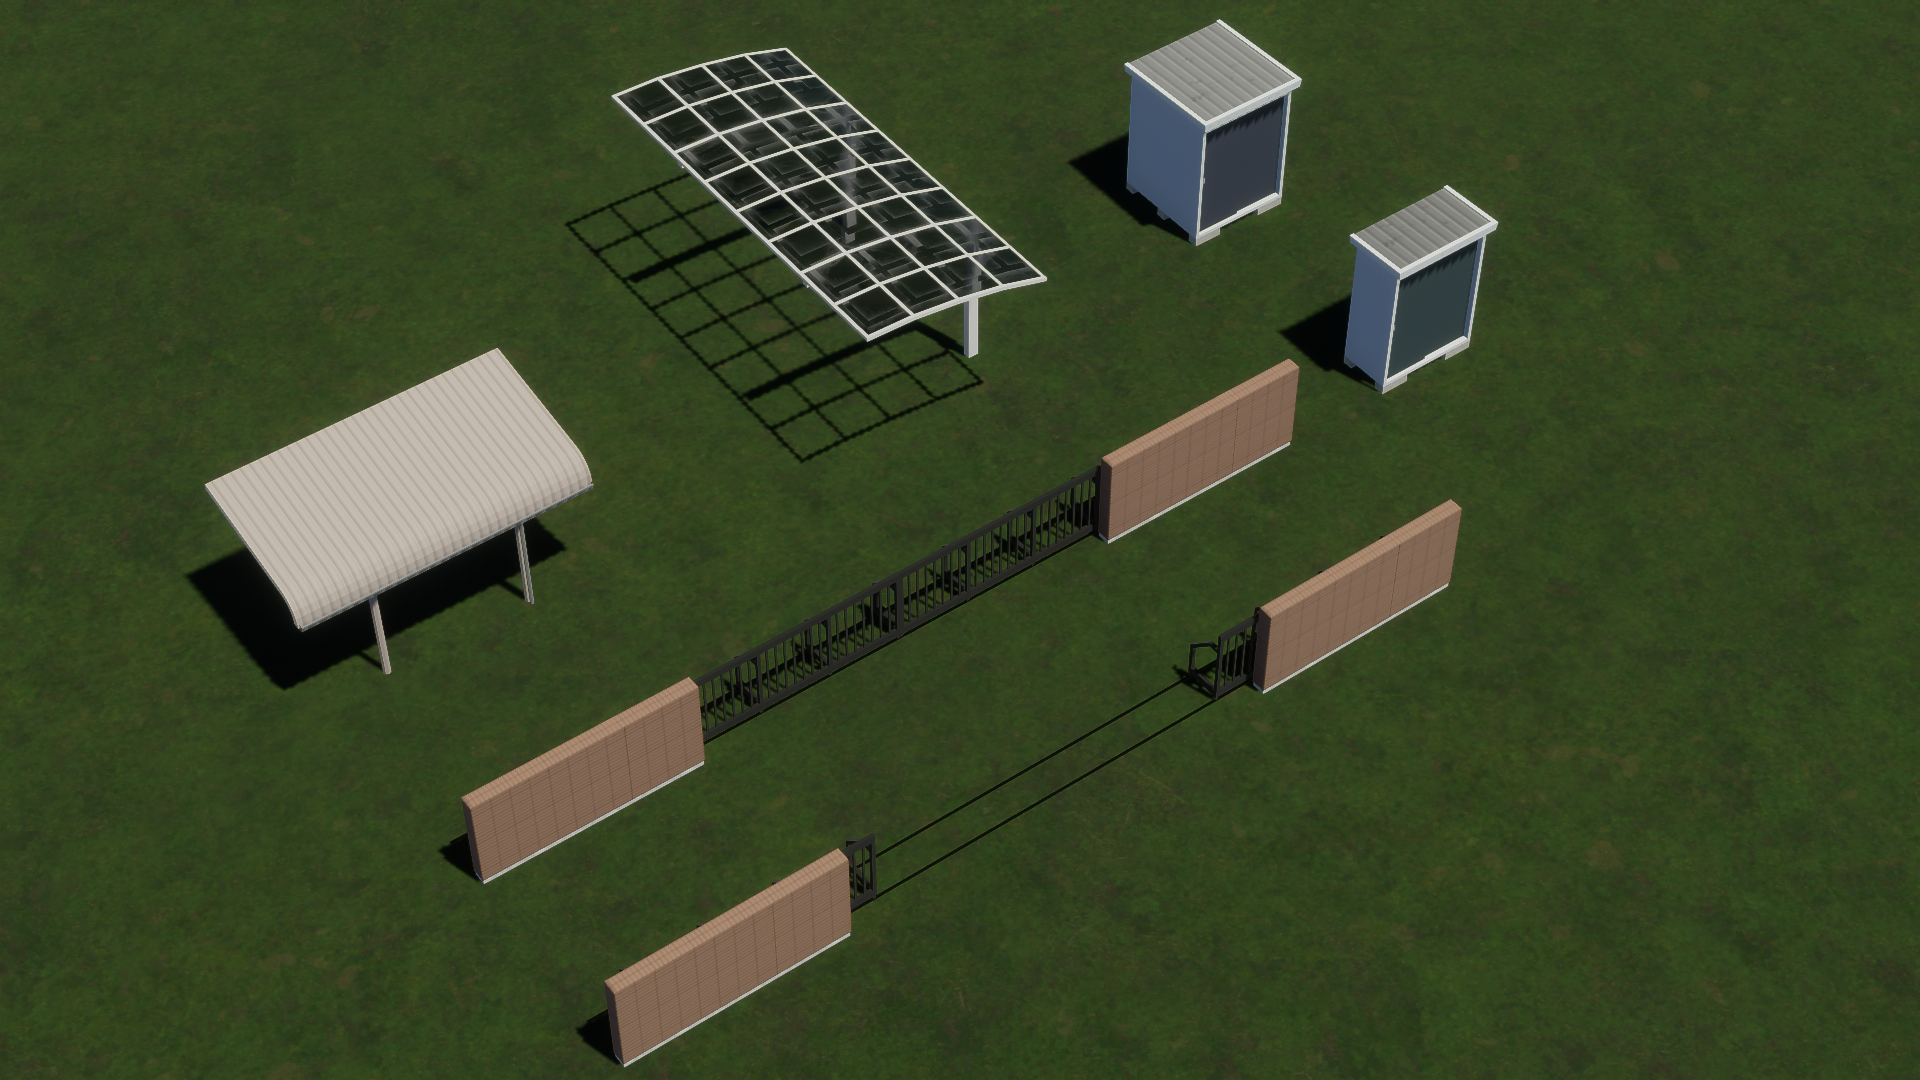
PS: There’s an assortment of other props outside this menu as well. Users of “Find It!” should know how to locate them.
A personal priority of mine was introducing more setback buildings — these structures taper at the edges to minimize the shadows they project onto streets or neighboring buildings. The Japanese place significant value on optimizing sunlight for streets and adjacent buildings, even embedding it in law as a “right to light” (nisshoken). While setback buildings are prevalent in reality, they are relatively scarce in the first game’s Workshop. Therefore, I aspired to create at least a few for the new game.
Some buildings are more committed to maximizing sunlight than others.
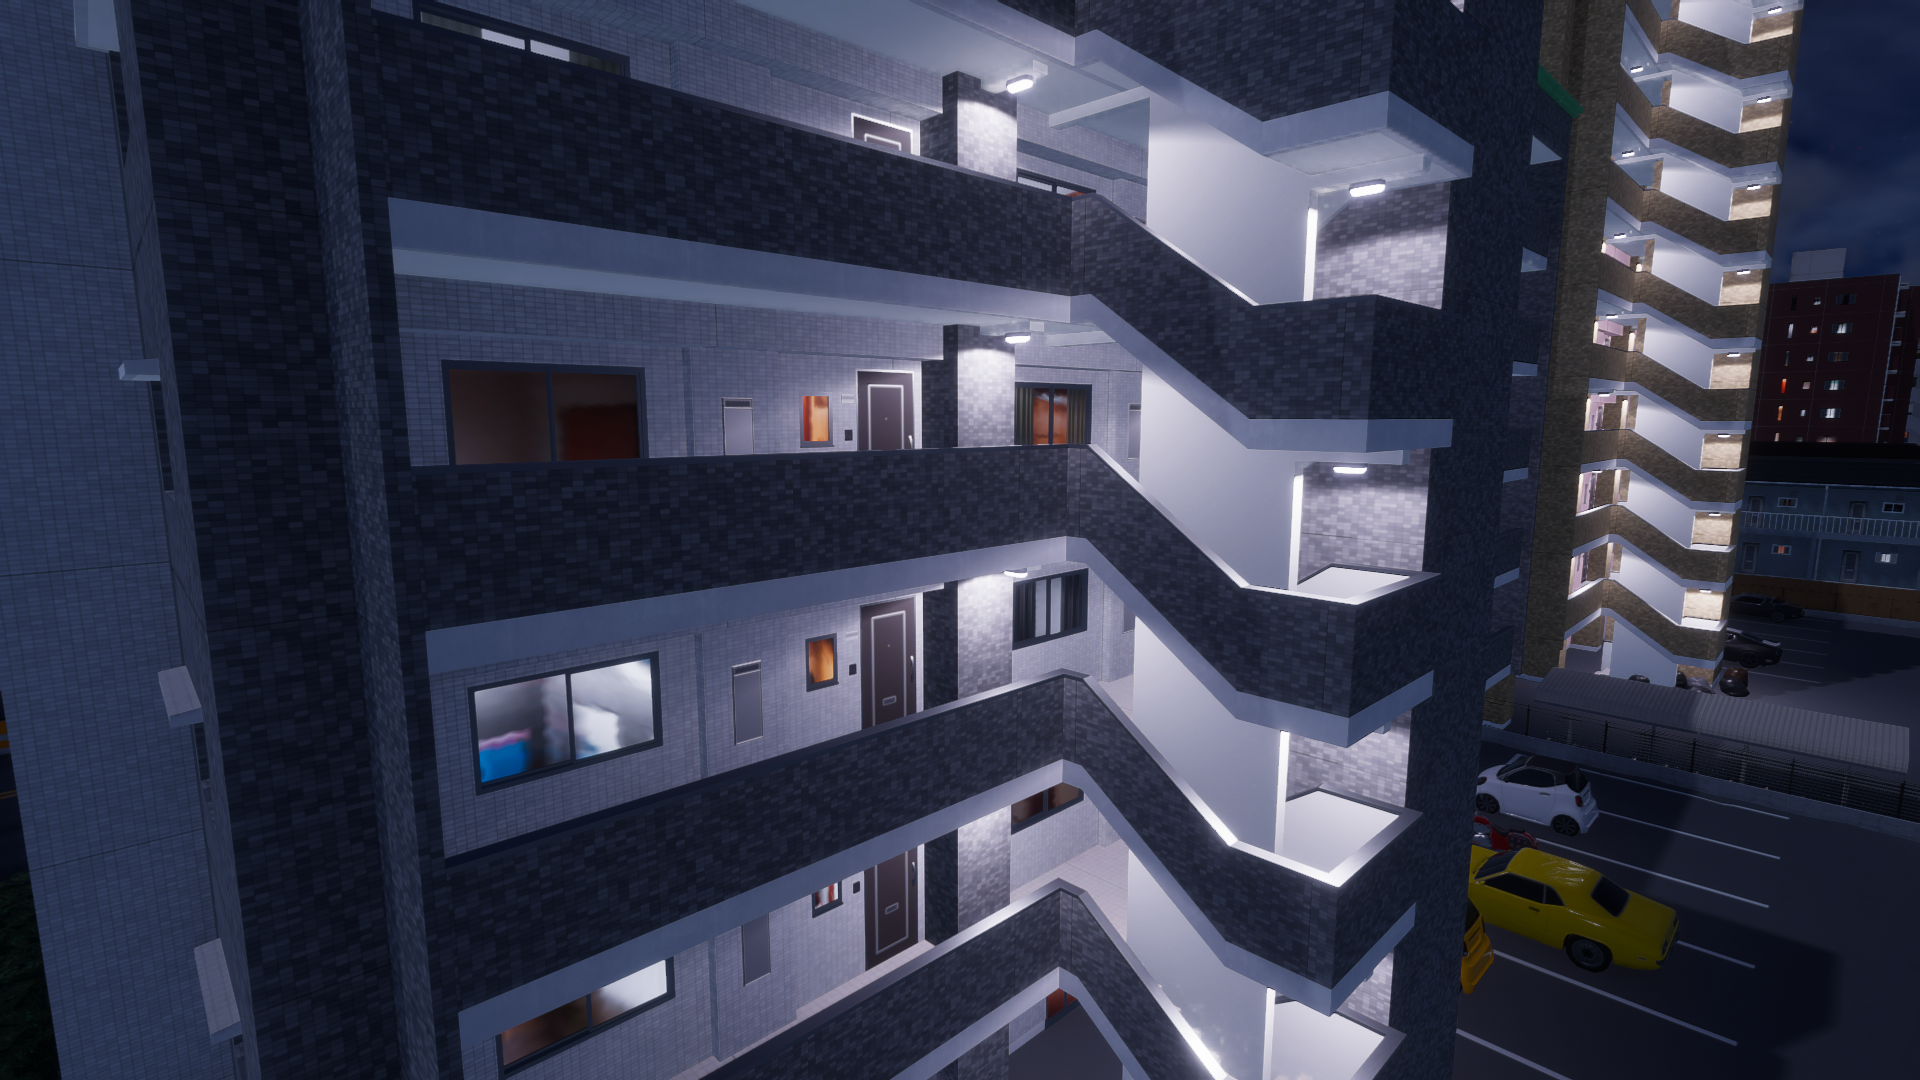
Open-corridor apartments might prove challenging to craft, but they certainly shine at night.
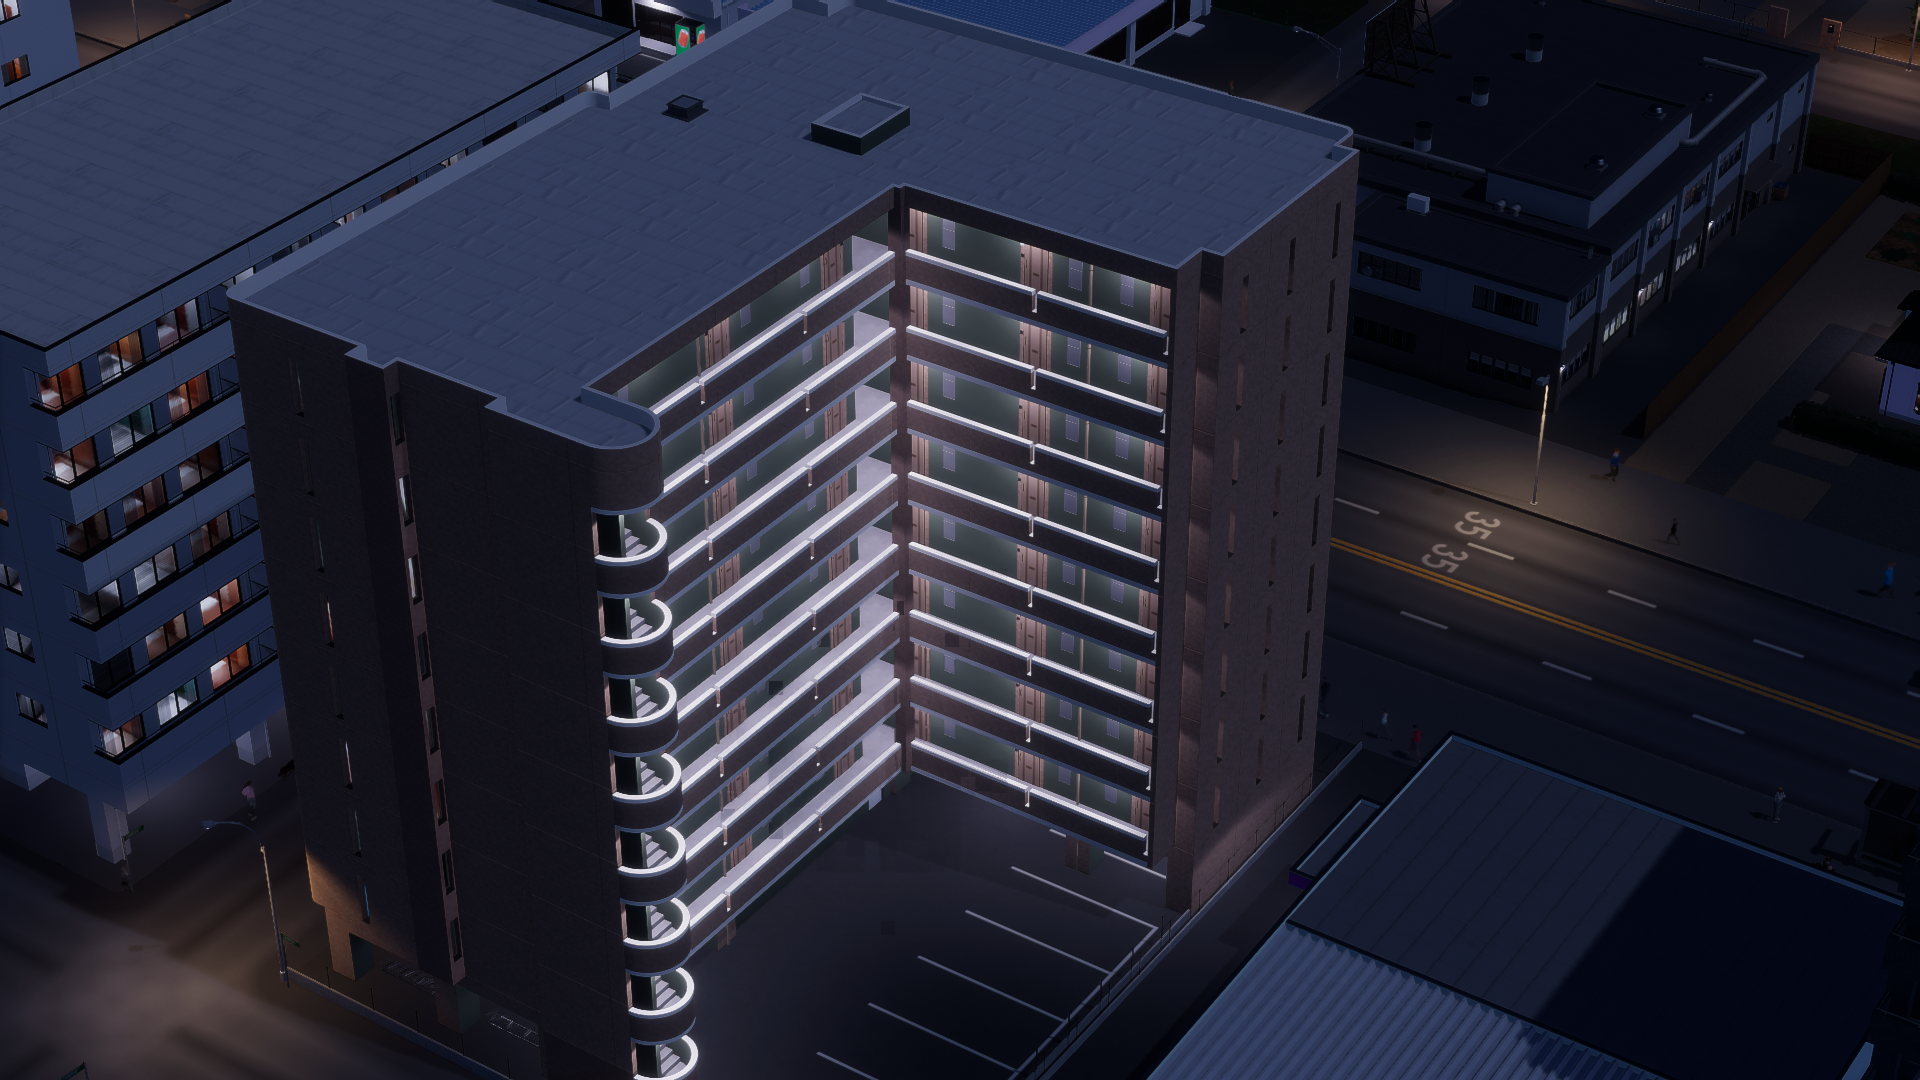
Truly worth it.
City building tip: Japanese cities generally do not adhere to strict separation of building types as seen in other nations. Typically, resist the impulse to rigidly plan from the beginning. Establish your city center within the initial tiles of your map, expand outward quickly, and gradually replace the low-density zones along major roadways with medium-density structures sporadically. Ensure variety in zone types too. It’s common to find residential, industrial, commercial, and office buildings sharing the same block. You may even encounter a small farm in a vacant lot!
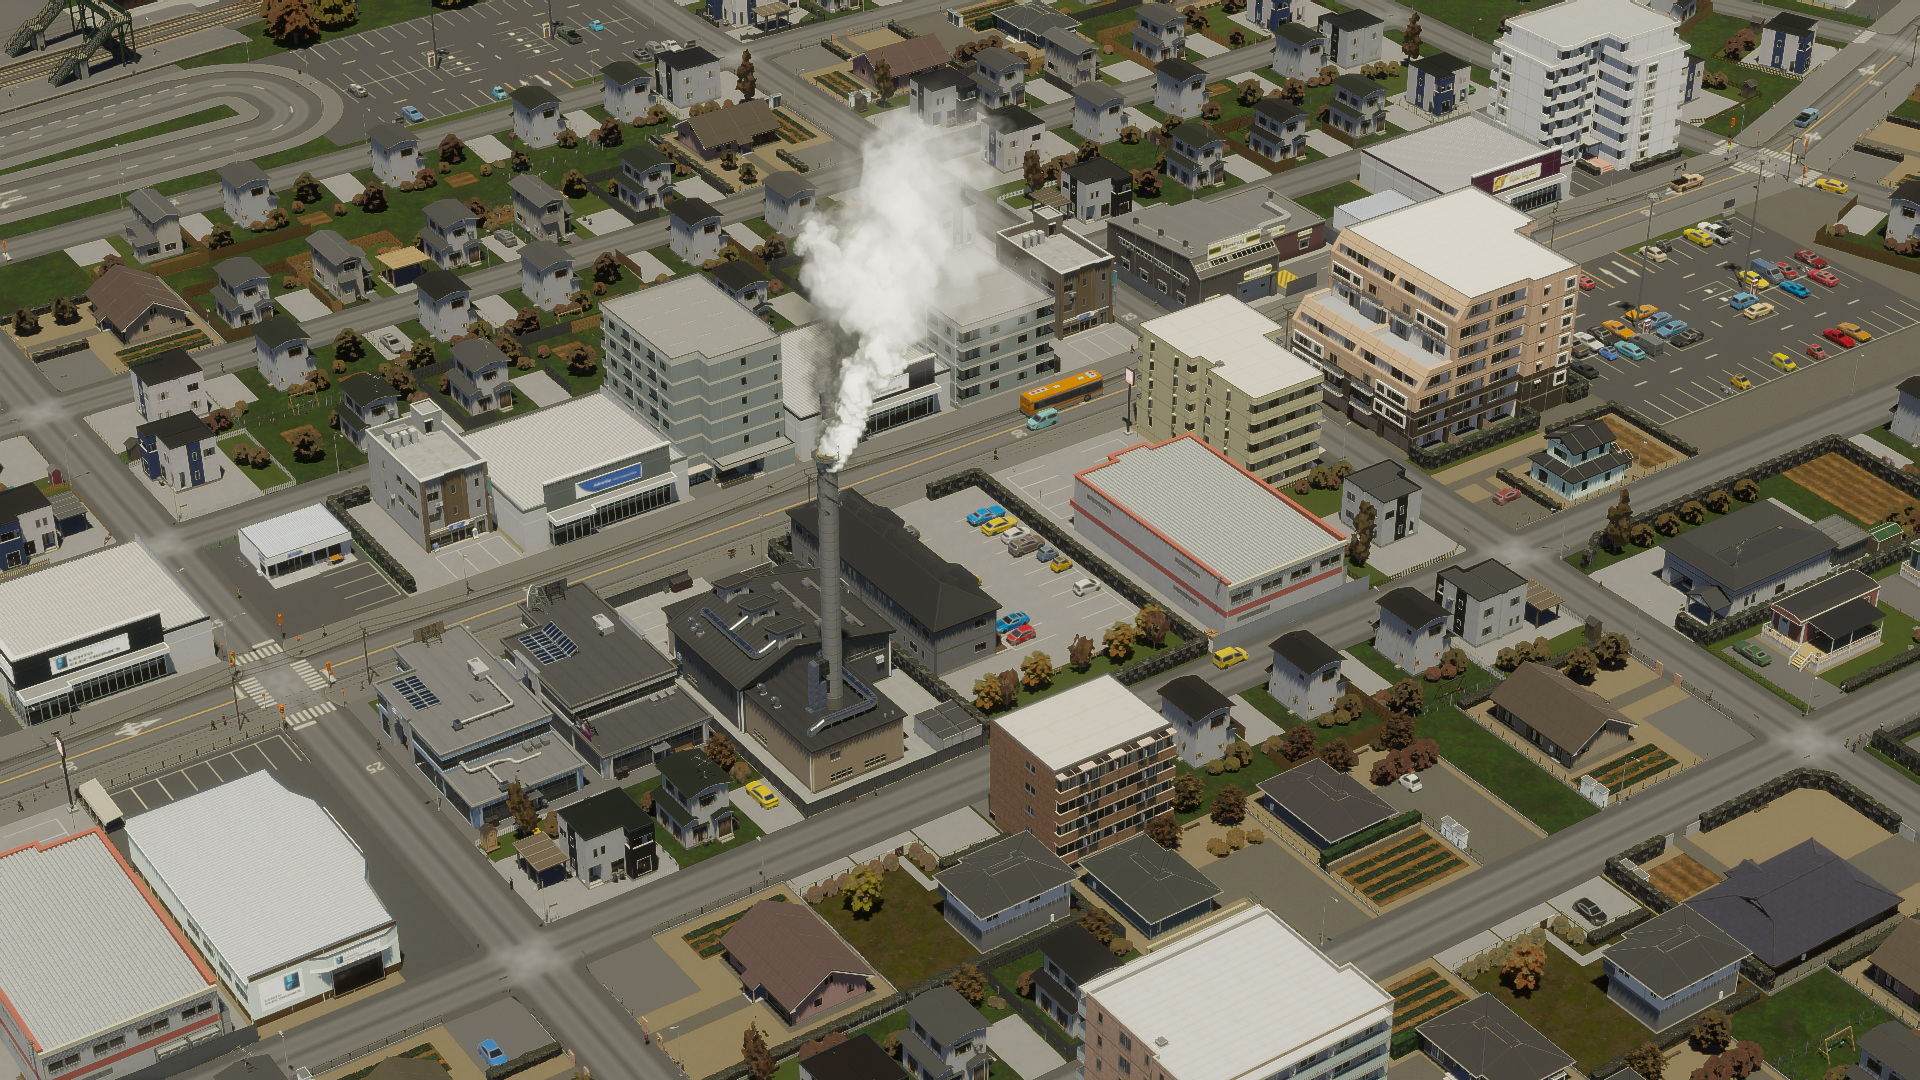
When I say industrial, I don’t mean smokestacks. Just envision that one’s a sentou.
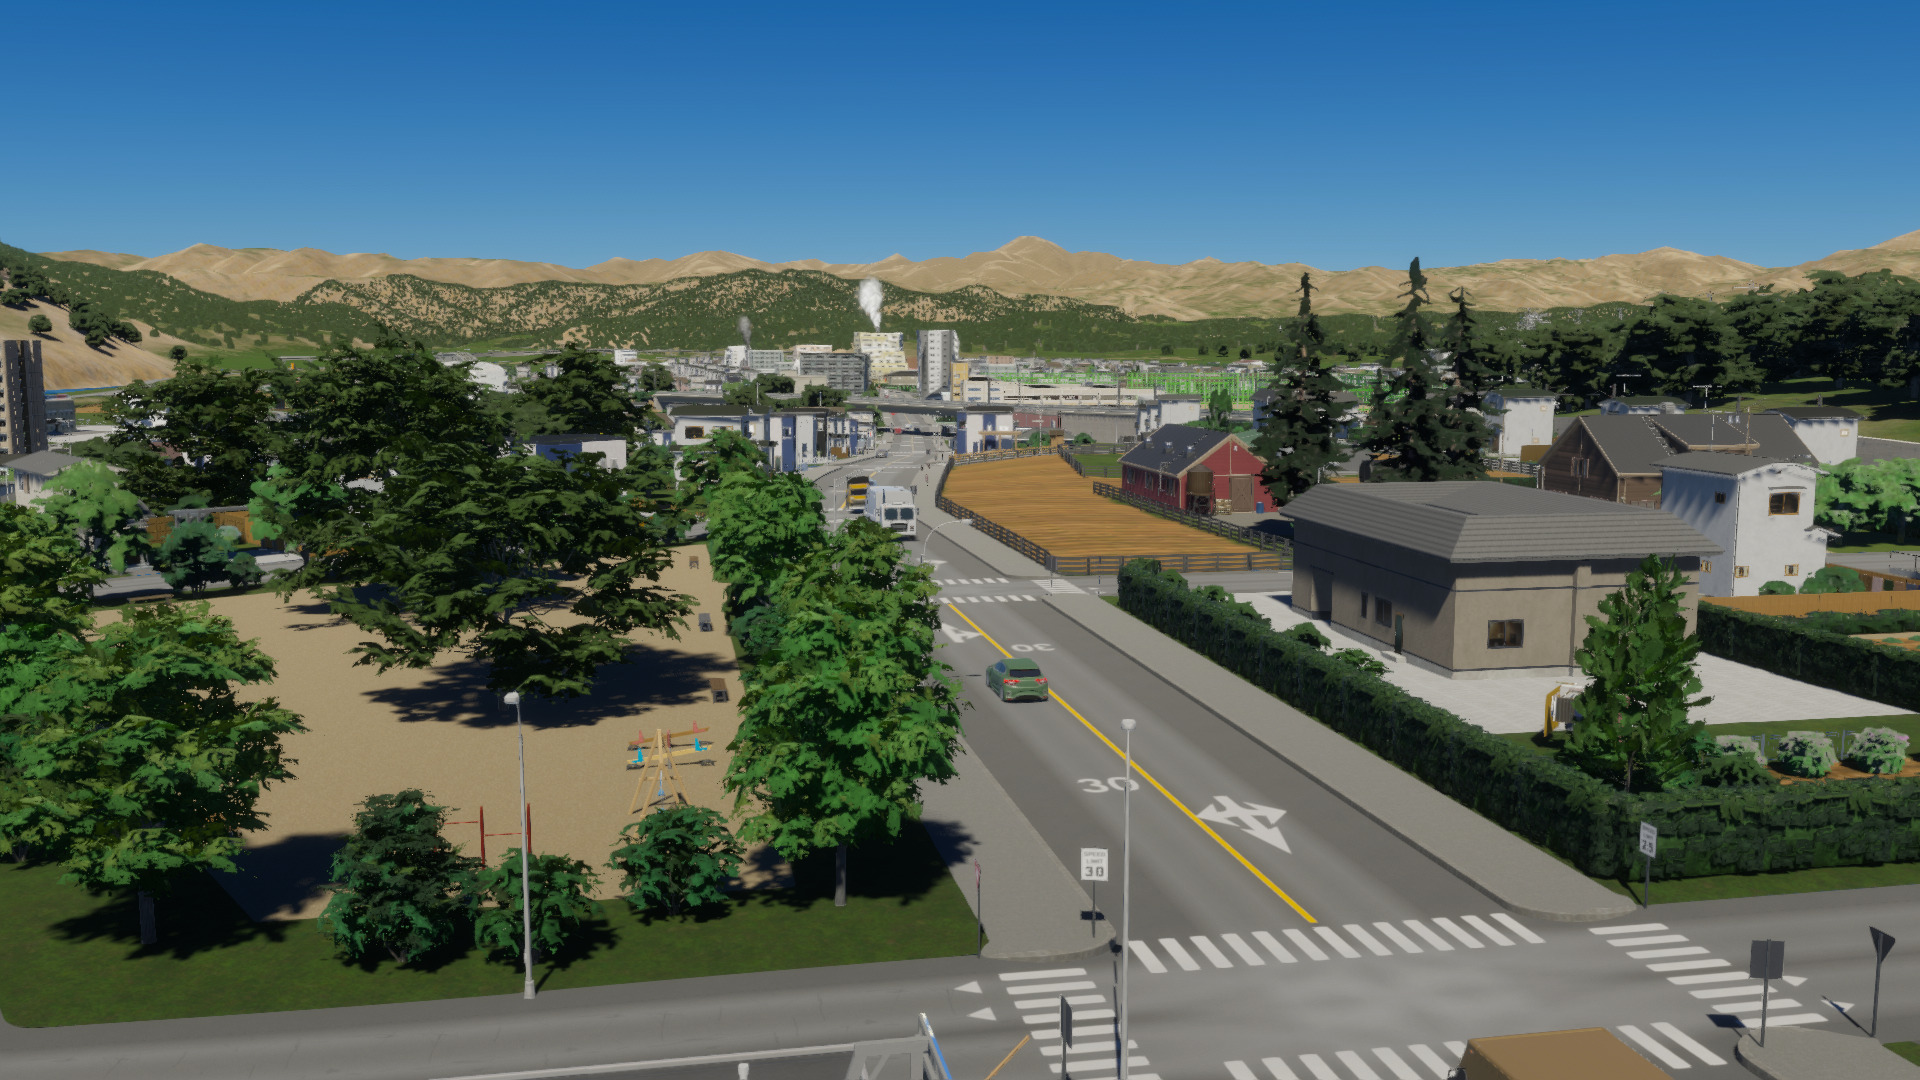
And finally, a selection of miscellaneous screenshots:

I’d like to express my gratitude to Kaminogi and Koma for their exceptional contributions to this project, and also to Kaminogi for facilitating the organization of the entire endeavor. Coordinating a bi-lingual project between two Japanese and an American is no small feat — without his efforts, I wouldn’t have been part of this project.
Thanks to Paradox for offering us this chance and championing us throughout, patpx_Peanut for their tireless commitment to releasing these packs, and Colossal Order for their unwavering resolve to ensure this game achieves its full potential.
Some concluding thoughts from our project leader, Kaminogi:
Much like Stop it D, I deliberated on the necessary assets, beginning with “What is the minimum to initiate a project?”. As many of you know, I’m responsible for creating assets for Cities: Skylines, having introduced a range of assets — both well-known large structures and intricate details like Braille blocks on sidewalks. The initial challenge was to reconcile my aspirations for these assets and establish the foundation for the initial pack.
Another significant challenge was adapting to personal life shifts and work schedules since the project began years back, making it hard to dedicate time to the project as envisioned originally. I’m delighted we overcame these hurdles to release the initial pack. Nevertheless, as you might perceive, we still lack essential components for portraying a true Japanese cityscape. Therefore, I’m reaching out for assistance from all Cities: Skylines asset creators. We seek your valued contributions to Cities: Skylines II, just as you did with the first game. I see this as the start of a grand narrative: the asset community that Cities: Skylines cultivated over nearly a decade is merely at its inception. I too hope to contribute, with the first step being converting Cities: Skylines assets for the sequel.
Next March marks a decade since Cities: Skylines’ release. I aspire that in another decade, Cities: Skylines II will boast a vibrant community, enabling the creation of Japanese cities where it feels like you live there. May we forge highly realistic Japanese urban landscapes together!
Thank you for reading, everyone. The pack is now available for download on Paradox Mods! It’s been quite a journey, and I’m thrilled you finally get to glimpse the finished product. The anticipation was unbearable for me, so I can’t fathom how you all feel! Should you have any feedback on the pack or suggestions for future content, feel free to comment or reach out via the links below. Enjoy!
Ryuichi Kaminogi:
https://www.youtube.com/RyuichiKaminogi
https://x.com/kaminogi
https://mods.paradoxplaza.com/authors/Ryuichi%20Kaminogi
https://steamcommunity.com/id/kaminogi_works/myworkshopfiles/?appid=255710
koma:
https://x.com/koma_csl
https://mods.paradoxplaza.com/authors/koma_cs2
https://steamcommunity.com/profiles/76561198367388905/myworkshopfiles/?appid=255710
stop it D:
https://x.com/stop_it_d
https://mods.paradoxplaza.com/authors/stop_it_d
https://steamcommunity.com/id/planetpiss/myworkshopfiles/?appid=255710
 City Corner #9 – Happy Six-Month Anniversary!
 Patch 1.6.0f1 – Summer Solstice
 City Corner #8 – Reshaping the Landscape
 Hotfix: Patch 1.5.10f1
 Saving Bug Fix
 Patch 1.5.9f1: Morning Dew
 City Corner #7: Morning Dew
 City Corner #6: Community Chat