In an era where economic pressures make gift-giving a daunting prospect, finding meaningful presents that don’t shatter the bank is a real challenge. This inspired me to shift toward handmade offerings; few things convey affection like a labor-intensive project fueled by personal effort. Having professional access to high-end 3D printers and a family of board game enthusiasts, I decided to tackle a particularly ambitious idea. You can probably guess the destination.
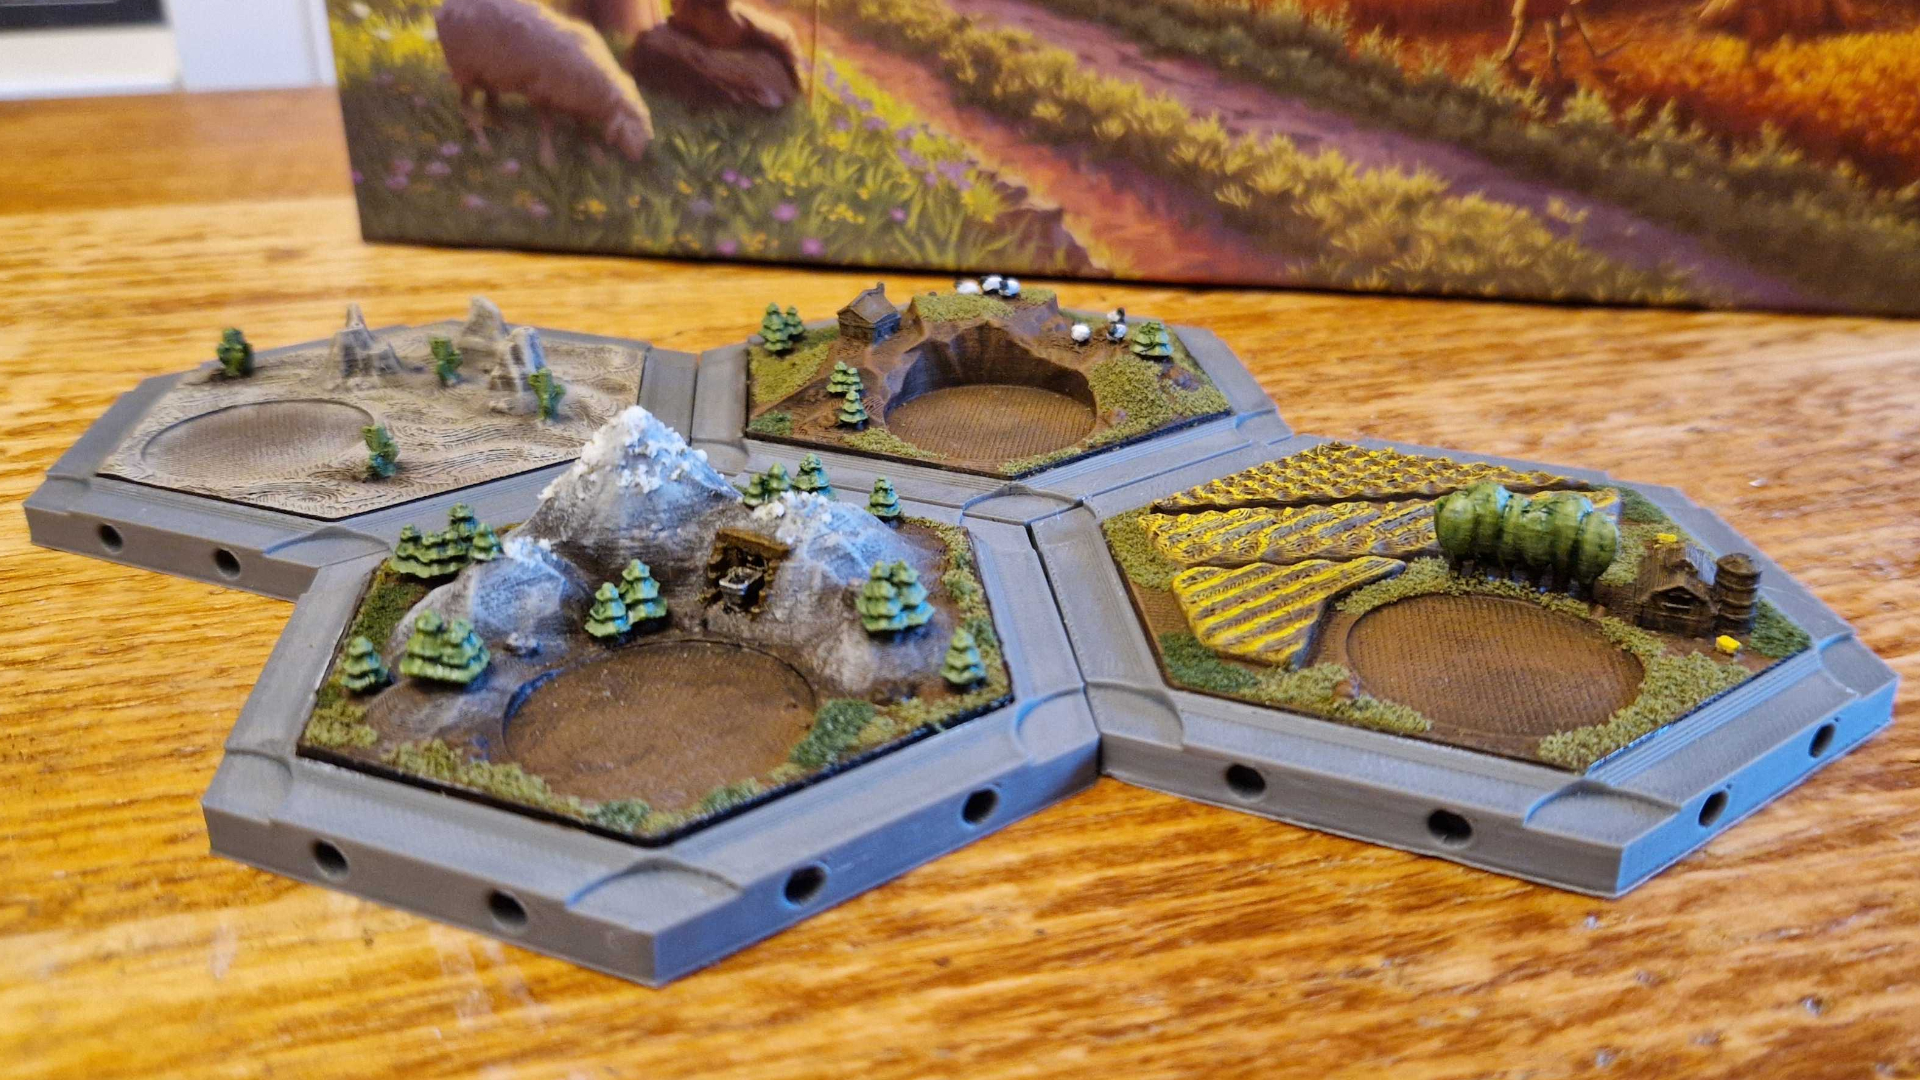
My relatives are obsessed with Catan, and the hobbyist community has generously provided free files to recreate the entire game board in stunning 3D. I initially thought, “I’ll just print the terrain, add some paint, and it’s done. Simple, right?” Looking back, I was incredibly naive. But despite the steep learning curve, the process became one of the most rewarding creative journeys I’ve had all year.
Start Your Own 3D Project

Interested in crafting your own? I utilized the Elegoo Centauri Carbon (available via Amazon), an excellent choice for both novices and veterans. Alternatively, the Anycubic Kobra 3 V2 Combo (found here) is a fantastic entry point for those interested in multi-color printing.
After sourcing the latest community designs from Thingiverse, I faced a pivotal technical choice: resin or filament? For those new to the hobby, resin printers use liquid photopolymers to produce incredibly fine detail, ideal for small miniatures. Filament printers, however, melt reels of plastic into durable, robust objects. Given that these game tiles needed to endure constant handling and travel, I chose filament for its superior resilience.
The next dilemma was whether to use multi-color filament or paint everything manually. While multi-material systems produce impressive results, the cost of stocking a dozen different colored reels felt excessive. Since I already owned a vast collection of miniature paints from my Warhammer hobby, I opted for the manual route. It was a classic case of underestimating the time commitment—a recurring theme in my DIY life.

The Elegoo Centauri Carbon remained my workhorse throughout the project. It’s a rapid, dependable machine that delivers consistent quality regardless of complexity. Even so, the sheer volume of pieces required more time than I had allotted. As any maker will tell you, preparation is vital—running test prints to calibrate settings saved me from countless headaches during the final production run.

The most satisfying phase was the artistic finishing. To avoid a “toy-like” plastic sheen, I utilized wargaming techniques: a dark brown basecoat followed by heavy drybrushing with lighter tones to highlight texture. I then applied various shades of static grass and flocking to create a lush, organic landscape. Glossy varnish for the coastlines and a “snow” texture for the peaks provided the final, realistic flourishes.
To truly elevate the set, I embedded small magnets into the base of each hex. This allows the board to “snap” together with a satisfying click, ensuring it remains stable even if the table is bumped during a heated game. It was the most tedious part of the assembly, but the tactile payoff was worth every moment of frustration.
What remains is a unique, premium tabletop experience. By the time you read this, I’ll have already gifted it to my family, and I hope it brings them years of enjoyment. This project served as a powerful reminder of the incredible things we can build when technology meets traditional craft. It has certainly inspired me to aim for even more ambitious builds in the coming year—even if I end up regretting the workload later!
Ready for your next game night? Discover our top picks for the best card games and the best family board games.
Source: gamesradar.com


