This lizard isn’t any match for you.

The Legend of Zelda: Breath of the Wild Walkthrough – Main Quest: Divine Beast Vah Rudania Dungeon
After the ordeal of that bloody stealth phase, you half methods along with your wayward and cowardly Goron pal (he’s no Darunia) and glide all the way down to the floor of Divine Beast Vah Rudania. How is it that the paraglider didn’t burn?! Ah, overlook it.
The level is, we’ve made it. In Zelda custom that is the closest factor in Breath of the Wild to a dungeon or temple, although that is nonetheless a really totally different beast certainly.
Your purpose on this divine beast is to activate 5 totally different terminals scattered all through it. The dungeon format is sort of open and doesn’t function many doorways, so the problem as a substitute comes from lateral considering and determining the best way to get to terminals in a extra natural approach than ‘unlock the door’.
Once you get entry to the map you’ll additionally be capable to make Vah Rudania transfer its physique from a flat place to an on-its-side place, which strikes the entire stage and the angle. First factor’s first, although… map!

Inside Vah Rudania: Getting a Map
Once the little chat with the champion is over, head on via the door in entrance of you. The lights exit. Great – darkness.
Take out the Ganon corruption in entrance of you – one eye on the left, one eye on the correct. Shoot ’em. Grab the chest from the place the left corruption was, then the chest from the place the correct corruption was.
If you didn’t come ready for darkness (and I positive didn’t), these chests are very important. One comprises a torch with an extended sturdiness than common (simply don’t waste that sturdiness utilizing it as melee) whereas the opposite comprises a picket membership that, likewise, is flammable. Do not throw these away till they break or the dungeon is full. You’ll want them even when issues brighten up.
Light one of many two on one of many blue torches in the beginning. In the proper nook of the room there’s one other lantern. Light it and a door will slide open.
On the opposite aspect of the door there’s a guardian. It’s weak, however it fires ranged assaults. Kite round it and smash it.
Glowing in the dead of night you’ll be capable to see Ganon’s corruption, full with two eyes for 2 separate tons. Shoot them each.
In the left hand nook of the room you’ll discover one other lantern and a chest – as soon as once more, return and lightweight your torch and are available again to gentle it. The door that lantern opens gives you the map. This beast, we study, can flip 90 levels backwards and forwards.
Inside Vah Rudania: Terminal 1
You can now see absolutely with the home windows open. Look on the left as you permit the map room – you’ll see an alcove and extra Ganon Corruption. Shoot the attention right here to get entry to 2 chests with a provide of arrows. We want some arrows on this place.
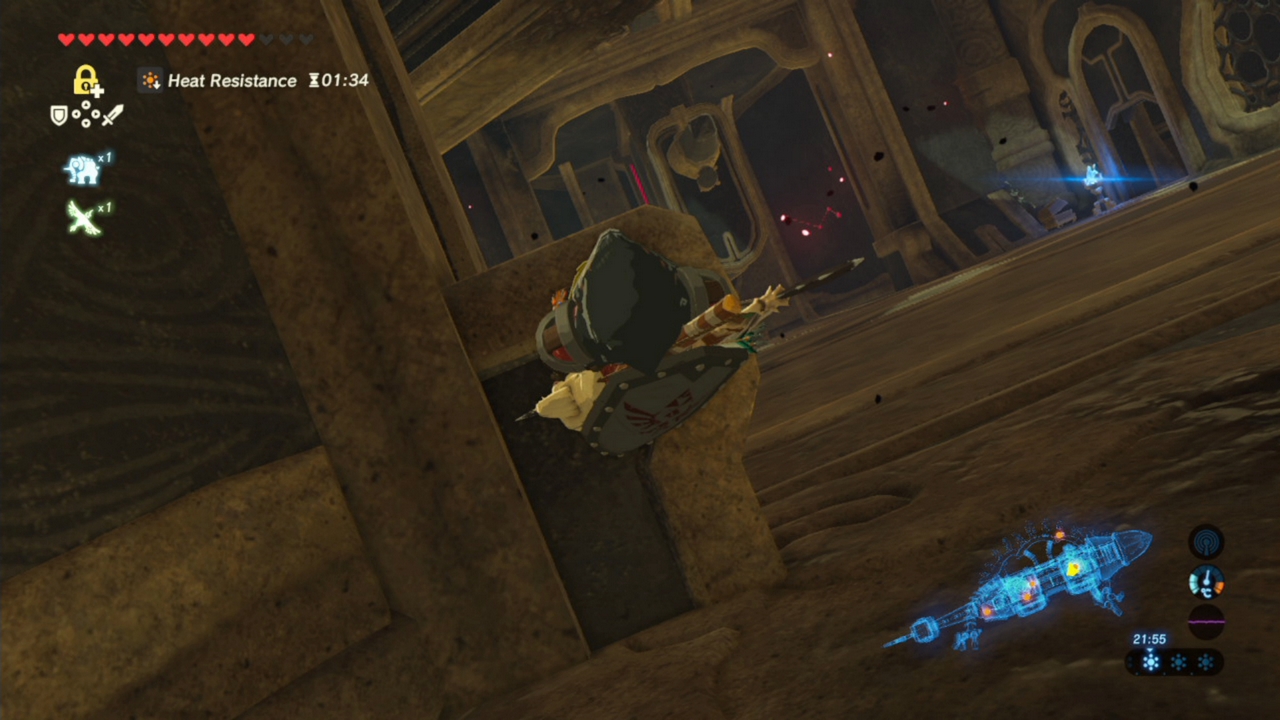
In this identical alcove, take cowl behind the small outcropping in it. This is our path to our first terminal. See the terminal on the opposite aspect of the room, going through in direction of you however on the wall? It’s on high of that oval platform on the opposite aspect of the room.
Well… standing right here, open your map and flip Rudania 90 levels. The room will flip, however the outcropping will allow you to keep place. When the motion is finished, you’ll almost be on the ceiling. Jump off and paraglide gently all the way down to the terminal and activate it. One down, 4 to go.
Inside Vah Rudania: Terminal 2
Jump off to the correct of the place the terminal is and stay on this ground. There’s an infinite ramp. Follow it up, taking out the 2 Ganon corruption eyes as you go.
Once on the high and previous the doorway approach that was blocked by corruption, tilt Rudiana again once more 90 levels. It needs to be laying flat once more now. Climb up the ladder in entrance of you. We’re now on Rudiana’s again.
Climb up. There’s a lantern right here. Ignore it for now – climb the opposite aspect of the fence-like ring and wait right here – now once more flip the beast 90 levels, so it’s sideways. Now you possibly can stroll alongside the spiked scales on its again. Up right here there’s a chest on one of many again scales.
Grab the chest after which as a result of there’s no option to climb again up flip the beast once more so it’s laying flat as soon as extra. You’ll now be atop the spike that runs throughout its again.
Face in direction of the pinnacle of the creature and also you’ll see our subsequent terminal, surrounded with corruption. Look to the left aspect of Rudiana and also you’ll see the attention, excessive on the spike. Take it out, then go get that terminal. Two down!

Inside Vah Rudania: Terminal three
Before we absolutely transfer on, flip round from terminal three and observe Rudiana’s backbone proper all the way down to its tail. There’s a chest down there with some minor non-obligatory loot.
Turn round and stroll again from there and also you’re again on the entrance. Head again all the way down to the primary chamber, the one which was initially pitch black.
On your proper is a door. The doorways are steel and will be lifted with magnesis, however the door is barred with wooden and overgrown with leaves. Wood burns.
If you’ve gotten hearth arrows and are lazy, hearth one on the leaves and watch all of it burn. If you don’t, head outdoors and equip both the torch or the picket membership. The warmth outdoors is such that they instantly are set on hearth, so you possibly can then carry them down, nonetheless burning, and throw them on the leaves with R.
Unbarred, open the iron doorways with magnesis. They push, not pull, for the document. Don’t be the fool that tries to tug them (IE me).
Behind the door is Terminal three. Halfway!

Inside Vah Rudania: Terminal four
Just behind terminal three are extra leaves. Burn these to see one other chest drop down with non-obligatory loot.
Now! To the rear. To get there, it’s good to take out your bow and go stand subsequent to one of many blue lanterns on the entrance. If you’ve a traditional arrow outfitted, it’ll catch hearth.
Take that arrow throughout to the door on the correct (when going through the tail) of the lanterns. Fire via the outlet within the door to gentle the lantern the opposite aspect. The door will open. Go on in.
Up on the ceiling in the long run of this new room are extra leaves. You know what to do: use the close by lantern or hearth arrows and burn ’em up! Don’t stand beneath this oen, as an enormous steel field drops from the ceiling once you do and if it lands on you it’ll harm.
You can use the newly acquired steel field to dam the flames, however you don’t have any option to climb the field. But… ah. Stand in a protected place and flip the beast once more.
Now you possibly can use the field to dam the flames and stroll previous them. Do that, then flip the beast as soon as extra so it lays flat with a view to use the terminal.

Inside Vah Rudania: Terminal 5
Back out within the corridor, gentle that extra-durability torch you bought earlier (or the membership in the event you in some way misplaced the torch) on one of many flames on the entrance. Now head up the doorway and onto Rudania’s again. Go to the ‘safe’ aspect of the Rudiana once you rotate it. If you’re uncertain of which aspect is protected, examine your map.
Get right into a place the place once you rotate you’ll be capable to stroll alongside Rudiana’s stone backbone, then order the beast to show so it’s on its aspect. Walk proper the way in which from one finish of the creature to the opposite. Remember you possibly can’t run with out extinguishing this flame, so simply be calm.
Remember that torch from earlier, on the way in which to terminal 2? We have to gentle it. Get there – up on Rudiana’s again in direction of its head – after which gentle the torch.
A gate will open and a ball shall be freed. Flip the beast as obligatory, following the ball in its observe proper the way in which all the way down to the primary room – it leads to alcove reverse the massive steel doorways and the door to the tail.
Here, when the beast is on its aspect you will need to use Magnesis to push the block in the way in which up; this may free the ball, and the ball will then fall into the outlet. This opens the ultimate door, behind which you’ll discover Terminal 5.
Finally, head again on as much as Rudiana’s again. The primary terminal is up there and is ready for you…
Boss: Fireblight Ganon
Fireblight Ganon is a comparatively simple boss, however it does include three distinct phases and one specifically ate up life and threw me for some time.
For the primary section of this boss, merely assault. Fireblight Ganon has an infinite sword, however the excellent news is that he’s pretty sluggish transferring and you’ve got a giant battlefield to work with.
I discovered if I bought in up-close and private he was simple sufficient to deal with for his first section: simply get in and go wild, although as all the time I like to recommend utilizing a one-handed weapon so you possibly can elevate your protect at a second’s discover.
In his second section he floats between the 4 corners of the battlefield (Vah Rudania’s 4 legs) and enters an enormous fireball. He’s invincible right here – ice arrows don’t work, you possibly can’t assault him, and in the event you go away him to his gadgets he fires an enormous fireball at you after which begins over. This is the section that threw me.
Well, right here’s a clue: take into consideration one other Zelda dungeon on Death Mountain. How did you beat its boss?
Bombs. When within the fireball, Fireblight Ganon sucks in vitality (and certainly, hearth) from throughout the realm. Toss a bomb at him whereas he’s doing this. He’ll swallow the bomb, and you may then use that to get in up shut and private as soon as once more.
The remaining section of this boss options him laser concentrating on you want guardians. Run and dodge to keep away from, then when you may get in shut and deal huge injury rapidly. Before what’s occurred, the combat is over.
For restoring management of Vah Rudania you’ll be awarded with Daruk’s Protection, a really helpful little energy that powers up your shielding three assaults at a time for a interval. You noticed this in use on the way in which to the dungeon.


