Tracking down every biobed location in Subnautica 2 is a substantial undertaking, but it is well worth the effort. There is nothing more frustrating than having to leave behind valuable resources because your pockets are full; however, each biobed you uncover significantly expands your carrying capacity. By securing every available unit, you can nearly double your total inventory space.
Here is your comprehensive guide to locating every biobed in Subnautica 2 and maximizing your loadout capacity.
Boosting your inventory space in Subnautica 2
You begin your journey in Subnautica 2 with a limited 20 inventory slots. By discovering and interacting with biobeds tucked away within abandoned pioneer wrecks and outposts, you can permanently upgrade your capacity. Each interaction provides either three additional inventory slots or one extra toolbar (hotbar) slot. There are seven biobeds to find in total.
Specifically, finding biobeds #2 and #6 will upgrade your toolbar capacity, while the remaining five focus on expanding your main inventory. Once you have successfully located all seven, you will possess a grand total of 35 inventory slots and seven hotbar slots. While the following list is numbered for organizational purposes, you are free to explore these locations in any sequence that suits your journey.
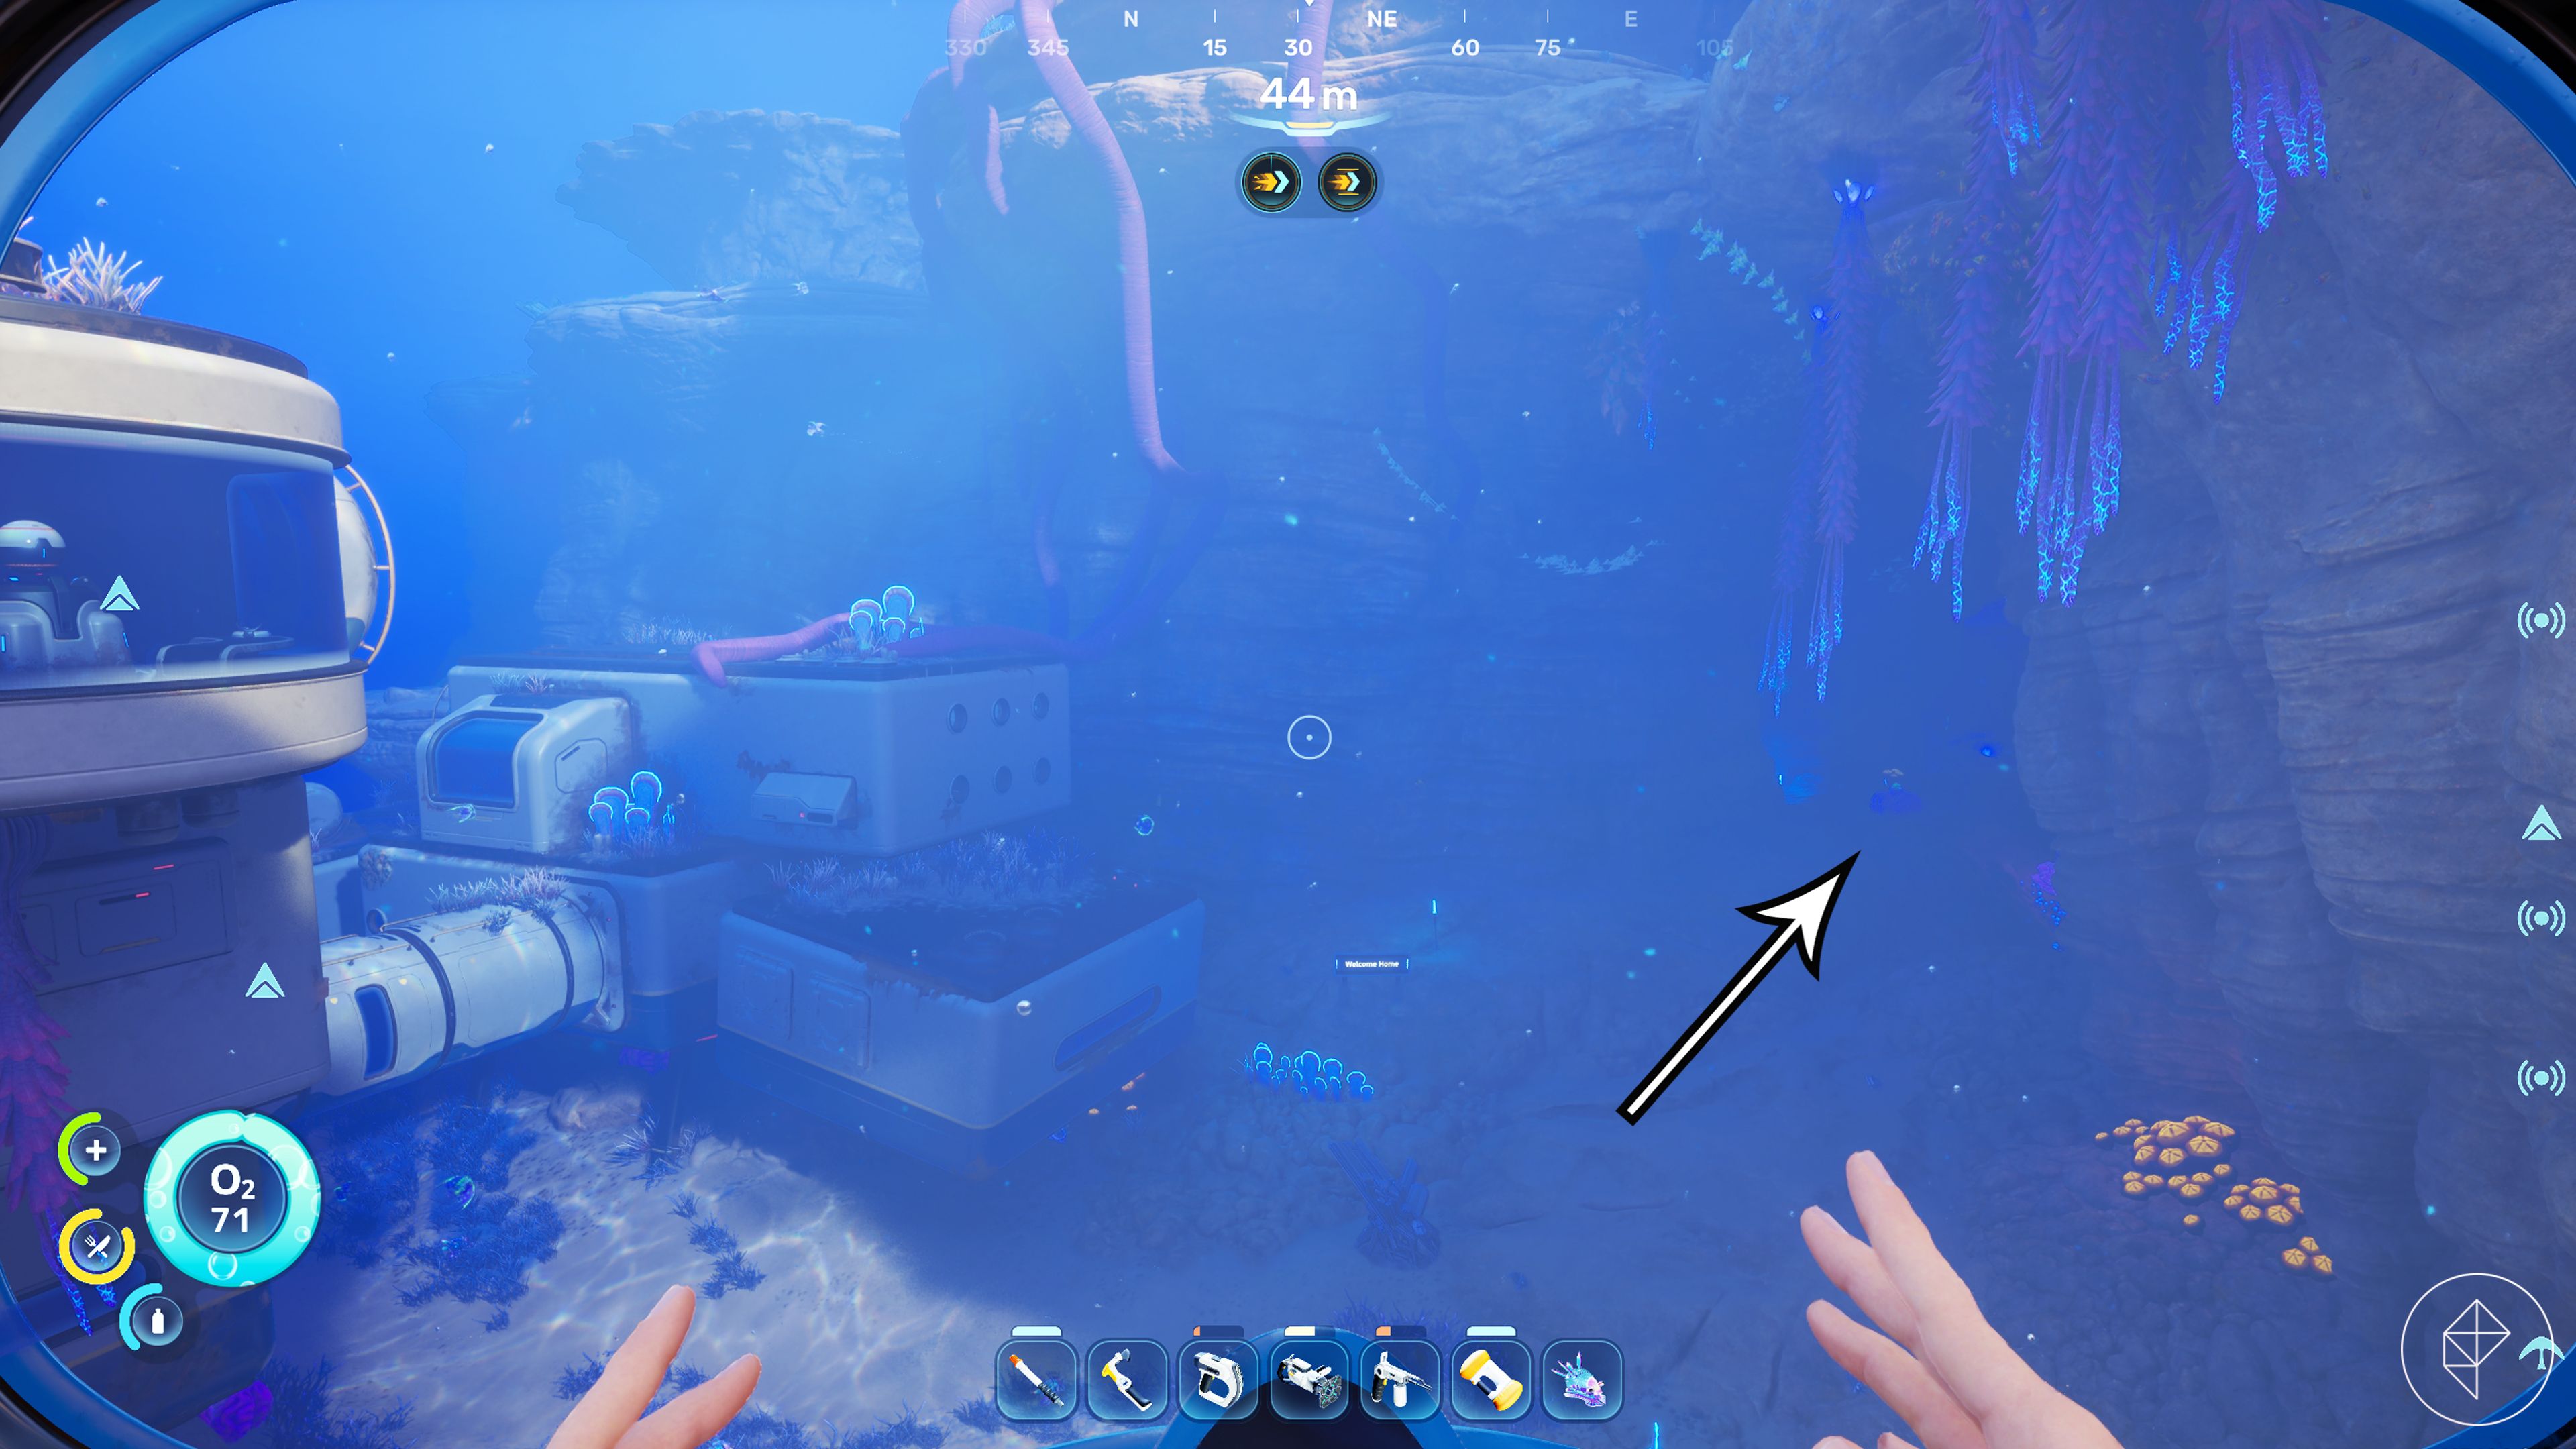
Biobed location #1
From your Lifepod, head 260 meters southwest. You will spot a wreck balanced precariously on the edge of a cliff. Descend to a depth of 90 meters, where you will find a hatch built into the steep rock wall; it opens into a chamber housing the first biobed.
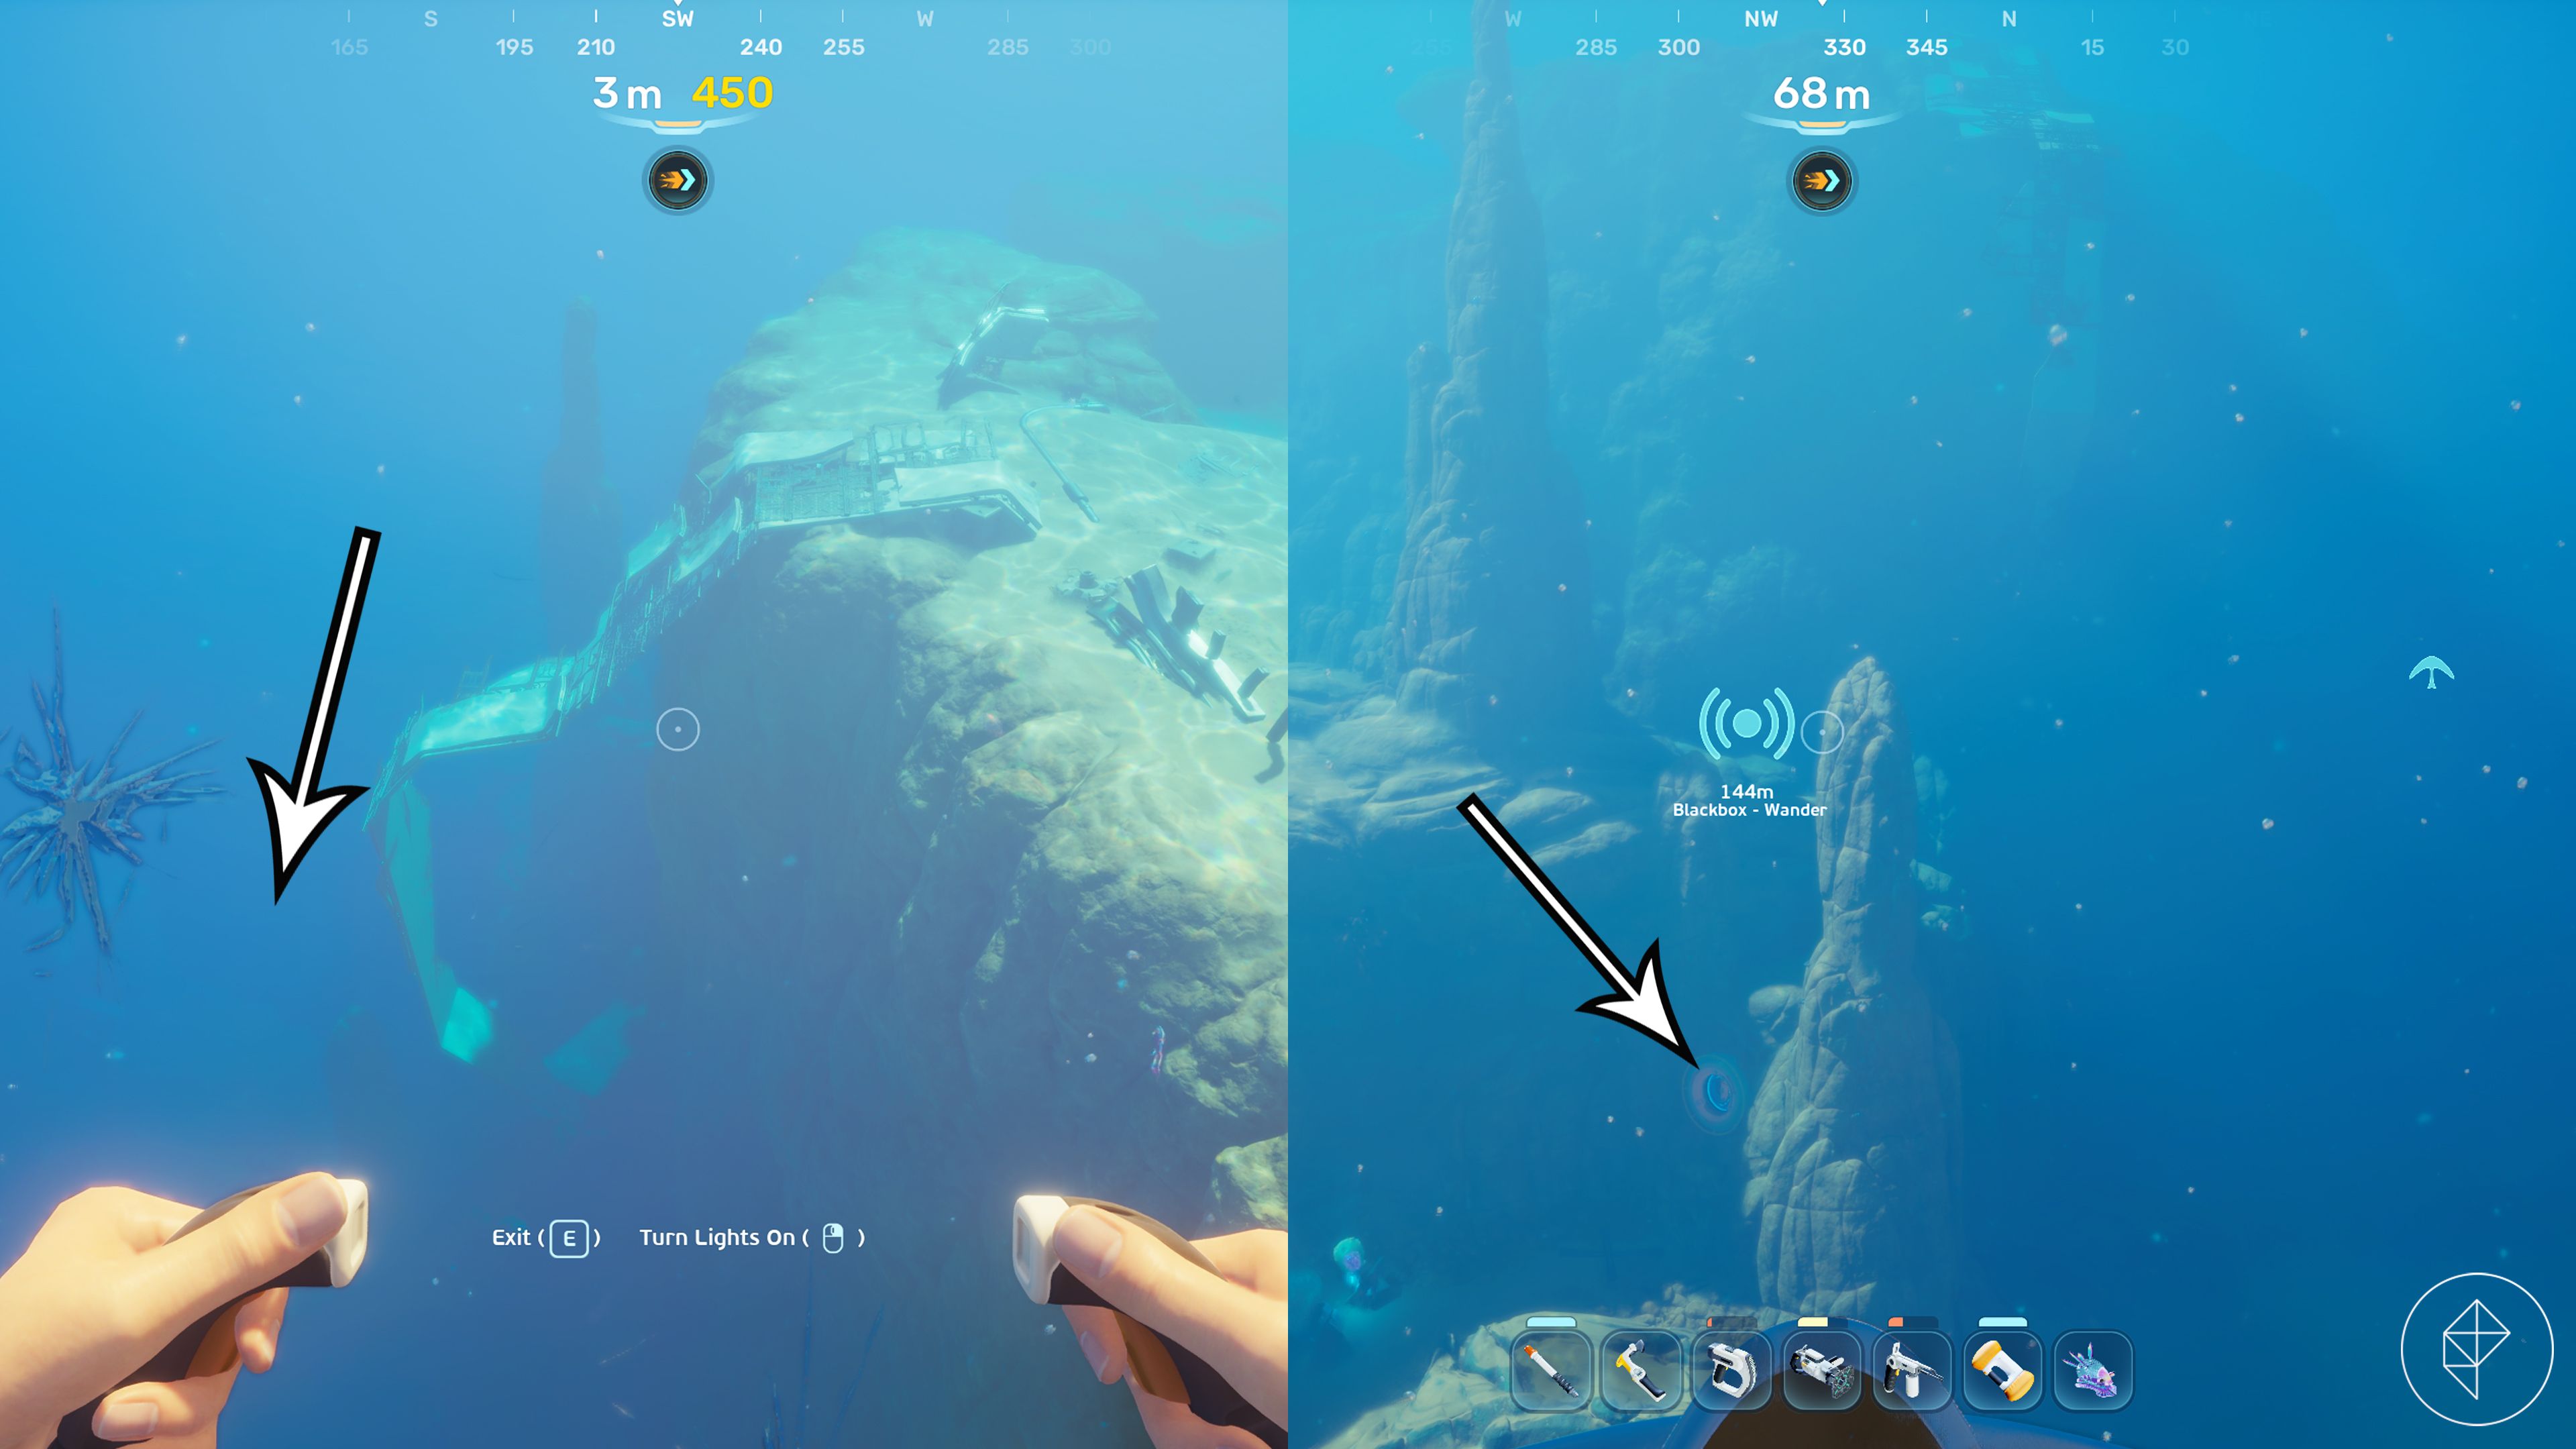
Biobed location #2
Starting at the Lifepod, travel 130 meters north-northwest until you reach a massive coral formation. Enter the chasm beneath it and follow the tunnel marked by bioluminescent blue flora.
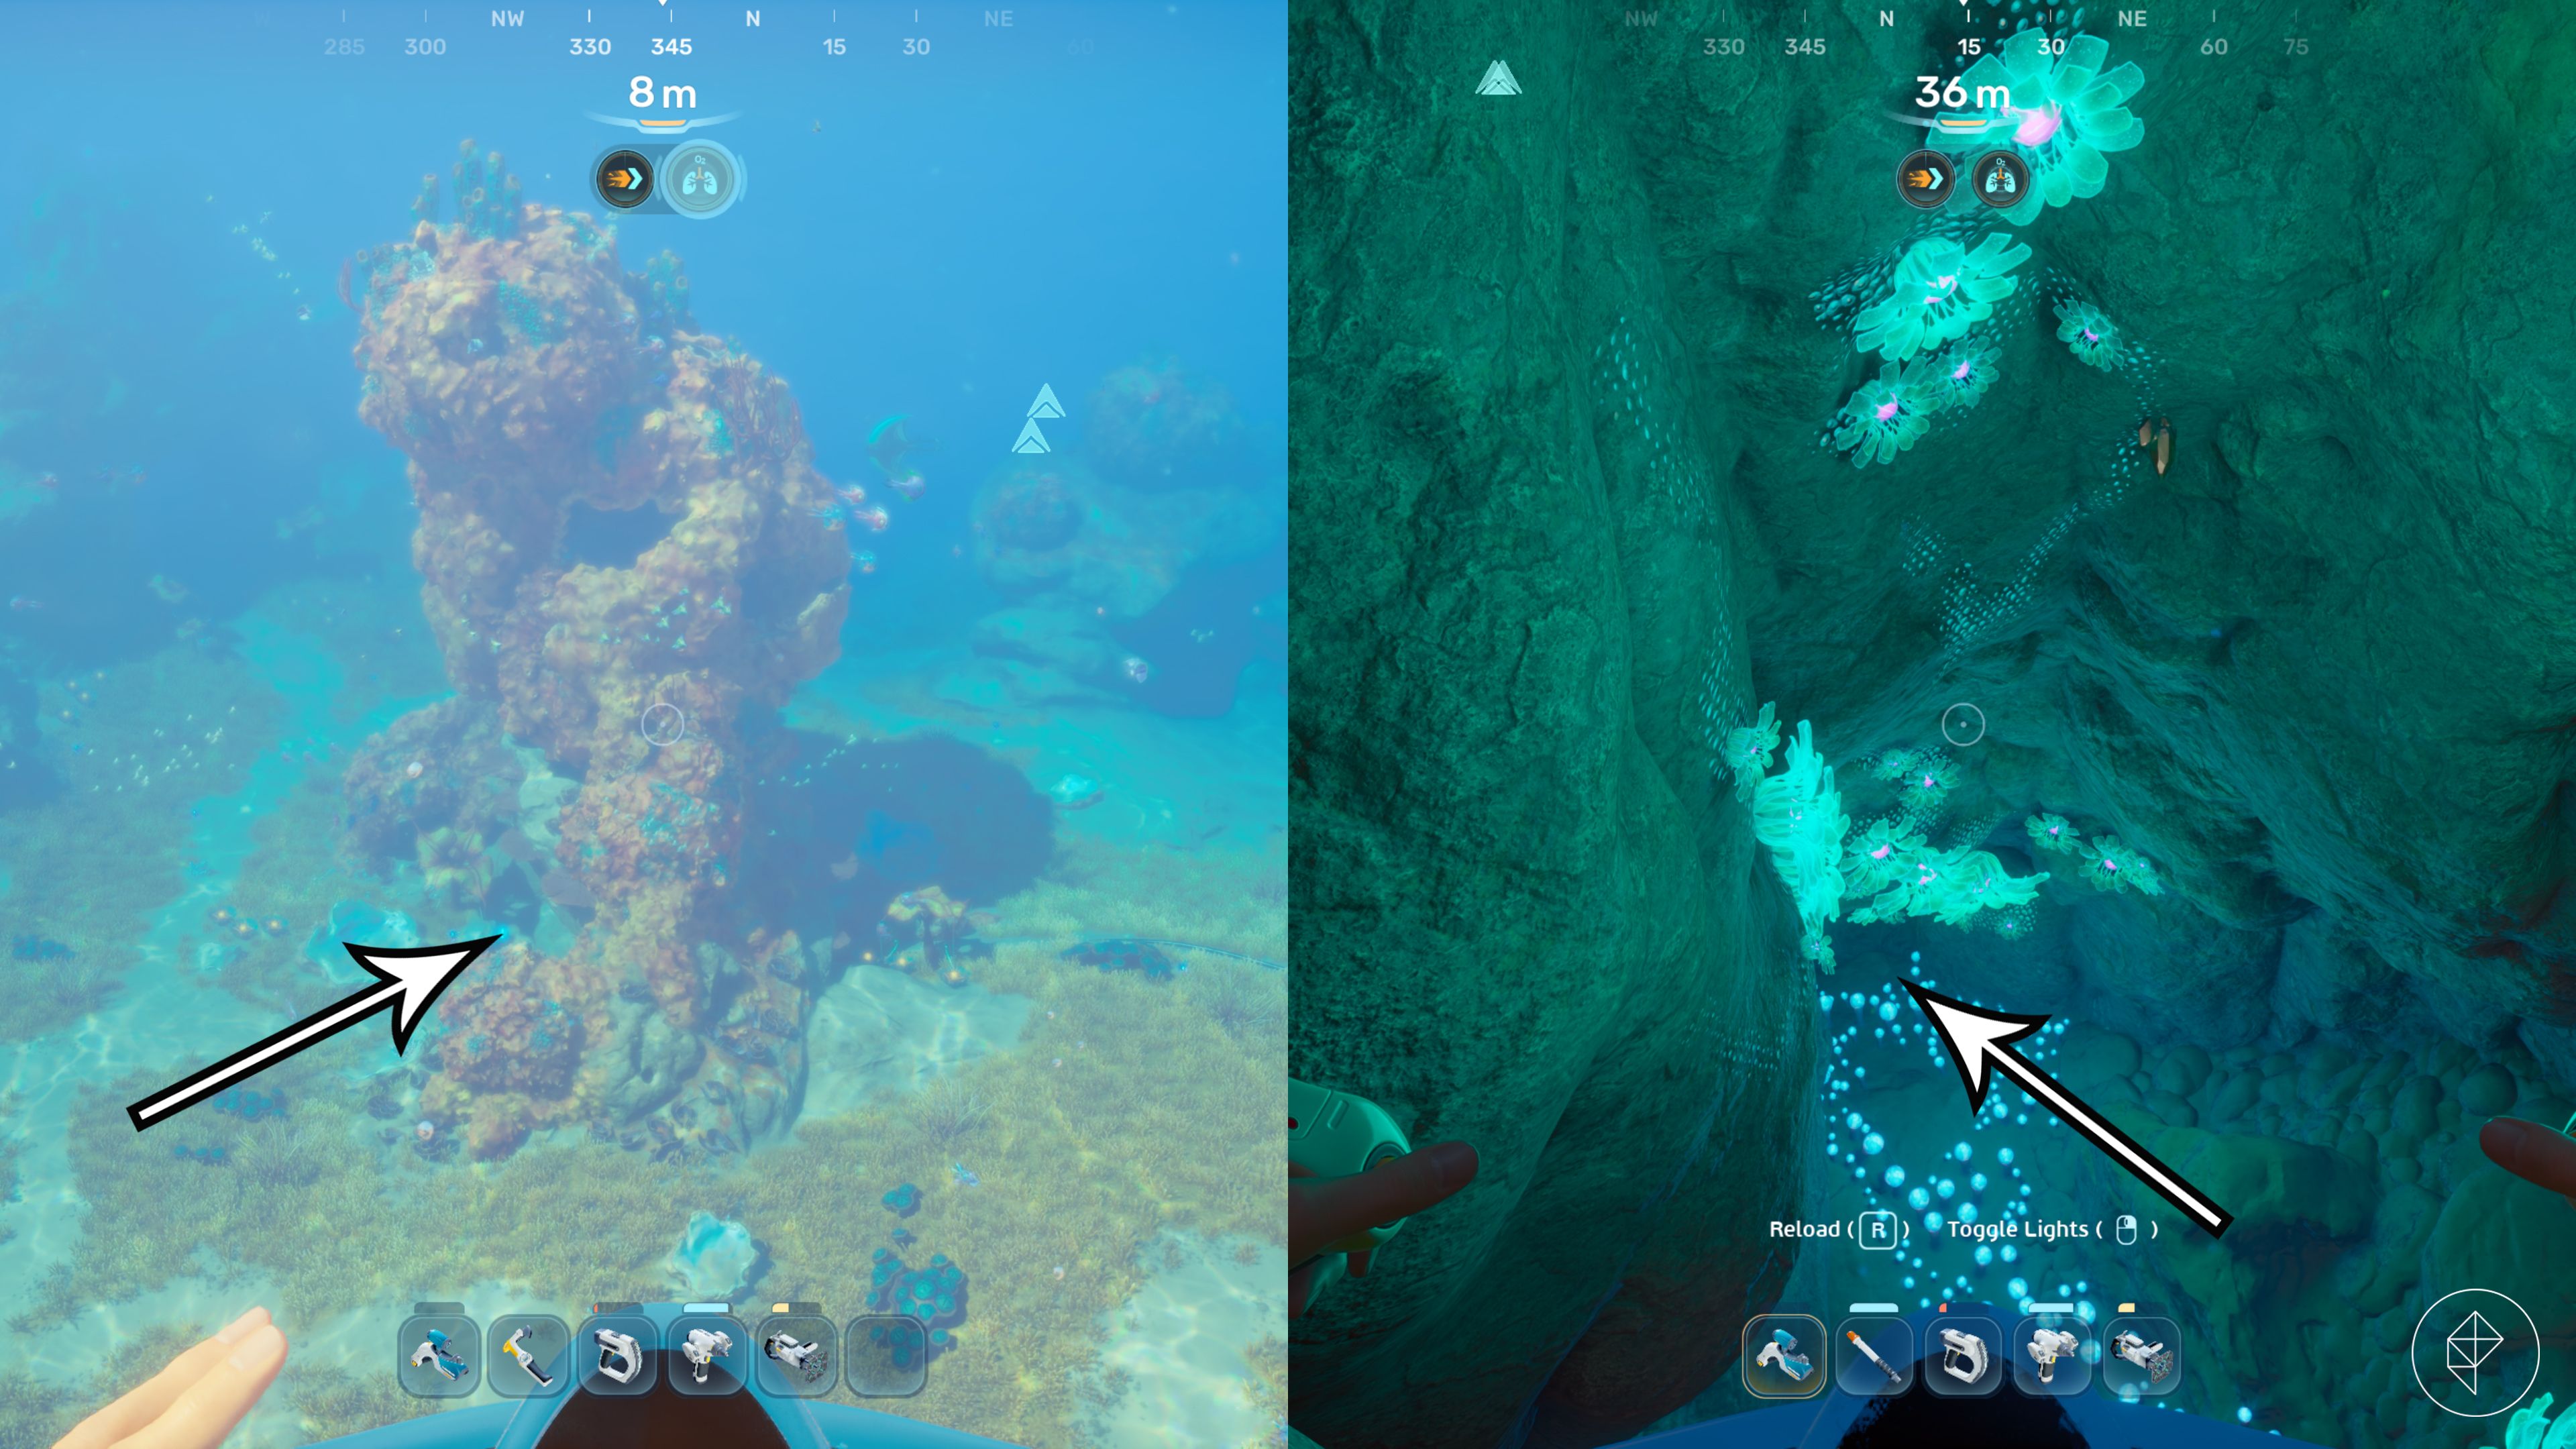
You will find an air pocket in the initial cave room—be sure to top off your oxygen. From there, proceed northwest. As you emerge into the larger chamber, look to your right to spot the hatch containing the biobed.
Biobed location #3
Travel 150 meters northeast-east from the Lifepod to locate the large pink Angel Comb flower (near Anita’s Blackbox). Look southeast to spot a porous coral structure. Pass it on the right side, where you will find three large yellow electric flowers marking two small entry points. Dive through either gap and head east until you see a hatch on your right; the biobed is positioned at the back of the room.
Biobed location #4
This unit is situated near the Old Habitat (Wu Lianghai’s Blackbox). If you haven’t discovered this signal, it is located 350 meters north of the Lifepod and 230 meters northwest of the Angel Comb. Locate the “welcome home” sign at the Old Habitat, then pivot slightly to your right to find a cave entrance facing northeast.
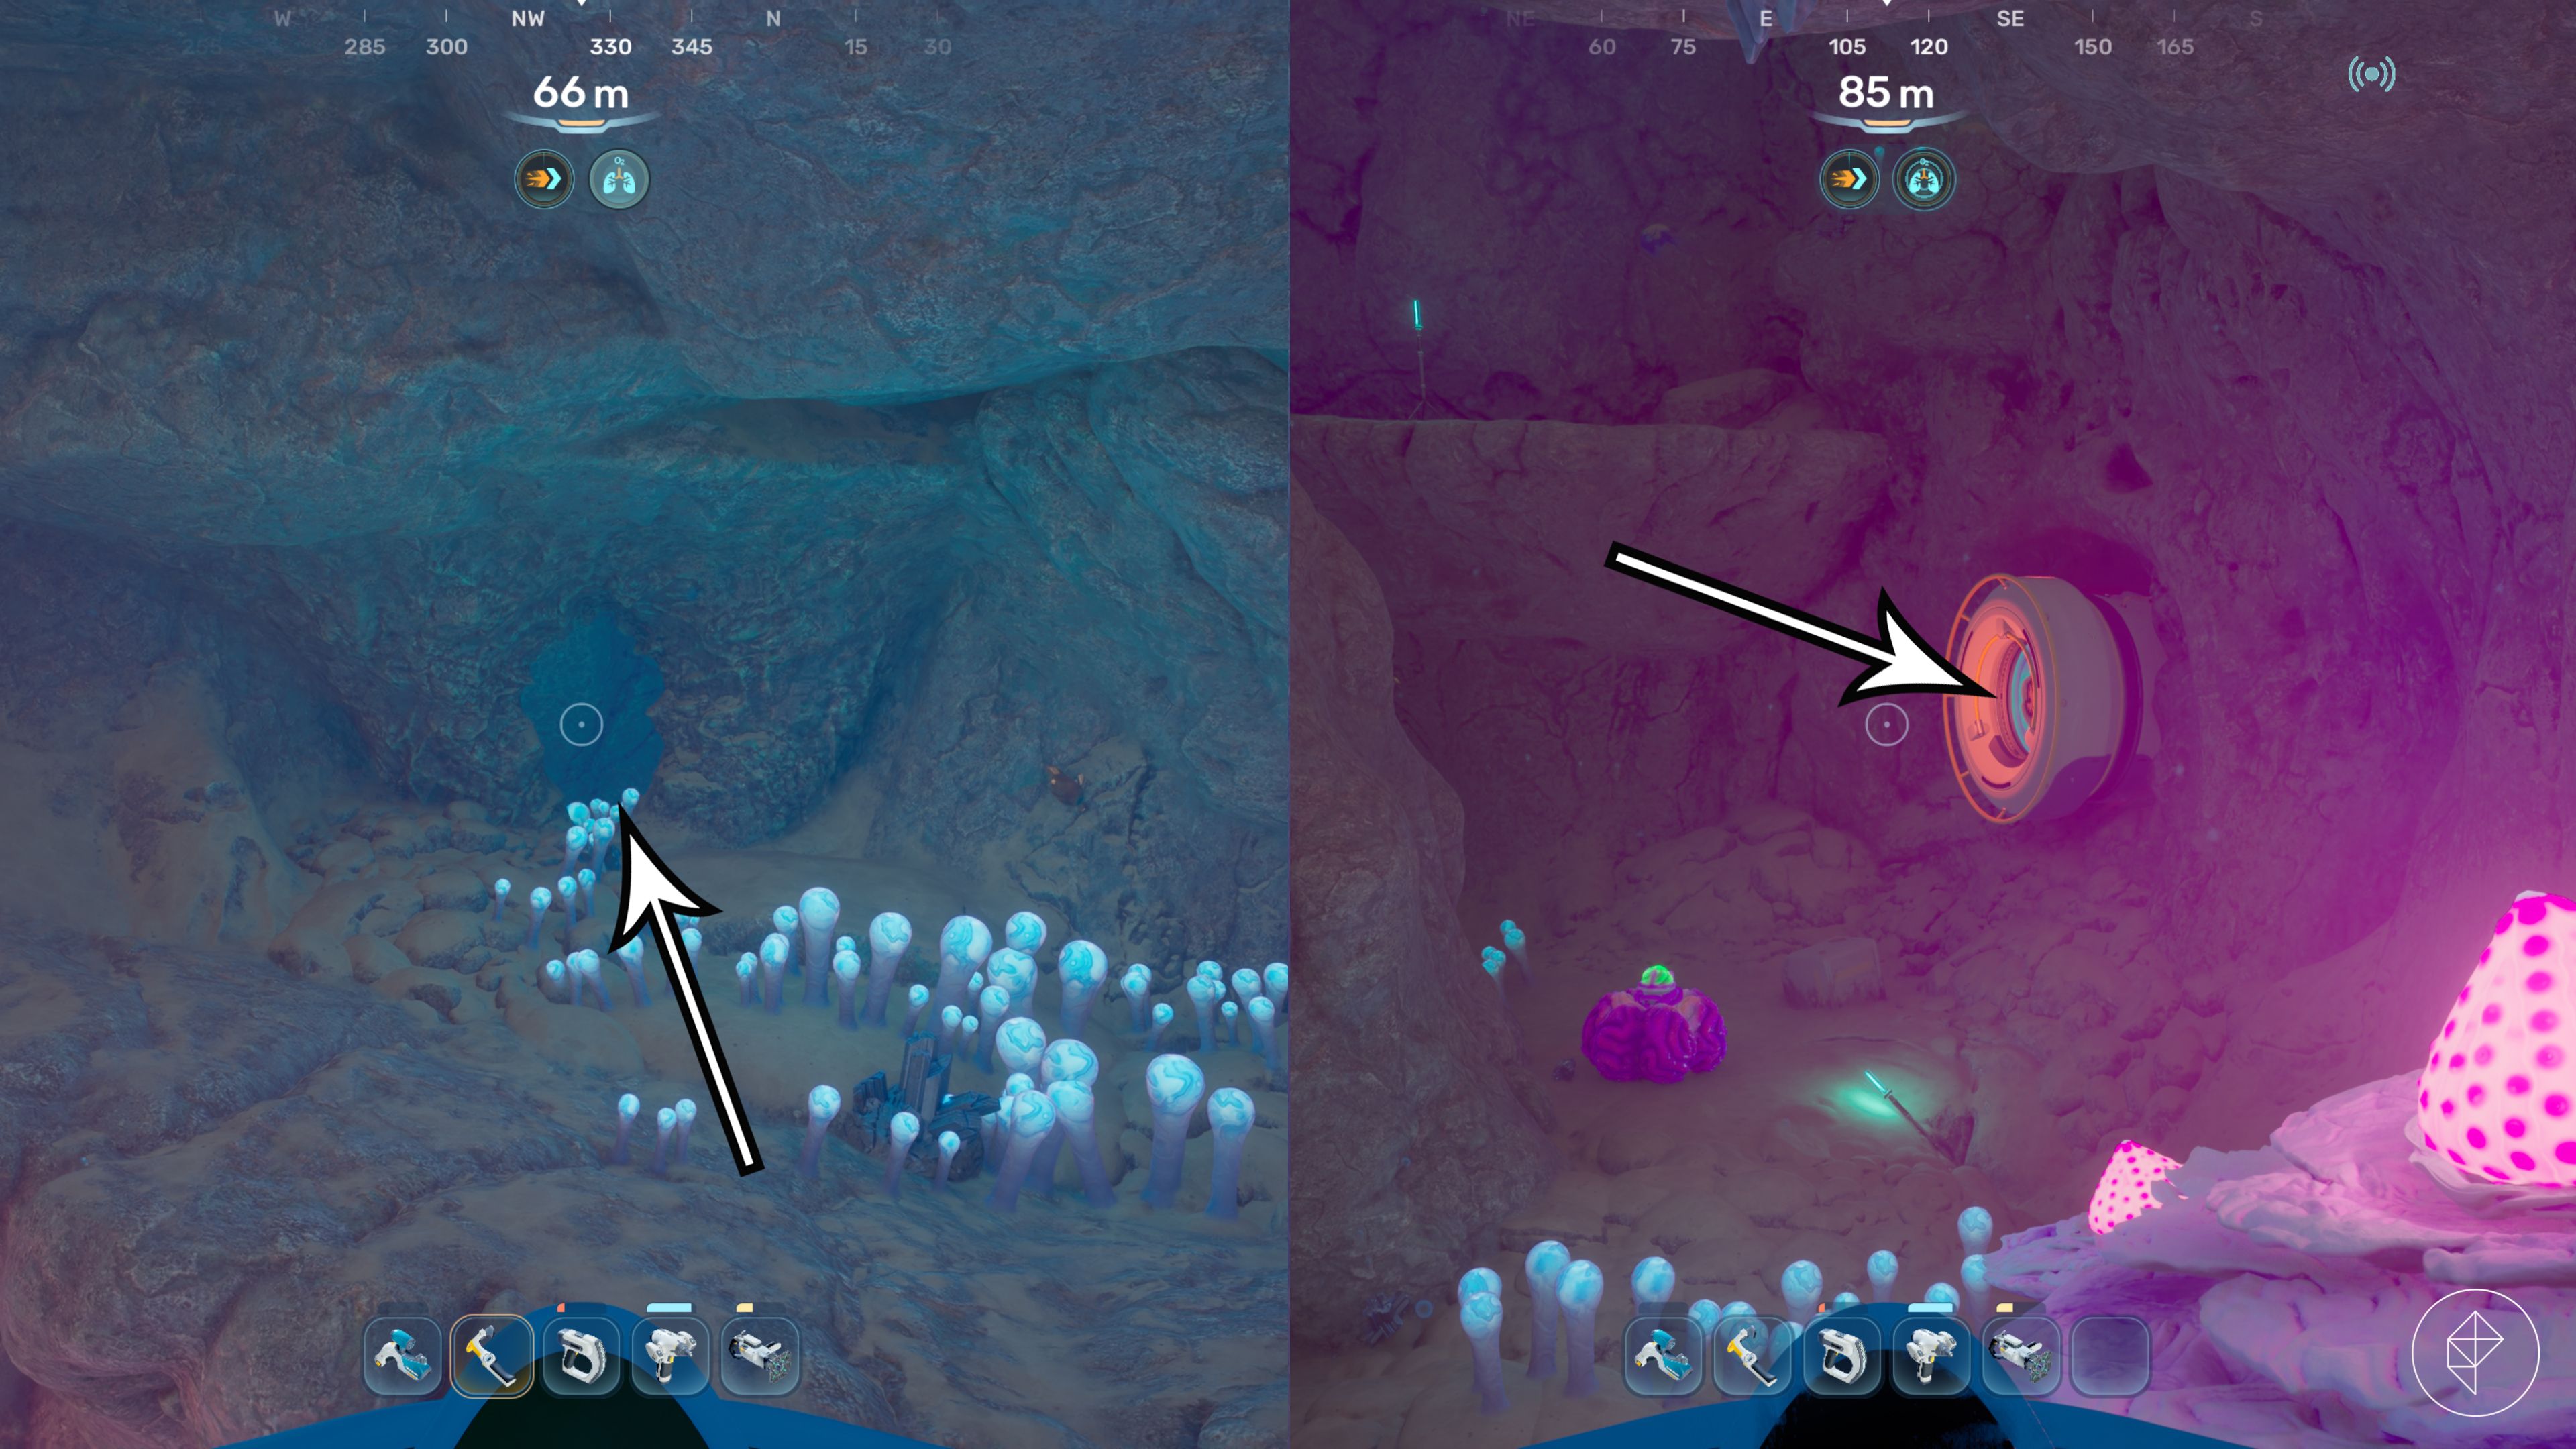
Enter the cave and take the first left tunnel—look for the glowing flowers—then descend as far as the path allows. The room containing the biobed will be right behind you.
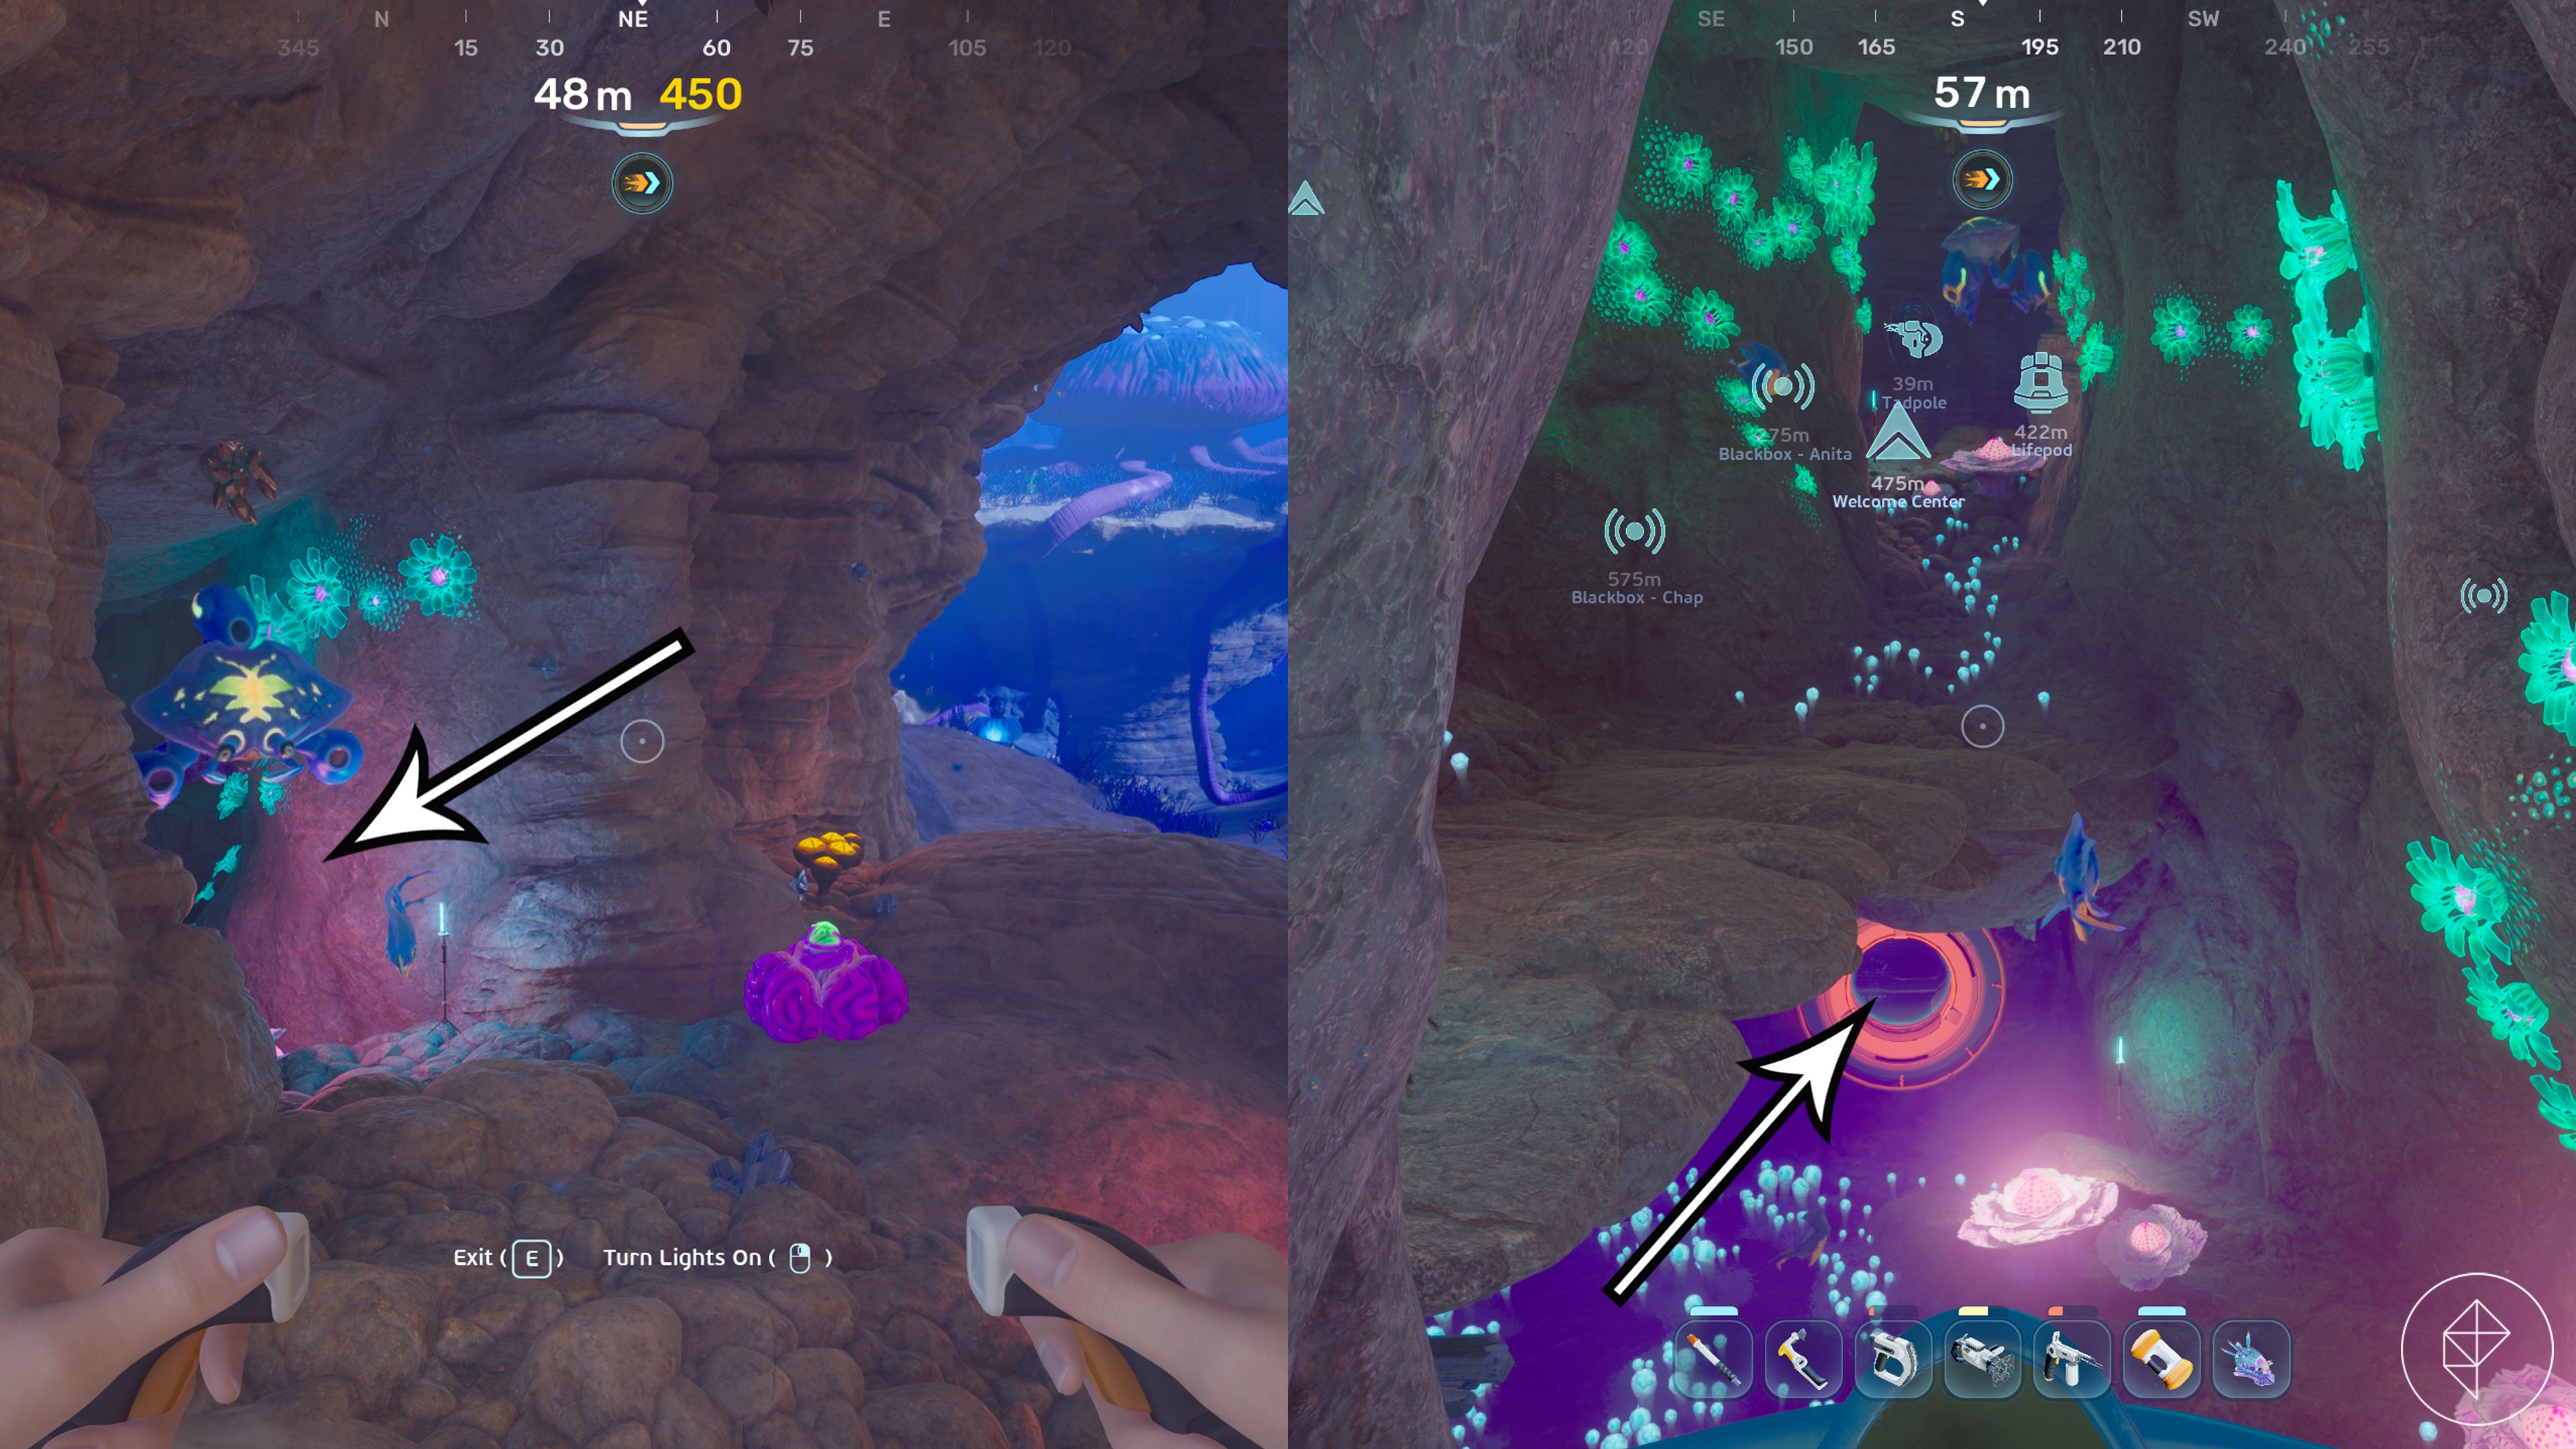
Biobed location #5
Found within the same room as Chap’s Blackbox, this biobed is 220 meters southeast of your Lifepod. Locate the tall pillar reaching toward the surface, and descend into the circular chasm at its base to find the access hatch.

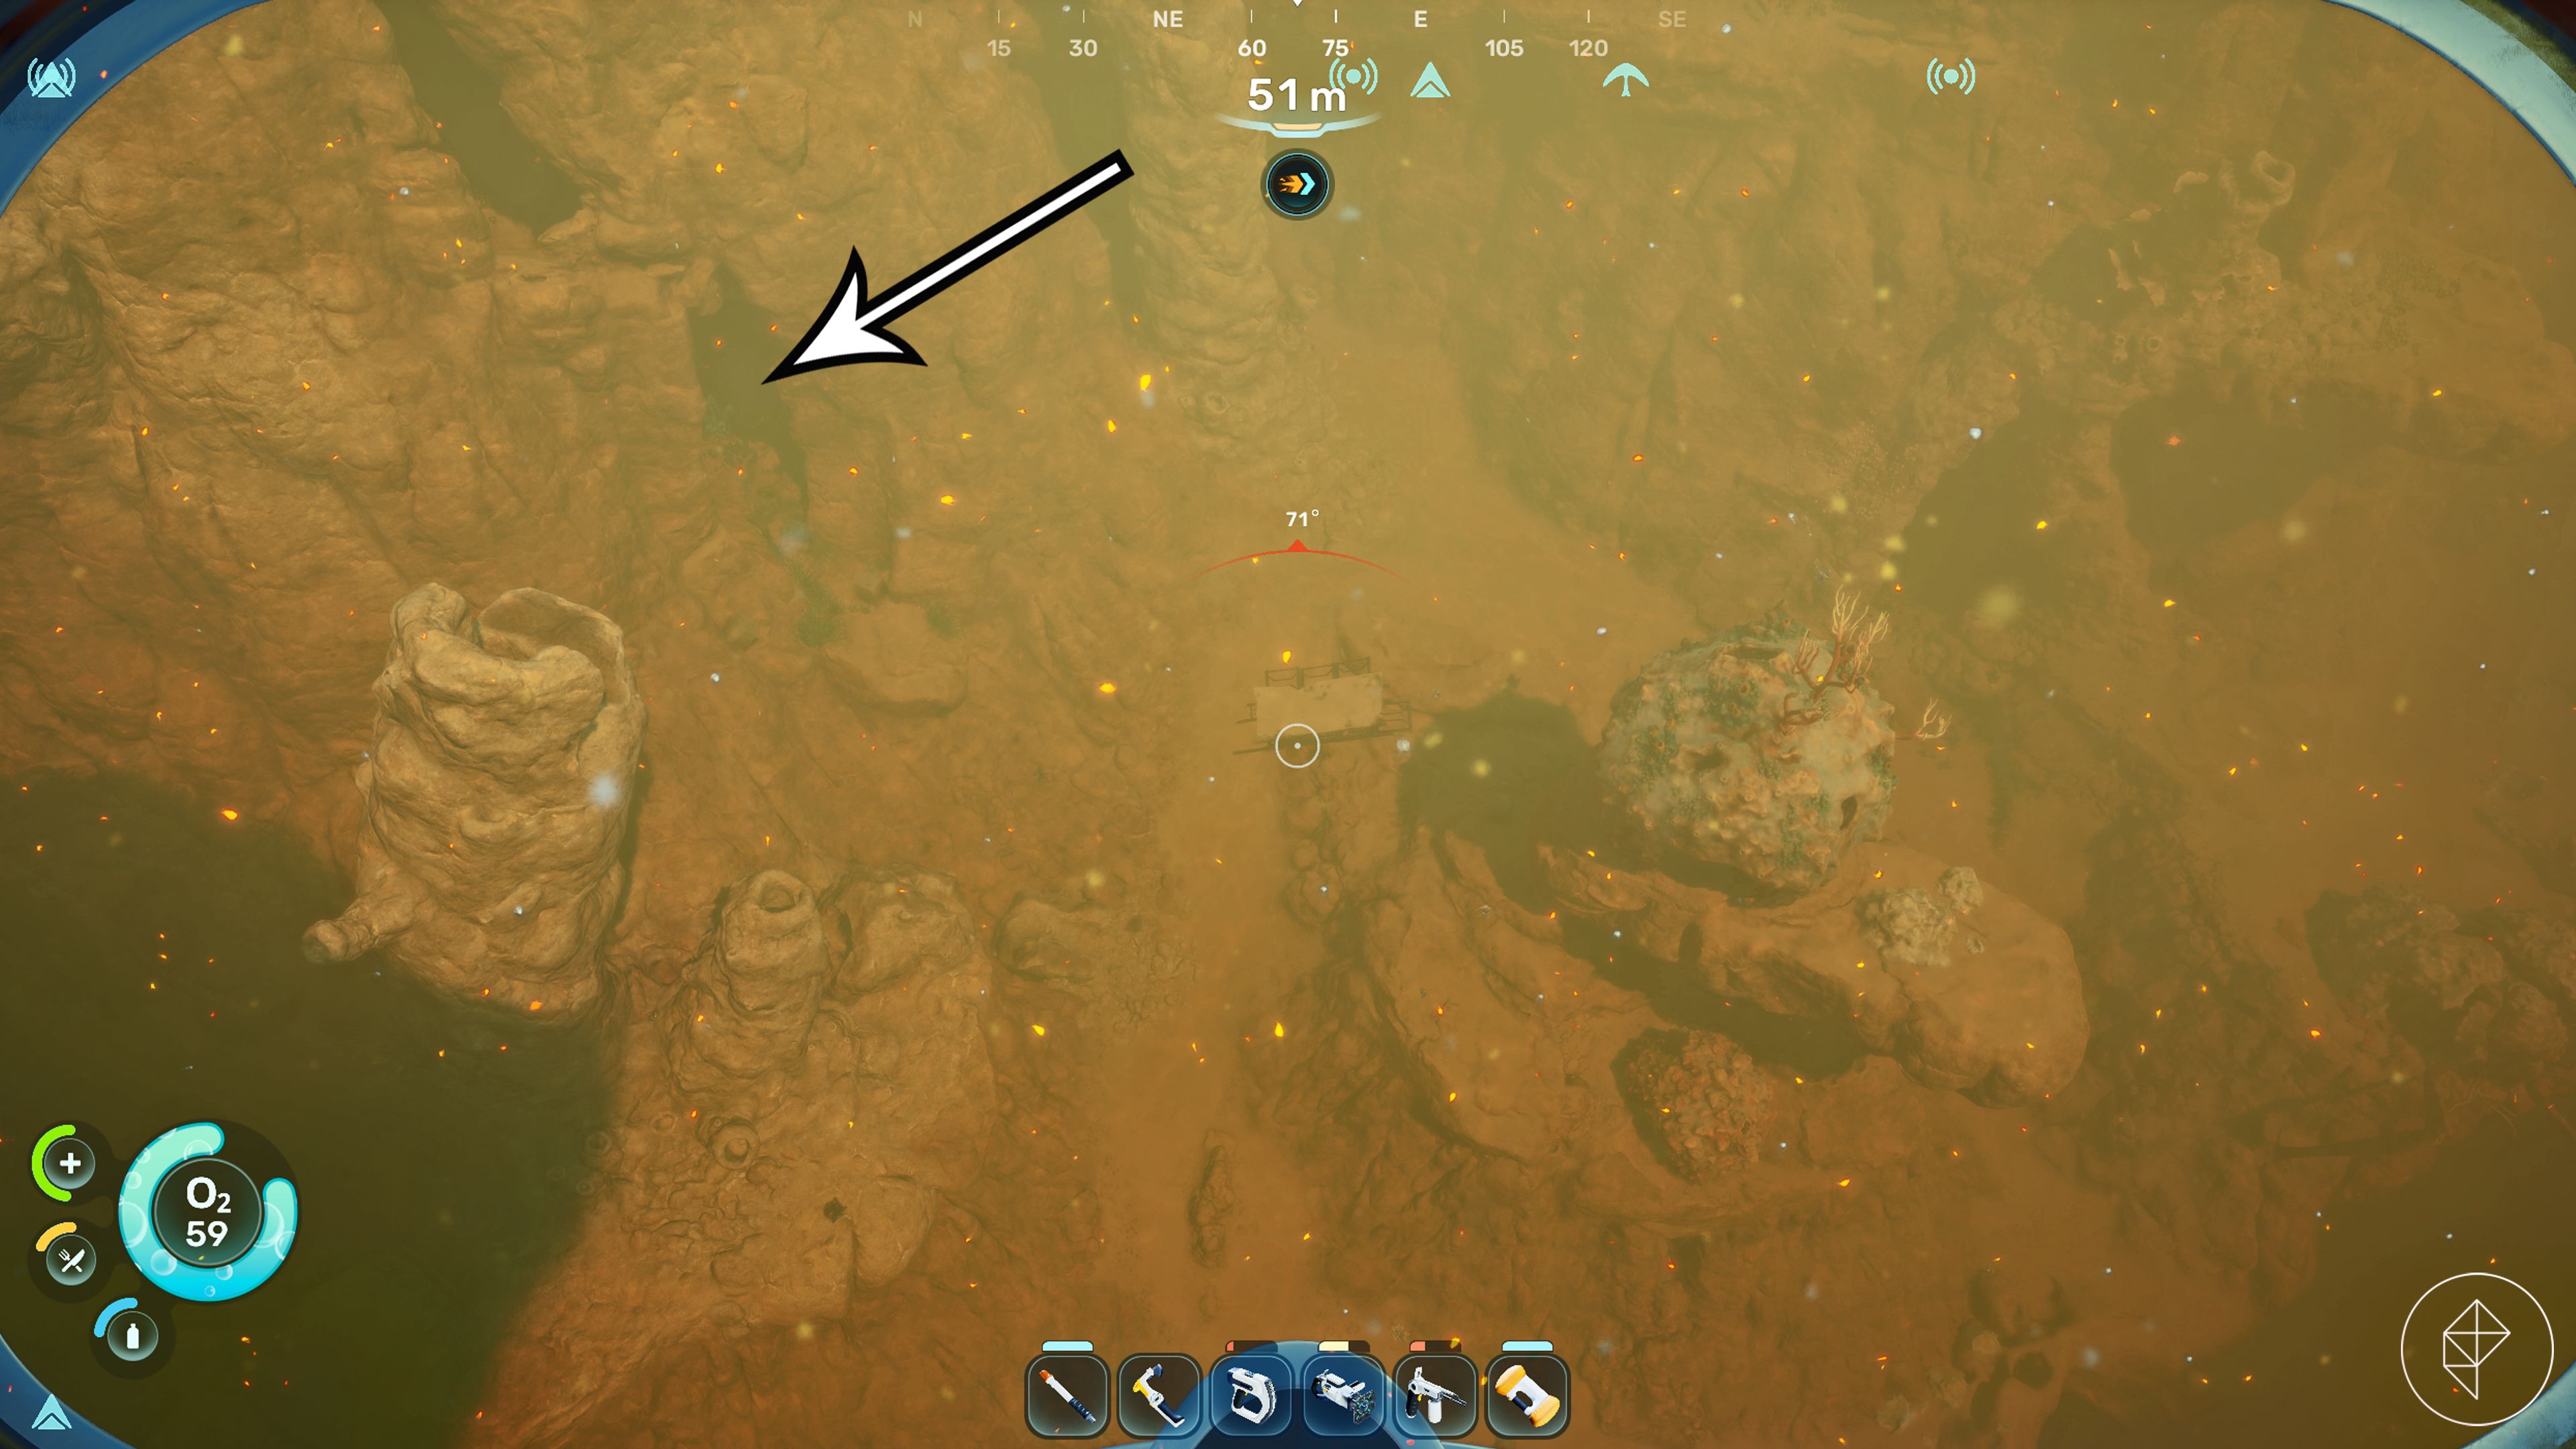
Biobed location #6
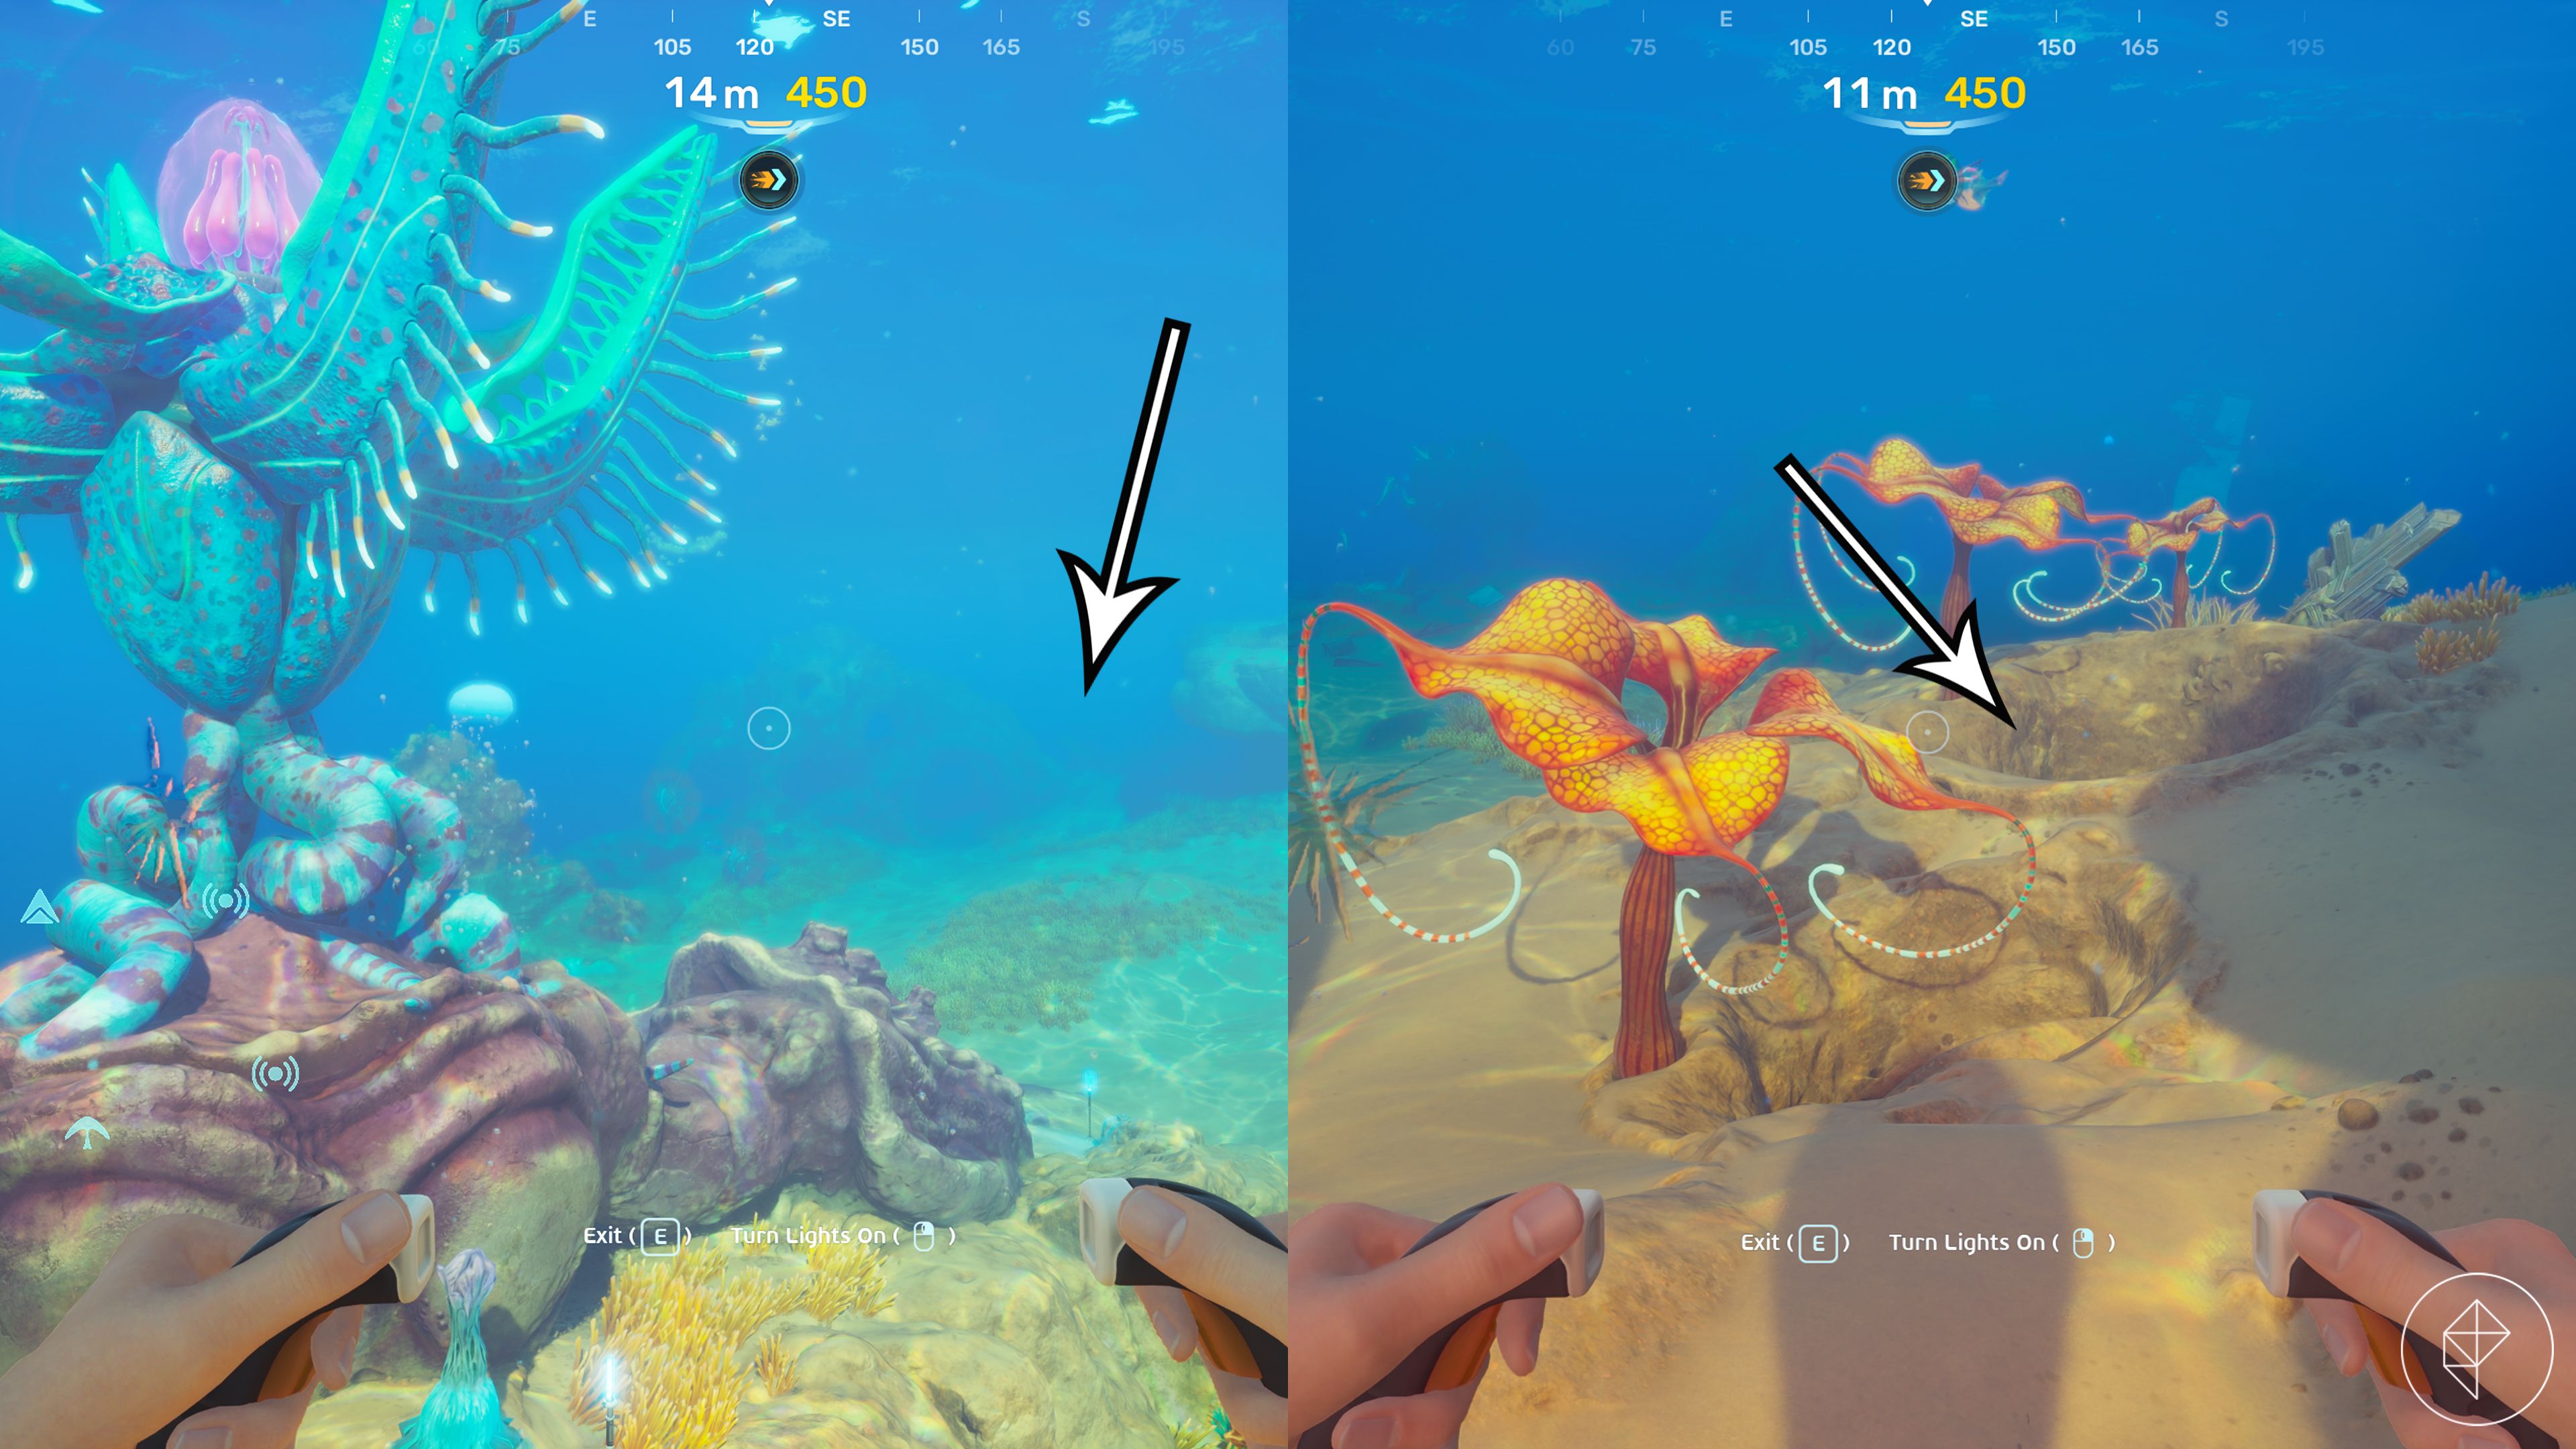
Venture 360 meters east-southeast from the Lifepod (or 140 meters southeast of Chap’s Blackbox) to reach the lava zone. Please note: you must possess heat tolerance (curing the sickly Angel Comb) to survive this trek. Peer over the cliff’s edge to see a series of rock formations and voids; navigate through the narrow gap on the left to reach the biobed.
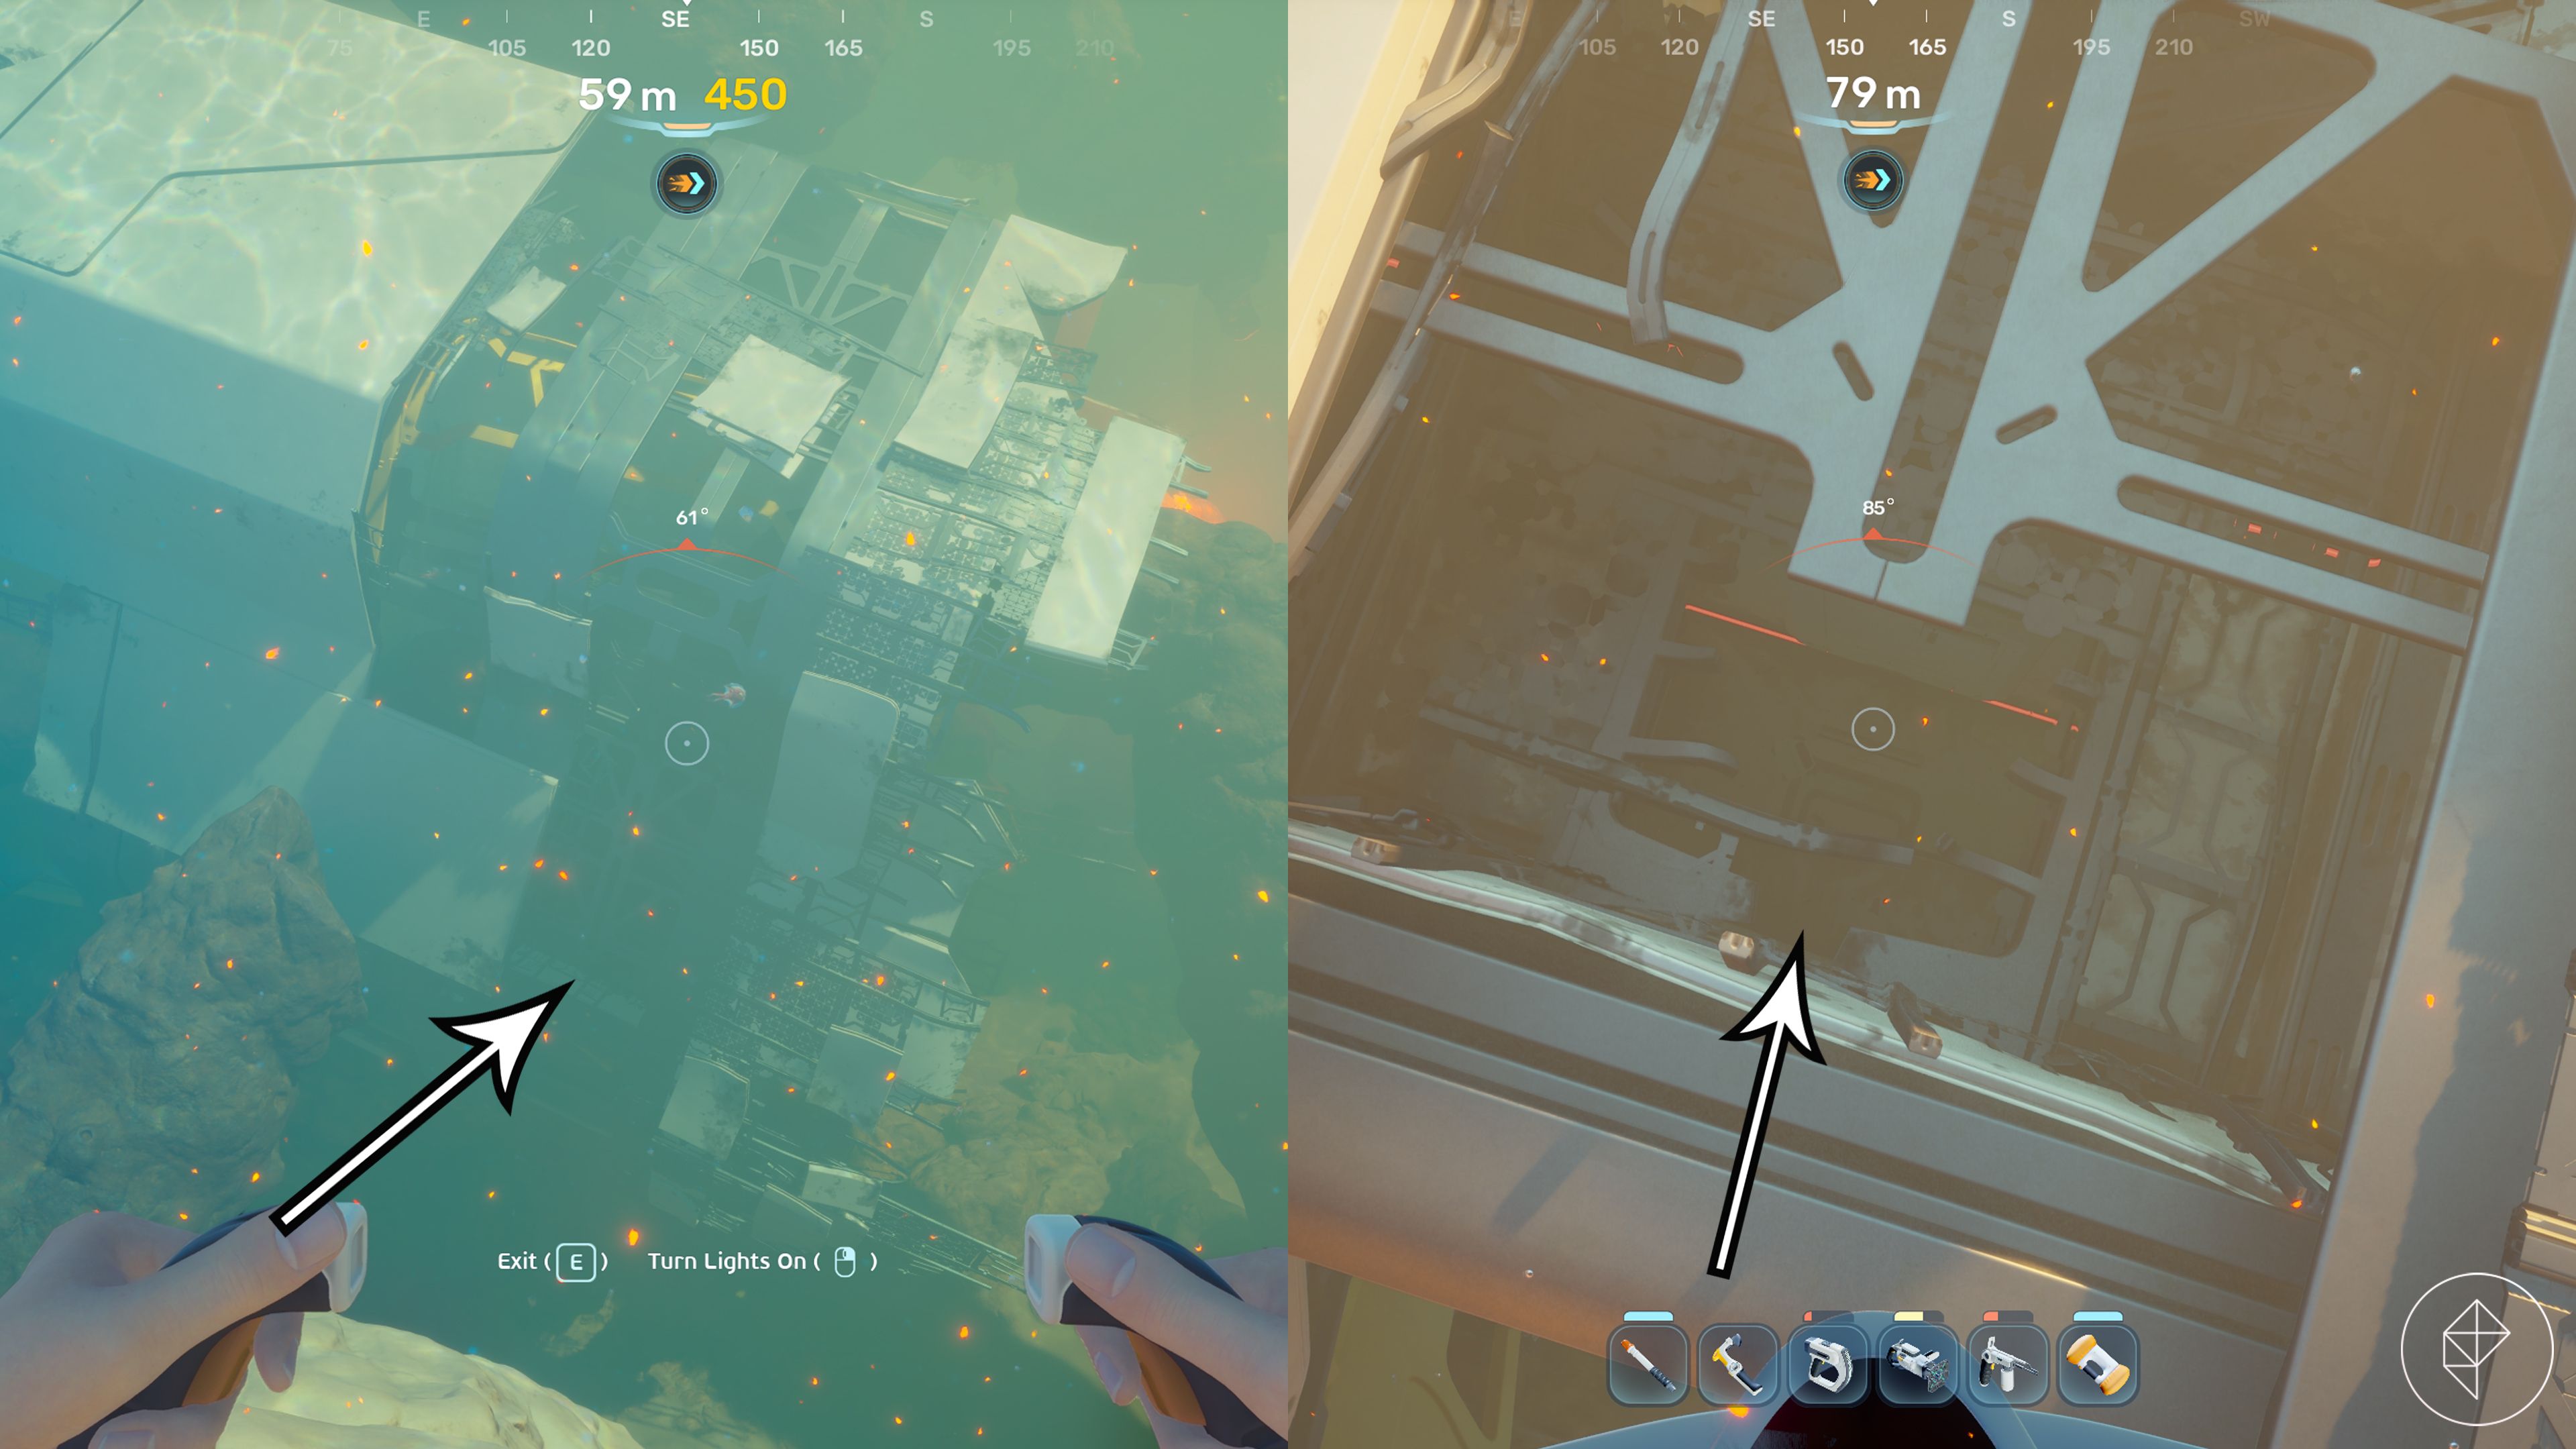
Biobed location #7
Head 490 meters east from the Lifepod toward the perimeter of the lava region. The final biobed is located inside a massive shipwreck. The entry point is found near the bottom on the left side. Once inside, follow the corridor to the left; the biobed is in the final room on your left.
If you are just beginning your expedition in Subnautica 2, we have an extensive collection of resources to help you master the ocean. Our beginner’s guide provides a solid foundation, while our construction tips will assist in designing an efficient base. Don’t neglect your supplies of food and water—and remember, you will need plenty of salt if you want to optimize your food preservation!
For those struggling to gather supplies, check out our guide on acquiring the sonic resonator, which is essential for efficient mining. We also offer detailed breakdowns on where to track down critical resources like copper, lead, quartz, gold, and sulfur.
Source: Polygon


