It’s time for some alien sudoku, some combating, and a bad-ass Krogan.

A Better Beginning: Activate Remnant Monoliths
Now you’ve activated the primary monolith and met Peebee within the course of, you now have an thought of what to do on the planet: these huge alien monoliths are doing one thing, and you’re distinctive in that you just’re in a position to interface with them and use them. It’d be impolite to not make use of this, wouldn’t it?
If you take a look at your map you’ll have waypoints to information you to the subsequent monolith, which is helpful, nevertheless it’s price noting that every of the monoliths additionally fires a brilliant white laser throughout the sky of the planet. These lasers converge on one level that appears to result in a complete lot of nothing proper now, however you may hint the lasers again to the monoliths it’s essential discover if you wish to observe them down in a extra natural approach.
We’re going to deal with the principle quest right here, and while in the last part of this guide we did tell you to mostly stay in the Nomad and make your approach very particularly from story level to story level it could be price hopping out should you move something of curiosity alongside the best way – you would possibly discover some Remnant robots to combat, or some Kett, and plenty of of those locations additionally maintain containers which have loot so that you can seize.
When you attain the subsequent monolith you’ll must combat to clear it of enemies – simple sufficient, simply bear in mind to take cowl as wanted and don’t neglect to spend your talent factors from levelling as much as improve your powers. When you’re completed, you’ll be confronted with a console and one other little puzzle.

Reactivating the second Remnant Monolith & fixing its glyph puzzle
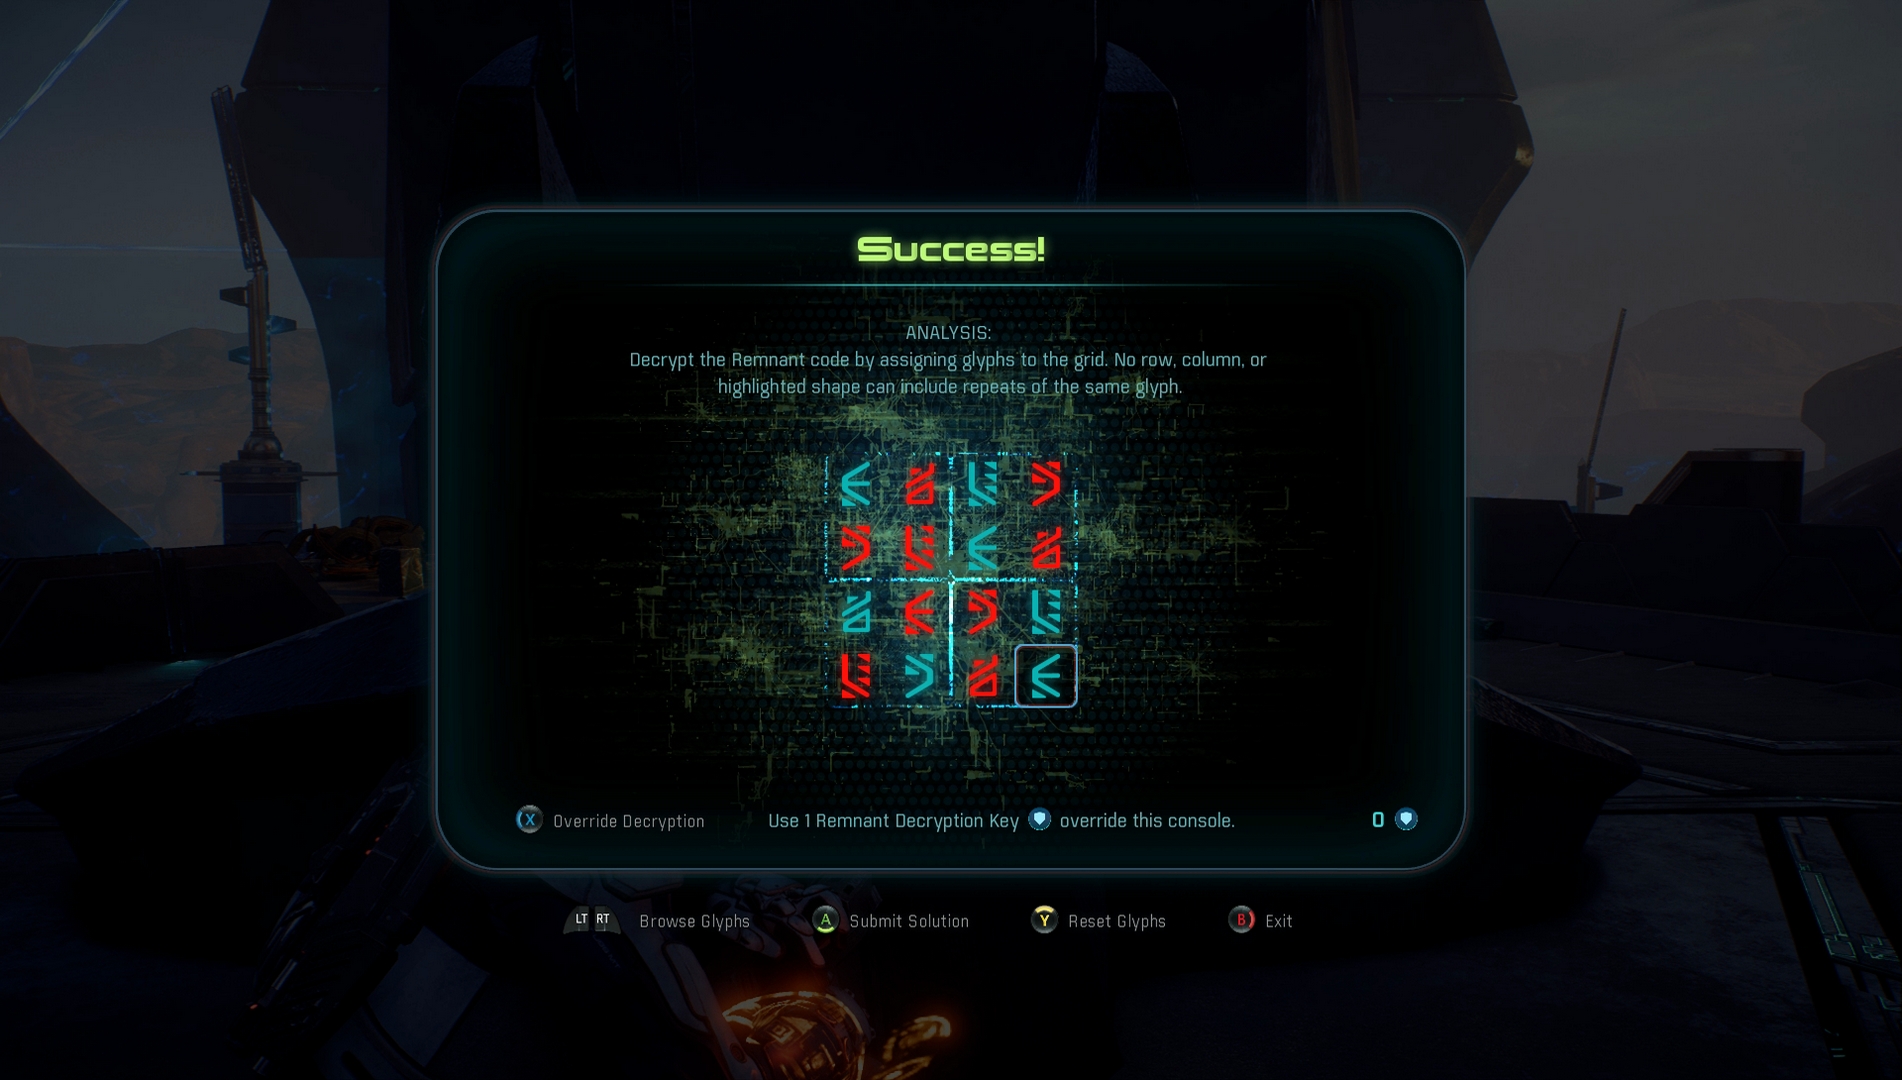
The very first thing you’ll must do is try to decrypt the Remnant Monolith sitting in the course of this space. When you do it’ll toss up a puzzle display: it’s instantly clear that this one isn’t so simple as waving a hand and activating it as with the final. You can’t full the puzzle, nonetheless, because you’re lacking among the glyphs.
To get the glyph, pop open your scanner and take a look at the console. Follow the cabling that comes out of the console underground and watch the place it goes: you’ll see it goes up excessive, however in the identical course because the cable you’ll see one other console. Interact with this – platforms will rise, permitting you to make use of your jump-jets to spice up your approach up to the place the cable leads.
Once you’re excessive up, activate your scanner once more and go searching – simply as on the final remnant website you’ll discover a glyph. From this vantage level you’ll be capable to see a second glyph too, so scan them each. Now we’re speaking!
Jump down and hit the principle console once more. The puzzle flashes up: and this time it’s doable! We’ve got a dedicated page that explains to you just how this monolith decryption mini-game works, so if it confuses you and also you need to do it legitmately head on over there and browse these suggestions. Basically it’s sudoku, although: every grid and line can’t comprise the identical icon greater than as soon as.
If you need to cheat, effectively, right here’s the reply:
After you activate the monolith some involved Kett troopers will present up – maintain them.

A Better Beginning: The closing Monolith & the Kett Base
Once the second monolith is activated our job is to go to the third, clearly. This one is a bit of bit extra sophisticated nonetheless – it’s surrounded by a pressure area that you would be able to’t penetrate and is surrounded by a Kett base. You’ll must storm this base and kill the Kett inside with a purpose to deactivate the pressure fields and attain the monolith. Head south-east following your waypoint to achieve the bottom.
The base is symmetrical, with one entrance that splits into left and proper pathways which can be kind of an identical. Park up the Nomad and start your siege. This is your first main fight problem, so use cowl correctly, don’t neglect to maintain transferring utilizing your soar jets and don’t rush – be affected person and take out the Kett in small waves somewhat than by speeding too deep into the bottom.
Don’t neglect to scan completely every part new that you would be able to for analysis factors. Power turbines scattered alongside the pathways will deactivate cowl that enemies use, making them extra susceptible.
Once all of the Kett are lifeless you’ll must scan for one final energy generator – it’s on the far finish of the bottom, proper close to the force-field that stops you from getting inside. Deactivate it and also you’ll be handled to a cutscene and meet a brand new character. That previous grandpa is cool.
Activating the ultimate Remnant Monolith
With this completed, head to the ultimate monolith. The rating is similar right here as earlier than: whip out your scanner, scan the console, then comply with the cables to seek out the 2 glyphs. They’re each on the roof of close by pillars. Once scanned you may work together with the principle console.
This time there’s no puzzle – you’ll mercifully simply be given speedy entry to the monolith and activate it. Once this monolith is energetic, main modifications are afoot right here on Eos. It’s time to take a look at no matter it’s the monolith activated. Prepare yourselves…


