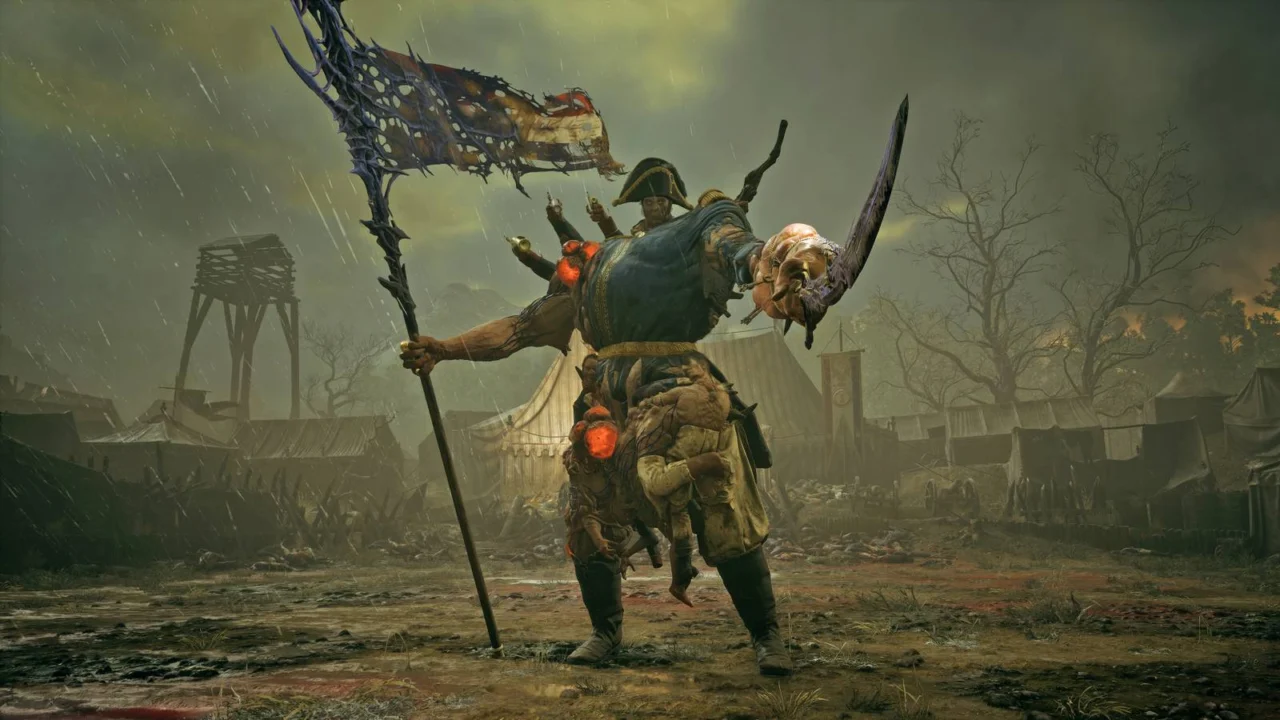
How to Defeat General Lothaire, the Eagle-Bearer, in Valor Mortis
To triumph over General Lothaire in Valor Mortis, you will need to fortify your stamina, equip top-tier early-game amber, and summon unwavering resolve. While he certainly isn’t the first formidable adversary you will encounter, Lothaire is leagues more punishing than any run-of-the-mill foe loitering near the stone quarry. Do not be discouraged if it takes several harrowing attempts to overcome him.
Equipped with the optimal loadout and a sound tactical approach, here is the ultimate guide on how to vanquish General Lothaire in Valor Mortis.
General Lothaire’s Location in Valor Mortis
Though your paths cross briefly at the conclusion of Chapter 1, you are not expected to survive that initial encounter. Rest assured, after meeting your demise, you will awaken at the dawn of the subsequent chapter. Your true reckoning awaits at the end of Chapter 2, where defeating Lothaire becomes mandatory to progress further.
His combat arena rests atop the craggy cliffside overlooking the quarry. Simply clear out the quarry grounds to activate the lift ascending to his domain.
How to Prepare for the General Lothaire Boss Battle in Valor Mortis
By the time you challenge Lothaire, you will likely be hovering around level 8, leaving you with six to eight skill points to allocate and a single amber socket to utilize.
Since a base nephtoglobin reservoir is more than ample to ignite the General—and prioritizing HP recovery trumps inflating your maximum health pool—your earliest skill points belong in Maximum Endurance to expand your stamina pool. Following that, invest heavily in Parrying Impact to accelerate the degradation of Lothaire’s posture gauge. Should your deflection timing feel unreliable, pivot toward the Blocking skill instead; this reduces stamina depletion upon blocking and expands your pool of recoverable health. Fear not, for you can always reallocate your build at any lantern.
With only one amber slot at your disposal, select one of the following enhancements, listed in order of priority:
- Transmuted Persistence: Inflicting damage via transmutations restores recoverable health. This ensures you regain vital HP every time you sear Lothaire with your fire transmutation.
- Dominatus: Heals you upon executing a critical strike. While rewarding, this relies entirely on breaking Lothaire’s posture—a feat you will only achieve a couple of times per match—making it less dependable than Transmuted Persistence.
- Potent Concoction: Consuming a ferrofluid flask simultaneously replenishes nephtoglobin and vitality, streamlining your ability to apply burn effects.
- Iron Grip: Accelerates ferrofluid flask usage and grants interruption immunity. Only equip this if you struggle to find safe windows to heal. Maintaining adequate spacing from Lothaire renders this largely unnecessary, however.
Regarding consumable utilities, the following items prove invaluable:
- Flaming Whetstone to rapidly build up fire affliction on impact.
- Fire-Clad Rounds to imbue your gunfire with scorching thermal buildup.
- Nephtoglobin Vials to instantly restore energy for your fire transmutations.
- Refreshing Vials to supercharge your stamina recovery rate.
- Hand Grenades to unleash devastating burst damage.
Nephtoglobin Vials, Flaming Whetstones, and Fire-Clad Rounds serve as absolute lifesavers should your energy deplete right before securing a burn state. Because resources are finite, however, reserve them for the latter half of the engagement. Once phase two begins and victory is within reach, unleash your explosive arsenal!
How to Beat General Lothaire in Valor Mortis
Lothaire invariably initiates hostilities with one of two signature openers: a vicious triple-shot barrage from his shoulder-mounted cannon or a devastating leaping downward strike. Whichever he chooses, be prepared to evade immediately. The leap attack yields a magnificent opening for retaliation; deftly sidestep behind him and unleash your fire transmutation to ignite his armor. Precision is paramount here—act swiftly enough and you will maximize the thermal buildup, afflicting him with continuous burn damage over time. Hesitate, and his counter-attack will interrupt you.
Lothaire will repeatedly incorporate these cannons and aerial leaps throughout the duration of the duel. The visual reference below highlights his cannon stance on the left (distinguished by an elevated arm) and his crouching posture preceding the leap on the right.
 Graphic: Marloes Valentina Stella/Polygon | Source images: One More Level/Lyrical Games
This grueling encounter is divided into two distinct phases. Keep the following operational parameters in mind as the battle evolves.
General Lothaire Boss Battle: Phase One
A completely full nephtoglobin meter, even bereft of statistical enhancements, provides just enough fuel to engulf Lothaire in flames. To harvest more nephtoglobin mid-combat, target his exposed weak points. He possesses three distinct vulnerabilities located on his shoulder, thigh, and knee, yielding three complimentary nephtoglobin orbs when struck. Standard melee aggression will also incrementally recharge your energy reserves.
 Graphic: Marloes Valentina Stella/Polygon | Source images: One More Level/Lyrical Games
Before unleashing your fire transmutation again, ensure your nephtoglobin bar is maxed out. Lothaire only suffers ticking damage over time if you completely fill the thermal buildup gauge in a single uninterrupted burst. Stalling halfway through to scavenge for more energy will allow the accumulated heat to dissipate entirely.
Ultimately, the most reliable path to victory involves systematically parrying his strikes until his posture breaks. When his stability shatters, sprint toward him and press the designated attack prompt upon seeing the crimson indicator to drive your blade deep into his skull, instantly stripping away roughly 20% of his total health pool.
The visual demonstration below illustrates a successful deflection on the left (highlighted by golden sparks) alongside a staggered Lothaire on the right.
 Graphic: Marloes Valentina Stella/Polygon | Source images: One More Level/Lyrical Games
Depending on the specific strike, absorbing a direct hit from Lothaire can obliterate over half your vitality, whereas standard blocks restrict damage to roughly 20%. Consequently, err on the side of caution: mistiming a parry slightly early results in a safe block, which is far superior to taking a full-force blow. Crucially, health lost while guarding remains “recoverable” for a brief window, meaning you can claw your health back by immediately retaliating against him.
Aside from his explosive cannons and aerial leaps, Lothaire wields an unblockable forward ground slam that must not be contested with a parry. The optimal moment to parry occurs when he advances on foot, raises his arm, and unleashes a sequence of two to three consecutive melee sweeps. If stringing together multiple parries feels too daunting, prioritize deflecting or blocking the initial blow, evade backward, and re-engage during the next opening without fear of resetting his posture meter.
 Graphic: Marloes Valentina Stella/Polygon | Source images: One More Level/Lyrical Games
As demonstrated above, Lothaire’s arm remains hooked when winding up a melee combo, whereas pointing straight upward signifies an incoming cannon volley.
General Lothaire Boss Battle: Phase Two
Upon entering the second phase, Lothaire mutates a monstrous claw onto his left arm, integrating unblockable strikes into his standard melee flurries. He also leverages this appendage to toss high-explosive payloads or forge energy orbs, slamming them into the ground to release a room-clearing shockwave. Try to shoot these projectiles directly out of his hand before he can deploy them!
The accompanying image highlights his unblockable claw maneuver on the left and the shockwave orb generation on the right.
 Graphic: Marloes Valentina Stella/Polygon | Source images: One More Level/Lyrical Games
Additionally, General Lothaire will summon two distinct classes of minions: elite musketeers and foot soldiers. Resist the urge to squander precious ammunition on them! To neutralize the musketeers, simply sidestep their incoming fire, causing them to phase out of existence immediately. For the ground infantry, a single well-placed melee strike will obliterate them instantly.
 Image: One More Level/Lyrical Games
Having pushed this far into the fray, expend your remaining special items—particularly hand grenades—to seal your triumph. For successfully retiring General Lothaire, the Eagle-Bearer, you will be handsomely rewarded with a bounty of 10,000 catalysts in Valor Mortis.
Source: Polygon
Related articles
 Roguelike Strategy Game Crown Must Hold Announced
 Xbox 360 Software Jailbreak Released Nearly 20 Years After Launch
 Asha Sharma Says Xbox Needs New Gaming Franchises to Survive
 Nexus Mods Removes Gears of War: E-Day Mod Replacing Megs’ Dialogue with Broken Record Sounds
 Valor Mortis Confirmed for PS5 and Xbox Series X/S with 60 FPS Support
 Activision Shuts Down Fan-Made Call of Duty Projects Featuring Black Ops 2 and Zombies Maps
 Space Horror Game Directive 8020 to Feature Online Co-op
 Physical GTA 6 Editions Becoming Difficult to Purchase as Rockstar Warned