XCOM Chimera Squad character guide: every agent's role explained
How to pair agent abilities


XCOM Chimera Squad has you take command of 11 specialised units. Each one has a dramatically different role that you can use to your advantage in battles, and abilities that you can unlock as you use them in missions. Some agents work very well with others, allowing for combos to quickly take out enemies.
XCOM Chimera Squad character guide
Our XCOM Chimera Squad character guide will explain all 11 agents available to you in the game, their roles in your squad, and what builds work for them the best. Feel free to head back to our main XCOM Chimera Squad guide hub for more tips and tricks.
New agents will periodically be available to you as you progress through the campaign. You'll get a selection of three at a time to choose from and there are a total of 11 in the game. You will begin the game with Godmother, Cherub, Terminal, and Verge already on the squad if you did the tutorial, but a free choice between any four of the agents if you didn't do the tutorial. We are still working out the best builds for each character, but in the sections below, you will find all the known information about each agent.
All of the stats for each character below are based on the "Normal" difficulty setting and will fluctuate slightly between different difficulty settings.
- Godmother
- Cherub
- Terminal
- Verge
- Shelter
- Patchwork
- Blueblood
- Claymore
- Axiom
- Torque
- Zephyr
- XCOM Chimera Squad guide series

Godmother
- Species: Human
- Class: Ranger
- Specialities: Offence, stealth, and ambush
- Starting weapon: Shotgun
Base stats
| Health | Mobility | Aim | Will | Dodge | Crit |
|---|---|---|---|---|---|
| 8 | 12 | 65 | 40 | 0 | 0 |
Abilities
- Scattershot: Godmother fires the shotgun in a short-range cone, damaging multiple targets. Costs two ammo.
- Alpha Strike: Godmother fires the shotgun during the breach and will take her turn earlier on the timeline. Godmother also gains one bonus action on her first turn. One use per mission. (Unlock at Deputy Agent rank)
- Last Stand: If Godmother is unimpaired and takes enough damage to begin Bleeding out, she is instead reduced to one HP and is given a turn immediately after the current turn. One use per mission. (Unlock choice at Field Agent rank)
- Flush: Godmother takes a shot at an enemy, forcing them to reposition. The shot does no damage. One turn cooldown. (Unlock choice at Field Agent rank)
- Ventilate: Godmother fires a shotgun blast that is guaranteed to hit and destroy the target's cover. Costs three ammo. Three turn cooldown. (Unlock at Special Agent rank)
- Close Combat Specialist: Godmother takes a reaction shot at enemies that get too close. Requires ammo. (Unlock choice at Senior Agent rank)
- Untouchable: If Godmother downs an enemy during their turn, the next attack against her will miss. (Unlock choice at Senior Agent rank)
- Overtime: Godmother immediately gains bonus crit and dodge, and takes an additional turn in three turns. Bonuses last until the end of the extra turn. Free action. One use per mission. (Unlock at Principal Agent)
Tips
- Godmother is a rush-and-gun type of unit initially, but is surprisingly adaptable. You can use her to move around enemy flanks and blast multiple foes with her Scattershot ability.
- If you unlock the Flush ability, she can have any unit that has overwatch enabled fire at the enemy as they move to new cover.

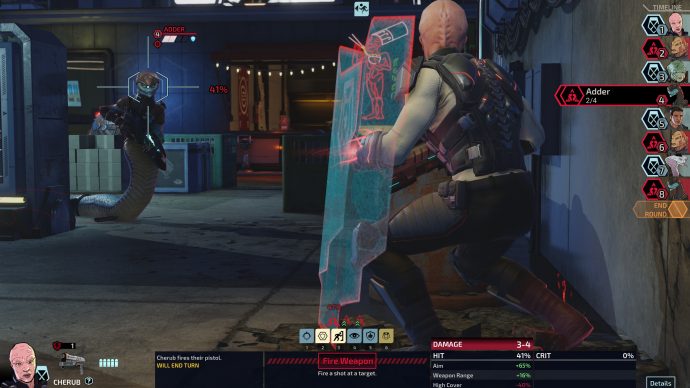
Cherub
- Species: Hybrid
- Class: Warden
- Specialities: Shields, protecting allies, and tank
- Starting weapon: Pistol
Base stats
| Health | Mobility | Aim | Will | Dodge | Crit |
|---|---|---|---|---|---|
| 8 | 10 | 65 | 40 | 0 | 0 |
Abilities
- Kinetic Shield: Cherub places an energy shield on self or ally to prevent all damage of the next attack. Cherub gains one charge when the energy shield is destroyed. Does not automatically end the turn.
- Kinetic Shield Charge: Cherub can gain up to two charges by protecting allies with Kinetic Shield. Having charge grants bonuses to several abilities.
- Charged Bash: Cherub bashes an enemy with the energy shield consuming all charge. If charge is consumed, deal damage in a cone behind the enemy. Damage increases with charge. Replaces subdue.
- Phalanx: Enemies focus their fire on Cherub, ignoring all other XCOM units at this breach point. Block all damage and gain one charge point for each attack. One use per mission. (Unlocks at Deputy Agent rank)
- Generator: Cherub gains one charge at the end of each encounter. (Unlock choice at Field Agent rank)
- Guard: At the end of the turn gain +1 armor, gain half-cover bonus even if flanked, and become half-cover for friendlies. Guard breaks after being attacked. (Unlock choice at Field Agent rank)
- Overload: Cherub can now store three charges and gains bonus mobility when charged. (Unlocks at Special Agent rank)
- Recharge: Using Charged Bash to render an enemy unconscious refills one charge. (Unlock choice at Senior Agent rank)
- Resonance Field: Allies with a Kinetic Shield gain 15 aim. (Unlock choice at Senior Agent rank)
- Supercharge: Cherub spends all stored charges and increases the primary weapon damage of allies, while placing a Holo-target effect on all enemies. The duration of the effect increases with Charge spent. One use per mission. (Unlock at Principal Agent)
Tips
- Cherub serves two purposes. He can use his regular shield to bash enemies for a non-lethal takedown, thus capturing a weakened enemy. His Kinetic Shield ability when it is damaged will also charge the regular shield's power, making it deal a lot more damage.
- It's usually best to make Cherub either go first to knock out an enemy, or in the slot where a unit is unable to fire their gun. Since he uses a pistol, it's not as powerful as some of the other early game weapons.
- He's also a bit of a tank, allowing him to take hits to protect weaker enemies. This works well with Blueblood and Claymore who can hit multiple targets he can lure in with his Phalanx ability.

Terminal
- Species: Human
- Class: Medic
- Specialities: Healing and support
- Starting weapon: Submachine Gun
Base stats
| Health | Mobility | Aim | Will | Dodge | Crit |
|---|---|---|---|---|---|
| 9 | 10 | 65 | 40 | 0 | 0 |
Abilities
- Safeguard: Terminal sends the "Gremlin" to an ally to restore four HP, cleanse burning, acid, and poison effects, and grant 20 defence. Terminal can target herself with Safeguard. Does not automatically end the turn.
- Hack Door: Hack open a door at the start of a breach.
- Gremlin Stabilize: Stops an agent from bleeding out.
- Refresh: Heals all allies at her breach point for two HP. One use per mission. (Unlocks at Deputy Agent rank)
- Sustain: If Terminal takes enough damage to begin bleeding out, she is instead reduced to one HP and immediately enters stasis for one turn. One use per mission. (Unlock choice at Field Agent rank)
- Pin Down: Terminal shoots non-damaging suppressive fire at a target to push their turn down the timeline. Two turn cooldown. (Unlock choice at Field Agent rank)
- Cooperation: Terminal coordinates with a nearby unimpared ally to grant them an immediate bonus action. Cooperation has a three turn cooldown. (Unlock at Special Agent rank)
- Armor System: Upgrades Safeguard to provide +1 armor to the protected unit. (Unlock choice at Senior Agent rank)
- Resilience: Terminal heals up to full at the end of every encounter. (Unlock choice at Senior Agent rank)
- Second Wind: Terminal sends the "Gremlin" to all allies, restoring 4HP, cleansing burning, acid, and poison effects, and stabilizing allies who are bleeding out. One use per mission. (Unlock at Principal Agent)
Tips
- Only attack with Terminal if she doesn't have some healing that she needs to do, or if she could easily kill off an enemy that's about to act. Remember to check first for the damage that you would deal and see if it's worth the risk.
- She can buff either allies who are defensive tanks like Cherub or Axiom, or help Blueblood deal tons of damage.

Verge
- Species: Sectoid
- Class: Envoy
- Specialities: Psionics and energy manipulation
- Starting weapon: Assault rifle
Base stats
| Health | Mobility | Aim | Will | Dodge | Crit | Psi |
|---|---|---|---|---|---|---|
| 7 | 10 | 65 | 50 | 0 | 15 | 50 |
Abilities
- Neural Network: Verge gains +10 aim for each enemy in the Neural Network. Certain abilities will add units to the Neural Network.
- Stupor: Verge psionically stuns a target for one to two actions and adds them to the Neural Network. Cannot target enemies in the Neural Network.
- Battle Madness: Verge psionically attacks an enemy's mind making them go berserk and attack a nearby target. Adds them to the Neural Network. Cannot target enemies in the Neural Network.
- Levitation: Verge lifts an enemy into the air removing their cover bonuses during the breach. Levitation cancels all Alert or Aggressive enemy behaviours. (Unlock at Deputy Agent rank)
- Crowdsource: Verge gains +5 aim and +10 critical chance for each enemy in the Neural Network. (Unlock choice at Field Agent rank)
- Collar: Enemies in the Neural Network that would be killed are rendered unconscious instead. (Unlock choice at Field Agent rank)
- Mindflay: Verge lashes out with his mind, dealing mental damage to all enemies on the Neural Network. Damage from Mindflay will render enemies unconscious instead of killing them. (Unlock at Special Agent rank)
- Network Healing: Verge heals one HP for each enemy in the Neural Network at the end of the turn. (Unlock choice at Senior Agent rank)
- Slam: Levitation slams the enemy into the ground dealing one to three mental damage and adding the unit to the Neural Network. Damage from Slam will render enemies unconscious instead of killing them. (Unlock choice at Senior Agent rank)
- Puppeteer: Verge mind controls all enemies in the Neural Network. The effect only lasts for the remainder of the turn. One use per mission. (Unlock at Principal Agent)
Tips
- If a bunch of enemies are close together, use Battle Madness on an enemy susceptible to mind control. It may make it so that you can hit those that are harder to hit.
- You can only add an enemy to the Neural Network once and once they're dead, they're gone from the network.
- Verge is a bit of a glass cannon, so make sure he is well protected. Cherub is a good partner for Verge as he can use his Kinetic Shield ability to protect him.
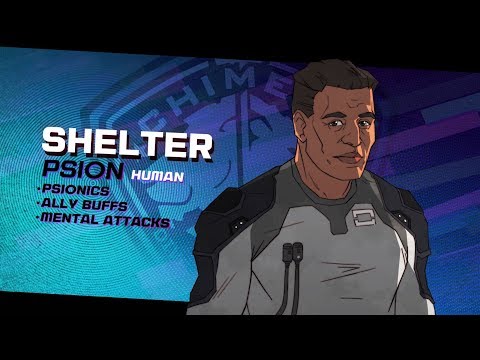
Shelter
- Species: Human
- Class: Psion
- Specialities: Psionics, ally buffs, and mental attacks.
- Starting weapon: Submachine Gun
Base stats
| Health | Mobility | Aim | Will | Dodge | Crit | Psi |
|---|---|---|---|---|---|---|
| 7 | 10 | 65 | 50 | 0 | 0 | 50 |
Abilities
- Relocate: Shelter psionically swaps positions with the targeted enemy or ally. Does not automatically end the turn.
- Dazzle: Shelter launches a Psionic Blast that disorientates all enemies near the breach point. Targeted enemy is disorientated for an extra turn. One use per mission. (Unlock at Deputy Agent rank)
- Temporal Shift: Upgrades Relocate so that it delays the next turn of relocated enemies. (Unlock choice at Field Agent rank)
- Distortion Field: Upgrades Relocate so that relocated XCOM units, including Shelter, gain +50 Defence until their next turn. (Unlock choice at Field Agent rank)
- Soulfire: Shelter launches a Psionic Blast at an organic enemy, delaying their next turn. Does guaranteed damage and ignores cover and armor. Two turn cooldown. (Unlock at Special Agent rank)
- Solace: Shelter is surrounded by an aura that immediately extinguishes or blocks any mental impairments for himself and any nearby allies. (Unlock choice at Senior Agent rank)
- Soul Storm: Upgrades Soulfire to heal Shelter for half the damage dealt. (Unlock choice at Senior Agent rank)
- Fracture: Shelter creates a Psionic clone that can use the Psionic abilities Relocate and Soulfire. One use per mission. (Unlock at Principal Agent)
Tips
- Shelter uses his psionic abilities to aid the squad, rather than deal damage to enemies.
- Swapping with allies and enemies allows you to get hurt allies out of trouble and closer to Terminal to heal, or bring enemies out of hiding.
- Zephyr is a great partner option for Shelter as he can use his abilities to bring enemies to her while she's in overwatch, so she can forcibly introduce her boot to their faces.

Patchwork
- Species: Human
- Class: Operator
- Specialities: Utility, and electronic disruption
- Starting weapon: Assault rifle
Base stats
| Health | Mobility | Aim | Will | Dodge | Crit |
|---|---|---|---|---|---|
| 8 | 10 | 65 | 40 | 0 | 0 |
- Chaining Jolt: Patchwork sends the "Gremlin" to an enemy to jolt them. Attack chains to nearby enemies. Damage is increased against robotic enemies.
- Hack Door: Hack open a door at the start of a breach.
- Combat Scanners: The "Gremlin" scans the room, applying holo targeting to all enemies. Increase the squad's aim by +15% against marked enemies. One use per mission. (Unlock at Deputy Agent rank)
- Voltaic Arc: The "Gremlin" shocks enemies if they move too close to Patchwork or if Patchwork moves too close to them. This attack chains to nearby enemies. (Unlock choice at Field Agent rank)
- Threat Recognition: Upgrades Combat Scanners to have one additional use per mission and grant +25 crit to all allies at the breach point. (Unlock choice at Field Agent rank)
- Reprogram: Patchwork sends the "Gremlin" to reprogram a robotic enemy and take control of them. Effect lasts for three turns. Four turn cooldown if the reprogram succeeds. One turn cooldown if the reprogram fails.
- Stasis Field: Patchwork sends the "Gremlin" to place target uinit into stasis for one turn. The unit cannot attack but is immune to all damage. Can be used on allies and enemies. Stasis Field has a two turn cooldown. (Unlock at Special Agent rank)
- Shock Therapy: Upgrades Chaining Jolt to disorient and potentially stun targets. (Unlock choice at Senior Agent rank)
- High Voltage: Chained electric attacks from Chaining Jolt or Voltaic Arc deal 1-3 extra damage. (Unlock choice at Senior Agent rank)
- Capacitor Discharge: Patchwork sends the "Gremlin" to a location where it emits a substantial electric discharge, damaging and potentially stunning all nearby units. Robotic units take more damage. One use per mission. (Unlock at Prinicpal Agent rank)
Tips
- Chaining Jolt is fantastic against clumps of enemies, weaker foes that are harder to hit, and robots. Make sure you use it when you can.
- Her Combat Scanners ability is a great pairing for enemies that need increased aim. Blueblood in particular benefits from having this skill used on him as it negates the penalty for his Deadeye ability.

Blueblood
- Species: Human
- Class: Gunslinger
- Specialities: Precision shooting and multiple shots
- Starting weapon: Pistol
Base stats
| Health | Mobility | Aim | Will | Dodge | Crit |
|---|---|---|---|---|---|
| 7 | 11 | 75 | 40 | 0 | 10 |
Abilities
- Deadeye: Blueblood takes a shot with -15% aim penalty for a +50% damage boost. Does not end the turn if used as first action.
- Desperado: Standard pistol fire and Deadeye cost an action and do not automatically end the turn if Agent has actions remaining.
- Lancer Shot: Agent fires his Lancer Pistol at a target, ignoring cover bonuses. (Unlock at Deputy Agent rank)
- Warm Welcome: The first shot in each clip disorients the target. (Unlock choice at Field Agent rank)
- Ever Vigilant: Blueblood automatically activates overwatch if the last action of his turn is spent moving. Includes using abilities that can provide movement, such as Subdue or Stabilize. (Unlock choice at Field Agent rank)
- Phase Lance: Blueblood fires Lancer Pistol in a straight line blast. The shot ignores line of sight and is unaffected by cover bonuses. Three turn cooldown. (Unlock at Special Agent rank)
- Fond Farewell: The last shot in each clip deals double damage. (Unlock choice at Senior Agent rank)
- Cascade Lance: Phase Lance upgrades to ramp up its damage for each subsequent enemy it hits in a single blast. (Unlock choice at Senior Agent rank)
- Faceoff: Blueblood fires his pistol at every enemy in line of sight, limited by ammo. One use per mission. (Unlock at Principal Agent)
Tips
- Combine him with allies that can buff his attack and aim, since he can fire powerful shots at multiple targets. Terminal and Cherub are good options here.

Claymore
- Species: Human
- Class: Demo Expert
- Specialities: Explosives, AOE damage, and breaching
- Starting weapon: Shotgun
Base stats
| Health | Mobility | Aim | Will | Dodge | Crit |
|---|---|---|---|---|---|
| 9 | 9 | 65 | 40 | 0 | 0 |
Abilities
- Shrapnel Bomb: Claymore throws an explosive that detonates after several turns. The explosive does not deal damage through cover and can be targeted to detonate it early. Does not end the turn if used as first action.
- Concussive Charge: Claymore detonates a powerful charge, rupturing all enemies near the breach point. Usable on wall breach points. One use per mission. (Unlock at Deputy Agent rank)
- Fortitude: Claymore is immune to the effects of all grenades and environmental hazards. (Unlock choice at Field Agent rank)
- Improvised Explosives: Claymore regenerates a charge for carried grenades at the end of each encounter. (Unlock choice at Field Agent rank)
- Sticky Grenade: Claymore throws a grenade that adheres to an enemy, causing them to fall back to a new location. When the unit stops running, the grenade explodes. Four turn cooldown. Ends the turn. (Unlock at Special Agent rank)
- Heavy Shrapnel: Upgrades the Shrapnel Bomb to deal damage through cover. (Unlock choice at Senior Agent rank)
- Impending Doom: Upgrades Shrapnel Bomb to immediately rupture targets within its blast radius upon landing. (Unlock choice at Senior Agent rank)
- Barrage: Shrapnel Bomb and Sticky Grenade do +1 damage and do not automatically end the turn. Shrapnel Bomb can now be used more than once per turn. (Unlock at Principal Agent rank)
Tips
- Claymore is the demolitions expert of the group. There are Claymore specific breach points, so keep an eye out for those while in setup.
- Since explosives have AOE damage, pairing him with allies like Verge and Shelter is very effective since they displace enemies and bunch them together.
- Explosives remove cover and deal damage to allies, so be careful when using them.
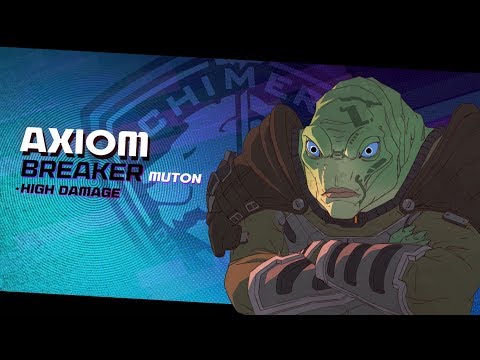
Axiom
- Species: Muton
- Class: Breaker
- Specialities: High damage
- Starting weapon: Shotgun
Base stats
| Health | Mobility | Aim | Will | Dodge | Crit |
|---|---|---|---|---|---|
| 9 | 12 | 65 | 40 | 0 | 0 |
Abilities
- Smash: Axiom charges to a target and smashes down with both fists. Chance to disorientate, stun, or render unconscious. Higher rage improves the chance to apply a disabling effect.
- Rage: Higher rage raises the chance of applying disabling effects with melee attacks, but also increases the risk of going berserk. Rage can be increased manually or by taking damage.
- Psych Up: Axiom increases his rage. Higher rage raises the chance of applying disabling effects with melee attacks, but also increases the risk of going berserk. Rage is also gained while taking damage.
- Battering Ram: Burst through a door breach point with a chance to panic nearby enemies. Panic chance increases with rage. (Unlock at Deputy Agent rank)
- Aftershock: Upgrades Smash to apply a small amount of damage to nearby enemies. The extra targets also have a chance to become disorientated, stunned, or rendered unconscious. (Unlock choice at Field Agent rank)
- Shrug It Off: Axiom has a chance to reduce the damage from an incoming attack to one. (Unlock choice at Field Agent rank)
- Adrenal Surge: Smash and Psych Up do not end the turn or have cooldowns. Four turn cooldown. (Unlock at Special Agent rank)
- Fear Factor: Upgrades Smash to give it a chance to panic nearby enemies. Chance increases with Rage. (Unlock choice at Senior Agent rank)
- Regeneration: Axiom regenerates a small amount of HP at the start of his turn. (Unlock choice at Senior Agent rank)
- Quake: Axiom leaps up and slams the ground, destroying nearby cover and damaging nearby units. One use per mission. (Unlock at Principal Agent rank)
Tips
- If enemies like to hide behind cover a lot, Axiom can break it down, leaving foes vulnerable to the rest of your squad.

Torque
- Species: Inquisitor
- Class: Viper
- Specialities: Enemy/ally repositioning, poison
- Starting weapon: Submachine gun
Base stats
| Health | Mobility | Aim | Will | Dodge | Crit |
|---|---|---|---|---|---|
| 8 | 11 | 65 | 40 | 20 | 0 |
Abilities
- Bind: Torque wraps up an enemy, dealing damage and preventing them from acting on their turn. Bound enemies cannot be targeted by XCOM for risk of damaging Torque. Free action.
- Tongue Pull: Agent shoots out their tongue to grab a unit and pull them into melee range. Can be used on enemies and allies. Some oversized targets cannot be pulled.
- Poison Immunity: Torque is naturally immune to the effects of poison.
- Adaptable: Torque can naturally enter through vent breach points.
- Toxic Greeting: Torque spits a blast of poison at a target. The enemy will remain poisoned for two turns. (Unlock at Deputy Agent rank)
- Tight Squeeze: Upgrades Bind to deal more damage. (Unlock choice at Field Agent rank)
- Hard Target: Torque gains extra mobility on the first turn of every encounter and a permanent bonus to dodge. (Unlock choice at Field Agent rank)
- Poison Spit: Torque spits out a blast of poison that explodes into a deadly pool. Poisons all units in the area and does a small amount of damage on impact. Three turn cooldown. (Unlock at Special Agent rank)
- Reinforced Scales: Torque gains +1 armor when binding an enemy and will not release the bind upon taking damage. (Unlock choice at Senior Agent rank)
- Synthetic Venom: Torque gains a bonus to crit against poisoned enemies and will heal when ending a turn while standing in poison. (Unlock choice at Senior Agent rank)
- Vicious Bite: Torque rears up and swiftly strikes an adjacent target with a devastating bite, dealing major damage and applying poison. Three turn cooldown. (Unlock at Principal Agent rank)
Tips
- Since she's a snake, she can slither into the vents, giving you a unique entry point. Take her on missions where vents are a breach point.
- Use her abilities to immobilise an enemy and poison them. She can also drag them out of cover.
- Her abilities synchronise well with the likes of Shelter as locking enemies in place makes her venomous attacks all the more devastating.
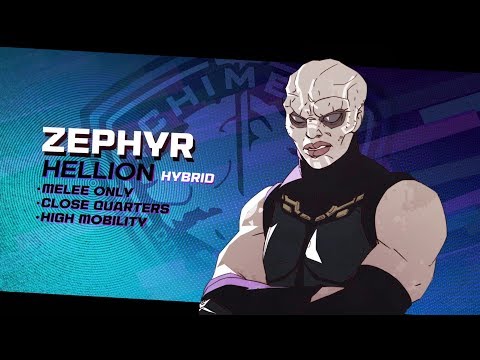
Zephyr
- Species: Hybrid
- Class: Hellion
- Specialities: Melee only, close quarters, high mobility
- Starting weapon: Pangolin Gauntlets
Base stats
| Health | Mobility | Aim | Will | Dodge | Crit |
|---|---|---|---|---|---|
| 8 | 14 | 75 | 40 | 0 | 0 |
Abilities
- Crippling Blow: Zephyr punches an enemy and inflicts one of several status effects. The effect is either disarm, disorient, stun, or root. This attack cannot miss and will trigger Momentum.
- Fearless Advance: Zephyr blitzes toward an enemy and melee attacks them after the breach. This will position Zephyr near the enemy. If the enemy was alert, their alert breach action is cancelled.
- Momentum: Zephyr is immune to root and gains an additional move action after using Crippling Blow.
- Parry: The extra action from Momentum can be spent to prevent damage from the next attack instead of moving. (Unlock at Deputy Agent rank)
- Lockdown: Zephyr attacks any enemy that enters or attacks from melee range. (Unlock option at Field Agent rank)
- Pressure Point: Melee attacks that would deal lethal damage will instead render enemies unconscious. Melee attacks do +1 damage. Replaces subdue. (Unlock option at Field Agent rank)
- Crowd Control: Zephyr quickly darts around and attacks every nearby enemy before returning to her original position. Two turn cooldown. (Unlock at Special Agent rank)
- Moving Target: Momentum is also triggered by Subdue and Crowd Control, and Zephyr does not trigger overwatch or reaction fire. (Unlock choice at Senior Agent rank)
- Vital Strike: Melee attacks will ignore armor. (Unlock choice at Senior Agent rank)
- Reaper: Zephyr enters Reaper Mode. With Reaper active, downing enemies with melee attacks grants an extra action. Each subsequent melee attack has reduced damage. Four turn cooldown. (Unlock at Principal Agent rank)
Tips
- She can only attack at melee range, but if you can trigger her overwatch ability, it does incredibly high damage. Pair her with Torque, Verge, or Shelter to take advantage of this.
- If your objective is one where you need to gather some items from a chest, it's entirely possible for Zephyr to grab the item then punch an enemy on the way back to the Evac point.
- Having her Pressure Point ability means that you'll gather more Intel, so may be more beneficial in the long run.
XCOM Chimera Squad guide series
Thanks for reading our XCOM Chimera Squad agent guide. You should now know a little more about your teammates and how best to use them in missions. Have a look at the rest of our guides to uncover more stuff about the facilities on offer.
- XCOM Chimera Squad guide: Our main guide with tips and tricks for XCOM Chimera Squad.
- XCOM Chimera Squad weapons: Learn about all of the unlockable tech and how much it costs.
- XCOM Chimera Squad training: Teach all your recruits abilities in the training facility.
- XCOM Chimera Squad spec ops: How to unlock all the spec ops options.
- XCOM Chimera Squad console commands: How to unlock console commands for modding or cheating.
- XCOM Chimera Squad field team: How to unlock field team abilities to manage unrest and anarchy levels.