Sekiro boss guide - prayer bead locations, mini-boss strategies


Bosses in Sekiro: Shadows Die Twice are not only the biggest tests you'll face, they also give you the opportunity to upgrade your abilities and health with both memories and prayer beads. If you've ever wanted to learn the best ways to defeat the likes of Genichiro, Isshin Ashina, and the Owl, then this hub will have all the answers you seek.
Those new and old to the library of From Software may wish to know more tips and tricks to get started, as well as some of the more complicated things that can occur while playing. Head to our Sekiro: Shadows Die Twice guide hub for everything you need to know.
Sekiro: Shadows Die Twice boss guide
Our most recent update completes the guide list for all the bosses and mini-bosses in the game, as well as lists all the prayer bead locations - including those that are not found on bosses. Mini-bosses are covered mostly in this guide, but there are some that are a little more nuanced that require their own page to explain their shenanigans.
Sekiro boss guides
| Sekiro: Shadows Die Twice Chained Ogre | This big hairy ogre is all chained up and thus very angry. |
| Sekiro: Shadows Die Twice Gyoubu Oniwa | His name is Gyoubu Masataka Oniwa, and he really wants you to know that. |
| Sekiro: Shadows Die Twice Juzou the Drunkard | Learn the sneaky method of taking out this drunk and his friends. |
| Sekiro: Shadows Die Twice Lady Butterfly | This ninja is the easiest boss in the game. Why? Read on dear shinobi, read on. |
| Sekiro: Shadows Die Twice Blazing Bull | The kindest thing for this poor beast is to put it down, find out how in this guide. |
| Sekiro: Shadows Die Twice Ashina Elite | It's just a jump to the left, to defeat this boss. |
| Sekiro: Shadows Die Twice Genichiro Ashina | Your first real test in Sekiro: Shadows Die Twice. Get the full strategy to defeat him here. |
| Sekiro: Shadows Die Twice Lone Shadow Longswordsman | This purple ninja was looking for you earlier... to kill you. |
| Sekiro: Shadows Die Twice Headless | Ladies and gentlemen - the most disgusting boss in Sekiro so far. |
| Sekiro: Shadows Die Shichimen Warrior | A mage-like enemy who loves to inflict terror on his foes. |
| Sekiro: Shadows Die Twice Armored Warrior | This iron clad lad is invincible. But there is a way to get rid of him. |
| Sekiro: Shadows Die Twice Folding Screen Monkeys | Four monkeys really don't want you to kill them. We have the tips you need to put them to the sword. |
| Sekiro: Shadows Die Twice Guardian Ape | The big boss ape is guarding a flower, but all is not as it seems. |
| Sekiro: Shadows Die Twice Headless Ape | Another fight against the big boss ape, but this time he's got new tricks. |
| Sekiro: Shadows Die Twice Corrupted Monk | An illusion of a monk is guarding a cavern ahead. He's a bit tricky but he has slow attacks. |
| Sekiro: Shadows Die Twice Great Shinobi Owl | Your toughest fight yet has you squaring off against the legendary Shinobi. |
| Sekiro: Shadows Die Twice True Corrupted Monk | The monk shows its true form and it has some new tricks up his very large sleeves. |
| Sekiro: Shadows Die Twice Divine Dragon | You need the dragon's tears and the only way you're going to get them is by getting close and stabbing its tear ducts. |
| Sekiro: Shadows Die Twice Demon of Hatred | Perhaps the most Dark Souls like boss in Sekiro, this giant flaming monster is surprisingly tough. |
| Sekiro: Shadows Die Twice Owl (Father) | If you thought Great Shinobi "Owl" was tough, you should have seen him in his prime. |
| Sekiro: Shadows Die Twice Isshin Ashina | Defeat the lord of the castle with the help of our tips and strategies. |
| Sekiro: Shadows Die Twice Isshin, the Sword Saint | One of the toughest fights in the entire game and the one with the most phases. |
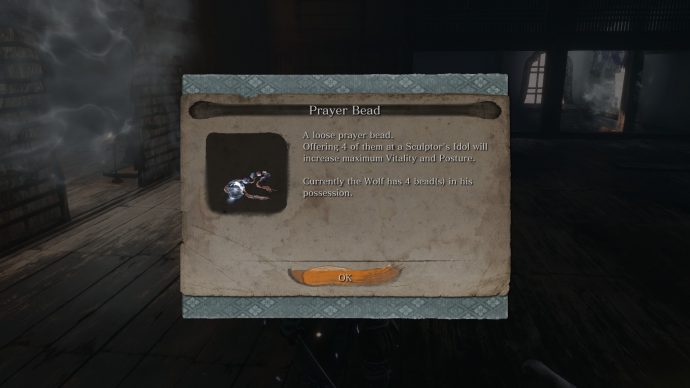
Prayer Bead locations
The only way to increase your health bar in Sekiro: Shadows Die Twice is to collect four prayer beads. These trinkets can be redeemed at the Sculptor's Idol for a permanent increase to your total life, meaning you can take significantly more damage before being killed. Naturally, you'll want these valuable little pieces of jewelry, so below are all the encounters you need to beat to get a prayer bead, as well as the few that are available out in the open.
Mini-bosses with Prayer Beads
- General Naomori Kawarada (Ashina Outskirts)
- Chained Ogre (Ashina Outskirts)
- General Tenzen Yamauchi (Ashina Outskirts)
- Shinobi Hunter Enshin of Misen (Hirata Estate)
- Juzou the Drunkard (Hirata Estate)
- Blazing Bull (Ashina Castle)
- General Kuranosuke Matsumoto (Ashina Castle)
- Ashina Elite Jinsuke Saze (Ashina Castle)
- Lone Shadow Longswordsman (Ashina Reservoir)
- Seven Ashina Spears Shikibu Toshikatsu Yamauchi (Ashina Reservoir)
- Armored Warrior (Senpou Temple, Mt. Kongo)
- Long-Arm Centipede Sen'Un (Senpou Temple, Mt. Kongo)
- Snake Eyes Shirafuji (Sunken Valley)
- Long-Arm Centipede Giraffe (Sunken Valley)
- Snake Eyes Shirahagi (Ashina Depths)
- Tokujiro the Glutton (Hidden Forest)
- O'Rin of the Water (Mibu Village)
- Headless Ape (Poison Pool) (yields 2 beads)
- Chained Ogre (Ashina Castle - while under siege)
- Lone Shadow Masanaga the Spear Bearer (Great Serpent Shrine)
- Lone Shadow Vilehand (Ashina Castle - while under siege)
- Lone Shadow Masanaga the Spear Bearer (Hirata Estate - Purification version)
- Juzou the Drunkard (Hirata Estate - Purification version)
- Sakura Bull (Fountainhead Palace)
- Okami Leader Shizu (Fountainhead Palace)
- Seven Ashina Spears Shume Masaji Oniwa (Ashina Reservoir - after Divine Dragon)
- Ashina Elite Ujinari Mizou (Ashina Castle - after Divine Dragon)
- Shigekichi of the Red Guard (Old Grave - after Divine Dragon)
Lootable Prayer Beads
- Great Serpent - End of the path near the idol.
- Hirata Audience Chamber - Head to the left and hug the wall with the painting to reveal a secret room. It's behind the folding screen in a treasure box.
- Hirata Audience Chamber - Stick to the hanging shaft as you make your way to the room where you head downstairs to fight Lady Butterfly. It's in a treasure box.
- Ashina Castle Gate - Enter the building at the top of the steps behind the battlefield. Head to the second floor though the ceiling to find a chest.
- Abandoned Dungeon Entrance - Available to buy from the merchant next to the idol for 1400 Sen.
- Underneath Long-Arm Centipede Giraffe's room - Follow the pathway underground from this room until you see beams. Grapple across to get the bead.
- Temple Grounds - Dive into the pond with the waterfall to find the bead.
- Poison Pool - Grapple from the idol and wall kick to climb the Buddha statue's head.
- Mibu Village - Go to the pond at the centre of the village and dive below.
- Wedding Cave Door - Head through the floor of the house and head outside. Grapple to the attic to find the bead.
- Feeding Grounds - There's a treasure chest buried in the sand underwater which contains the bead.
- Under-Shrine Valley - Jump across the abyss by grappling the tree stump behind where the player spawns at the idol. Hug the wall and drop down the other side to find it in the snow.
Bosses strategies
Below are some strategies for bosses that don't really need their own guide as they're relatively straightforward. These range from Generals, Shinobi Hunters, Seven Ashina Spears, and more. A fair number of these can be ambushed too, so you'd only need to worry about one or two health stocks at most.

Shinobi Hunters and Seven Ashina Spears
Shinobi Hunters are the spear wielding sub-bosses that you first see in the Hirata Estate memory - before the Juzou the Drunkard fight. You'll need the Miriki Counter skill to easily take down this opponent as his attacks are mostly unblockable thrusts.
Seven Ashina Spears are a lot bigger than other similar enemies with spears. That isn't to say that they're not overcome with enough insight of their attacks, and they're not overly difficult, just that they hit very hard. Deflecting their attacks can be tricky as the speed fluctuates mid-attack, making them hard to predict. Backing off can be viable, but make sure you have enough room to move around if you try this. They can try to chase you down with a running leaping strike, so dodge around them to avoid it.
If they ever start running and the unblockable symbol appears, chances are that they're about to thrust their spear. This is the perfect time to perform a Miriki Counter, dealing lots of posture damage to them. They're also capable of unblockable sweeps and thrusts from a standing position, so look carefully at how they're wielding the spear to see which attack they're going to use. Finally, they're able to recover posture by channelling their ki - indicated by a haze that emits around them. Make sure you hit them before they complete their chant.
The first Seven Ashina Spears samurai that's standing guard of a tower in the Ashina Outskirts can be ambushed, as can the Shinobi Hunter in the Hirata Estate memory, so there's only one health stock to worry about for either. They're also vulnerable to the oil/fire combination, which if the burn effect takes will drain some of their overall health. They usually reward you with a prayer bead upon being defeated.
Ashina Reservoir Seven Ashina Spears
As for the other Ashina Spear enemy, he's a lot tougher and has a very powerful samurai friend. Make this easier on yourself by ingesting a Gachiin's Sugar to make yourself invisible, then sneak up to the samurai with your Puppeteer ninjitsu equipped. Backstab him and convert, while keeping an eye on which attack the Ashina Spear uses. Eventually your samurai follower will begin attacking his former friend. Together you should shave off an entire health stock, but you will need to finish the fight on your own. Since he hits like a truck, harder than any enemy in the game, this could be quite the challenge, so good luck.

Generals
These officials have more than one health stock and are generally tougher than your regular enemies, thanks to their increased number of offensive options. Most of their attacks can be blocked and they make for good practice when it comes to deflecting attacks. Their swings are a little slow, but they do pack serious damage potential. Watch out if they ever leap into the air, as they'll slam their sword into the ground. Just sidestep this or perfectly time a deflection if this happens.
They do have a couple of unblockable attacks they can use. If the symbol appears as he crouches with his sword to his side, jump and perform a diving kick on him by pressing the jump button again, as the sweeping attack can be avoided while in the air. This has the added benefit of doing a bit of extra stability damage. They rarely also use a thrusting attack, so if the sword is still raised, use a Miriki Counter to parry this blow. You shouldn't have too much of an issue with these guys, but they are able to recover posture by channelling their ki - indicated by a haze that emits around them. Make sure you hit them before they complete their chant, while at the same time increasing their posture damage.
So far in my experience, every General I've faced has been able to be ambushed, shaving off one health stock and thus cutting the duration of the fight in half. Taking a high vantage point is the key for doing so, before promptly dispatching the rest of their allies if they have soldiers reporting to them. They usually reward you with a prayer bead upon their defeat.
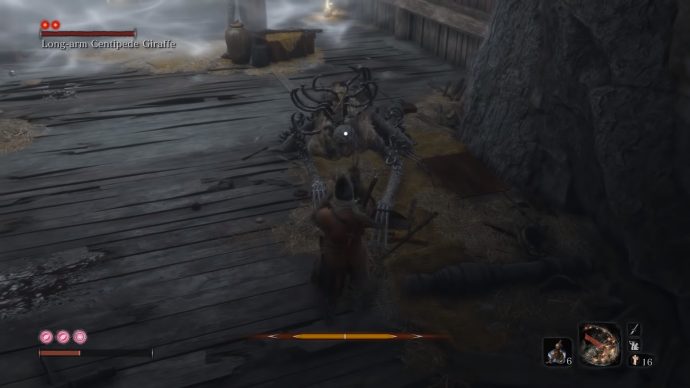
Long-Arm Centipede
There are two of these guys in the game - namely one in the Sunken Valley - Gun Fort (nicknamed "Giraffe") and one in Senpou Temple (nicknamed "Sen-Un"). Sen-Un can be approached from up in the rafters and a stock immediately taken via an ambush attack, but Giraffe must be taken on directly. With Sen-Un, try to kill any of the other smaller enemies while he's recovering from his health stock loss.
Neither of these guys are particularly difficult as their attacks are predictable. The aim is to keep an eye on which claw leads the flurry of swipes. If he leads with his right claw (or the left claw as you see it), then just keep deflecting attacks to build up the posture break. If he leads with his left claw (right claw as you see it), halfway through the flurry, he'll go for a sweeping attack which you can dive kick to deal posture damage. You'll still likely need to deflect a second batch of attacks after the sweep. He can also sweep outside of the combo. Defeating either one will reward you with a prayer bead and yellow gunpowder.

Snake Eyes
These two mini-bosses are found in the big poisonous pit in Ashina Depths (just before the second fight against the Guardian Ape), and by the statue you need to grapple to just after the Sunken Valley Sculptor's Idol. Both of these work exactly the same way, but have vastly different arenas. We'll go over their attacks first before highlighting the two different settings for their encounters.
Stick close to both of these enemies as their long range gunfire will deal a massive chunk of damage if you're hit by it. Should you see the enemy aim at you, dodge at the last moment if you don't have space, or sprint to the side to avoid the gunshot. They also have multiple attacks that can be deflected, though the timing can be tricky to nail down. Its unblockable attack is a grab, so as soon as you see the symbol, make sure you get out of there before the Snake Eyes hooks you in and shoots you at point blank range.
Now for the two different arenas. The Sunken Valley Snake Eyes does have a lot of allies, but your fight is conveniently hidden behind a large boulder. As long as you don't peak out of the sides, you should be relatively undisturbed. The poisonous pit Snake Eyes however is in an arena full of mortar firing enemies. My tip here is to ignore everything and grapple to the far corner of the room as you look at it. There is a second idol here which you can use to your advantage. Take out the mortar nearby before sneaking around the side, making sure none of the other two mortars see you. You can take a health stock from this Snake Eyes, while also keeping the fight contained within the area where he starts. Both reward you with a single prayer bead each.

O'Rin of the Water
Outside the Lone Shadow Longswordsman fight, you'll see a man lured by the sound of music. Keep talking to him in the various locations and don't attempt to lure him away from the music. Eventually, just before the Corrupted Monk fight, you'll come across some music being played. This is O'Rin of the Water who is pining for her husband. Upon talking to her, she'll become a vengeful spirit and attack you.
This mini-boss is incredibly annoying as she'll phase in and out of existence, making her very hard to hit. Her attack patterns are also slightly erratic, which makes learning their timing a little tricky. If you try to get any distance away from her, she can warp to an attacking position with surprising speed, so she can keep up the pressure. My main tip here is to hold the block button down to bring your posture to manageable levels. Her attacks do a lot of posture damage if you don't deflect them, so try not to get too greedy.
If you see the unblockable symbol, it's a sweeping attack that needs to be jumped over or a grab that you definitely don't want to be grabbed by. The grab only appears if you are stunned, so dash or jump away as soon as you see the symbol appear. She doesn't have a thrusting unblockable attack, so just focus on jumping whenever you see the symbol outside of the stunned state. When you do put this spirit to rest, you'll get a set of Prayer Beads, as well as one of the better skills - Breath of Life: Shadow. This allows you to recover a small amount of vitality upon performing a successful deathblow. Returning to the man just before the fight will reveal that he was who she was looking for and that she can now be at peace. He'll give you a Jinza's Jizo Statue - which "restores a node of Resurrective Power" before perishing in front of you.
This concludes our Sekiro: Shadows Die Twice boss guide. When fighting the many bosses of Sekiro, it's a good idea to have your PC optimised so that you have plenty of frames to dodge or deflect attacks. Katharine has had plenty of experience with the game's options menu, so head to our Sekiro: Shadows Die Twice PC graphics performance guide to find out the best settings for your rig.