Apex Legends Training Mode - aim training, how to get attachments in Training Mode
Yes, you CAN get attachments in Training Mode


Apex Legends' Training Mode leaves quite a bit to be desired. In its current state, it's really more of a tutorial designed to teach newcomers the basics of the game, rather than a dedicated training area where you can practice your aim and movement-based skills. But with a bit of willpower and some sneaky techniques, our Apex Legends Training Mode guide will teach you how to get the most out of this training arena, from useful aim training routines to a little-known exploit which enables you to get hold of all sorts of attachments and gear while in Training Mode.
This Training Mode guide is just one small part of our massive Apex Legends guides series, all of which you can peruse by heading to our Apex Legends tips page. There you'll find tonnes of tips and strategies for all skill levels, as well as links to other pages on everything from the various Apex Legends characters to all of the stats and spray patterns for different Apex Legends guns & weapons, and much more.
Apex Legends Training guide
The Apex Legends Training Mode is pretty good at explaining the game, but not so great when it comes to giving players an environment where they can simply practice and warm up their trigger finger between matches. Fortunately, we've got a few tricks to share for helping you get the most out of what Respawn have given us. Click on any of the links below to skip ahead to a particular section.

Training Mode overview
When you load up Apex Legends for the first time, the game won't let you enter the standard battle royale mode until you've gone into the Training Mode and completed its tutorial. From then onwards, it may appear that your only option for learning the game is to play in the battle royale mode. But in fact, it can be very useful to make a habit of heading back into the Training Mode between matches and brush up on your aim.
To head back into the Training Mode, all you need to do is open the dropdown menu above the "Play" button in the main menu, and select Training. Then click "Play", and you'll be quickly brought into the Training area. You'll start by having to follow Bloodhound's orders to walk, sprint, crouch, jump, slide, and open various Supply Bins full of gear. But after you open the second Supply Bin and pick up the R-301 Carbine located inside, the Training Mode suddenly becomes much more useful.
At this point, all the other guns in the game will be spawned in rows depending on their ammo type; and you can spend as long as you want at this point of the tutorial, shooting targets, trying out different weapons, sliding about the place, and anything else you want to do. The game doesn't force you to continue after a certain period of time - although it will disconnect you if it detects no activity for 2 minutes or so, so make sure you don't go AFK for a while, or you'll be forced to restart and make your way back to this point in the Training Mode in order to continue.
Training attachments - how to get attachments in Training Mode
It's a common complaint directed at Respawn that they included all the weapons in the game to try out but neglected to include all of the attachments as well. As you'll know if you read our Apex Legends attachments guide, many weapons are completely changed, both in stats and in behaviour, when attachments are brought into play. So it's a real oversight to prevent players from using these attachments in a risk-free area such as the Training Mode.
However! There is a very roundabout and bizarre method of procuring some attachments in the Training Mode, if you really want or need them (as I did at several points in order to test certain aspects of the game for this guides series). It's an exploit that requires a great deal of patience and a bit of luck, but it will allow you not only to equip attachments but also all kinds of gear and healing items as well.
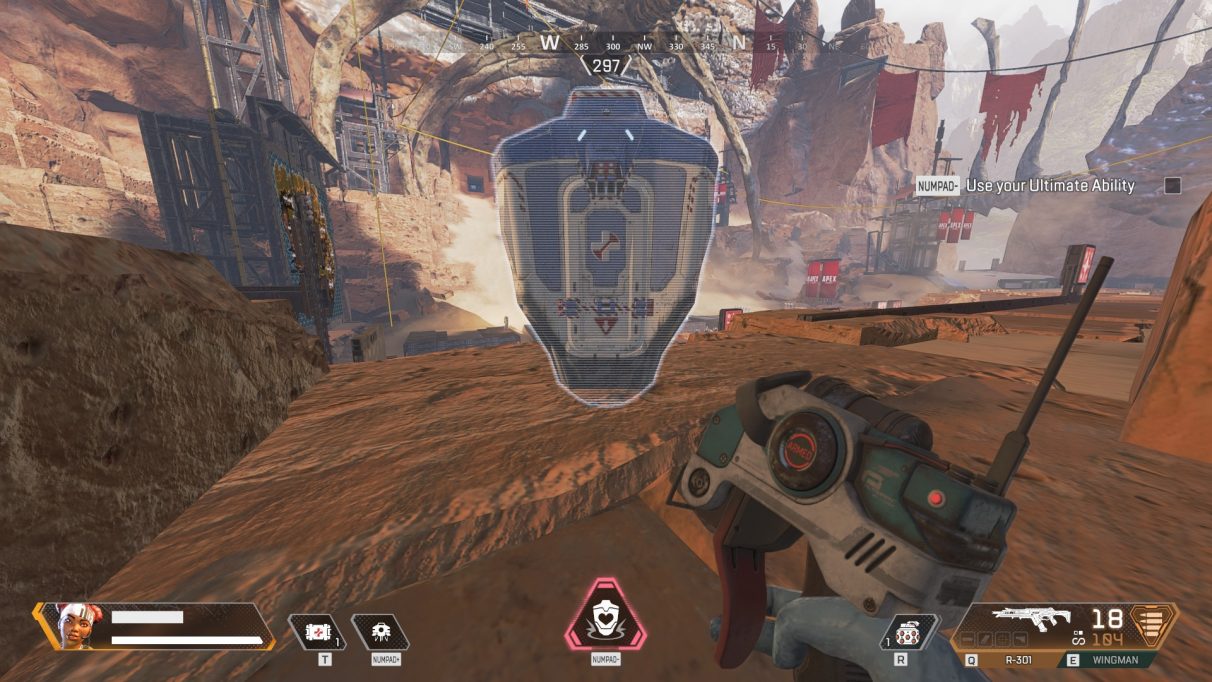
What you'll need to do is progress through the steps of the tutorial until you're with Pathfinder, and he asks you to call down your Care Package as Lifeline. This is in fact the final step of the tutorial after which you'll be kicked out of the Training Mode, so it's important to time this right. You'll need to call down your Care Package, and then just before it lands you'll need to kill yourself.
But Ollie! How do you kill yourself in Training Mode? You're invulnerable to grenades and all other kinds of damage!
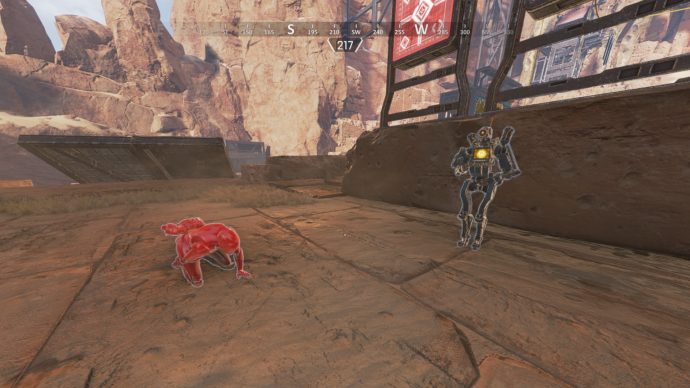
Right you are, astute reader! But there is a way. Quite simply, head around to the back of one of the flap-down human targets, crouch down, and then shoot the target. It will flap down and crush you, immediately killing you and respawning you back in the cave where you first encountered Bloodhound. Dying in this manner will send you back in time slightly, to the beginning of the Pathfinder section of the tutorial - but, crucially, your Care Package is still there.
Open up the Care Package and you can equip whatever you find inside, including Gear, Healing Items, and - you guessed it - attachments. If you don't get what you're after, simply repeat the steps above and call down as many Care Packages as you like until you get what you desire. Not ideal, and Respawn really ought to just add a proper training area with weapons and attachments... but until they do, this is a workaround. Just be aware that when you die you lose everything you were carrying, and if you drop anything on the floor then it immediately disappears. So if you want a fully equipped weapon, then leave the attachments in the Care Packages until you're ready to pick up all of them at once.
Improve aim and skills with these training routines
Now that we've got the attachments exploit out of the way, I thought I'd share with you one or two useful routines to practice in the Training Area to improve your aim and other skills in Apex Legends.
There are all sorts of ways to use the targets in the Training Mode to practice with, but one of the most important things to get to grips with if you're newer to Apex Legends is flick aiming. Here this translates to "moving between and shooting multiple targets in a row without hesitation". I often grab something like a Wingman and a Carbine, and stand to the left of Bloodhound, facing the three dummies to my left and the three to my right. Then, alternating between my two weapons, I try to headshot each of these six targets as quickly and accurately as possible. Rinse, repeat.
If you're not so confident about your aim, then you can start simply by going for bodyshots. Alternatively if you're more adept at your flick aiming, then you should incorporate some "A/D strafing" or "dancing" on the spot while you shoot, because in an actual game it's usually a very bad idea to be standing still while you shoot at someone. You can also switch up the targets or the order of the targets at a moment's notice, to keep yourself on your toes. However you want to do it, the idea is to flick to the next target the moment you fire at the previous one.
Bullet Drop is pretty prevalent over longer distances in Apex Legends, so it's good to get a handle on how far above enemies you should aim over certain distances. When aiming down a scope you can use the markers to help you figure this out, but you really ought to commit it to memory rather than having to stop and work it out before you fire in an actual match.
One little-known secret of the Training Mode that only really makes itself known if you get your hands on a scope for your weapon (or, for an easier approach, simply pick up the Kraber in the final row of weapons) is that there are four very far targets that you can use to practice shots over distances of around 400 metres or more. To find these targets, look towards the south-east, where the enormous ship is hovering on the horizon; then zoom in below the ship's left thruster. You'll find three stationary targets and one moving target with which you can practice your sniper shots over long distances. Check the gif below if you're still not sure where to look:
Bunny Hopping is an extremely useful advanced Apex Legends movement skill to learn (as you'll know if you've read our Apex Legends advanced movement guide), and it's a good idea to commit this skill to muscle memory in a non-threatening environment such as the Training Mode. The terrain of the training area is very varied, allowing you to practice Bunny Hopping across flat land, downhill, around obstacles, and more.
To begin with, I'd suggest picking the flat strip of ground that separates the weapon platforms from the flap-down targets. Run back and forth along this strip while Bunny Hopping until you've got the movement down. If you want to practice healing as well (which is the main reason to Bunny Hop - again, see the above guide link), then you'll need to be at less than full Health, because otherwise the game doesn't allow you to heal. You start the Training Mode with less than 100 Health, so you can use this time to practice Bunny Hop healing; but remember to cancel the heal before it completes, or you'll have to kill yourself using one of the flap-down targets in order to be respawned with less than 100 Health.
The Training Mode is an excellent way to learn the names, behaviours, and damage stats of all the guns in Apex Legends. And this includes mastering the spray pattern or burst pattern of each weapon (for full details and screenshots of all the spray patterns of every gun in the game, check out our Apex Legends guns & weapons guide).
To get started with some basic spray pattern training, the first thing you'll need to do is head into your Video Settings, and make sure the following are true:
- Effects Detail: set to Medium or High
- Impact Marks: set to High
This allows you to properly see the impact marks of bullets upon surfaces so you can learn the gun's spray pattern. Now, simply pick your desired gun(s) and ammunition, then head to a rock with a flat vertical surface - you can find plenty of these on the downward slope at the start of the Training Mode. Stand several steps away from the rock's surface, then empty your weapon's magazine onto the wall without adjusting for the recoil. Look at the marks you left behind so you can figure out the weapon's vertical and horizontal recoil pattern; then fire again, this time adjusting for the recoil. Your goal with this second round of firing is to make every bullet hit roughly the same point on the rock.

That's more or less everything we've got for you on the various uses of the Apex Legends Training Mode. Why not head there now and have a quick round of Bunny Hopping or flick aim training before your next match begins? Then you can transfer what you've practiced into a match situation, where you'll hopefully now have more of an advantage on your foes.