Introduced in Operation Grim Sky was the first of the reworked maps in Tom Clancy's Rainbow Six Siege. Hereford Base was an old map and as such seemed a bit behind the times compared to the more elaborate maps that have been unveiled more recently. This guide will go over all of the changes that have been made to the new map, as well as point out how to attack, how to defend, and any other useful tips and tricks to up your game.
There's perhaps no better time to jump back in than now, especially with a classic map getting such a big overhaul, so for those who haven't played in quite a while may wish to consult our Rainbow Six Siege guide for some more tips that can be used on any map in the game, as well as some things to keep in mind when on either the attacking or defending team.
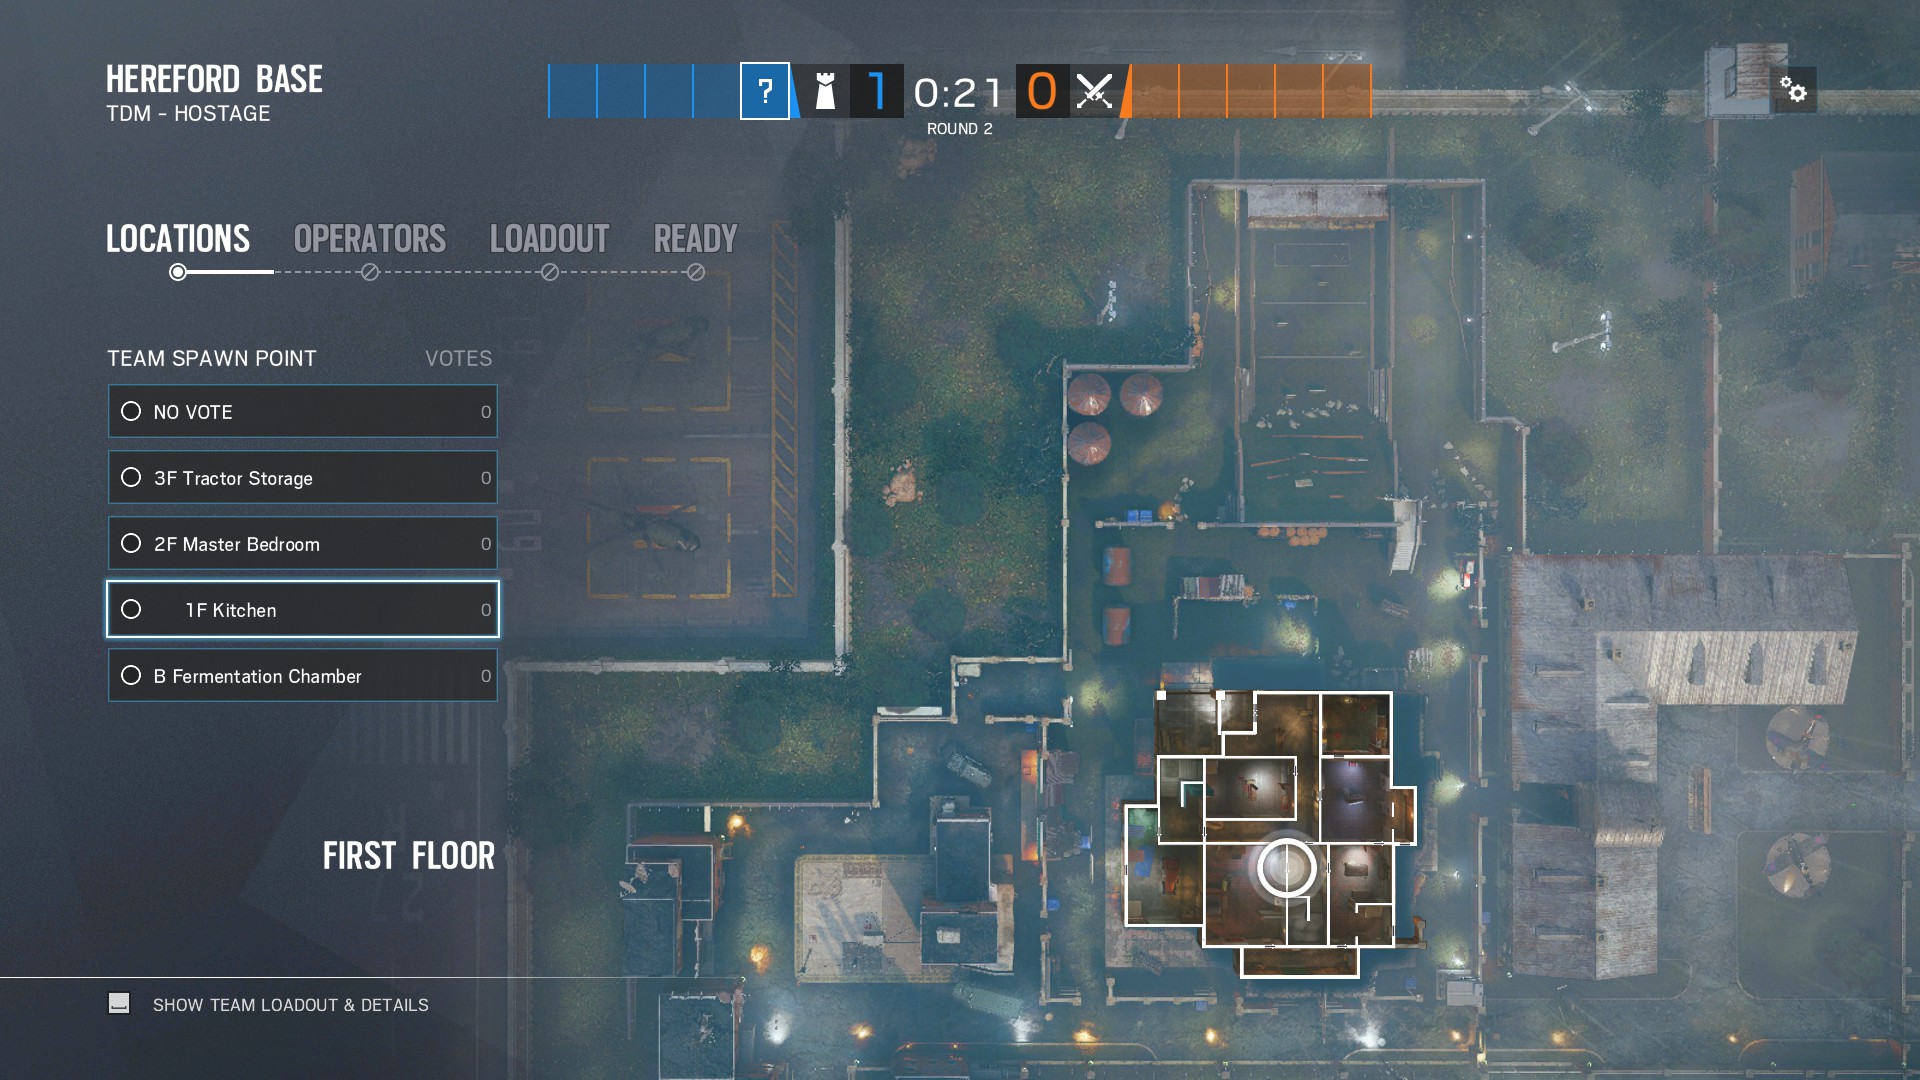
Hereford Base overview
The military base at Hereford is four stories high with multiple staircases and plenty of routes in-and-out of the complex. The defending building is somewhat small compared to some other maps, but the key thing is that it spans over four floors. Vertical attacks are therefore a much larger threat, particularly as now the map includes some destructible floorboards.
Defence spawn points in Rainbow Six Siege's Hereford Base
In each of the three game types, there are a number of spots where the objective can spawn. Below are the rooms to keep in mind for both those defending and attacking the map's objective.
Basement
Fermentation Chamber - Bomb & Hostage
Brewery - Bomb
Barrel Storage - Secure Area
First Floor
Dining Room - Bomb
Kitchen - Bomb & Hostage
Piano Room - Secure Area
Second Floor
Master Bedroom - Bomb & Hostage
Loom Room - Secure Area
Kid's Room - Secure Area & Bomb
Third Floor
Tractor Room - Bomb & Hostage
Ammo Storage - Bomb
The third floor sites for objectives are entirely destructible from below, so make sure you've got a good defensive network underneath you as well as above. If you're playing Secure Area as your game mode, you'll never need to check the third floor as the objective never appears there. Basements will now have more access points, meaning that just camping at the bottom of the stairs is no longer going to cut it. There is also plenty of cover for defenders, including the trench which is now enclosed. The second floor's bathroom is another rather key area to defend as the enemy can access it from the stairs balcony rather easily.
Just make sure that you keep an eye above and below you when defending, as attacks can pretty much come from anywhere on the map realistically. Roamers will be able to get some rather cheeky shots in, so use the highly destructible walls for ambushes. Given the map's unfortunate camera placement, you may find that the western side is relatively vulnerable as the enemy team can easily access that side without being detected. It also has less visibility when it comes to internal cameras, but at the same time is less windy than the right side.
Attacker spawn points in Rainbow Six Siege's Hereford Base
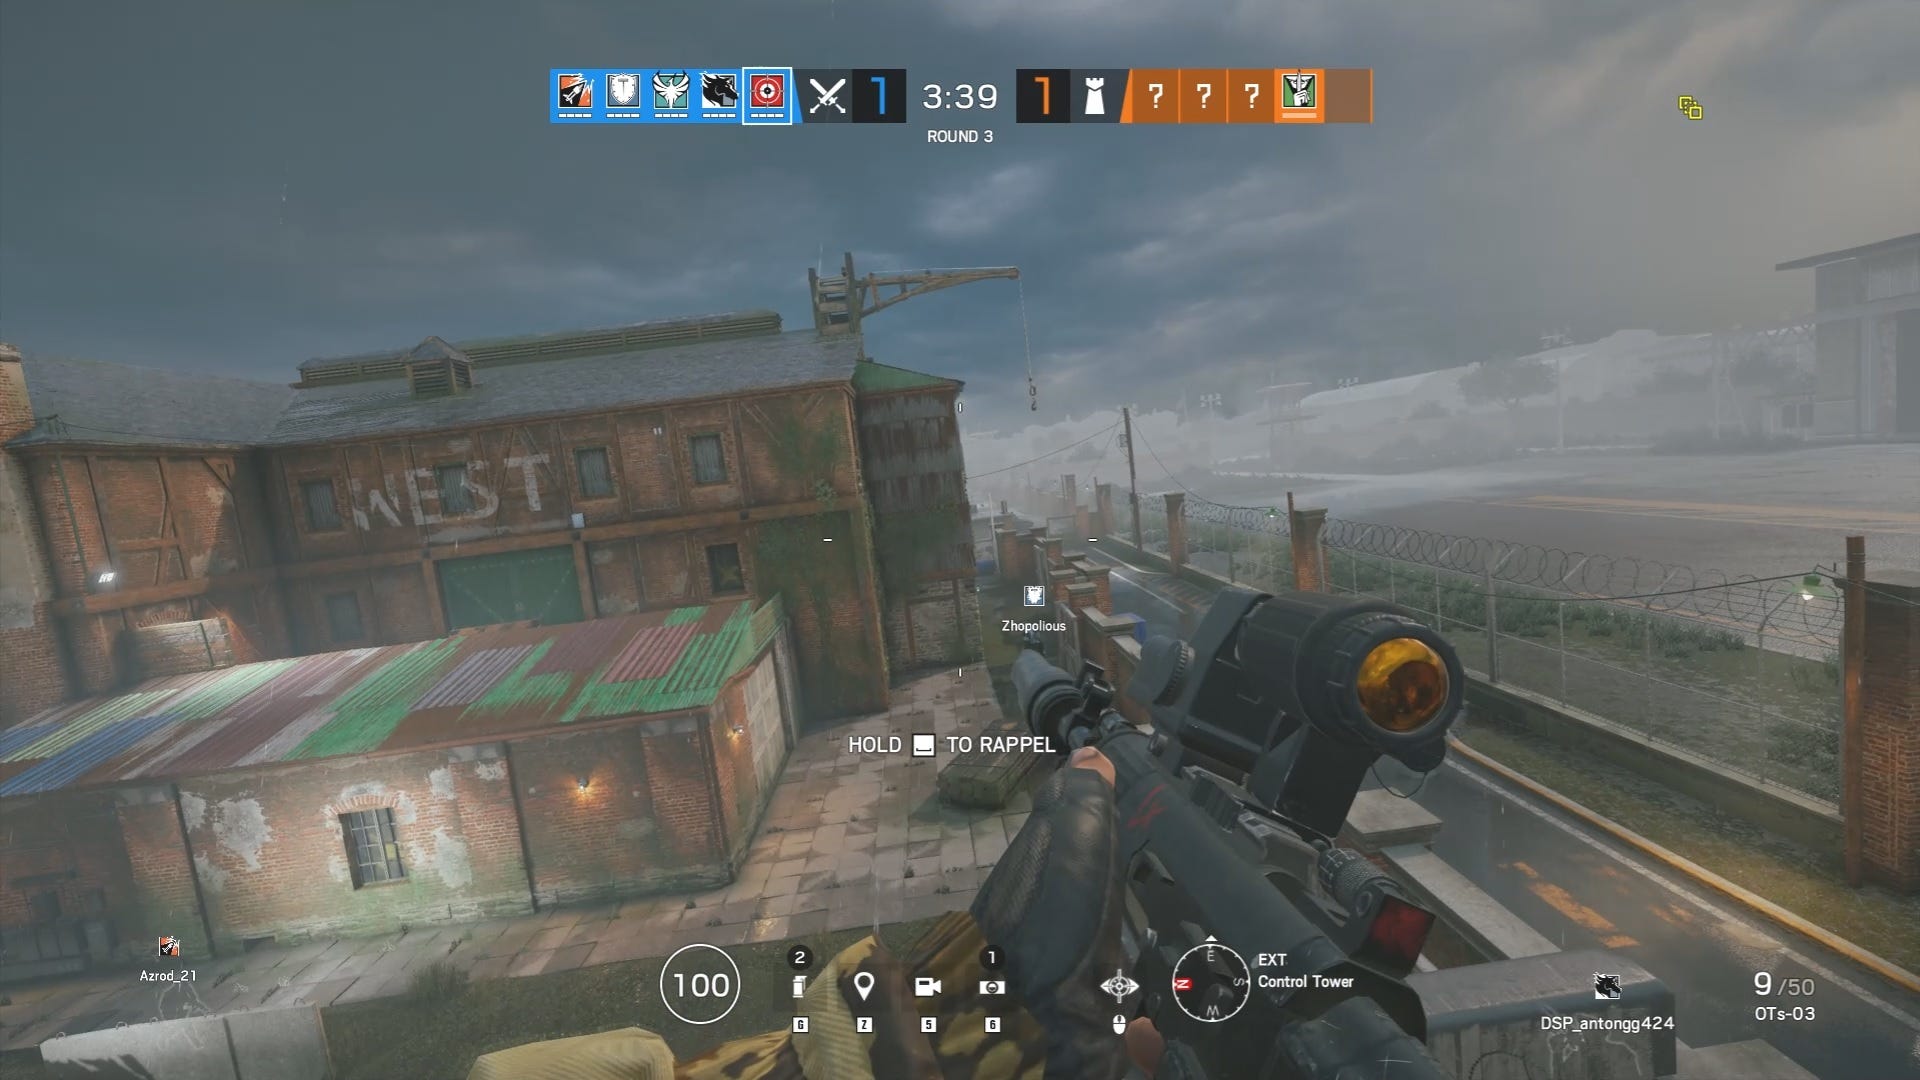
Three spawn points are all relatively secluded initially, but aside from the trench that leads to the basement there's no safe place to stay outside in. Approaching the third floor may be tricky as only a few can be rappelled through, which is more unorthodox than smashing your way through a balcony window.
One interesting note is that starting out in the Shooting Range gives the attackers relatively decent cover for taking out the external cameras. From the start point, there's a camera post on the left and right side of the courtyard, allowing players who hide behind the small mound to take potshots. Using the map above as guidance this leaves the left side exposed (towards the control tower), so allows for easy access to the basement and other floors.
Good operators for Rainbow Six Siege's Hereford Base
Similar to the last map - Villa (more on that in our Rainbow Six Siege Villa map guide), the defenders that work the best are those that can fortify walls, as well as those that can find where the enemy is coming in. Mira's can set up her black mirror in some key positions, keeping track of multiple doorways and access points. Roamers like Caveira can also use many hiding spots to ambush foes, thus giving teammates invaluable information about the enemy's position.
Given the rather tight design of the map, attackers such as the likes of Montagne might not be the worst choice here, provided the rest of your team are up for picking off any defending operators that you can herd into a corner. Many walls can be reinforced, so those operators that breach them can also make a huge impact. Hereford Base was made for attackers like the newly introduced Maverick, but those that specialise in tearing down walls and floors have some great advantages. Some roamers are also very good at holding certain positions that are not the objective.
Hereford Base cameras
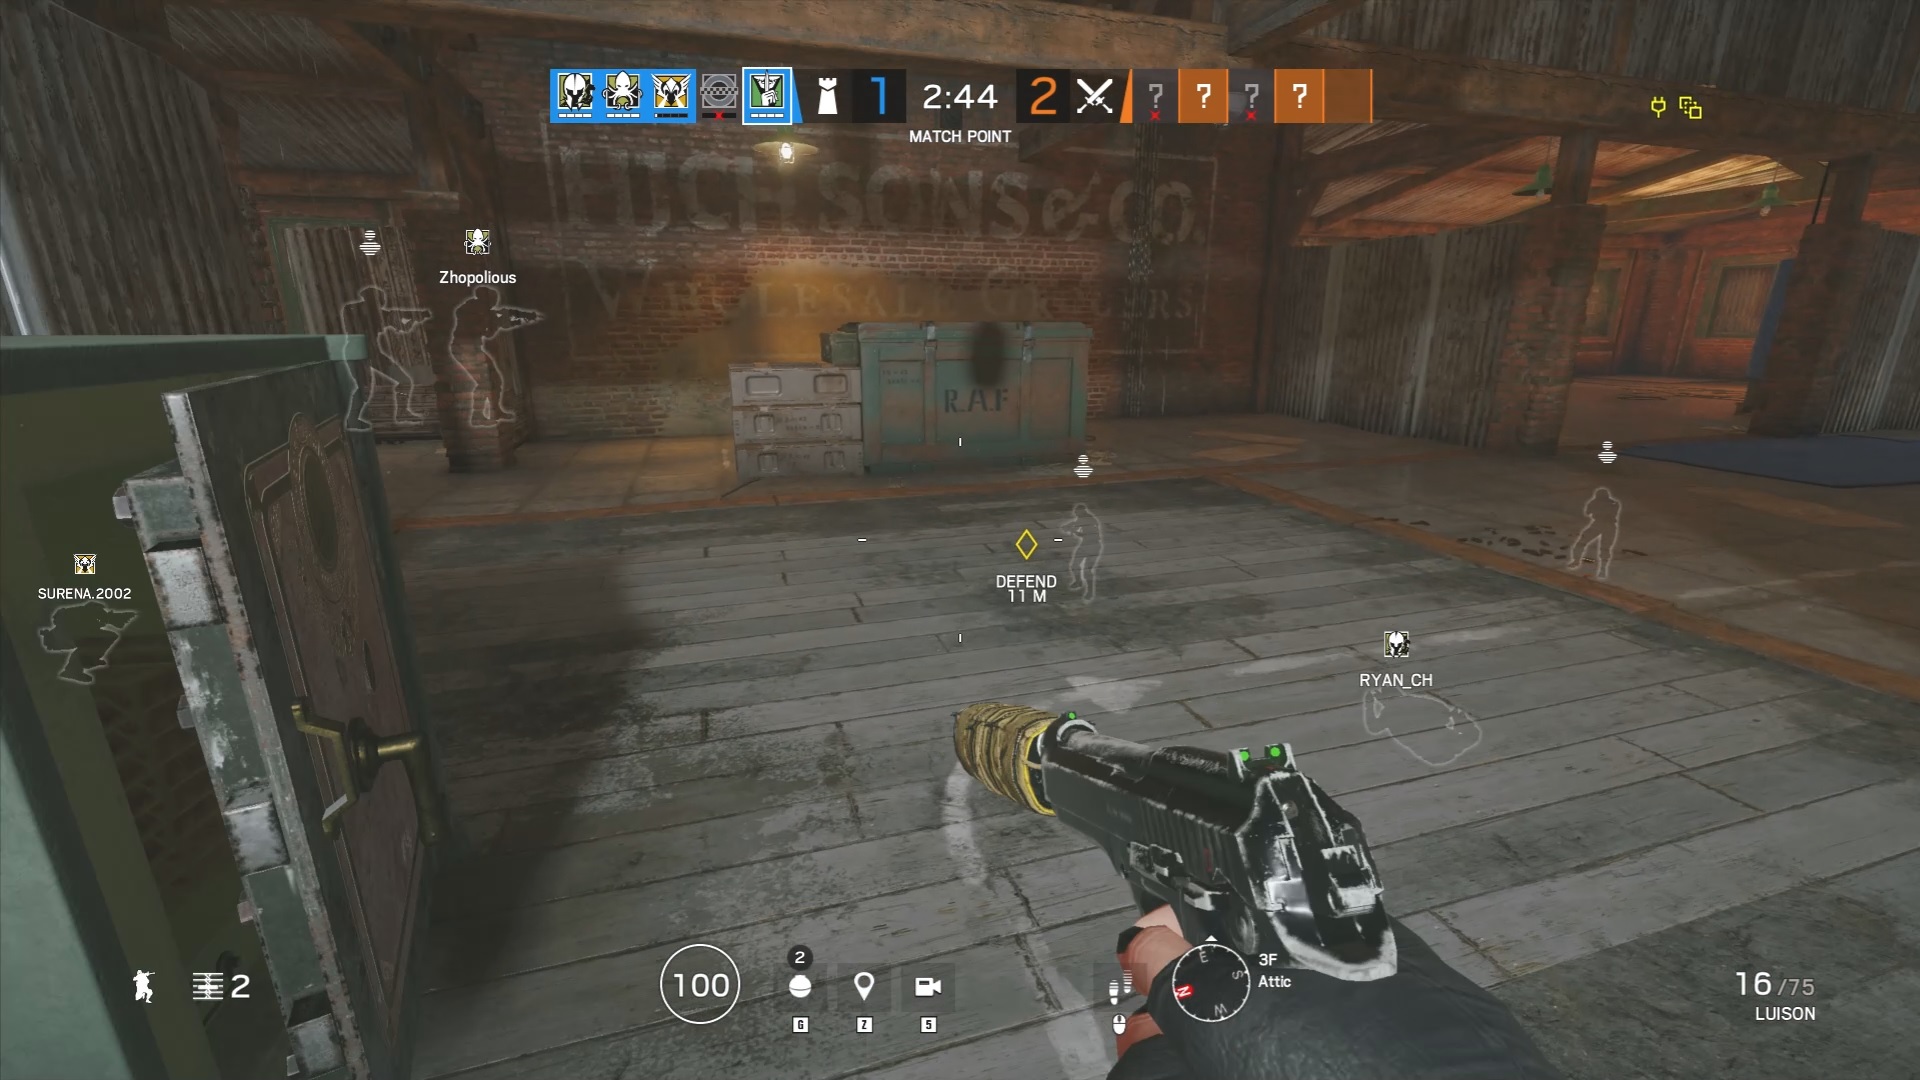
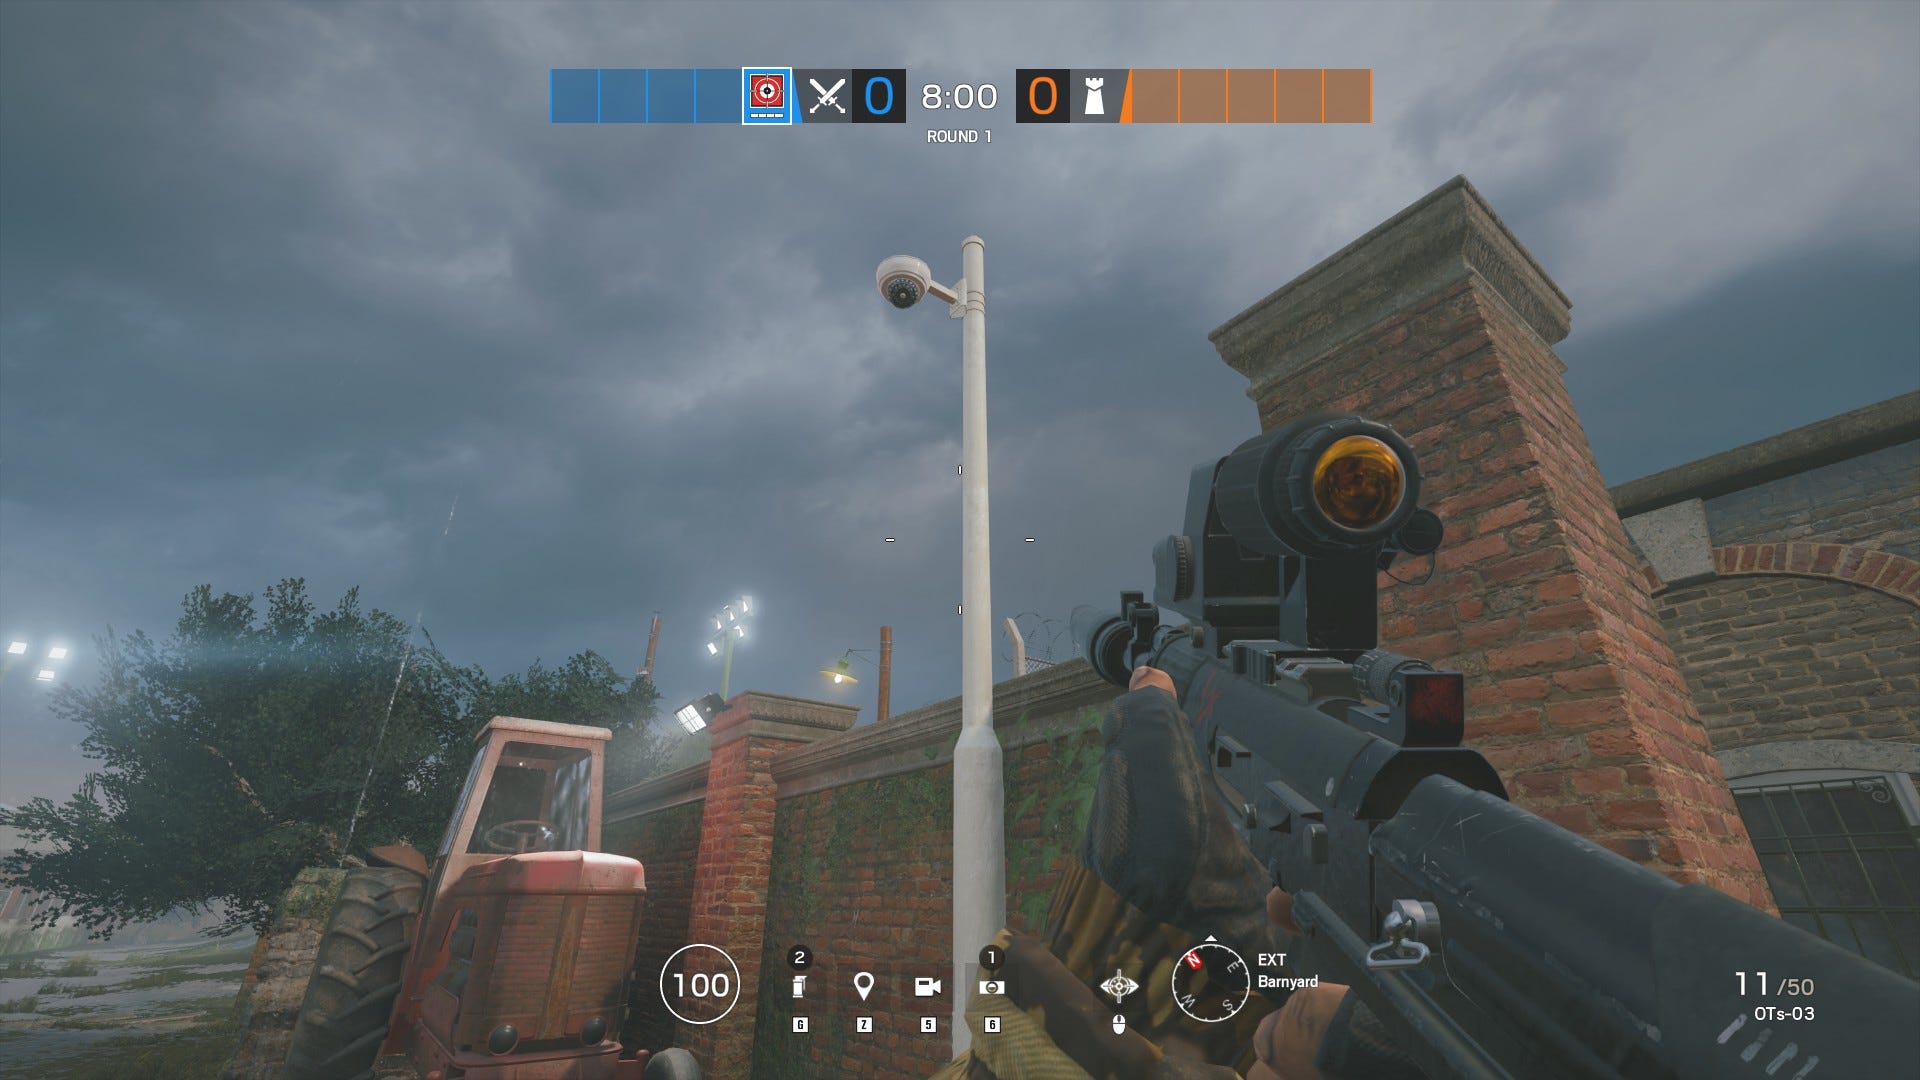
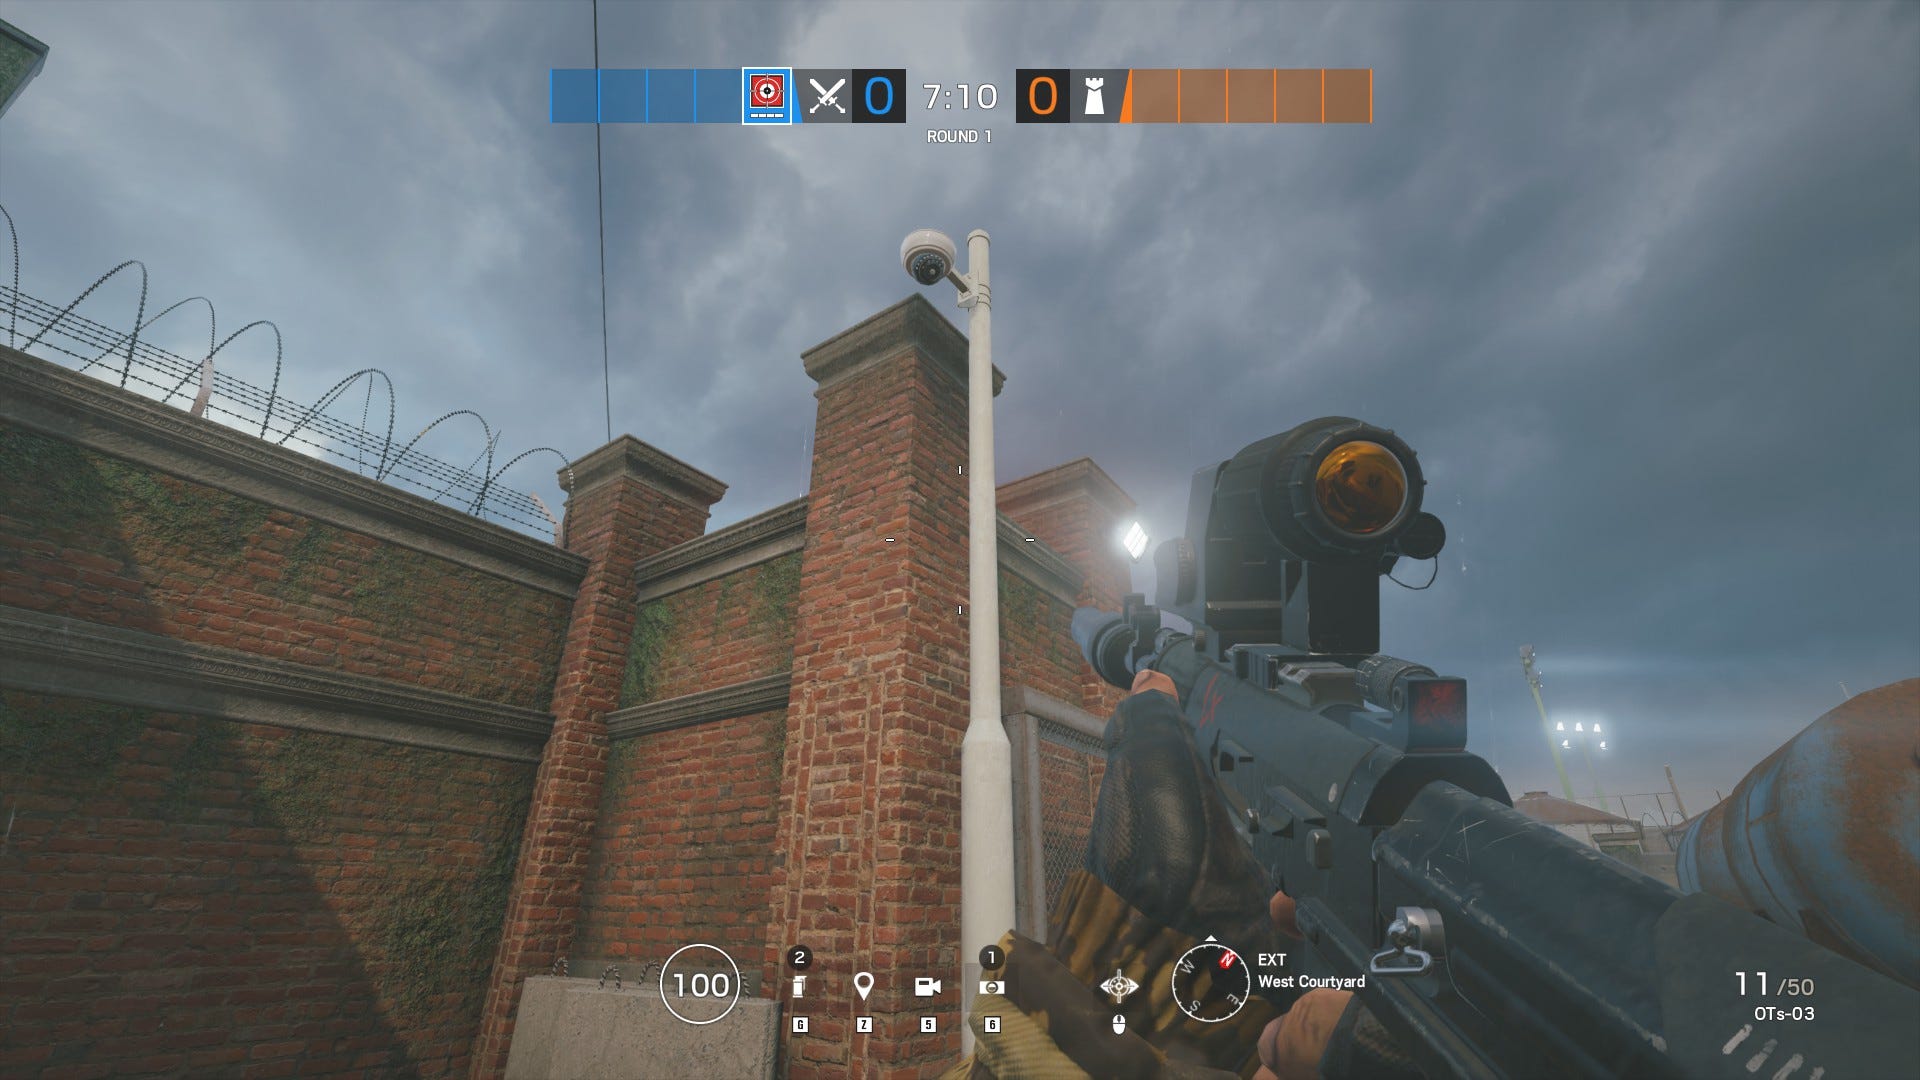
Like most maps in Rainbow Six Siege, there are cameras dotted around that newer players may not even know about. In the heat of the moment, it can be easy to ignore these cameras in favour of hunting down the objective or that last operative, however the cameras give the enemy free intel on your position.
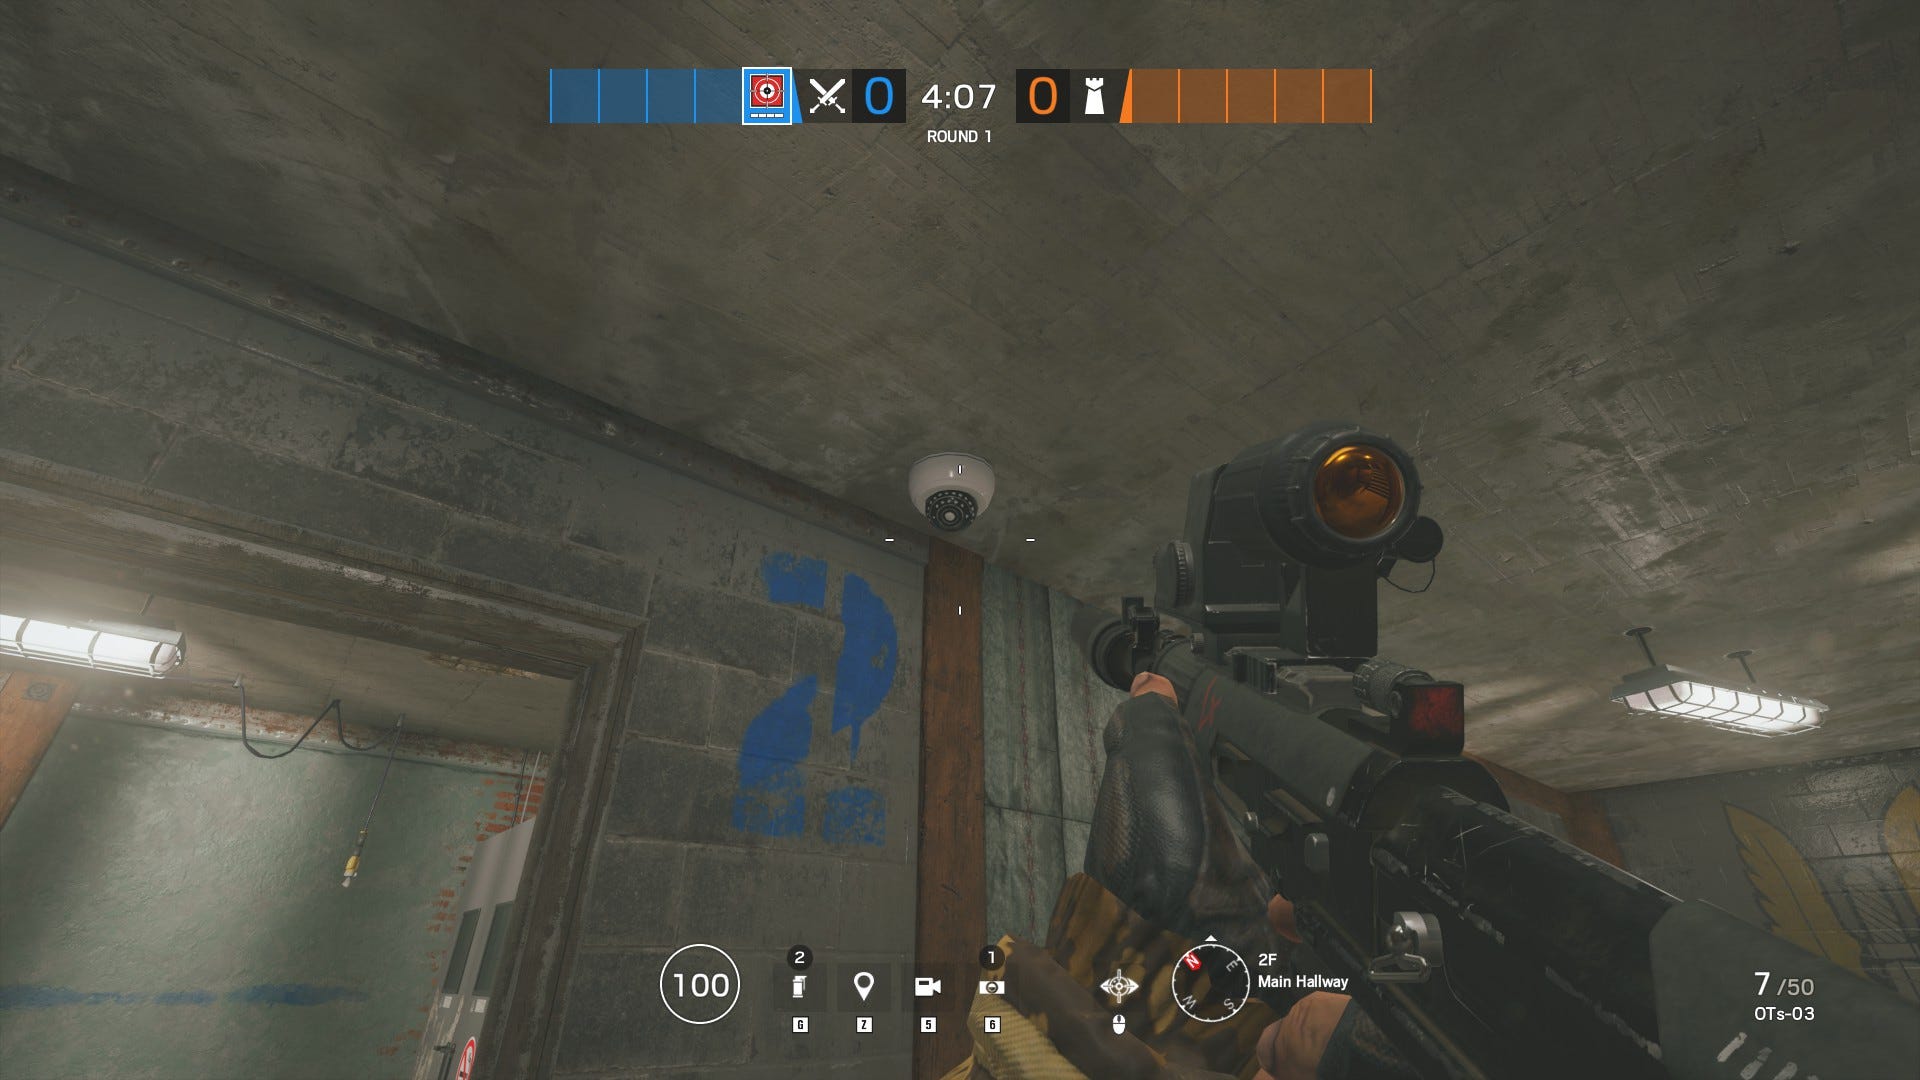
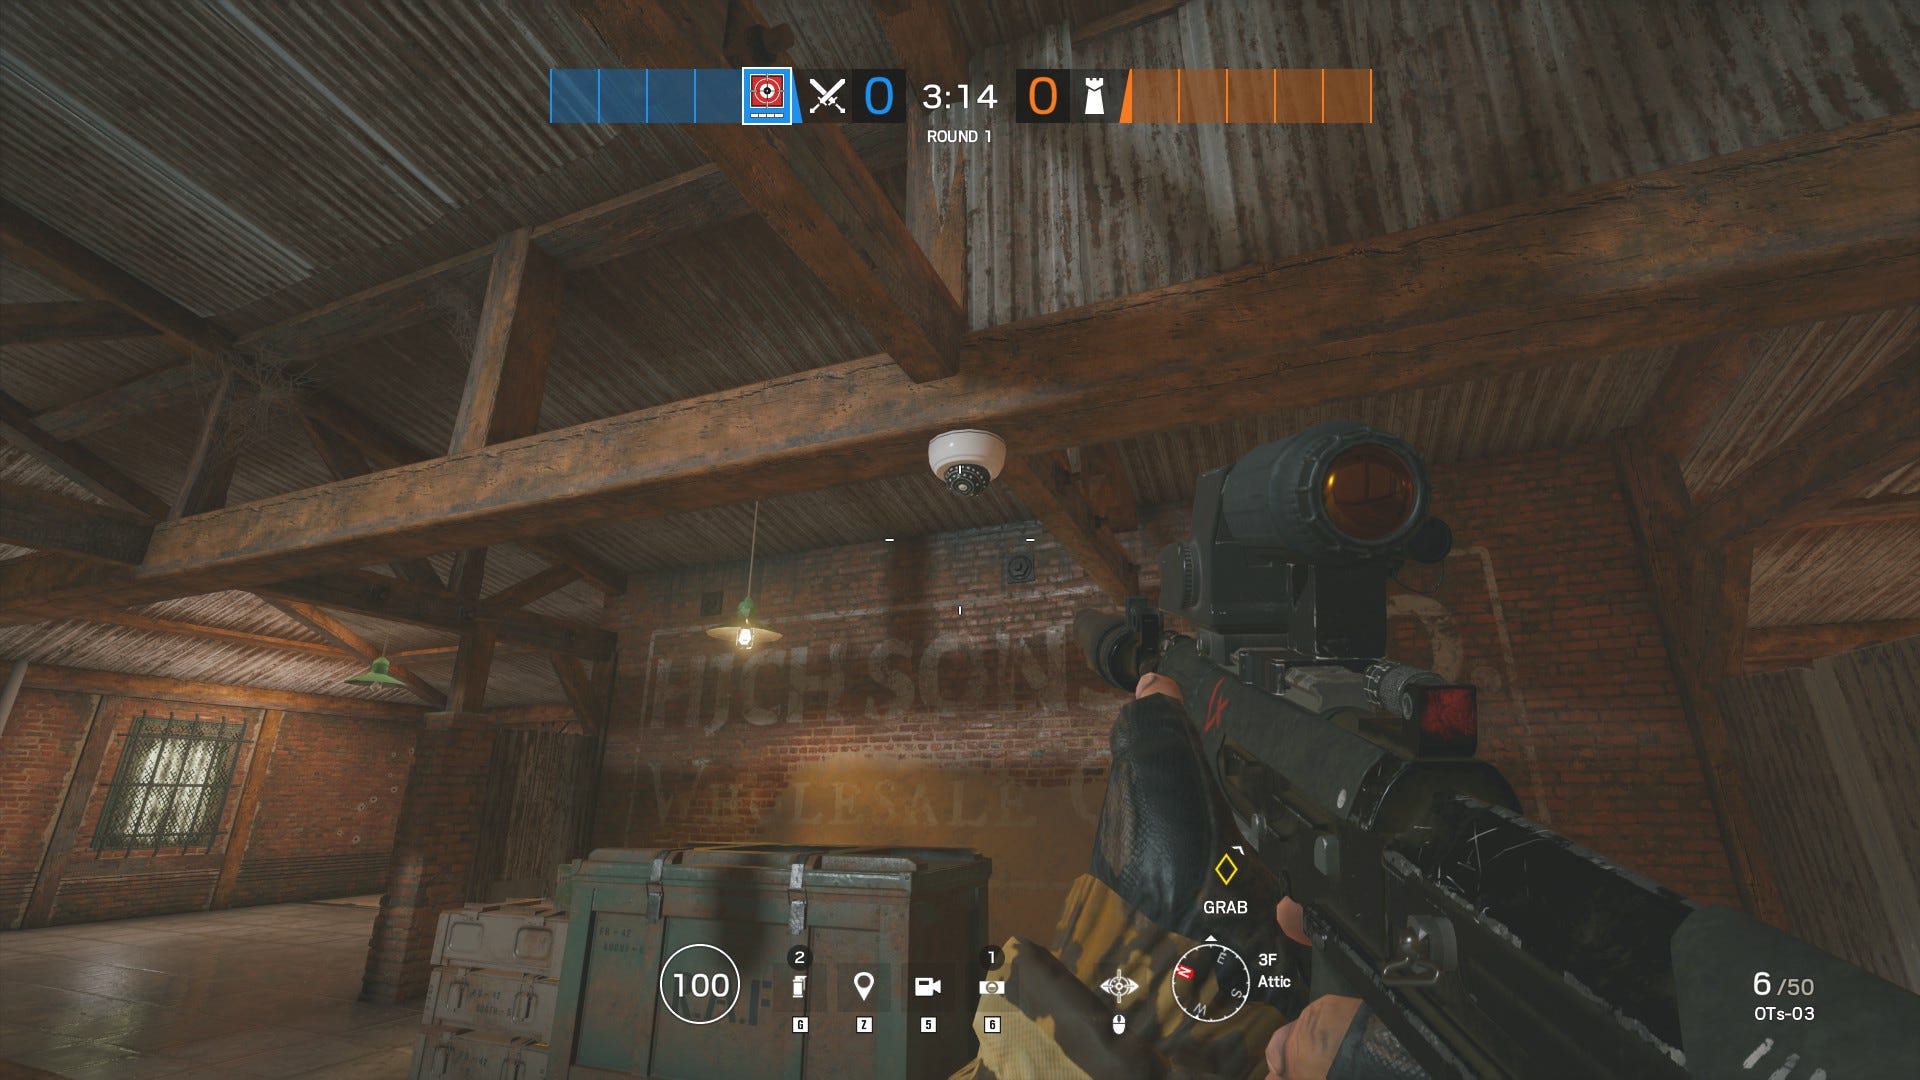
If you're an attacking player, you'll certainly want to take these out as soon as you can, so below are screenshots showing where the seven main cameras are. All the cameras inside are within close proximity of the eastern side of the map's staircase, but only the first floor and attic have immediate vision of the left hand side staircase. Below are screenshots of the individual cameras, which can be clicked to make the image bigger so you can see the location on the HUD. The hover over text will also detail where the camera is.
Tips and tricks for Rainbow Six Siege's Hereford Base
Finally, we'll leave you with some more general tips and tricks for getting the most out of every game that you play in Hereford Base.
Hereford Base is littered with cover, so there's potential for prolonged firefights if you're not moving as a team. Stick together so that at least one of you can flank the enemy. While it's a relatively big map, it can also get somewhat snug, so watch out for traps that could render your operators knocked out for the round.
If you're defending from the basement, you can use the barrels in Barrel Storage to hide in. Melee attack them until they're fully broken, then clamber in to have an ambush point for any attackers trying to break in. It's difficult for the attackers to see you on first glance and is around the corner from where they'll enter the room from, so they may not automatically check the barrels for any trickery.
One interesting design feature is that defenders can have someone positioned in the Blue Hallway 2F corridor, in the room between the two staircases. Provided that they are suited to roaming, they can get the jump on enemies that are scaling the stairs, though they need to be quick with their checks.
Attackers can have an easier time breaching from above. Take for example the second floor balcony. As both access points lead into different rooms, namely the laundry room and loom room, it's easy for attackers to indicate that they're accessing the building from one side of the balcony, while simultaneously sneaking in via the other side. This can make defending the second floor a little more challenging, particularly if you're playing the Bomb game mode as both 2nd floor bombs are incredibly close to each other. Thankfully the access point isn't where the bombs would be, but that is probably little comfort in this case.
Attackers approaching from above can find a small little access hole just big enough to fit a drone. This will allow players to get a drone in relatively unseen, allowing for visual coverage of the third floor. Given the darkness of the roof area, these drones can be very hard to spot from the access point they come in from. So any abilities that can make spotting these drones easier may be advantageous for defenders.
You can find out more about these character's abilities in our Rainbow Six: Siege operators guide, which also has information about the more universally useful operators and which ones are best for those getting back into Rainbow Six Siege. You can also check out the latest map in our Rainbow Six: Siege Fortress guide.

 Watch on YouTube