Kingdom Come Deliverance guide: walkthrough, tips and tricks
How to survive the middle ages

Kingdom Come: Deliverance is an atypical roleplaying game even putting the lack of supernatural creatures aside. There's a greater focus on simulation, and a much steeper learning curve – getting into it is not easy or overly intuitive, especially compared to the majority of games that tend to lead you by the hand. Explanations for Kingdom Come's various systems are particularly hard to come by, so if you'd rather not bash your head (and indeed your lockpicks) against every secured door you see, then take a seat, pour yourself a Saviour Schnapps, and have a gander at our guide to the game. This article was updated on March 9th 2018 with another million side quests and things.

This is not a game where you'll blindly follow the quest arrow until it takes you to your intended target (at least, not most of the time), and so in the table of contents below you'll find walkthroughs for the main and side quests, with their various solutions and possibilities handily mapped out. We've also included a few general tips and explanations, to give you a leg up and gain more of a foothold in a harsh medieval world that really isn't too fussed whether you live or die.
Words by Tom Sykes, based in part on rockpapershotgun.de articles by Sebastian Thor.
Main quests
Kingdom Come Deliverance: Unexpected Visit
Kingdom Come Deliverance: Run!
Kingdom Come Deliverance: Homecoming
Kingdom Come Deliverance: Awakening
Kingdom Come Deliverance: Train Hard, Fight Easy
Kingdom Come Deliverance: Keeping the Peace
Kingdom Come Deliverance: The Prey
Kingdom Come Deliverance: The Hunt Begins
Kingdom Come Deliverance: Ginger in a Pickle
Kingdom Come Deliverance: Mysterious Ways
Kingdom Come Deliverance: On the Scent
Kingdom Come Deliverance: My Friend Timmy
Kingdom Come Deliverance: Nest of Vipers
Kingdom Come Deliverance: Baptism of Fire
Kingdom Come Deliverance: Questions and Answers
Kingdom Come Deliverance: All that Glisters
Side quests
Kingdom Come Deliverance: The Good Thief
Kingdom Come Deliverance: Mightier than the Sword
Kingdom Come Deliverance: Courtship
Kingdom Come Deliverance: Playing with the Devil
Kingdom Come Deliverance: At your Service, My Lady
Kingdom Come Deliverance: Language Barrier
Kingdom Come Deliverance: Next to Godliness
Kingdom Come Deliverance: Scavenger
Kingdom Come Deliverance: The Horse That Bolted
Kingdom Come Deliverance: Aquarius
Kingdom Come Deliverance: Tough Love
Kingdom Come Deliverance: Waldensians
Kingdom Come Deliverance: Clothes Make the Man
Kingdom Come Deliverance: Robber Baron
Kingdom Come Deliverance: Miracles While You Wait
Kingdom Come Deliverance: A Friend in Need...
Kingdom Come Deliverance: A Costly Brawl
Kingdom Come Deliverance: In God's Hands
Kingdom Come Deliverance: A Man of the Cloth
Kingdom Come Deliverance: ...Is a Friend Indeed
Kingdom Come Deliverance: Saintly Remains
Kingdom Come Deliverance: A Bird in the Hand...
Kingdom Come Deliverance: Masquerade
Kingdom Come Deliverance: Pestilence
Kingdom Come Deliverance: Damsel in Distress
Kingdom Come Deliverance: The House of God
General tips and help
Kingdom Come Deliverance: A guide to lockpicking
Don't yet own Kingdom Come Deliverance and wondering whether it's for you? Check out our Kingdom Come Deliverance review. If you've bought it already and want to ease yourself in, read on for some general tips...
In general: say goodbye to the idea of strolling around a relaxed fantasy playground. That's not Kingdom Come: Deliverance. Simple things like a trip from point A to point B can not only strain your time and nerves, but also the body of the game's protagonist, Henry. Be attentive during the opening quests, and read through all of the various text pop-ups carefully – you'll learn a lot of useful facts about the game. Beyond that, don't be afraid to consult the Tutorials tab in the Codex – there, all instructions and tips are stored and can be accessed after they've disappeared.
Saving: a particularly vital topic, given that you're probably keen on shutting the game down now and again. As you may already know, Kingdom Come puts a limit on manual saving, first requiring that you possess a relatively pricey item called Saviour Schnapps. Autosaves are made during quests and (sometimes) when you take a kip in a bed, but they can be quite unreliably spaced out. What to do if you suddenly need to save then? (And you're not keen on using mods to do so.)
You guzzle down that Saviour Schnapps, of course. This is generally found in taverns, either from the barkeep or a waitress, or behind the counter of a pharmacy. If you have any belladonna and stinging nettle lying around, you can also brew your own at an alchemical table, provided that you follow the necessary steps to the letter. One bottle of Saviour Schnapps allows you to save anywhere – either by drinking it from the inventory, or by selecting 'Save' from the pause menu – but uses up the beverage in the process. It also gets your character drunk. Well, it is alcoholic.
Unfortunately, this special booze is not particularly affordable, although the price does vary between suppliers. We've seen it on offer between 20 and 100 Groschen, so it's worth shopping around for the best deal. The best deal, naturally, is to pay nothing for the liquid, by mastering the steps necessary to manufacture it yourself.
Quest markers: we've become used to games telling us exactly where to go in order to complete objectives, and precisely who to natter to for essential info. Kingdom Come doesn't do this, at least not most of the time. In general, when you're dispatched to an area to perform a specific deed or to chat to an individual, you'll be sent to a vague yellow circle on the world map. This gives you only a small hint, the approximate location of the thing in question. Often enough, you'll have to comb this yellow area to find the NPC, location or item you're looking for.
World map and symbols: get familiar with the map and its myriad symbols quickly. The map itself is beautiful and stylishly drawn, but it's also full of detail, its various symbols (once you know what they mean, at least) telling you where to find butchers, bakers, taverns, pharmacies, cobblers, shooting ranges, blacksmiths or whetstones. To discover what each icon represents, switch to the Legend tab while on the map screen.
Plan ahead: understanding where to find something when you need it is an essential skill in Kingdom Come, saving you a lot of time that would otherwise be spent blustering your way around. A small example: in the evening you'll become tired and need to bed down somewhere, so be sure to have some accommodation lined up. After waking up you'll feel recovered, but also hungry, so keep a bit of grub handy, or some spare cash so you can go and purchase a slap-up breakfast. Meanwhile, it pays to memorise the location of whetstones, as a blunted blade will do less damage – and it can be pricey to pay someone for the privilege of repairing it.
Much like in real life, your daily life in Kingdom Come is generally a matter of sticking to a schedule, so it will save plenty of time each day if you know where everything is located beforehand. Time you can spend on other pursuits, such as exploration, foraging or riding lessons.
Fast travel: while there is a form of fast travel in the game, it's a little different to the one found in, for example, Skyrim. You can only travel to specific fast travel points – usually major cities – locations that will be marked out by a blue banner bearing a picture of a wheel. Click on these and Henry will make towards it, however it's not as simple as instantly teleporting there. His physical needs including hunger and sleep will continue while he's on the move, while time will pass inexorably as he marches forward. Take a little trip around the world on an empty stomach and you'll pay the price when you finally arrive at your destination, so it's better to stuff your gullet before embarking on a long voyage. (Also, for that matter, before a lengthy kip.)
You'll watch Henry make the voyage from the comfort of the world map screen, instead of jumping directly to your destination as in many other games. In the process, he'll occasionally stumble upon random events, be they an encounter with bandits, corpses ripe for plundering, or knights travelling with the intention of duelling you. These surprises can be pleasant, or a royal pain in the medieval arse, so if you'd rather just ignore them, you can whistle for your horse and scarper without engaging.
Player menu, buffs and character development: your character is the centerpiece of Kingdom Come: Deliverance's medieval banquet. His skills define what you're capable of and what kind of playing style you're shaping for yourself. Accordingly, it's important to keep an eye on and to understand Henry's development. In general, skill advancement in Kingdom Come is based on the learning-by-doing principle. So if you're doing something active you'll be gradually getting better at it, be it riding, picking locks, hunting or potion-brewing. You can keep track of all these improvements on the Player screen, with the Stats, Combat, Skills, Buffs and Reputation tabs going into more granular detail. Increasing your skills and stats will add additional, permanent boons to your character, but it's just as important to pay attention to your Buffs. These are effects that will temporarily affect your character, in both positive and negative ways.
Here are a few examples. If you're starving and haven't eaten for a while, your health will drop until you push something behind the gills. If you're sent to jail – for instance, for walking around at night without a torch – your stats will be diminished for a bit. Meanwhile, if you insist on lugging too much stuff around, you'll become over-encumbered and restricted, movement-wise. Whenever a new symbol appears next to the red life and yellow endurance bars, check the Buffs screen to see what it means.
Theft, property and murder: are equally important issues to be aware of. In this strict medieval world, you can't just do whatever you feel (or at least, not if someone's watching). For example, if you bust into a stranger's house, a fade effect on the screen indicates unlawful entry into a private area. The inhabitants will warn you briefly before taking further steps – which can include reporting you to the guards. The same applies to theft: if you pinch an item in front of its owner, they'll do everything in their power to get it back. And even if you steal an item without being noticed, you may still fall foul of a later pat-down from a guard.
Thankfully, stolen goods can be fenced, for example to Rattay's Miller Woyzeck after you've completed The Good Thief side quest for his mate Peshek. If you have the resources and skills, a career in thieving can be quite lucrative – as long as you don't get caught.
With these basics in mind, you should find it a little easier to get started with Kingdom Come Deliverance. You'll still have problems here and there, but don't be discouraged: should you find yourself in a hopeless situation, remember that you can always run away. It's not what a hero would do, but you're playing the rare game where you aren't one.
Kingdom Come Deliverance: Main Quest: Unexpected Visit
After the intro, you find yourself in conversation with your mother. You're in the town of Skalitz in Bohemia, and the year is 1403. Your responses during this initial dialogue sequence will affect the default statistics of Henry, the game's protagonist. It might not be entirely clear what will change as a result of these choices, so here's how all that breaks down:
"We talked in the tavern." – this increases your speech.
"I was at the dance." – this increases your agility.
"I went to Bianca." – this increases your vitality.
"I worked in the forge." – this increases your strength.
At least at this point, the decision is not hugely important as it mainly influences the beginning of the adventure. Later, you'll be able to develop Henry in any direction you so desire. Pick whichever option you like, and that will bring the conversation with your (strikingly young-looking) mother to an end. You'll be given a few tasks to perform, but before you head off be sure to grab and eat some food (there's plenty lying around the hut). Henry's belly is rumbling, and he's going to need his strength.
Go to your father
Leave the house and go and speak to your father, who runs his smithy a little way to the northwest. For the first time in the game, you'll be able to use the power of persuasion to advance a conversation in your favour. This being the first time, you can't do anything wrong here, so just pick the option with the highest value (visible at the bottom-right of the screen). Dad sends you off on a series of errands: collect a debt from the town drunk Kunesh, buy some charcoal from the market, pick up a cross-guard from the castle, and finally, some beer from the tavern. Let's get to work.
Collect the cross-guard from the castle
From your father's forge, go to the right and follow the path along the wooden outer wall, where you should pop straight out at the castle. Speak to the gatekeepers Jaroslav and Janek, who will eventually hand over the cross-guard.
Collect Kunesh's debts
Now run northeast from the castle, which will take you into the village. Point C on your radar marks Kunesh's house - during the day he is usually busy chopping wood in front of his home, if you can't find him. Talk to Kunesh about the debt and urge him to pay at least for the axe and hammer, which he'll refuse. You may now attempt to persuade him, although this will be difficult and will result in a fist-fight if you fail. Thankfully you won't die if Kunesh beats you up, and your mother will happily patch you up if you head home – but it's more than a little humiliating.
Best to find another way to get the tools back. The axe can be pilfered when Kunesh puts it down, but the rest of your father's goods are behind a locked chest in Kunesh's house. Sneak in and attempt to open the chest, and Henry will remark that his friend Fritz might be able to supply him with a lockpick. Fritz, along with the rest of your chums, can be found in the local tavern, which resides in the middle of the village.
Go and talk to your friends. Before Fritz will help you, you'll have to promise you'll help them deal with the German, before running after them to the man's house in the southwest of the village. You'll receive a last briefing there, before Henry is ordered to distract the German's wife.
Tell her that her husband is causing trouble, and she'll clear the way – simple as that. Henry and his friends proceed to fling shit at the German's house, however his son soon gets wind of it and brings a couple of croneys with him to rough you up. With your best buds in tow, you should be able to win the fight without too much effort, and once you've done so, set off for Kunesh's house to finally recover the merchandise. The old dog doesn't stand a chance against Henry's shit-slinging medieval justice gang, and will readily hand over the key to his precious chest. Once inside his dwelling, open the chest and take the hammer and nails. If you haven't already done so, be sure to grab the axe in front of the house as well.
Buy a sack of coal from the market
Find the charcoal-burner and speak to his assistant to get the coal. Though you should have enough cash, feel free to sell any unwanted items to the merchant, and even to haggle a little bit if you're feeling up to it. With your newfound wealth, buy ten pieces of charcoal.
Buy beer from the tavern
You know where the tavern is by now. Inside you'll find your girlfriend Bianca, who works here as a barmaid. Talk to her to receive a pitcher of ale for your father, and also a free gift of three Saviour Schnapps (remember, you can use these to manually save the game). During the conversation, Bianca will mention that a mysterious man named Vanyek is looking for you.
Swordfighting training
You'll find Vanyek sitting at a table in front of the tavern. He's eager to teach you the basics of swordplay, and while you can take him up on his offer now, it might be best to offer a quick hello, before agreeing to meet him later at the practice area at the south of the village – right after giving your father the beer. The reason for this is that the beer you're carrying will become warm if you take too long dilly-dallying – and nobody likes a warm beer. Whenever you choose to take the swordmaster up on his offer, you'll proceed to learn the basics of armed combat, including how to target and switch between body parts, and how to perform weak and strong attacks. Just follow his instructions and practice everything as often as necessary until you feel comfortable swinging a sword.
Return to your father in the smithy
Having gathered everything he asked for, run back to your industrious father and give him the items. If you've taken too long with the beer, you'll have to go back to the tavern and buy more with your own money. Once everything is in place, the forging of Lord Radzig's sword can begin.
Get the nails for Theresa
Afterwards, a woman named Theresa turns up looking for nails. Go back into the house and into the room on the right to retrieve them. You'll find them in an unlocked chest, along with some other items you might want to grab as well. Return to Theresa and give her the nails to complete the quest. Lord Radzig himself arrives to admire the fine craftmanship of his new blade...before things take a turn for the unexpected. Go along with the story and Henry will receive a new main quest, the ominously titled Run!
Continue with: Kingdom Come Deliverance: Run!
Back to the main Kingdom Come Deliverance walkthrough.
Kingdom Come Deliverance: Run!
This quest starts with Henry waiting outside the castle, after having survived the terrible events of the introduction. As the quest title suggests, running is the best option here, down the slope to the southeast, and back towards the village. Before long you'll hear a woman crying for help: it's Theresa from earlier, under attack from a group of soldiers. You can either leave her to her fate, or attempt to intervene (fear not, there's a way to help her without having to defeat the soldiers). Startling them will give Theresa time to run away, but be sure to do the same thing yourself afterwards – you're no match for any of these men, even with Lord Radzig's sword.
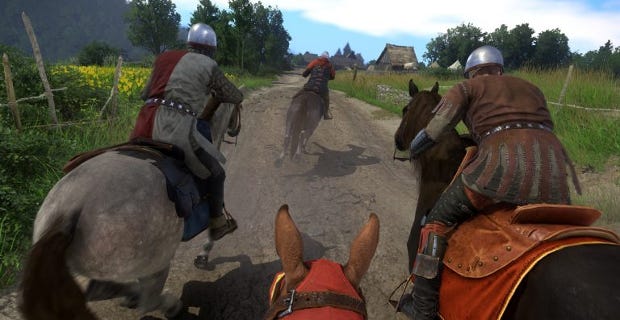
You'll see a few horses nearby. Jump onto the first one you see and gallop east out of the village, with Henry receiving an unavoidable arrow to the leg in the process. He used to be an adventurer like you until...well, I'm sure you've heard that one before.

Continue in the direction indicated until Henry comments that Talmberg lies to the left. Follow the path past the countless fleeing civilians, and away from the riders chasing you, while keeping an eye on your horse's stamina, so that you don't overwork the poor frightened beast. After a few minutes you'll reach Talmberg and trigger a cutscene, during which your pursuers will finally tire of chasing you. Phew.
Talk to Sir Robard
As you leave the building, go down the steps to the right and talk to the armored man in the courtyard. Follow him into the kitchen and, well, stuff your gob with food – fleeing a village is hungry work. You might want to keep some food for later, although be aware that it will spoil if you leave it in your inventory for too long. Now, let's find a place to sleep.
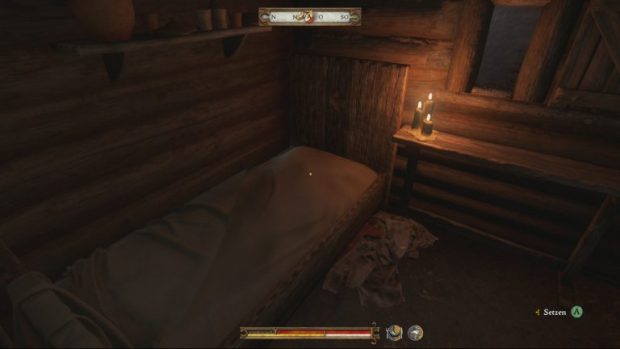
Go to the guardroom on the forecourt and sleep until morning
Exit the kitchen and enter the building just across the alley on the left. You'll find a nicely decorated bedroom there that you can use to rest. Sleep until your energy reaches around 100. Lady Stephanie of Talmberg will wake you up for a friendly chat. You can decide if you want to report on the attack on Skalitz or not, and whether or not to omit all the gory details. Do so, picking the speech options at the top, to get in Lady Stephanie's good graces.
You'll return to sleep afterwards, before you're woken once again – by Sir Robard.
Join the garrison on the battlements
Grab the torch from the table in your room and leave the building. Run around it to the left, and make your way towards the lowered gate. On the left you can see some steps, proceed to climb them to finally reach the battlements. Speak to Robard again to trigger a cutscene where Lord Radzig suddenly turns up, having survived the attack on Skalitz. He wants you to stay here while he marches out with his men, and good Sir Robard is only too happy to put you to use. You're to patrol the battlements, for several long hours, with his men.
Keep watch on the battlements
Thankfully, waiting in this game is a whole lot easier than in real life, thanks to your ability to fast-forward time. A nearby guard will show you how to use the Wait function, and unless you'd rather stand there picking your nose all night long, it's best to use it to advance the time of day until around five in the morning.

Suddenly there's turmoil. The guards are mobilised as they rush headlong to battle, and while at this point you would probably rather hide in a nearby cupboard until the whole thing blows over, you should follow them to the village and beyond. Sigismund's army has advanced upon Talmberg, resulting to a tense standoff that ends...huh, peacefully. For now, at least. Now, to get out of the castle.
Talk to Sir Robard
Robard isn't keen on you returning to Skalitz; you can attempt to persuade him, but you'll likely fail. You stand a better chance trekking to the castle gate and attempting to convince Radim the guard to allow you through, but even that won't be a sure thing. How on earth are you going to leave the castle then?
Talmberger armor / escape from the castle
One way out is to impersonate a guard, by wearing guard gear. Just a few meters from the exit, you'll find Votava sitting on a bench, who will sell you a lockpick if you're not carrying one. Flog him any unnecessary items and don't be afraid to haggle if you're feeling brave. With the lockpick in hand, you can crack open a chest in the battlements' attic room, where you'll find a set of unused guard armour. With this, Radim will believe that you're a guard and open the gate for you. Be sure to collect your horse before you leave (it's the one that says 'mount' rather than 'steal' when you hover the cursor over it), as the journey home is a lengthy one.
If you're in a hurry, however, or you simply can't be bothered to find the guard armour, you could also try jumping from the drawbridge in the middle of the castle. The downsides of this approach should be obvious: you'll probably injure yourself when landing on the rocks, and you'll also need to hotfoot it home without the aid of a nag. A few guards will stop you just outside of Talmberg; you can either bribe, attack the men, or convince them to let you through. Make your way to Rovna to the west, where a cutscene will trigger, before you're given the task of finding your parents. So starts the next main quest, Homecoming.
Continue with: Kingdom Come Deliverance: Homecoming.
Back to the main Kingdom Come Deliverance walkthrough.
Kingdom Come Deliverance: Homecoming
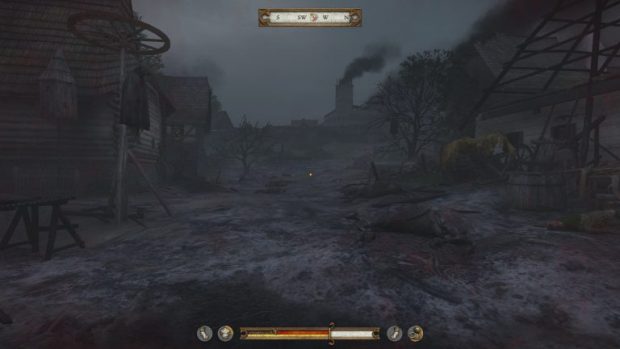
The starting point for this quest is the town of Rovna, east of Skalitz, which is little more than a ruin full of piles of dead bodies. Henry decides then that he should give his parents a proper burial, but first he'll have to make his way through Rovna, past plenty of corpses to plunder, not to mention bandits who will attack you if you get too close. These grave-robbers aren't heavily armored, so you shouldn't have too many problems taking them on as you progress through the town and onto Skalitz.
Search for your parents
You arrive to find that your hometown has been completely destroyed, with corpses and debris everywhere. Naturally, you should loot what you can before heading to your parents' remains, who remain out on the street, right where they were cut down during the introduction. Not wanting to leave them there, Henry reasonably decides to bury them at his former home, for which he'll need to find a shovel.
Get a shovel
The game now gives you a yellow perimeter on the map that covers the entire village – hardly a precise marker. You can either search for the shovel yourself, or walk back the way you came, towards the north village entrance, keeping your eye on the main road to the left. After a few meters you should hear a dog barking – head towards it to trigger a cutscene in an alleyway. Henry meets a grave-robber named Zvyshek, who happens to have a shovel. What luck.
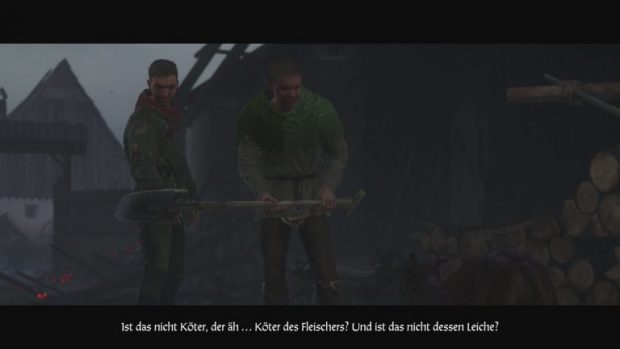
Naturally, Zvyshek won't just hand over the tool, no matter how nicely you ask for it, so your options are to use your speech skill to threaten him, or to fight him for the tool, which won't be easy. However, if you pull out Radzig's sword during the ensuing fist-fight he'll be so intimidated that he'll leg it, leaving his precious shovel behind.
Dig a grave under the linden tree
Return to your former home. Nearby stands the linden tree under which your father wished to be buried. It's time to fulfill his final request. Look at the ground next to tree and interact to begin digging; when you're done, trouble finds poor Henry once again. Zvyshek returns with reinforcements, including a bruiser somewhat ironically named Runt. If it seems like a battle you can't win, then you're right, as you'll lose no matter how skilfully you fight. Henry is whacked on the bonce and falls to the ground.

Before Runt can deliver the killing blow, however, backup arrives to save the day. Or, at least, your life. When you wake up next, Kingdom Come's training wheels will finally come off, and the real adventure can begin.
Continue with: Kingdom Come Deliverance: Awakening.
Back to the main Kingdom Come Deliverance walkthrough.
Kingdom Come Deliverance: Awakening
After you have buried your parents in Skalitz and been rescued by your allies, you wake up in a kind of fever dream. It's not a pleasant one for Henry, who stumbles through this hellish vision, replaying the awful events that brought him here. Follow the target west/southwest until you stumble into three mercenaries. They'll attack, but dissolve into the air after absorbing just a few hits, which is terribly nice of them.

Follow the quest marker over the battlefield until you stumble into a cutscene showing various flashbacks of your recent past. A few moments later, Henry wakes from his dream, where he finds that Theresa, the miller's daughter, has been tending to him for the past couple of weeks. It's about time you got up out of that bed, and started exploring a new location: the town of Rattay.
Get your things out of the trunk
But before you head off into the big wide world, you might want to open the chest next to your bed and reclaim your possessions. Don't forget to re-equip your weapons and armour, unless you'd prefer to walk around in your stained medieval pyjamas. Leave the mill and chat to Miller Peshek nearby - Theresa's grumpy father who will offer you your first side quest: The Good Thief.

You'll find that in the Side Quests section if you'd like to pursue it, but for now, let's head to the castle for a long-overdue meeting with Lord Radzig.
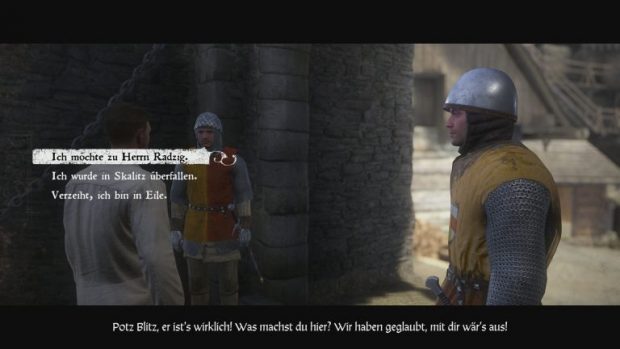
Go to Pirkstein for an audience with Lord Radzig
Leave the property and head south/southeast, making for the hill and towards the castle. There are a couple of guards standing at the gate, but even if you mess up the skill-check where you insist to be let through, the pair will eventually recognise you as Lord Radzig's blacksmith and let you pass.
After entering, keep to the right and cross the wooden bridge, where another pair of guards stands in your way. Thankfully they, too, will let you pass without further ado, leaving you free to climb the outside staircase to the upper floor. Opening the door, you find that you've interrupted Lord Radzig's feast, which was probably frowned upon in medieval times. How embarrassing, but not so awkward that it prevents Radzig from putting you to work in his garrison. Thus begins the next quest, Train Hard, Fight Easy.
Continue with: Kingdom Come Deliverance: Train Hard, Fight Easy.
Back to the main Kingdom Come Deliverance walkthrough.
Kingdom Come Deliverance: Train Hard, Fight Easy
This quest concerns your training under one Captain Bernard. To begin, leave the castle grounds and head back towards the village, before going east/northeast to find the battleground (it lies just outside the protective walls). He'll only be there during the day, so if it's night-time either get some kip or use the Wait function to advance time until about eight in the morning. Talk to him to start your training without further ado.
Training under Bernard
It's up to you whether you want to re-acquaint yourself with some basic combat first, or to go directly into the more advanced techniques. Since the fighting in Kingdom Come is quite unique and more than a little cumbersome, there's no shame in beginning with the basics, even if you've already picked some of it up. In any case, pay close attention to his instructions, as there are plenty of worthwhile techniques to learn.
Do as Bernard tells you, and you might notice that some of your skills are already improving – you'll be a master warrior in no time. At some point, an arrogant snob named Hans Capon will interrupt proceedings to announce that his archery training will soon begin. But before that, you will learn how to feint and dodge to outwit your opponents.
Bow training on the shooting range
Afterwards, go straight to the shooting range, where you'll learn how to perform archery. Bernard will lead you right to the range, and even give you a pair of vambraces for your trouble – stick these on or you'll damage your arms when firing. Aiming with a bow is a little tricky, given the lack of a traditional cursor, so take the time to shoot a few targets, to get a sense for how your stamina affects the bow's alignment. Shooting continues until Capon decides to challenge you to an archery competition and, finally, to a good old swordfight.
If you succeed, you'll receive Capon's bow as a reward. If you lose, the haughty Lord will make you feel about two inches tall. Talk to Bernard afterwards and he'll give you a new errand:
Report to the bailiff
The bailiff is located in the west part of the city, but before you head to see him, you might like to peruse the nearby buildings where you'll find shops selling armour, weapons, clothes and alchemical supplies. Near the tailor, a wooden staircase on the right leads you directly to an inn, where the lonely bailiff resides.
Caution: there's a bug that occasionally shows the door to be locked, a lock that you may find difficult to pick this early in the game. In our case it helped to go and sleep in a bed for a few hours until the game autosaved, before we returned to find that we were able to enter the building as normal.
Go inside and tell the bailiff that you want to work for him, and you'll be given the next main quest, Keeping the Peace.
Continue with: Kingdom Come Deliverance: Keeping the Peace.
Back to the main Kingdom Come Deliverance walkthrough.
Kingdom Come Deliverance: Keeping the Peace
Much of this quest involves performing your new duties as a city guard, but before you head out on your rounds you should take the opportunity to find some appropriate equipment.
Get your gear out of the armory
You'll find the armory on the first floor of a watchtower that lies to the east of Rattay, between the shoemaker and the pub. Go inside, talk to the guard about why you're there, and he'll give you a set of glamorous work clothes. The light armour and hood don't offer much in the way of protection, but hey, they're free, and you can always sell them later if you want.
You should now head to the west of Rattay, to begin your tour with a senior guard there named Nightgale. If you arrive before 11:00 or after 19:00, he won't be there, so don't be afraid to wait or take a nap if you need to. If you appear within those hours, he'll be waiting for you near a cart in front of the church.
Turn up in civilian clothes and Nightingale will (understandably) have a go at you for failing to put on the uniform first, but you can always lie and say that your current outfit has been cleared for duty. Conversation over, you'll set off on your patrol, with Nightingale giving you a brief tour of the area and its history. Talking to him about Theresa will begin the Courtship side quest, but more on that later.
Dispute between armorer and beggar
It won't be long before your talents are in demand. The armorer is in the middle of a heated dispute with a beggar named Jane, who the man wants gone from his property. Listen to both sides of the conflict, and step in to solve their dispute. One interesting way to resolve things is by pointing out his charity deficit, which opens up further conversation options. You can persuade him to help the beggar out with a charitable donation, that the two should sort it out among themselves, or if you're feeling especially cruel you can drive the beggar away with the threat of violence.
This won't have much of an impact on the rest of the game, so resolve the situation however you see fit. Follow Nightingale and listen along as he resumes his historical tour, which takes quite a while. At some point you'll end up in a tavern, where he will invite you to play a game of dice. You can choose to play or not, but it's fairly difficult to win against the man.
Ring the bell
After a short cutscene, the time has come to ring in the changes, which is to say, Nightingale wants you to go and ring the town bell, which will signify the end of the day's trading. So head back to the marketplace, to the buildings with the colored facades, where you'll find the bell on the wall of the armorer's shop. Ring it, then run back to the tavern. You're supposed to clear it out, but your old friend Hans Capon doesn't seem to be in any great hurry.
Hans will challenge Capon to a fist-fight. It doesn't matter whether you win or lose, but try to get a good few hits in – soon enough, Lord Hanush will arrive to break up the fight. Hanush decides that the two of you should go hunting together, and so begins the next main quest, The Prey.
Continue with: Kingdom Come Deliverance: The Prey.
Back to the main Kingdom Come Deliverance walkthrough.
Kingdom Come Deliverance: The Prey
The starting point for this quest is the stables east of Rattay, where Hans Capon will be waiting for you bright and early – seriously, he's there from half-five in the morning. By around noon he'll be gone again, so don't tarry.
No meeting with Capon can happen without some measure of humiliation, of course, so after you've spoken to the mounted nobleman, he'll gallop clear away from you, leaving you to bound after his horse on foot. The nag continues eastwards out of town, and you've no choice but to follow it.
Go to the camp
Lose sight of Capon and you'll have to find your own way to the camp, so be sure to keep the man within your sights. The camp is located far to the northeast of the map, and will take a good fifteen minutes to reach on foot – thankfully, you can use fast-travel to get there.
It's nearly nightfall by the time you arrive at the camp. Once there, Capon asks you to bring him some wine and bacon from his saddlebag, before quizzing you about Skalitz. It would be foolish to hunt at this late hour, so go for a kip in one of the bedrolls until about 6am.
Hare-hunting with Capon
A poacher's life isn't exactly easy. First, grab the arrows from the chest in the warehouse, and pick up the bow while you're at it if you don't have one. During the hunt, remember to be patient, not to fire off shots prematurely, and of course to always collect any mislaid arrows that are still usable. Those things don't grow on trees, you know.
However, that's not the beginning and end of your hare-hunting difficulties, as the hopping creatures can sometimes be hard to find. Don't despair if you have to stalk through the thickets for a while until you see one. As a rough guide, it can be helpful to avoid overgrown areas, and to direct your attention to the edges of the forest, to clearings or paths with a better view.
In any case, you should crouch as soon as one of the rodents is in sight, so you can creep a little closer for a more promising shot. Patience is a virtue, as is a silent approach, meaning you might want to remove any heavy armour before stalking your prey.
Return to Capon at around noon. If you've managed to bag more hares than your rival, he'll be so impressed that he'll reward you with 35 Groschen. Not bad.
Free Capon and hunt boar
Capon then decides that he wants to hunt bigger prey. Follow him through the forest for a while until he pulls out his bow and attempts to take down a boar, merely grazing the creature in the process. Capon will gallop after it, disappearing from sight and leaving you on your own to look for him.
You'll find him in the north-west of the forest, where he is now being held hostage at a Cuman camp (the lordly idiot). If you're struggling to find it, it's northwest of the deer-hunting area and just east of Talmberg. The best way to approach the camp is to sneak up on the men, as the archer and swordsman won't mess around in open combat. Depending on how accurate you are with the bow, you can also attempt to open fire from a distance, but be sure to take the bowman out first.
You should scour the camp for valuables before you release Capon, as that will put an end to the quest and teleport you away (don't you hate it when that happens?) Once you've saved Lord Capon, the newly affectionate pair will return to Rattay, and automatically start the next main quest, The Hunt Begins.
Continue with: Kingdom Come Deliverance: The Hunt Begins.
Back to the main Kingdom Come Deliverance walkthrough.
Kingdom Come Deliverance: The Hunt Begins
For Henry it really pays off that he rescued Capon during the hunt, as he is rewarded with a position on Lord Radzig's staff. You'll also be given a horse, which you'll need to make use of almost immediately, as it seems the neighbouring village of Neuhof has been attacked by bandits.
At this point, you'll probably be keen to unload your inventory on the first merchant you come across, but you should resist that temptation and go see Captain Bernard ASAP, as you will technically fail the mission if you don't speak to him in time. (This being a main quest, you can still complete it, you'll just have to hoof it to Neuhof on your own.)
If your inventory really is jam-packed, it might be worthwhile to dump some of your possessions into your new horse's saddlebag, freeing your pockets for all that lovely bandit loot. Once you've reached Captain Bernard and acquired the nag in question, follow along with the soldiers as they ride to the assistance of Neuhof, located northeast of Rattay. It'll be easy to spot, as it's currently billowing smoke into the air.
Investigate Neuhof and question the survivors
Once you've made it to the village the captain will give you a new task: question the surviors. The are four you must talk to, and it makes sense to start with Zora, who is crying over her husband's body nearby in the courtyard. She gives you some information about the attackers, and tells you who you should go and speak to now: Jakub, Mark and Ginger. You'll find Jakub just a few metres away from Zora, and when you chat to him he tells you to look for a fence that has been knocked over: a sign that might point to the direction of the attack. Mark is sitting down beside a hay cart to the east of the village square, while aptly named redhead Ginger is waiting just a few metres north of Mark. Once you've interviewed the four witnesses, and returned to Captain Bernard, you'll be dispatched to explore the nearby forest.
Explore the area north of the stud farm
Leave through the broken gate on the left and continue north, where you'll find a trail that takes you into the forest. You'll come to a street where you can see a patch of blood. Investigate the bloodstain to advance the quest, moving the exploration area further up the map. Follow the blood trail until you reach a path, and eventually two bandits, one of whom is thankfully wounded, while the other is only too happy to carve you up.
After you've dealt with the bandit, you'll discover that, during the course of your battle, the wounded robber has died of his injuries. Search his body to find a bloody hoof-pick – a quest item – along with a few pennies and helpful items. Who does this strange object belong to? To find out, you must return to Neuhof, the scene of the crime.
Talk to Mark. He tells you that the hoof-pick belongs to Ginger, who in your absence has made a run for it. Return to Jakub at the stables to learn where to find him. He doesn't believe that Ginger is in league with the bandits, but he knows where you can find him: with the Charcoal-Burners. The current quest ends here and you can once again report to Bernard.
Continue with: Kingdom Come Deliverance: Ginger in a Pickle.
Back to the main Kingdom Come Deliverance walkthrough.
Kingdom Come Deliverance: Ginger in a Pickle
As you have just learned from Jakub, you can find what you are looking for among the Charcoal-Burners. He mentions a camp located to the south, which should be a good starting point, so let's head there. Ride south along the narrow stream near Neuhof until you reach the point marked on the map (it should be marked with an A). Once you arrive there, either persuade or bribe the Charcoal-Burner spokesman to help you, who will only send you to meet with some of his colleagues in the north. Look for them in the clearing at the bottom of the search area that opens up when you arrive there.
Again, you can either try to persuade or bribe their spokesman for the information you need. The former option won't be easy, but a good 25 Groschen should be enough for him to loosen his tongue, telling you to continue your search near Talmberg.
The location of the next camp will now be marked on your map, and if you want to avoid a scrap with a camp full of bandits along the way, best follow the river. When you finally arrive at the next camp, ask the twins for information about Ginger. They say they have him, but they'll only release the lad on the condition that you eliminate a couple of troublesome bandits.
Kill the bandits
In this sub-quest, there is also the possibility of lying to the brothers and pretending that the bandits are already dead, which is the option you should take if you're looking to complete the game without killing unnecessarily. The easiest option is just to kill them, however, so head for the middle of the forest to the point marked on the map – the bandits can be found at the place where the central path through the forest starts to fork.
You can talk to the bandits before you attack them, if you like, however that will prevent you from sneaking up on them for a stealth advantage. If you come at night, you can also assassinate them in their sleep.
Once the bandits are no more, return to the Coal-Burner camp to inform the twins of your heroic deeds. True to their words, they'll tell you where to find Ginger, who turns out to be hiding in a small hut to the north of the third Coal-Burner camp.
Inside, Ginger asks you what he has to do with the attack on Neuhof – it turns out he's blameless. Let him know that you've taken care of the bandits, before either assuring him that you'll smooth things over back in Neuhof, or that he should go back there and explain his story himself. If you pick the first option you'll have to return there yourself to clarify the matter with Zora, but the next time you see Ginger in Neuhof he'll thank you with a bag of Groschen, and offer to increase your riding skill.
Regardless of how that pans out, Ginger will also clue you in about a limping man in Uzhitz, who has something to do with the bandit attack – but let's save that for the next quest, Mysterious Ways. Before you embark on that, return to Captain Bernard and Lord Radzig, who will give you your reward.
Continue with: Kingdom Come Deliverance: Mysterious Ways.
Back to the main Kingdom Come Deliverance walkthrough.
Kingdom Come Deliverance: Mysterious Ways
During the course of the previous quest, Ginger told you where you should be heading to next: to find a limping bandit in Uzhitz, a town located to the northeast of Talmberg. Mount your horse and head north to reach it, but don't be alarmed at the vast search area once you arrive (the entire place is circled – how on earth are you supposed to find the bandit's house?) As soon as you approach one of its citizen – for example, the innkeeper – you can speak to them to learn where the bandit lives. If they don't know, just keep asking until someone tells you.
You'll discover that Limpy Lubosh lives on the village outsirts, on the road to Rattay. Head towards the small bridge over the river, which divides Uzhitz. His hut is one of the last huts to the south, which some passers-by are currently crowding around. Approach the scene and Henry will talk to the bailiff; as it turns out, your target has been murdered. It's time for you to play detective.
Get more information about Limpy Lubosh
Talk to the surrounding onlookers, asking about any suspicious activity. They say that Lubosh recently paid a visit to the local priest. You'll find Father Godwin's church in the north of the village, while the padre himself will likely be standing outside it, possibly performing some sword-fighting exercises. Just follow the A on your map to locate the priest. He'll also give you the Playing with the Devil side quest, but more on that later.
Ask Godwin what happened on the day Lubosh died, and he'll reveal that he came to the priest and made confession, but that Godwin can't reveal what the deceased told him. You could attempt to persuade him, now, but it's unlikely your skill will be high enough to succeed. Instead, Godwin will invite you to join him in the tavern that evening, which handily is located next to the church. You can meet the priest here from around half-past eight, but it's not a big deal if you arrive early - just take a seat and let some time pass you by. Take a seat at Godwin's table and the conversation can begin.
From here on there are two different outcomes, each dependent on your relationship with Godwin. If you want to maintain a positive relationship with the priest, then talk openingly about your background (always give the first answer), and don't take too long to reply as most of the choices are time-sensitive.
Positive relationship
If you're open with Godwin, he will also begin to loosen up, before finally suggesting having an alcoholic beverage or two. It's worthwhile agreeing to his request, but if you don't mind getting on the priest's bad side, you can always refuse. Continue down the drinking path and you'll wind up being thrown out of the establishment after a scuffle with the other patrons. Follow Godwin to the church tower and, if necessary, pick up the torch if you can't see the wooden stairs in front of you.
Take over Father Godwin's sermon
You wake up with a hangover after a memorable night, and next to a priest who is in no mood to deliver a sermon. To stay in his good books you'll need to deliver it for him, by first putting on some suitable attire, and then following Godwin to the church and hoping for the best.
First, say that God is at the head of the church. After that, that it is human to sin. Finally, speak harshly, but stand up for Father Godwin. That should get the assembled crowd on your side. If the sermon goes well, the priest will keep his word and break his silence over Lubosh's confession. It seems that the limping bandit was involved in the raid on Neuhof, but that he wanted nothing to do with its more out-of-control violence. According to Godwin, a man named Reeky can help you, in Ledetchko.
Negative relationship
If things go pear-shaped with Godwin you will have to learn what happened to Lubosh in a different manner. Canvassing the public is not particularly helpful, so you should instead locate the Bailiff (you'll find him in the tavern during the evening).
From him you'll finally gain a new lead: the Rattay Black Chronicle should be able to help you. Using the fast-travel system you'll be able to jump back to Rattay pretty quickly. To find the building itself, first locate the tailor, then take the door on the right-hand side, in front of the wooden staircase, where you'll find the poorly scribe lying in his bed.
The scribe asks you to pick up a salve from the pharmacist that will ease his discomfort – you can conveniently find this next door, where it's on sale for 40 Groschen. After the scribe's speedy recovery, follow him to a previously locked room where you're given access to the chronicle. Depending on whether Henry can read or not, either have a read of it yourself or ask the scribe for help. From the chronicle you'll learn of Reeky, and the next main quest can finally begin.
Continue with: Kingdom Come Deliverance: On the Scent.
Back to the main Kingdom Come Deliverance walkthrough.
Kingdom Come Deliverance: On the Scent
Henry must continue to make use of his detective senses here. Head south to the remote village of Ledetchko – it's southwest of Talmberg and northwest of Rattay – but you should have a marker on your map anyway. The investigation here follows much the same procedure as before: talk to one of the citizens on the subject of Reeky and you'll be referred to a tanner in the south of the village, who is said to be Reeky's dad.
You'll also be able to fulfill an optional quest objective. Henry will be referred to a woman known as the Bath-house Wench, who is said to be familiar with Reeky. Be sure to talk to her before concluding the main objective if you want to tick every box, and discover some hidden treasure, as that secondary goal will fail once the story moves along.
Let's do that then, and receive some information about buried loot. Reeky's father will be near his house for the day (south of the village and at quest marker B on your map), but before you talk to him, grab the nearby shovel and prepare to dig to find the gold. There's some loose earth next to a pile of stones - that's where the treasure is buried. For your effort, you'll find a bag with over 100 Groschen, a gambeson, and a piece of armour.
Talk to Reeky's father afterwards and he'll mention a potential hiding place for Reeky, who apparently makes a few pennies working as a poacher. The exact location is unknown to him, but the man that runs the local tavern may know more. So hop to the nearby building on the opposite side of the river (again, quest marker B on your map).
The man is usually waiting outside. Exhaust all the questions and you'll learn of four potential hiding places.
Tracing Reeky's hideout
Don't go searching all of the hideouts in turn, as that would be a right waste of time. The game will mark the other three objectives as failed quests if you head immediately to the correct location, but that's the only downside really. So go straight to the cave to the northeast of Ledetchko (quest marker B on your map).
You'll find Reeky inside, who you'll learn was one of four bandits who had no desire to contribute to the Neuhof murders. They are: Limpy Lubbosh, Reeky, a man named Timmy, and Pius Paven, four (relatively) kind-hearted bandits who didn't wish to have blood on their hands. Paven, the mastermind behind the attack, is dead, meaning that Timmy is who you should look for next. Before you go to meet him, however, there's the little matter of the vicious bandits who have just appeared outside Reeky's hideout.
Continue with: Kingdom Come Deliverance: My Friend Timmy.
Back to the main Kingdom Come Deliverance walkthrough.
Kingdom Come Deliverance: My Friend Timmy
You suddenly find yourself surrounded by three shady characters, who will go straight for the offensive. Hold back and wait for Reeky to get their attention by running away – you stand little chance against the bandits in a fair fight. Either wait for them to separate, taking them out with stealth attacks, or scarper on the back of a horse – there's no shame in that.
Head north once you've dealt with the bandits, to the windmill southwest of Talmberg and almost exactly north of Ledetchko. Chat to one of the passers-by to learn that Timmy has a sister here named Mirka, who you'll find either in the building next to the windmill, or walking around the grounds, depending on when you arrive. Without too much effort you'll discover where Timmy is hiding out, before she suggests that you talk more behind the windmill.
Follow Mirka and talk to her again. The two of you are interrupted by Runt, the particularly vicious bandit who knocked you out back in Skalitz. They want to find Timmy as well, but unlike you they plan to kill him.
At this point, the situation will lead to one of two different outcomes, resulting in a diverging story. Whichever way you proceed, try to keep Timmy alive, as he'll no longer be able to tell you the whereabouts of the bandits' camp.
Note: joining with Runt has serious consequences for the next story quest, which asks you to scout out the vast bandit camp. If you've sided with Runt, you'll be able to visit there with no trouble, but if you've put yourself in opposition to him, then you obviously won't be welcome there, making the quest more difficult as a result.
1. Reject Runt's offer and have Timmy tell you where the camp is.
The dialogue with Runt ends in an important decision: do you want to join forces to locate Timmy? If you'd rather not parlay with the murderous bandit, you can attempt to mislead him and claim that Timmy is staying in Rattay. However, it's unlikely that you'll succeed. If the situation escalates and blades are drawn, our advice would be to leg it, as these three are too powerful for you.
Ride to Merhoged and visit Kolben's farm. You'll find Timmy here, who dances to your tune by giving you directions to the bandit camp.
2. Collaborate with Runt and kill Timmy on Kolben's farm
The other approach is completely valid, however. If you have something against Timmy, and you can forgive Runt for that painful wallop on your head earlier, you can agree to help him find, and to kill, poor Timmy. (Note that before you agree, you can also ask for an advance on your payment upfront.) After that, it's still possible to fool Runt by telling him that Timmy is holed up in Rattay, but you'll need a high Speech skill for that.
Either way, Runt sets off to kill Timmy. As he doesn't trust you yet, he leaves one of his people behind to watch you, who will be hard to shake. Walk to Merhojed next. The shady characters are already there, and may already have murdered Timmy. If he's croaked it, speak to Runt to receive the other half of your payment, before asking if there's anything else you can do. Runt finally begins to warm to you and gives you the location of the bandit camp: it's at Pribyslavitz. If you're feeling particularly devious, you can also untie Timmy's corpse to find a key that will unlock his house – clear it out if no one is watching you.
You've finally achieved your goal. Now to let Lord Radzig know, who you'll find just northwest of Merhojed. Claim your reward, and agree to take a closer look at this bandit camp for the next main quest.
Continue with: Kingdom Come Deliverance: Nest of Vipers.
Back to the main Kingdom Come Deliverance walkthrough.
Kingdom Come Deliverance: Nest of Vipers
By the order of Lord Radzig you should now scout out the bandit camp. You'll already begin to feel the effects of your previous decision. If you and Runt are on good terms because you cooperated with him during the previous quest, then you will have learned exactly where you need to go. If you sided with Timmy, however, you'll have to follow his slightly more vague directions. Use the landmarks he gave you to discover your destination, which lies east of Skalitz and northeast of Rovna, within the large, eye-catching forest in the extreme north of the game world. Go to the middle of the yellow circle and you'll eventually discover Pribyslavitz, which is the camp you're looking for. You'll be given a fast-travel point so you can return later, if you desire.
Infiltrate the bandits' camp
Radzig wants only basic information about the layout and nature of the camp, but you can stick around a bit longer and do a more thorough job if you wish, which will make the following quest easier. Walk along the strategically important parts of the camp (for example the moat, the fences and the central church, which serves as a fortress) and Henry will mutter something at each point, letting you know that you've come to the right area. After a few of these remarks, you may return to Radzig.
Ultimately, however, spying on the camp plays out in one of two ways:
1. Runt likes you: you can move around the camp at ease
If you helped Runt out before, you may look around the camp without worrying about sneaking around, or having to run away from the bandits inside. In fact, the first bandit you see will hail you as you approach, before leading you inside to wait for Runt. Take the man at face value and you'll be led into an ambush that will likely lead to your demise - however, you'll be safe if you wander off before that, at the point when you're told by the man to sit still for a moment.
2. Runt doesn't like you: sneaking around the camp
If you're on the bandits' bad side, you'll need to stay out of sight as much as possible, so it's best if you come here at night. If you're having trouble keeping to the shadows or reducing your noise output, you can always creep around the camp from the outside. You probably won't find everything of tactical interest, but you'll find enough for the quest to continue.
Optional secondary targets: sabotage the arrows, poison the bandits
If you want to really ruin the bandits' day, set their arrows on fire. (Hey, they need those for firin'.) You can fulfil this optional objective by standing next to a single barrel full of arrows and lighting it on fire, but you'll need to do this without being seen, which may prove tricky. Drink a Saviour Schnapps first if you're intending to carry this out, and the more barrels you can manage to destroy the better.
If you like, you can also poison the guards' provisions. Poison can be found in pharmacies (not that there are any of those nearby), or from the herbalist who just so happens to live in the woods to the southeast of the camp. There are also a few chests in the warehouse containing the unpleasant substance. Once you've attained it, locate the cooking pots near the hearths, hover the cursor over each of them, and select the poison from your inventory to pour it in. Once again, one poisoned pot is enough to fufill the secondary objective, but the more pots you can ruin, the better.
Talk to Radzig
Return to Radzig to report on your findings. After Henry describes what he has seen, the Lord will ask how many bandits, in your opinion, can be expected inside. Tell him that there are a lot, which is only speaking the truth. Based on your estimate, he'll adjust the number of troops he dispatches to storm the camp with you.
Prepare well for the ensuing battle, as it'll be the toughest you've been through so far. Sharpen your weapons, brew a few performance-enhancing potions, and above all get a good night's sleep. When you're ready, speak to Sir Divish in Talmberg to ask for reinforcements. He'll ask you if you're ready to begin the battle. Well, are you?
Continue with: Kingdom Come Deliverance: Baptism of Fire.
Back to the main Kingdom Come Deliverance walkthrough.
Kingdom Come Deliverance: Baptism of Fire
This can be a difficult quest - that is, if you're intending to fight fairly - so you may well face a few problems if you didn't prepare well enough during the previous mission. The more arrows you burned, the more cooking pots you poisoned, and the more bandits you told Radzig about, the better chance you stand of making it through this quest in one piece.
Before you storm the camp, it would be worthwhile to restore any worn equipment. So sharpen your blade on a whetsone, restore your armour to tip-top condition, and get in some practice with the weapon class you're intending to use in the ensuing battle.
Storm the bandit camp
Now it falls to Henry to accompany Radzig's men to the bandit camp. However, it's entirely possible to let those men do all of the work, and to wade in only when the odds are in your favour - in fact, this is probably the best approach if you're keen on staying alive.
If you're intent on entering the fray, only engage with enemies that are already fighting Radzig's men, as the AI generally has a hard time responding to attacks from multiple directions. Attack someone from the side or, better yet, from behind, to heroically fight your way to victory.
This strategic/cowardly approach is all the more important as Kingdom Come doesn't offer the opportunity to heal during combat. Bandages will only mend your wounds outside of battle, so keep your distance and only intervene when you feel certain of victory. Thankfully, within this quest there are a few breaks during combat in which you can stop and heal - when the 'crossed swords' symbol disappears from under the radar. Use these breaks well.
Fight your way into the camp
After arriving in the camp's vicinity, advance along the path beside the marching soldiers. The path takes you over a small bridge alongside the wooden palisade, where you'll slaughter the first group of bandits with the help of Radzig's men. When they're dead, your current objective updates, expecting you to now fight your way through the main Cuman camp. However, while you're here, take the time to plunder a few corpses to replenish your supplies. It's what they would have wanted. Probably.
Stay in the background and let Radzig's men do most (or all) of the work. However, if you want to get actively involved (say, to train your combat skills), then it's best to do it here, before the first checkpoint hits - if you croak, you won't have to replay too much again.
Deal with the archers / kill the Cuman commander
There'll be a cutscene after the first two groups of opponents, during which the wagon will be pushed aside and you'll finally enter the camp itself. Look to your left: on a wooden staircase you'll see a group of archers. Take them out first, completing the sub-objective that popped up, before rifling through their corpses to find some valuable Saviour Schnapps.
Follow the men in the direction of the tents. There you'll find the Cuman commander, who's carrying a useful helmet. Make sure you loot it after you (or, more likely, the men) proceed to strike the commander down. You'll receive a new goal:
Fight through to the church
At this point, the men men will rush up the slope towards the church, and if you're interested in finishing the game, then you should follow them. On the right side of the wall in front of you you'll see more archers; kill them with a bow and arrow. There'll be another cutscene then, before you're put into a battle with your nemesis (or one of them, anyway): the bandit Runt.
Kill the bandit commander in the steeple
Runt puts up a tough fight if you try to take him on in fair combat - there's not much room to move, and he's likely more skilled with a blade than you. However, if you put the idea of chivalry aside (he is a murderous bandit, after all), you can take the helmet-less Runt down easily with a bow. When he rushes towards you after the first starts, gain as much distance as possible, before stretching the bow and firing an arrow right at his face. If your aim is true, you'll take him out immediately and complete the quest. Huzzah.
Continue with: Kingdom Come Deliverance: Questions and Answers.
Back to the main Kingdom Come Deliverance walkthrough.
Kingdom Come Deliverance: Questions and Answers
With a nice big battle under your belt, you're probably ready to offload some of that equipment you've been dragging about, which was helpfully, ah, donated by the Cumans cut down on the battlefield. Do that now, and use the downtime between quests to freshen up a little, too. Hanush gives you a room in Pirkstein, near Rattay, which you can use for this purpose.
When you're ready, find Sir Radzig in the hall of the upper castle in Rattay, and have a chinwag with the man. Your next objective is less about murder and manslaughter, and a little more civilized, calling for your detecting and conversation skills. It seems that, while you were gone, bandits attacked the town of Merhojed, west of Talmberg - however, the villagers managed to capture one of the attackers, who might be persuaded to divulge some useful information if he were pressured hard enough. So it's up to Henry, very much a medieval Cadfael, to ride to the town and chat to the locals about the situation.
Once you arrive at the town you'll learn that it's not had the best time of it lately. In addition to the bandits, it's also been subject to a mysterious plague. Henry becomes concerned about his old friend Matthias, who survived the attack on Skalitz and who now resides in Merhojed. Speak to one of the villagers about your friend and you'll learn that he lies injured in the stables in the west/northwest part of the village. Let's go there and check up on him.
Find out what happened to Matthias
Once you've made your way to the stables, talk to Matthias, mentioning the bandit raid you've been sent there to investigate. If you haven't heard about it already, he'll also give you the lowdown on the plague currently sweeping through the town.
Ask the local bailiff about the situation
Our next stop is the bailiff, Melichar, who resides on the west side of the village. During the day, however, he'll most likely be roaming the streets, where he'll tell you that he has no time to talk to you, and that he won't give you access to the prisoner until the plague is cured. It's up to muggins here to do that, of course.
Now, you can try to force your way into the barn to talk to the prisoner, either by bribing the next-door neighbour or picking the lock on the door, but even if you manage to finagle your way inside, the prisoner won't talk to you, as he is also suffering from that curious sickness. So your only real option is to complete the Pestilence side quest that will have popped up while you were exploring Merhojed. We go into that in the side quests section of the guide, so if you haven't completed it yet, be sure to head there before reading the rest of this page.
Done it yet? Great. After that quest, you'll either have a working remedy for the affected population, or, well, you won't, depending on your choices.
If you've discovered the cure:
The bandit will recover to the extent that he is finally ready for conversation. And boy is he informative about any and all things bandit: about Pribyslavitz, the attack on Merhojed, the counterfeit currency, and the group's mysterious leader. He tells you he was given the forged coins by someone called Menhart, who he was planning to meet up with soon. He then gives you a letter from the leader that he was supposed to give to this Menhart.
You'll now have to make a choice regarding the prisoner. The executioner, Straw, is eager to kill the man, but if you persuade him after he busts in on you, you can convince him to leave the prisoner to you. Or you can let Straw kill him, it's up to you. Speak to the prisoner again (if he's still alive) and you'll automatically be taken to Rattay's dungeon, where you'll drop the bandit off for his remaining sentence. Speak to Radzig again to complete the quest and receive 175 Groschen (you'll find him in a camp in the mountains just west of Talmberg).
If you've created the wrong remedy:
In this case, the captive bandit will die just like the rest of the population of Merhojed. You'll have to retrieve the letter from his body buried outside the village - so grab a shovel and look for the large tree in the big field near town. You'll still get the necessary information, but you won't be able to furnish Radzig with as many details. The start of the next main quest, All that Glisters, will change a little too, however the impact is minimal.
Continue with: Kingdom Come Deliverance: All that Glisters.
Back to the main Kingdom Come Deliverance walkthrough.
Kingdom Come Deliverance: All that Glisters
The previous quest, Questions and Answers, was rather intricate, closely linked to the side quest Pestilence. Whatever occurred during that, you will have received the prisoner's letter and reported to Radzig, and now you should meet with this Menhart fellow to convince him to hand over the counterfeit coins. If you managed to save the prisoner, then you can now follow the trail to Rovna. If, instead, you plundered the letter from his corpse, you'll first have to speak to the innkeeper at the Sasau tavern that's just been marked on your map. Once done, the diverging mission will join back together.
Go to the place where the counterfeit money is being exchanged
The prisoner said that he was supposed to meet with the middleman near the camp north of Rovna. Following the 'A' marker will lead you to a forest crossroads, where you'll discover that you've arrived here too late. You find only dead bodies, and naturally a few possessions to nick.
Examine the broken wheel next to the cart, and then the bloodstain. Someone has been wounded and dragged away, so your next task is obviously to follow the blood trail.
Follow the trail of blood leading away from the wagon
Keep to the northwest and you'll come across new drops of blood every few meters. Eventually you'll be taken to a Coal-Burner camp north of the location where you discovered the ruined wagon. You'll be given a new goal, 'Find out what happened to the wagon', so let's find out what happened to, well, the wagon.
Someone in the camp must have heard what happened to the cart, so let's ask around. Speak to the Charcoal-Burner with the white shirt, who pretends to be ignorant, but with a bit of Persuasion (better than 0/0/7), you can intimidate him into giving you the information. He tells you to go and talk to Borya.
Borya spends his days in the adjacent camp just to the north, only a few meters away. He also says he knows nothing, but again with a spot of the old Persuasion, or with a 30 Groschen bribe, you can help to jog his memory. In short: the Coal-Burners aren't responsible for the attack on the wagon, they only looted it afterwards. In addition, a survivor managed to drag himself to their camp.
Talk to the wounded man
Although the wounded man has paid the Charcoal-Burners not to let anyone near him, Henry remains persistent and manages to convince Borya to give him the key to his shed, where the survivor is hiding out. Either that or he cracks the Very Light wooden door, and bursts his way inside - the choice is yours. Inside, you'll find the man lying on the floor.
This time the mercenary has no choice but to respond to your questions. Ask him about Menhart, about a knight that attacked the wagon, and his wound. Suddenly that knight appears on the scene, swanning into the camp before making off with the bag of counterfeit coins. Climb onto your horse and chase after him, ASAP.
Catch the mystery knight
The pursuit will get a little tricky as he speeds north/northeast through the forest, so take care that your own steed doesn't get caught on any of the branches, bushes or stumps that will surely get in your way. Stick to the 'A' objective marker, and when it seems convenient to intervene, do so by firing an arrow at the knight's back, or by pulling out your sword and riding close to him so you can attack him with your blade. When you catch up to the knight, he'll get off his horse and challenge Henry to a duel.
Eventually - providing he doesn't kill you, of course, Ulrich the knight will concede defeat, where you'll be given the choice to either spare him or finish him off. Spare the man to learn that he is, in fact, on your side, and likewise searching for the counterfeiters - he'll give you some documents to deliver to a Tobias Feyfar.
If you don't catch the knight in time, you'll meet him again in the tavern in the northern part of Sasau. He'll say he's ready to talk, but not here, inviting you to meet him at a spot southwest of the inn (marked on the map). It's an ambush, obviously, though if your speech skills are up to snuff (better than 11/12/17) you can talk him down. If not, you'll have to fight him, before the game again gives you the choice whether to spare him or finish him off. Depending on your choices, you'll either have been given the documents by Ulrich or taken them off his corpse, and you may now ride out to meet Tobias Feyfar at Rattay.
Give Ulrich's documents to Tobias Feyfar
You'll find Tobias at the lower castle, in his room (if the door is wrongly labelled as locked, just restart the game). Talk to him about the fake coins and about the goings-on in Rovna, before finally handing over the documents. The trail now leads to a noble family named the Rosenbergs, and to a silver amalgam that is being used to produce the coins. Optionally, you can choose to check in with Ulrich afterwards, who is still at the tavern in Sasau.
Find out who works with copper in Sasau / where the counterfeiters source mercury from
Refuse Ulrich an interim report and he'll tell you that the necessary material for the counterfeiting lies in the Sasau monastery, where the monks complain of getting no sleep because a blacksmith insists on working through the night. Hmm. In addition, a fresco painter is waiting urgently for a delivery of mercury from the monastery. Things are beginning to add up.
That sounds like a good starting point for our investigation, so let's go and talk to the fresco painter who, as luck would have it, is only a few meters away in the same tavern as Henry. Ask him about the mercury and he'll pass you onto the monastery's overseer - however, before you go, know that you can trade with the painter for the book Life in the Tavern II, and Treasure Map III.
Continue the investigation in the overseer's office
During the day, you'll find the overseer traipsing around the monastery grounds. Your inquiries about the mercury go nowhere with him, but he passes you onto his assistant, who wears a yellow top and also spends his days walking the monastery grounds. Initially, this guy is as tight-lipped as all his monastery mates, but you know what to do by now: use his persuasion skill (if it's better than 10/12/5) to get the yellow-topped berk to open up. Eventually he'll tell you about a knight and his entourage, which includes a farmhand named Rapota.
Talk to Tobias Feyfar about this, who since your last meeting has arrived in Sasau's southern district. He tells you to focus on a master engraver named Jerome, who operates out of a workshop in the northern part of Sasau.
Check the engraving workshop
The workshop lies northeast of the tavern, and south of the monastery. You'll find Master Jerome at the top of a flight of stairs, where he'll talk your ear off about his apprentice Florian, who didn't turn up to work today. Your next task, therefore, is to find the paranoid-sounding Florian, who sleeps in the Beckers' basement. Jerome also mentions a woman from the bathhouse that Florian was seeing.
You'll consequently get two new goals: 'talk to Florian, the engraver's apprentice', and 'Talk to the Madam of the baths'. The latter is a purely optional conversation offering some background information about Florian and Esther, and how the latter individual was recently abducted.
Find Florian
You know that Florian lives with the baker, so let's head there (and maybe buy a loaf, if we're feeling peckish). Enter the building through the small door facing the street, where you'll find the apprentice - hey, that was quick. He denies being involved in the whole affair, before admitting that Esther has been kidnapped, and pleading for your help. If you have the necessary persuasion skills (better than 5/8/9) you can skip having to do a side quest for Florian, otherwise you'll need to complete the Kingdom Come Deliverance: Damsel in Distress">Damsel in Distress quest before continuing with this one.
Once you've completed said quest, Florian tells you about a man named Rapota who has been following him around. If you want to skip a lot of bother, as you look for him, know that you can find Rapota right away. He stands nearby as you talk, leaning outside the neighboring grocery store, or if not there, then sitting on a bench in the yard. Talk to him and he'll take flight to the northwest. Chase him down, won't you?
Stop Rapota
When sprinting, he's just as fast as Henry, so to make Rapota stop you should run up close and draw your sword, an action that will cause him to fall to his knees. If this fails, and he manages to climb on his horse, then do the same with yours before whacking him with your blade. When he finally stops running, talk to him to learn of a counterfeiters' workshop, operating out of a mine somewhere in the Skalitz hills.
Find the entrance to the mineshaft in the Skalitz hills
If you prefer, you can chat to Ulrich now and ask him to accompany you to the mine, which changes the rest of the mission a fair bit. With him in tow, you'll travel automatically to the mine's entrance, but the knight will also tackle the ensuing bandit mob head-on, making sneaking around much more challenging. However, with Ulrich occupied with the bandits in front of the mine, you're free to run past them all until you reach their leader, Jezhek, where your pursuers will suddenly lose all interest in you.
By the way, there are several additional entrances into the mine. Pay attention to your map and you'll see a few other, less guarded ways to get inside. We recommend taking the entrance marked in red in the image below. Light a torch and follow the arrows painted in chalk on the wall, as all the other ways end in dead ends. Climb the ladder on your right when you reach it, and you'll be taken to Jezhek with no bother. All that matters now is whether you've come alone, or brought Ulrich with you.
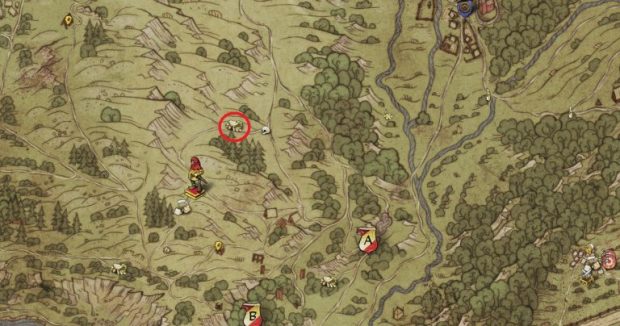
If Ulrich is there: the old knight wants to kill Jezhek. If you have sufficient speech skills (better than 9/11/19), you can convince him not to, otherwise you'll need to fight Ulrich too if you want Jezhek to live.
If you're alone: you'll have to face Jezhek yourself. With a shiny enough silver tongue (speech skills better than 7/13/20) you'll be able to convince him to go with you; otherwise, you'll have to fight the man. Spare him when he yields and he'll accompany you peacefully to his interrogation at Rattay.
Interrogate Jezhek of Ronow
Jezhek, safely locked up in the dungeon, asks to see Henry, so fast-travel there after you arrive in Sasau. Get the key from Captain Bernard (you'll find him at the battlefield near Rattay during the day), before heading to the town hall square and using it to gain access to the dungeon underneath. There are three cells down here, and Jezhek is in the leftmost one. When you talk to him, he'll tell you everything about the counterfeiting, including who exactly is involved - finally. Present your findings to Radzig, and you'll be rewarded with 175 Groschen, and with a blessed end to this miserably long quest.
Back to the main Kingdom Come Deliverance walkthrough