Kingdom Come Deliverance: side quests
Tackle the middle ages side on

Kingdom Come Deliverance: The Good Thief
This will likely be the first side quest you come across, unless you flee from Rattay immediately after waking up there. Once you've finished the intro and gathered your things, go and talk to Miller Peshek, who will give you this multi-part quest.
It seems you've racked up quite the debt by lying unconscious in his mill the past two weeks, which doesn't exactly seem fair, but then it is the Middle Ages. Peshek wants you to repay the money he's had to spend on herbalist appointments and whatnot, and if you want to be debt-free in 1403, you should get Peshek off your back ASAP. Unfortunately, the actions the miller requires of you are not exactly... savoury.
Find a shovel
The easiest part of this quest. You can find a shovel lying on the cart right next to the mill. It's not marked on the map, but you should be able to find it without too much trouble.
Get the dead man's ring
This part's a little harder. You'll need to dig up the body of an executed criminal, who lies southwest of Peshek's mill, on Gallow Hill. That's marked on the map, so head there and put your shovel to work, where you'll discover – shock horror – that the ring is nowhere to be found.
You can either return to Peshek now and tell him that the ring wasn't in the grave - where he'll reason that the executioner must have pinched it, and even offer you training to improve your thieving skills - or head directly to the executioner's house to claim the jewellery.
Find the ring in the executioner's house
The hangman's estate is located near the gallows, and if your persuasion skills are up to scratch you can convince him to just hand the ring over for 15 Groschen. Otherwise you'll need to lure him out of his house, or return at night for a daring raid on his property. Remove any heavy, noisy clothes and sneak past the dogs to reach his front door, which will be secured with an easy-level lock. You'll find the ring inside a chest in the room on the left, where (if you come at night at least) the executioner will be getting his 40 winks.
Return to Peshek and show him the ring. Not only will he clear your debt, but he'll teach you how to pickpocket, if you want to pick a pocket or two. Afterwards, he'll ask you to take the ring to a friend of his in Kohelnitz, a town situated a little way northeast of Rattay. Make your way to the mill, talk to Miller Woyzeck there, and hand over the ring to complete this quest.
Continue with: Kingdom Come Deliverance: Mightier than the Sword.
Back to the main Kingdom Come Deliverance walkthrough.
Kingdom Come Deliverance: Mightier than the Sword
Like most people in the Middle Ages, Henry can't read. If you'd like that to change, be sure to talk to the bailiff on the subject during the main quest Train Hard, Fight Easy, where you'll be given this quest to do so.
If you set off from Rattay, where the bailiff lives, you should first head northeast to the village of Neuhof (where the main quest The Hunt Begins takes place). You may need to sleep there before heading northwest for Talmberg, which should already be marked on your map. From Talmberg, set off in a northeast direction, keeping to the marked path until you reach the village of Uzhitz, where your tutor resides.
Find the scribe
The man operates out of a room near the market. Look for a red and black wooden sign with three potions and a feather on it – so that you know you're in the right place, a pop-up will appear once you've discovered his home. Tell the scribe that you want to learn how to read, and he'll happily oblige. (Well, if you give him 50 Groschen first.) After a short cutscene, look at the book on the table, which you should be able to decipher, despite Henry's literary difficulties. Reply to the scribe that "being greedy doesn't pay," and he'll next ask you to look over some Latin text. Sit back down and read the next book, responding to the scribe's question with the words "Nullus est liber tam malus, ut non..." etc etc.
The delighted scribe will then inform you that he can't teach you anything more, and thus ends your extensive reading lessons – if only it was so easy in real life. As a result of this arduous endeavour, you will have gained a new level in Reading, and will now able to read text out in the world.
Continue with: Kingdom Come Deliverance: Courtship.
Back to the main Kingdom Come Deliverance walkthrough.
Kingdom Come Deliverance: Courtship
This side quest has to do with Theresa, niece of Miller Peshek back in Rattay. If you're interested in courting her, you'll find Theresa at the mill during the day; ask her how she is, then suggest going for a walk. Eventually she will agree, opening up a trio of suggestions including a stroll down by the river. Pick that one. The quiet walk will eventually transform into a friendly race.
A little friendly competition
It doesn't seem to matter whether you win or lose, so don't worry if you start to lag behind. After a few hundred metres or so, Theresa will look for a place by the water to sit for a while. Sit down and chat, although be aware that you'll need to pass a couple of Speech or Charisma checks for her to agree to a second date.
Return to Theresa
After a few days have passed, return to Theresa and ask her if she'd still like to go for that meal – you'll know when the time is right because the quest log will automatically update. She suggests the Broken Wheel tavern, although your pleasant evening is soon curtailed by the arrival of a drunkard who begins to attack Theresa. Beat him up until he forfeits.
After tending to Henry's wounds, Theresa and Henry return to the mill, where they share a goodnight kiss.

Blind Man's Bluff
After another few days have passed, you'll receive a pop-up telling you that Theresa is ready to see you again. Return to her and she'll suggest a game of Blind Man's Bluff, because cinemas sadly haven't been invented yet. You can either let Theresa win or go and hide in the corner until she loses – it makes no difference to the outcome, although the second one is kind of cheating.
In any case, the sudden arrival of rain prevents another thrilling round, as there is laundry hanging that needs to be brought in. Or rather, it was hanging. Several aprons have tumbled carelessly to the ground, meaning that your next objective is to pick them all up. Once collected, follow Theresa into the barn, where the pair will spend the night and the quest will end.
Continue with: Kingdom Come Deliverance: Playing with the Devil
Back to the main Kingdom Come Deliverance walkthrough.
Kingdom Come Deliverance: Playing with the Devil
As part of the main quest Mysterious Ways you'll come across the town of Uzhitz. Speak to Father Godwin there, who often trains during the day in front of the church. A little way along into your dealings with him he'll tell you about a herbalist named Getrude, who is said to have sold a magical ointment to three women from the village.
Talk to Gertrude
You'll find the herbalist in the middle of the forest, north of Talmberg (just follow the quest marker there). Before you advance the quest, you might like to make use of her alchemy table to brew up a few potions, or improve your Herbology skills with her if you're of a sufficiently high level, and you have enough spare change.
Be persuasive on the subject of witchcraft, and Gertrude will eventually open up to you, revealing how the supposedly magical ointment was made. Belladonna and devil's berry are the key ingredients, so feel free to make some yourself if you're feeling devilish. The woman says she meant no harm when she sold the women the substance, but that she now fears for their safety, as it can cause some...unusual visions. From her you'll learn where to find the three Uzhitz women.
Talk to the women about the ointment
You'll receive three quest markers to aid the next step of your investigation: one in the north, one in the middle of town, and one in the south.
Krista can be found in the south of the village and often works in the fields during the day. Even with a bit of persuasion, she's rather evasive and won't tell you exactly what's going on, only that she and the other ladies are definitely not up to anything evil in the woods at night. Well, OK then.
You'll find Vera in the fields as well, however she won't tell you anything more. The last woman is named Zlata, who is a little more talkative about the ointment, but who won't tell you anything you don't already know. Well at least we know that something suspicious is going on in the woods at night.
Follow the women to the forest
As evening approaches, the three women set off independently, leaving the village for the dark embrace of the forest. You can start to follow them from about seven in the evening, but be sure to keep your distance so you aren't seen. They meet at the eastern entrance, right on the path. Stay back as the trio chat amongst themselves, before resuming your Assassin's Creed-style tailing mission to a campfire in the woods.
After a short cutscene, the women will mistake Henry for the devil. You can either agree to their request or refuse to grant it, but the result will be the same: the women will smear Henry with the ointment, causing him to pass out by the fire.
Cavort with the women
An...interesting vision ensues, during which you'll need to use your lockpicking skills on one of the animals. You don't need a lockpick in your inventory, however, and you can try as many time as you need to succeed.
Once done, some mysterious figures will appear, who you'll have to fight. The vision will end when combat does, and Henry will wake up in the forest, more than a little worse for wear. Those mysterious figures were ordinary woodcutters, as it turns out, who decided to attack the women, believing they were witches.
Return to Father Godwin to tell him what just happened, and that will conclude this memorable quest.
Continue with: Kingdom Come Deliverance: At your Service, My Lady.
Back to the main Kingdom Come Deliverance walkthrough.
Kingdom Come Deliverance: At your Service, My Lady
Gossip in Talmberg has it that Lady Stephanie is organising a wedding for her cousin Sophie. Speak to one of the guards in the southern part of the castle, or speak to Stephanie directly, to receive a side quest helping out with her preparations.
Stephanie normally resides in that southern building during the day. She'll ask Henry to retrieve three items: an ornamental crown from Master Jerome in Sasau, fine wine from a Rattay merchant, and a horse from the stables in Uzhitz. Talk to Stephanie about each of these topics to receive 19 Groschen, along with detailed information about where exactly they can be found.
Buy wine from the Rattay retailer
You'll find the dealer near the church, by the baker and butcher. Tell the merchant that Lady Stephanie has sent you, where you'll be disappointed to learn that the promised barrel of wine is no longer there. The dealer has donated it to the local archery competition.
Archery competition / get the wine a different way
If your archery skills are up to scratch, you can compete in the tournament and gain the fine wine that way. In this test of marksmanship, you'll earn three points for hitting the centre of a target, two for hitting the white area, and just one for landing the arrow at its edge. Our tip is to save before you attempt this challenge, take some time to find the correct orientation of the bow, and then to hold it exactly in place – don't move the camera, don't move the mouse or the right analogue stick. Hold the bow in position as you fire one arrow after the other.
If you move away from the archery range during the competition, you'll fail and will need to obtain the wine another way. Follow the winner and his newfound booze after the competition, and either persuade/bribe him to give it to you, pickpocket him when he's not looking, or steal it from his home later on. If you were particularly forward-thinking, you could have even pinched it from a chest at the Archery contest before the tournament began.
Either way, you now have the wine, which completes the first part of the wedding prep.
The crown in Sasau
If you have not yet been to Sasau, start in Ledetchko and ride west from there. The town has several fast-travel points, including one in the centre and at the monastery a little way to the north. Nearby you'll also find Master Jerome's workshop, where naturally another calamity has occurred. The crown's moldavite gem has not yet arrived, while the man responsible for the delivery cannot be found. Either tell the smith to replace the gem with an inferior stone, or look for the original – your choice.
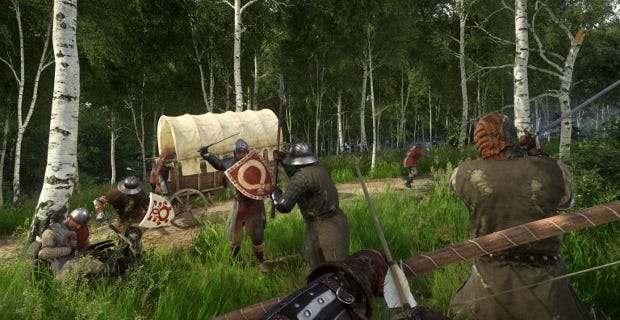
Find the missing moldavite
Jerome tells you where the man was last seen – west of Sasau, near the footbridge over the ford – so head there. In the yellow circle you'll find a cart with a conspicuous blood trail leading away from it. Follow it to a campsite, where you'll find two bloodthirsty bandits waiting for you, and also the merchant's body. The gem won't be on his person, but it's not far away as it's in the locked chest sitting next to him. If you didn't bring a lockpick – always bring a lockpick – you can find one on one of the bandits. Be sure to save before attempting to pick it, if it's your only one.
Bring the gem to Jerome, wait about a day for him to fit it, and finally you can pick up the finished crown. Now to see a man about a horse.
The roan at Uzhitz
Go to Uzhiz village and visit the stable master. He says that he horse in question can be a little bad-tempered, before he directs you to his assistant Vashek, the only person who knows how to calm it down. After some persuasion, Vashek finally teaches you how to calm the mare yourself, which thankfully works a treat; mount the steed and ride it back to Lady Stephanie.
As a thank you for all your hard work, Stephanie will reward you with...a shirt. Great. It's her father's old shirt, so it's not even new. If you're interested in romancing Lady Stephanie, agree to change into it when she asks.
Continue with: Kingdom Come Deliverance: Language Barrier.
Back to the main Kingdom Come Deliverance walkthrough.
Kingdom Come Deliverance: Language Barrier
East of Sasau lies a mill – you'll see a map marker if you've already been there, but it shouldn't be too hard to find if you've not yet had the pleasure. Talk to the miller, who tells you of a trapped Cuman he's eager to question – unfortunately, neither he nor any of his servants speak Hungarian.
Find a translator
According to the miller, there's a sawmill further down the river where one of the workers has been heard to curse in Hungarian, so that sounds like the perfect place to head to next. To find it, head northeast along the river for a few minutes – you can't miss it.
Look for a labourer in green clothes – this is Miller Simon. Tell him there's work going, and after a bit of cajoling he'll follow you back to the other mill.
Talk to the trapped Cuman
Once you've returned to the first mill, talk to the laborer again to begin the interrogation. It proceeds largely automatically, aside from a few decisions Henry will have to interject with. (Offer the Cuman freedom, then urge him to make a statement.) While all this is going on, Henry can't help but notice that the translator is acting a little...oddly. He claims that Hungarian is a difficult language to translate, but Henry has his doubts.
Use your speech skills to reveal that the translator has been lying to you, and that amongst his other dialogue the Cuman has revealed the location of, sweet, some buried gold. The labourer eventually gives you detailed directions on where to find the hidden treasure.
Find the Cuman's loot
The translator's instructions tell you to cross the river from Rattay, to follow the hill, to go towards the city, and then to take the first road, before you come to an intersection near a burnt tree. From there a path leads into the water, where on the right you'll find a hollow stump containing the gold.
Start from the broad river north of Rattay's mill, before heading north. Look to the west and you'll see the aforementioned hill (with white flowers on it). Cross the bridge near the mill, then stay north on the path indicated on the world map. You'll discover a shrine at an intersection. There the path branches off to the west; follow it to the next fork in the road, which is also marked on the map.
From there walk almost exactly due north, where you will come to the famous burnt tree. In front of it is a sack with a nice pile of Groschen inside, along with some armour, a weapon and other bits.
This isn't the actual treasure, however. You'll find that at the spot pictured below, in the yellow circle. It's not exactly in the location specified by the translator, which is a bit perplexing. Inside you'll find an antidote and 200 Groschen; you can choose to share this with the miller, or to keep it for yourself. The quest ends either way.

If you prefer, you can convince the Cuman to lead you directly to the site of the buried treasure. However, for some reason the quest may fail as soon as you secure the loot and bring it back to the miller, so it might be better to find the place on your lonesome – or better yet to follow the Cuman to the location, before reloading to discover it for yourself.
Continue with: Kingdom Come Deliverance: Next to Godliness.
Back to the main Kingdom Come Deliverance walkthrough.
Kingdom Come Deliverance: Next to Godliness
You'll already know Hans Capon from the main storyline, where you rescued the snobbish lord from bandits. Since then, he's become a little friendlier towards Henry, and is now staying in Rattay, where you'll come across him in the southern castle complex (in his quarters, naturally). He invites Henry to join him at the local bathhouse, which lies just outside the city walls.
Meet Hans at the bathhouse after dark
Hans will be at the bathhouse shortly before 19:00, and upon his arrival he'll get a girl and go into one of the rooms. He won't actually let you inside until about 21:00, as presumably he and the girl are busy doing a jigsaw puzzle or playing Ye Olde Top Trumps. Actually, it's not too far off that – once he lets you into the room, he invites, well demands, that Henry plays a dice game with the bathmaid. It's a game of strip dice, naturally.
Play Zdena at dice
Remember that you can smuggle dice inside with you before the game if you want, and you might need to as Zdena is rather good. You can win against her, however, and if you intend to, be sure to swig a Saviour Schnapps back before beginning the game. It doesn't matter if you win though, so when the game is over, talk to Capon again.
Where has he been during all this? In the bathtub of course, and Henry is rather keen to get in too. So put your clothes in the chest nearby and sit down in the water with Capon.
Get the Sylvian Red wine from the Rathaus cellar
The pair get to drinking, but Capon soon demands a nobler drop of wine, and of course it's up to Henry to go and get it. Before you leave, put your clothes on for heaven's sake, but also be sure to grab Capon's key from the chest next to the tub. This will give you access to the basement of the town hall, where the Sylvian red wine resides. (It's the last barrel at the back-right of the basement, and it's already been tapped, says Capon.)
Both quest markers – for the wine, and for the pitcher to carry it – point to the same location, near Rattay's market square. You'll find the tailor's shop there, and at the back of the building there'll be a wooden staircase leading upstairs. Unlock the door with the key, then squat down and creep inside. You're not supposed to be here, by the way, and guards are patrolling the area.
Sneak downstairs and unlock the wine cellar. Here you'll find the pitcher, and not too far away the barrel, on the right. Should one of the servants in the wine cellar surprise you, Henry will say that Capon has sent him, presenting the key as proof. The evening in the bathhouse continues in good cheer when you return there with the pitcher of wine.
Collect a bouquet of flowers for Klara
Next Capon will send you to get a bouquet of dandelion, sage, roses and poppies to give to another bathmaid, Klara. You can find them anywhere, but be aware that you'll have to find them before 6am, or else the task with fail. The quest marker points to a spot on the northeastern wall of Rattay, where the poppies can be found at the battlefield just past the city's topmost gate.
Sage is easy to find as well. It grows at the wooden bridge right at the Upper Gate fast-travel point, while there are dandelions nearby this location too. They can found in a meadow to the northeast, near a small farm. Be careful not to confuse the yellow flowers with St. John's Wort.
You won't find roses anywhere near, but if you hotfoot it back to the garden of the upper castle, you'll find them growing there, along with any flowers you might have missed. (Feel free to just head there immediately, ignoring the precious quest markers.) To reach the garden, warp to the Upper Gate fast-travel point, walk over the bridge back to the city, and then immediately veer to the right. The door opposite will take you to the garden.
As the evening comes to an end, you'll be thrown into a fight with a man upset by Capon's carrying on. Win the fight and Henry will wake up the next morning in a dung heap. Track Capon down (as in, follow the quest marker) and he'll reward you with a whopping 12 Groschen.
Continue with: Kingdom Come Deliverance: Scavenger.
Back to the main Kingdom Come Deliverance walkthrough.
Kingdom Come Deliverance: Scavenger
You might remember Kunesh from the opening of the game, back in Skalitz. He wasn't exactly Henry's, or his father's, favourite person, refusing to pay the debts he owed to the blacksmith. Like many refugees from the town he has made it to Rattay, where he begs in the town square on his hands and knees. When Henry sees his old acquaintance, he strikes up a conversation.
Gent that he is, Henry reminds the impoverished beggar that he still has a debt to pay, but it's quite obvious that he's unable to pay it back. If you succeed in persuading him, Kunesh offers to settle his debt with information regarding a treasure buried in Skalitz – if your silver tongue fails you, and you persist in your line of enquiry, it can end in a fight. Let's not take that option, and try to track down the treasure, which is apparently buried under a dovecote.
Find the treasure under the dovecote
Off we go back to our old hometown, then. If you're unsure how to get there, it's in the northwest of the game world, and don't be afraid to spend the night at a town along the way if it gets too late.
Not much has changed in Skalitz since you buried your parents in the early main quest Homecoming, although the other bodies are gone now, at least. Let's focus on finding the treasure – you remembered to bring a shovel, right?
The entire village is marked with a yellow circle on the map, so you're given no help with finding the dovecote. Obviously you're here because you want to know exactly where it is though, so read on to find the precise location.

Enter Skalitz through the eastern gate, keeping left on the path as it wends along between the ruined buildings. The dovecote lies in the middle of this path – go to its southeast side and turn around. If you turn your attention to the floor, now, a message should appear informing you that you may dig here. Do that to find a buried sack that contains a goblet belonging to Beran, and 100 Groschen. Kunesh has more than paid off his debt with this, it seems.
You can now choose whether to keep the goblet and money, or whether to return them to Beran in Rattay. You'll be rewarded with gold if you return both of them, though obviously not as much gold as was in the sack.
Continue with: Kingdom Come Deliverance: The Horse That Bolted.
Back to the main Kingdom Come Deliverance walkthrough.
Kingdom Come Deliverance: The Horse That Bolted
The starting point for this quest is the village of Uzhitz, which you should be familiar with by now. Near the fields in the south of the village you'll find the stable master with his animals. Talk to him to discover that one of the horses – their fastest stallion, Pie – has gone missing.
Talk to the stableboy, Vashek
The master's assistant knows a little more about the matter. You'll find him nearby, but he won't be up for discussing it right away, instead suggesting that you meet him in the local tavern that evening for a few drinks.

Join him at the time he suggests and you'll learn that Pie is especially speedy (although you already knew that), but also the location in which the horse bolted from Vashek. That dreadful event happened at the crossroads south of here, between the fields and the forest.
Go to the intersection
The quest marker for the crossroads will appear on the map, so you don't have to spend an eternity searching for it. When you reach it, you'll see...nothing suspicious at first glance, although if you sniff around a bit more you'll see some horse dung leading to the southeast. Back in the tavern, the stable-boy mentioned that the horse is more used to riding on bridle-paths, so head to the one nearby and you'll be reassured by the appearance of even more dung.

Eventually you'll come to a small fork in the road, which we've highlighted in the picture above. Follow the track to the right, and at the next fork the forest path should bend around to the south/southwest. You'll know you're on the right track because you'll come across yet more horse poop.
Search for Pie near the creek
At the side of the trail you'll meet a wanderer who can provide further information: according to him, you should continue south to the river, and then follow it upstream to the east. (A yellow search radius will appear on your map there.) You'll find a Coal-Burner camp at this location, where you'll learn that Pie passed by here, before heading further up the river. One of the burners, Thistle, ran after the animal, and has not returned so far.

Before you head off from the camp, look around here and you'll find a basket with some Saviour Schnapps inside – a nice little bonus. Now follow the river upstream, to the east, keeping your eyes on your left-hand side. You'll find Pie waiting almost at the eastern end of the yellow circle, in the undergrowth.
Return Pie to the stables
Thistle's here too, however, and the prickly thief won't give up Pie without a fight. A fist-fight, luckily for the Coal-Burner, and once he's ready to concede defeat, you can mount the steed and gallop it back to the stables. Deposit it at the yellow marker there and talk to the stable master to claim your reward: a handful of Groschen and a saddle bag.
Continue with: Kingdom Come Deliverance: Aquarius.
Back to the main Kingdom Come Deliverance walkthrough.
Kingdom Come Deliverance: Aquarius
Check back in with Rattay's bailiff to initiate this quest, which sees you giving jobs to the Skalitz refugees. In short, he needs a cook and five porters: three to carry water, the other two to empty the latrines. (You don't want to get those jobs mixed up.)
Talk to Alex from Skalitz
Like so many of the refugees from the bloody events in Skalitz, Alex is currently begging on the streets of Rattay. He gets around during the day, but if he's not at the market, look for a kneeling beggar elsewhere in the centre of town. Alex knows a lot of people from Skalitz looking for work, and offers to gather them up for you in front of City hall. He suggests Agnes as the cook, who is currently working in the rectory.
Talk to the Konrad Hagen
Hagen's shop is across from the grocer, next to the bakery. He's the one searching for a cook, and after you learn of the qualities he's looking for, it's time to go and recruit Agnes for the job.
Find Agnes at the church
You'll find her in the church in the northwest part of the city, during the day. She'll need a bit of persuading, but if you go and talk to Father Francis, and tell her the news that he won't be returning to the parish, she'll happily leave and take the job as Hagen's cook.
Distribute work to the refugees
After a short while, you should receive a message informing you that the jobseekers have gathered in the town hall's courtyard. (There will be a very accurate quest marker pointing there.) Once you arrive, address the beggars and you'll be given the opportunity to ask a series of questions, so you can work out how to distribute the jobs. Some offer rewards if Henry gives them the job, including Rock, who will tell you of silver in the Skalitz mines, and Kornelius, who will give you better prices at the Sasau blacksmith.
At some point, a woman named Antonia will run up and speak to you. Since the job as cook has already been taken, the only job left is carrying water. Her story isn't a cheerful one, and she could do with the money: her wounded husband lies on his deathbed. Keep her in mind for your conversation with the bailiff.
If you hang around in the market, Theresa may appear at some point to tell you that nobody needs the job more urgently than Antonia.
The conditions that advance the quest now are a bit obscure. You must have talked to all interested parties before the diary will update, and if it looks like you've missed some, head back to the town hall square and go through all of the dialogue until your journal updates.
Eventually you'll be given the task of talking to the bailiff, and assigning each job to a person. He very much relies on Henry's opinion on the matter, so it's up to you to decide who will carry water and who will empty the latrines. The Rock is the only one that seems eager for the latter job, but Antonia should definitely get the water job. Lastly, appoint Agnes as Konrad Hagen's new cook to conclude this side quest.
Continue with: Kingdom Come Deliverance: Tough Love.
Back to the main Kingdom Come Deliverance walkthrough.
Kingdom Come Deliverance: Tough Love
Hermann, the executioner of Rattay, is trying to help a widow named Elishka, as you'll discover if you return to his house (you will have previously been there as part of The Good Thief side quest). The crying woman sits in front of his home, on a bench, while the hangman attempts to console her,
despite having chopped off her husband's head to begin with. Listen to the conversation and the quest will be automatically added to your journal.
Talk to executioner Hermann / talk to Elishka
You'll hear the whole sorry tale when you go and speak to Hermann and Elishka. After her convict husband was executed, the hangman saved her from being chased out of town, and put her up in his house. Unfortunately, she's not particularly happy living there. With no kin of her own, the widow has nowhere to go to – but her departed husband may have some family somewhere, who would be willing to take her in.
Find out more from the bailiff
Elishka knows that he had a family, but as they never came to visit she doesn't know where they are. She refers you to the bailiff, so when you've finished speaking to the unlikely housemates, head to the town hall square in Rattay. During the day, you'll likely find the bailiff in the tavern.
The bailiff, however, is not terribly inclined to help you, just brushing your inquiries aside. If you persuade him, he'll pass the buck to the city's scribe, who resides in his study on the town hall's top floor.
Walk right through the door next to the bailiff, and go left up the stairs, and there you'll find the scribe retiring in his bed. Tell him that the bailiff has sent you, before asking about the relatives' records, and eventually discovering that the widow has married into the Mischek family. As luck would have it, they live next to a fishpond to the east of Rattay.
Visit the family
There will be a new quest marker on the world map leading straight there, and it's not too far away if you're up for a leisurely stroll. Talk to the elderly woman on the field, and bring her the news about her daughter-in-law. She's not interested in taking Elishka in, sadly, but it's possible to convince her with your persuasive skills or, if they fail, bit of coin.
Return to Elishka and report back with the good, I suppose, news. She agrees to live with the family, but if you think she should stay with Hermann, you can suggest the pair make a go of it instead. If you choose that option, the overjoyed executioner will reward you with a load of Groschen.
Continue with: Kingdom Come Deliverance: Waldensians.
Back to the main Kingdom Come Deliverance walkthrough.
Kingdom Come Deliverance: Waldensians
At some point late in the game, Sir Hanush in Rattay will have a quest waiting for you (look out for the star floating above his head). He has a problem that only Henry can help with, regarding a vicar who has allegedly turned up in the region to hunt down heretics. Hanush doubts the vicar, and wants him to scram back to Prague.
A word of caution before you begin: the entire quest is time-sensitive, which the game doesn't bother to tell you about. Start doing the quest immediately after taking it on and you should be fine, but don't get distracted with other tasks along the way.
Talk to the vicar
The vicar in question is staying in Uzhitz, where he often sits on a bench near the local church during the day. Talk to him and he'll fill you in on his investigation – he's been tracking down so-called heretic Waldensians after one was arrested and interrogated for information. The vicar is only too happy to hand the man's testimony over to Henry, which relays the miserably long route to the Waldensians' meeting place.
Dispose of the vicar
You can either agree to find the heretics for the vicar or not, and if you're not in the mood, Hanush will tolerate – with some persuasion – the vicar being 'removed' by another method. Such as: killing him. It's not easy to off the holy man, as he is generally surrounded by two guards, but if you find a suitable moment, such as at night-time, then you can kill the vicar and ride back to Hanush for your reward.
He won't be entirely enthusiastic about your methods, but if your speech values are higher than his, you can appease him and end the quest without having to hunt down those heretics.
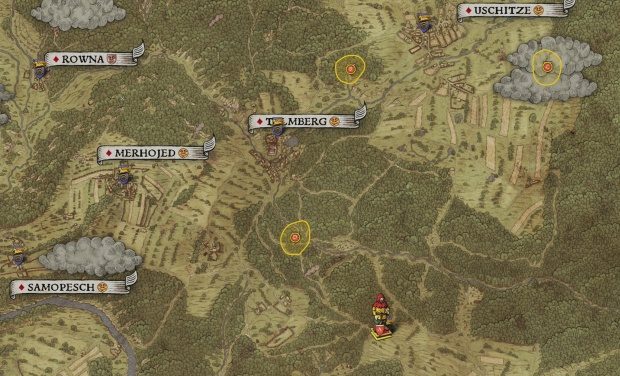
Find the Waldensians' meeting place
Let's assume you didn't do that, and that you aided the vicar in his holy quest. Now, you could follow all the clues and approach the meeting place step-by-step as the developers intended, or you could save yourself a heap of trouble and just look at the map below. In short: the Waldensians' meeting point is located northeast of Uzhitz. Follow the river that runs north from the town until it broadens further up. To the west you'll find a small, outward-looking forest clearing. That's the place.

Examine the meeting place
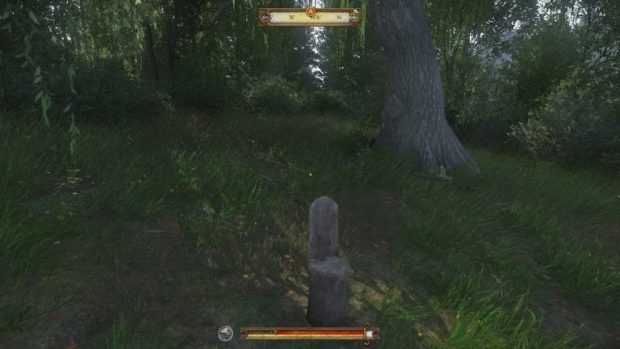
Approach the eye-catching tree in the clearing and take a look at the small tree-trunk-shaped altar in front of it, where you'll find a wooden cross. Grab it and Henry will remark that someone from the village might recognise it.
So it proves when you return to Uzhitz and ask the first person you see. They'll direct you to your old drinking buddy Father Godwin, who as part of his sacred duties blesses all the crosses in the houses here.
After a brief conversation, he informs you that the cross belongs to the Bauer family, who he very much doubts are heretics. Still, it won't hurt to spy on their prayers, in order to confirm things. They meet in the evening at their farm house, which lies beyond the fields southeast of Uzhitz.
The vicar, who is big into eavesdropping apparently, suggested hiding in their attic, but you'll have to sneak through the farm in order to reach it. Come here in the early evening and you should be able to climb to the attic without too much trouble, by ascending the ladder at the side of the main building.

Let some time pass, until about 9:30 pm, and the Bauers will gather at the dinner table. They don't exactly practice satanic rituals or anything, but as you can witness, they do possess 'heretical' beliefs. You have a number of options now:
You can tell the vicar, who will give you 325 Groschen in gratitude, and put you in good standing with the church. Hanush won't exactly leap into the air with thanks, but he'll be satisfied with the outcome, as the vicar will be gone.
Or you can turn to Father Godwin instead, who says that you should persuade the farmers to flee. Go back to the farm now, and talk to Mrs. Bauer. You'll need extraordinarily good persuasion skills to convince her (better than 13/6/2), otherwise you will fail in your attempt.
You could also talk to Mr. Bauer about the situation, telling him that you will kill the vicar. It's certainly an option, as described above, but if you go down this route, maybe keep it a secret from Hanush.
Continue with: Kingdom Come Deliverance: Clothes Make the Man.
Back to the main Kingdom Come Deliverance walkthrough.
Kingdom Come Deliverance: Clothes Make the Man
Speak to your sometime collaborator Hans Capon after the distinctly soggy side quest Next to Godliness to receive this next mission. You'll find him walking through the city at noon, or other times at the archery range or tavern.
Before you speak to him, you should know that this quest puts you rather on the spot, taking you directly to Sir Hanush and a cutscene. You are to be Capon's page, and as such he asks you to wear something more appropriate for his upcoming audience with his uncle. If you refuse to put the outfit on, the rest of the quest will be skipped, but let's go along with Capon's request.
Help yourself to clothes from Lord Capon's trunk
To find the finery, head to the southern castle, to the red quest marker, and then go up to the second floor. Once you're in the hall, enter the first room to the right where you'll find the chest – and you'll be able to take anything you want. Grab the brown leggings, linen shirt, red-and-white double-leggings, black chaperone, ornate equestrian boots and ornate shirt to accomplish the sub-objective.
Put the sharp threads on and make your way back to Capon, after which you'll be dragged immediately to Hanush.
It seems that Hans Capon has not behaved in a manner befitting a high-born gentleman, which of course refers to the pair's nocturnal drinking at the bathhouse, and the resulting fist-fight. Turns out your opponent was one of the city guard, and thanks his severe injuries he was unable to report for duty the next morning.
The bailiff complained to Hanush about the matter, who has decided to give the boys a job to keep them from further shenanigans.
The job concerns a couple of Captain Bernard's cousins. They became involved in a dispute, and one of them lies wounded in Rattay, while the other has taken up with a band of robbers near Neuhof. That's not exactly a desirable situation, so it's up to to Henry and Capon to bring Bernard's outlaw cousin in and put things right. Thus starts the next side quest, Robber Baron.
Continue with: Kingdom Come Deliverance: Robber Baron.
Back to the main Kingdom Come Deliverance walkthrough.
Kingdom Come Deliverance: Robber Baron
This quest can only be started after you have completed Next to Godliness, and its resulting follow-up, Clothes Make the Man. In fact, Robber Baron will begin immediately after that side-quest, with Sir Hanush telling you and Capon to deal with a cousin of Captain Bernard's, who has taken to highway robbery.
If you want, you can go and chat to Bernard about this, and follow him and his men to try and locate the man's cousin, but it's completely optional. He waits in the castle courtyard, by the horses, if you're interested. If you waste too much time after the quest begins, and they set off with you, it hardly matters as it's easy enough to make your way to the location. Leave Rattay through the upper gate, stay on the path to Neuhof and follow your nose/the quest marker from then on, which will lead you to the camp you previously stayed at with Capon during the main quest The Prey.
Caution: you may encounter a bug at this location if you interact with Capon in the camp. The game thinks the quest is just starting, and makes you relieve the scene with Hanush in Rattay, so if you're worried, or you haven't saved in a while, perhaps leave Capon be for now.
Chat with Bernard, who will share with you a few stories about his roguish cousin Wolflin, before asking you to check out the nearby robbed farms. One is up the hill near Neuhof, while the other lies north of the camp. At both locations you'll have the opportunity to gain more information about Wolflin's hidden camp.
Head to the northern farm
Follow the forest path from the camp and you'll come directly to the farm. If you ask about, both the farmer and the mistress of the farm will say that they know nothing about any robbery – which is a bit suspicious. With high speech values (better than 10/9/7), the woman will eventually open up, revealing that, yes, the bandits came to the farm. One had an injured leg and asked her to take care of it. Furthermore, she knows where their camp is, and will take you to a spot where you can view it for yourself. The game will take you there automatically.
Take a few steps forward to get a good view of the camp, and you'll be able to report the location to Bernard.
Head to the farm to the south
You can also head for the southeast farm before reporting back to Bernard, by following the red quest marker to the small plot. Talk to the villager at the cottage, who will tell you that a man named Lumir chased the bandits away, who then fled into the nearby forest. Her husband, too, ran after the bandits, catching one of them with his sickle along the way – the blood trail should offer a tangible clue. That the bandits mentioned someone named Wolflin is a fact that should make your ears prick up. Before you leave to follow the blood trail, you can give the woman three bandages for Lumir's wounds, and she'll reward you with 70 Groschen. Either accept or honorably decline this money, it's up to you.
Follow the bloody footprints
Follow them north into the forest, keeping to the small path. They'll take you into the undergrowth, and to an overturned tree trunk, before the path twists to the northeast. In front of a tree, you'll find a blood-soaked garment, where Henry will comment that he is getting closer to the bandits.
Follow the blood trail further to the northeast. At another tree trunk you'll discover one more bloody garment; from there continue northwest, then north again, until you reach a creek. There you'll discover Wolfin's camp.
Negotiate with Wolflin
Report back to Bernad. He believes that Wolflin should be hanged for his crimes, but if your speech skills are up to scratch (better than 12/13/16), you can attempt to convince him otherwise. If you don't have the skills, put on Capon's outfit from the previous quest - if you're not wearing it already - as it offers a nice charisma boost. If you're successful, Bernard will give you a tabard with Bernard's coat-of-arms on it, which will allow you to enter the camp and parlay with the outlaw.
Stick the tabard on, unequip your weapons, and make for Wolflin's camp, where you can begin to grill him about his actions, and arrive at a solution. These solutions include letting him disappear while leaving his loot behind as compensation – and even paying you additional money, if your persuasion skills are high enough. One of the resulting dialogue options (the crowned heart symbol) will appeal to Radzig, and seems to work even if you possess a lower value, as Wolflin doesn't want to face off against an old friend.
This solution offers a decent compromise, as neither Bernard or Hanush will lose face, and they'll still get what they want. For your efforts, Sir Hanush will reward you with a sturdy cuirass.
If you offer more concessions to Wolflin and promise safe conduct for the robber, you'll finish the quest but annoy Hanush and Bernard. Still, a man-on-man duel between you and Wolflin will remedy the situation somewhat.
Lead Bernard to Wolflin's Camp
If no peaceful solution is found, Henry will have to agree to lead Bernard's men to Wolflin's camp, and to end the robber's life. This happens automatically after the dialogue option is chosen, and if you'd rather not get involved with the battle, remember that you can always hang back and let the others do most or all of the work.
Caution: you may encounter a bug where Wolflin is not considered dead at the end of battle. His body remains marked with a quest symbol, while you'll still have the objective to kill the man. If this happens, you won't be able to talk to Hans Capon or Bernard, or even move elsewhere in the world, so it might be best to save before storming the camp, if that's your intended solution.
Continue with: Kingdom Come Deliverance: Miracles While You Wait.
Back to the main Kingdom Come Deliverance walkthrough.
Kingdom Come Deliverance: Miracles While You Wait
In the southern part of Sasau, you'll find a charlatan near the trader stalls, offering all sorts of strange items, including a unicorn horn and (actually useful for you) a treasure map. It looks like he needs supplies, and Henry is naturally the man to deliver them. These items are, of course, a little unusual: he wants one of Procopius' teeth, a cat's paw, a burial shroud, and a branch from the festival tree. Handily, everything he needs is located in Sasau, so you won't have to travel too far to find them.
Get the cat's paw
You won't have to take this from a disgruntled cat, thankfully, but you will have to win it from a dice player in the local tavern, who keeps the paw on his person as a lucky charm. You'll have to raise 100 Groschen in the ensuing bet, but don't be too alarmed as you'll only lose five coins if you suffer a defeat, and you can retry as many times as you like.
Alternatively, you can offer the man 150 Groschen for the charm, or threaten him with violence if you have more than 9 points in the discipline. Whichever way you go about it, you are now the proud owner of a cat's paw. Well done, I guess.
Get Procopius' tooth
Go to the northern part of the city and cross the river that separates the city. On the right, you'll come to an area with many small fields and flower beds, where this Procopius often works during the day.
You can just ask him about his tooth, now, which as it turns out as causing the man some pain. If you have First Aid II, you can use this in dialogue to convince him that you're a doctor, and to follow you to the, er, blacksmith's to have it taken out. You can also just attack him to have the tooth fall out that way, but try to do it when he's not looking.
Get the branch
For this you'll have to go all the way to the north of the village, to Sasau's monastery. There's construction work going on, and so a handy scaffold has been erected on the side of the building. Climb the scaffolding to the top and you'll see a tree hanging over the monastery's outer facade. You won't be able to reach it directly, so take out your bow and shoot the hanging branch with an arrow, after which it will tumble to the ground.
Get the shroud
The burial shroud must be from someone who led a righteous life, according to the charlatan. That description applies to someone named Loukota, who died recently. His body has been laid out in a small church to the south of the city.
The church itself is open, but the game regards it as a private area, except for a small vestibule. If you wait until night, the fathers will be gone, so you should should be able to sneak in and grab the garment without too much trouble.
Return to the charlatan with your items, where you will be rewarded with a few, more useful, objects. He doesn't want to exchange the shroud out on the street, however, and so invites you to meet him at house. Follow him there, to the western edge of Sasau. You'll be greeted by an angry mob of villagers, who aren't too happy with the charlatan's shenanigans. He promises Henry a reward, from his chest, if he can stop the crowd, before he scarpers with the ominous words "See you in Ledetchko."
Stop the crowd
Face the people, in particular the lout leading the charge. His language skills aren't too impressive (0/0/12), so you should be able to convince him to leave easily. The quest ends here, but before you go, be sure to clear out the charlatan's house, and maybe to eat there and take a kip, if you need a rest. In the chest you'll find a variety of items, including a book entitled The Dream of the Alchemist, some outerwear, and 11 bandages. There's another 'light' chest that can be picked open as well.
Until Ledetchko, where we'll meet the charlatan again.
Continue with: Kingdom Come Deliverance: A Friend in Need...
Back to the main Kingdom Come Deliverance walkthrough.
Kingdom Come Deliverance: A Friend in Need...
This short and concise quest starts in the city of Sasau, located barely two hours west of Ledetchko. Walk to the northern part of the city and look behind the bridge, where you will find a tavern. Henry's old chums Matthew and Fritz, from back in Skalitz, will be in here, either at the entrance or asleep in one of the barns.
Get Matthew and Fritz work
Talk to one of your old friends to begin the quest, where you will learn that the two carpenters are out of work. It's suggested that they get a job at the mill, a job that shouldn't be too demanding, your old friends say. If you speak to Fritz again you'll be given another quest, A Costly Brawl, but let's deal with this one for the moment.
You will have been given an optional goal: to greet Theresa with the news that Matthew and Fritz are alive and well, so let's kill two birds with one stone and inquire about a job at the family's mill at the same time, back in Rattay. Travel to Theresa's mill and inform her that the two are well, and that they have washed up in Sasau.
Don't expect to get them work in Rattay, however, as the city is full of refugees who are even worse off than your carefree buddies. Millers Peshek, Simon and Woyzeck will also reject your requests, so don't bother heading to their mills to petition the men. However, Theresa proposes inquiring in other mills, in smaller villages – for instance, the miller in Ledetchko is said to be seeking workers.
Ledetchko mill
Make your way to the mill, which lies northwest of Ledetchko, in the eastern part of the city, just south of the bakery. As luck would have it, the miller Oliver actually does have need of a few good carpenters. He won't tolerate laziness or drunkards, however, two characteristics that apply neatly to Fritz and Matthew.
You only need a little speech skill (better than 1/1/4) to convince the miller to take them on, but if necessary, you can also grease his palm with a few Groschen. In any case, Miller Oliver will offer to provide your two friends with work, accommodation and food.
Upon your return to your two chums, the pair will reward you with...absolutely nothing. Matthew tells you to come back to them in a week – when they have received their first bit of pay, they'll give Henry some coin to show their appreciation.
Travel a little and let some time pass. At some point, out of the blue, you'll be told that a related quest, ...Is a Friend Indeed, has just begun. There the story of Fritz and Matthew continues.
Continue with: Kingdom Come Deliverance: A Costly Brawl.
Back to the main Kingdom Come Deliverance walkthrough.
Kingdom Come Deliverance: A Costly Brawl
Follow the directions for the start of the side quest A Friend in Need... to find your old friends Fritz and Matthew in a tavern in the northern part of Sasau. During a conversation with Fritz, you'll learn that the pair have outstanding debts with the monastery. Fritz isn't too eager to open up about it, and indeed if you push the matter he will lose control and start a fist-fight. It's only a small brawl between friends however, which is why it calms down relatively quickly.
Figure out why Matthew and Fritz owe the monastery money
The situation is a bit strange, as it turns out. The two are to pay for the treatment costs of a person they have beaten up. We'll learn more when we head to the monastery in the far north of the city.
Enter the compound near the main building and you'll see a hospital ward full of injured people. Here you can pick up another side quest, In God's Hands; you can also talk to Brother Elias, with whom your friends fought.
Convince Brother Elias to forgive the boys' debt
Elias isn't eager to let your friends get away with their behaviour, but of course you can convince him to let them off the hook. Either pay the man, or use your powers of persuasion (better than 6/5/4), and he will relent and offer to clear the debt in exchange for an apology.
Depending on whether you have helped your chums find work for the side quest A Friend in Need... or not, they will either still be in Sasau, they'll be en-route to Miller Oliver in Ledetchko, or they'll already be there – you can follow their progress on the world map.
Bring Fritz the good news to end the quest. The pair don't actually go and apologise to Elias, though, unless they somehow do it when you're not looking.
Continue with: Kingdom Come Deliverance: In God's Hands.
Back to the main Kingdom Come Deliverance walkthrough.
Kingdom Come Deliverance: In God's Hands
Johanka is an old acquaintance of Henry's from Skalitz. Like you, she fled the town during the events of the main quest Unexpected Visit, and has made it safely to Sasau. Go to the monastery in the north of the city, and you'll find a makeshift hospital operating out of the grounds. Johanka is here, caring after the wounded – unfortunately, she is swamped by the amount of work required.
The monks tolerate the hospital's presence rather than actively supporting it, so you should ask Johanka if you can help her out. If you possess the First Aid II skill, you can make use of it to treat some of the patients directly, but you can also assist by collecting various items for the hospital.
Help care for the sick and wounded in the monastery
Your first task is to acquire some meat, which is easy enough. You need ten units in total, and any meat will do, from dried beef jerky to meat fresh from the hunt. It makes no difference, but the quickest and easiest method is to buy some from the tavern, or from the dealer at the market in south Sasau. Deliver the meat to Johanka when you're done.
A man named Brother Nicodemus is also employed at the infirmary. Let's have a chat with him, and ask why the monastery refuses to give the infirmary additional funding. This ends the current goal and opens up a new one:
Find out how to get better conditions for the sick
Sebastian von Berg usually stays in his house, which is left of the infirmary, through the northern gate, and over the yard. There's a man outside who will offer you yet another side quest, Saintly Remains, but let's not get sidetracked with that. Enter the house and look for the custodian. Most of the time, he lies asleep upstairs, and if you're desperate for a kip yourself, no one will mind if you use one of the beds here. Talk to him about the infirmary situation, although you'll need high speech skills (better than 15/17/8) to be able to convince the man to help. If that fails, you can always bribe him with 150 Groschen.
Treat the sick
There are five people in the infirmary you must help: Phillip, who needs a potion, a villager with a broken leg, Hans (who needs his dressings changed), Semek (who needs some healing herbs), and last but not least an insomniac, who's rather keen to get to sleep.
Johnaka has some tips on how to help them. If you possess the First Aid II skill, you can try to fix the broken leg yourself, while Phillip is apparently poisoned, due to him hiding among the corpses during the attack on Skalitz. She directs you to Father Simon in Rovna, who will be able to help with that.
You can change Hans' bandages yourself if you have the First Aid II skill, otherwise you'll need to ask Nicodemus. As for Semek, he's a construction worker and not as important as the others, apparently, but you'll need to help him all the same. Use the alchemy station in the next room, read the book there, and leaf through the pages until you learn of the necessary herb, which helpfully you can buy directly from Nicodemus.
He's the one to talk to about the insomniac, too, recommending a sleeping draught named Lullaby Potion, which requires a poppy, strawberries, and a thistle, all of which can be bought from the man you're currently chatting to. Using the alchemy station nearby, here's a step-by-step guide to brewing the potion:
After the sleepless man gets his forty winks, Sebastian von Berg will enter the room and make a right song and dance. You can leap in to Johanka's defence here, but if your speech skills aren't high enough (better than 15/17/8), you'll spend half a day in the 'dungeon' as a result.
Find Father Simon
Now, only Phillip remains to be treated. Father Simon from Skalitz knows a lot about poisoning, so let's travel to Rovna and speak to him. South of the fast-travel point, right at the quest marker, you'll find a hut. The villager inside will direct you to Father Simon, beginning the linked side-quest A Man of the Cloth.
Complete that quest, which ends with you finding Father Simon and asking him about Phillip, and you'll discover that the cure calls for vermouth. You need 2x vermouth, 1x sage, and alcohol, and here are the exact steps for creating the antidote:
Give Phillip the medicine and then cross your fingers that it works. Wait for a couple of hours in the infirmary, and you'll know one way or the other. If your treatment was successful, you will have now helped all the needy people, who will thank you if you go and speak to them again. To finish the quest, speak to Johanka once more.
Continue with: Kingdom Come Deliverance: A Man of the Cloth.
Back to the main Kingdom Come Deliverance walkthrough.
Kingdom Come Deliverance: A Man of the Cloth
This quest is closely related to the side-quest In God's Hands. In that mission, you're tasked with helping Henry's old acquaintance Johanka look after the sick and wounded in Sasau. One of them, Phillip, is suffering from poison, and Johanka suggests meeting with Father Simon, a poison expert, to learn of a cure. Unfortunately, he disappeared several years ago, and now lives as a hermit in the wilderness.
Once you're given this quest, the marker will lead you to small farm northeast of Skalitz. Ask the people here about the pastor, and about what happened with his housemaid, with whom he had a relationship. She died years ago, and her parents buried her in the woods – however, the cross above her grave is being decorated regularly by a mysterious visitor. Who would be visiting the grave, if not Simon?
Find Mary's Cross and Father Simon
The quest marker leads you to a point in the woods west of Skalitz. At the edge of the path you'll find a cross with a bouquet of flowers in front of it; interact with it to be given a new quest marker leading to the southwest. Before you leave, however, be sure to check out the grave to the northeast, in the bushes, where you'll discover all sorts of treasures including the book The Food of Hercules IV, some clothes, recipes, and 206 Groschen.
Now, follow the small, east-flowing river upstream in the direction of the marker. Near the source of the river you'll meet two vagabonds, and Father Simon. A fist-fight ensues when you approach the men.
If you're not too good with your fists, you can of course pull out your blade and slaughter the vagabonds, but Father Simon will admonish your behaviour. Whichever way you resolve the fight – lethally or no – chat with Simon, before encouraging him to return to St. Jacob's. He'll refuse at first, but eventually change his mind.
Speak to Father Simon again to ask him about Phillip's poisoning (from the quest In God's Hands). He suggests a cure involving fine alcohol, distilled from vermouth. Let's wrap this quest up first though, shall we?
Go to Rovna and report what happened
Ride back to the villager in the run-down hut near Rovna, and tell him you found the pastor. He'll offer you 100 Groschen as thanks, but you can decline the man's money if you prefer. Thus ends this quest, leaving you free to wrap up the previous one.
Continue with: Kingdom Come Deliverance: ...Is a Friend Indeed.
Back to the main Kingdom Come Deliverance walkthrough.
Kingdom Come Deliverance: ...Is a Friend Indeed
Check in with Matthew and Fritz, to see how they're settling in to their new lives at Ledetchko mill. As you approach the pair, you can hear them talking, and it sounds like they're not particularly happy. The problem is the foreman, Thomas, an apparently arrogant and incompetent man. Speak to both Matthew and Fritz to learn more about Thomas, who Fritz describes as the "root of all evil."
Bring peace to the mill
It can't hurt to talk to Miller Oliver about the matter. When you chat to him, he tells you about how his son died in the yard, but he doesn't want to hear your allegations about Thomas and sends you away. His daughter Julia will come up to you afterwards, telling you that Thomas is a strange man and, on the subject of her deceased brother, that he had a scarf on his person that was stolen from him.
Talk to Thomas directly and you'll be given several options. The most peaceful solution is to use the central dialogue option, regarding the two carpenters. You'll then assure him in a calm tone that they are just doing their job, they will leave Julia alone, and that they'll leave the mill when they have enough money to pay off their debts.
Fritz won't be happy with this outcome, as he was hoping for a rumble, but what can you do. Matthew, on the other hand, will reward you with 45 Groschen. Alternately – if you fancy that rumble – you can sneer at Thomas during the conversation to initiate a fight with the foreman.
The are other options, in fact, and plenty of them:
The topmost option in the conversation, in which you call Thomas a village idiot, will provoke him in such a way that he will challenge you to a sort of duel, in which Fritz and Matthew, and also a couple of Thomas' friends will participate. Force all three attackers to their knees to bring an end to the quest.
Or you could talk to Thomas about the dice game with Lorenz from Budin – providing you've done that already – answering to his questions that you know Miller Peshek from Rattay. You'll wind up in a dice match to sort out your problems, which seems a little more civilized, doesn't it?
You could also ask Thomas about the miller's son's death, where he will tell you his version of the unfortunate story. When the scarf is mentioned, it comes to light that Thomas has it. You can either knock him out and take it off his person, or pickpocket it from him, if you're sneaky enough. Show the scarf to Julia and Thomas will be forced to leave the farm, making your two friends happy.
After a few days...
...Visit the tavern by the forest meadow, which lies northwest of Neuhof (there's a fast-travel point here). You'll find Matthew and Fritz here, and you can begin their next side quest, Masquerade.
Continue with: Kingdom Come Deliverance: Saintly Remains.
Back to the main Kingdom Come Deliverance walkthrough.
Kingdom Come Deliverance: Saintly Remains
You can pick up this quest up from outside Sebastian Von Berg's house, north of the monastery. There's a guard named Urban waiting outside, who has a rather sneaky task he'd like you to perform.
Get some of St. Procopius' mortal remains for Urban
That's all the man wants, can't see why the monks would deny him that. Henry promises to fetch a piece of St. Proc. that Urban can touch and then bring back – no harm done. Now, breaking into the monastery might sound like a daunting task, but it's not as bad as it seems. If you stand with your back to Johanka's infirmary, you should see an open wooden gate leading to the courtyard. From there, you can head northeast through an open door in the wall. Run past the wooden scaffolding next to the monastery wall and you'll discover, on your right, a Very Heavy locked door. This leads into a small cave with some niches, a wooden cross, and a bowl – grab the bowl and leave.
Bring the relic to Urban
If you don't have a high lockpicking skill, you can head to the cave another way. Again with your back to Johanka's infirmary, go straight ahead, and then left through the wall onto a red-brick courtyard. There should be a spot here in which you can drop through to the entrance of the cave. The Very Heavy locked door to the cave can then be more easily opened from the inside.
Bring the bowl to Urban, who can finally get his hands on the holy relic. He'll give you 160 Groschen to say thanks, and despite what he says you don't even have to take the relic back.
Continue with: Kingdom Come Deliverance: A Bird in the Hand...
Back to the main Kingdom Come Deliverance walkthrough.
Kingdom Come Deliverance: A Bird in the Hand
Speak with Berthold in Rattay to begin this quest (you'll find him behind the staircase leading to the northern castle). He has managed to lose some nightingales that he was tasked with looking after, and he asks Henry to help recover them. To aid with this, he gives you three empty bird cages, before dispatching you to Vranik forest to search for the birds.
Find the nightingales
The forest is located west of Rattay, but the yellow quest circle covers a few hundred square meters – how on earth are you supposed to find them? Thankfully, Berthold has imitated the noise that you should be listening out for, so finding the three birds is a simple matter of stopping whenever you hear the appropriate call, setting a trap and then waiting until the bird appears.
To save you some time, here are the places you'll need to stop at to recover the birds:
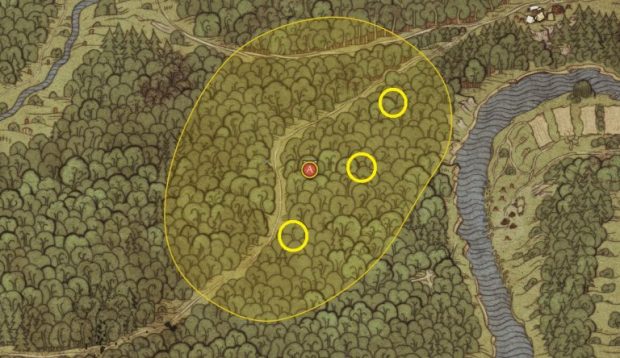
The chirping will be unmistakable when you get there, and if you have a good sound system, you'll be able to pinpoint exactly where to set each trap. To do so, open the inventory, switch to Other and click on the empty bird cages. Drop one, pull back, and then let two hours pass using the wait function. The cage should then be veiled with a cloth, which is your signal that a nightingale has fallen into your trap.
You can find and catch all three birds in a matter of minutes. It's best to leave early in the morning, so you have enough light in the event that finding them takes longer than expected.
Return to Berthold and give him the nightgales, and you'll be rewarded with 40 arrows and 50 Groschen.
Continue with: Kingdom Come Deliverance: Masquerade.
Back to the main Kingdom Come Deliverance walkthrough.
Kingdom Come Deliverance: Masquerade
Let's help out our old pals Fritz and Matthew, who have come up with a daring plan to clear their debts. You'll find them at the Inn in the Glade tavern that lies to the northeast of Ledetchko and northwest of Neuhof – speak to both Matthew and Fritz for the lowdown on the plan. They put you onto the landlord, Andrew, who leads you down to the cellar before telling you that he wants you to recover a few pieces of Cuman armour. How you get them is up to you, but he marks a few places on your map where Cuman camps, and therefore their armour, can be found.
Get the Cuman armour
You'll need three Cuman helmets with face shields, and three pieces of heavy torso armour. Andrew's markers lead to Cuman camps to the east and west of Uzhitz, and to one not far from the tavern, although depending on when you start this quest, you may already have some armour parts on your person. Matthew and Fritz aren't any help, so if you want to face the Cumans head-on, you're going to be going solo.
Let's start with the nearest camp (quest marker D) , which can be found in the forest northwest of the tavern. Five Cumans have settled here and will attack on first sight – quite a battle unless your combat skills are notably high. If you're intimidating enough, however, you can scare some of them away, making the battle much easier. When you've won – presuming you did win – take as much armour as you can find/carry, then proceed to another camp if you've not gathered enough.
The Cuman camp marked with a B is the easiest place to head to next, as only three Cumans are present there. If that still sounds like a challenge, you can try to pull the archer away, or approach the camp at night and poison their wine.

If you're taking the sneaky route, don't bother attempting to open the chests, as they're empty and may alert the sleeping men. You probably know by now that you can assassinate them in their sleep – although it doesn't always work, so save before.
Ask Milomir what a 'real Cuman' looks like
Once you've gathered the armour pieces, hand them over to Andrew, who decides that the armour is no good. This armour doesn't make you look like a Cuman – or, more specifically, what people think Cumans look like, which is what you're really going for. Milomir knows what a 'real Cuman' looks like, apparently, and you'll find the man in front of the tavern.
Ply him with alcohol and Groschen and he'll tell you some tall tales, before directing you to three others who will hopefully be more helpful.
Talk to Olena, Vashek and Brinus
Three new markers will appear on your map. A points to the Coal-Burner camp northwest of the tavern, which is only a short ride away. There you'll find Brinus, who doesn't have much to say except that Cumans use black feathers as decoration. Olena you'll find on the eastern edge of Talmberg, who reckons that they adorn themselves with fangs. Vashek you may already know from the side quest At Your Service, My Lady – he's the stable boy at the Uzhitz stables. He believes that Cumans use dog skin as part of their armour.
Find raven feathers, wolf teeth, and dog skin
You don't necessarily have to find raven feathers or wolf teeth – any black feathers and animal teeth will do. And despite Vashek suggesting killing a dog at night, you can just buy dog leather from a tenner for about 10 Groschen. The same applies to feathers and teeth, in fact – you can buy teeth from hunters, for example Berthold in Rattay, and feathers from most alchemists, for example the herbalist in the small forest west of Neuhof.
Otherwise, nobody will stop you from just killing a dog and skinning it, even though they obviously should. Feathers you can find from bird's nests (you might need to shoot them down with your bow), and teeth, well, those you'll find on the bodies of animals, obviously. Once you've found the items, return them to Andrew for your reward.
Continue with: Kingdom Come Deliverance: Pestilence.
Back to the main Kingdom Come Deliverance walkthrough.
Kingdom Come Deliverance: Pestilence
It's not often that main and side quests overlap in the game, but here we are. During the main quest Questions and Answers, Henry will have been to the village of Merhojed and noticed the mysterious plague that has fallen upon it. There, the local bailiff Melichar dispatches you to see Johanka in Sasau, initiating the side quest we're going to tackle now.
It's an optional quest, but it's worth completing to help the people of Merhojed – and it will lead to a better outcome for Questions and Answers. But before you head out to Sasau, first ask around about the plague in Merhojed.
Examine the plague raging in Merhojed
Walk around the town and stop at any door bearing a cross – there you'll find victims of the plague. A little way west of the fast-travel point, you'll find a woman named Bedrishka, whose husband succumbed to the illness. She asks you for help, so agree to dig a grave for him behind the house.
Once you've dug it, next to the tree, carry the body from the bed and put it into the grave. Ask Bedrishka about the symptoms and she'll tell you that he suffered from fever and abdominal pain, as if his stomach was filled with stones.
Further findings are provided by an old man, whose hut lies not far the shed holding the prisoner. He's very aggressive torwards Henry, but if your skills are better than 2/1/13 you can convince him to let you see his dying wife in the adjoining room. Examine her to discover that she, too, is suffering from a fever.
Daniel is in the hut southwest of the yellow quest marker. He's deluded and believes that you are his brother, which you can go along with if your speech skills are better than 3/2/12. He doesn't tell you anything you don't already know, however, so you should now head to Vincent in the east of the quest marker circle. He complains of fever and frequent shitting, before giving Henry yet another side quest named Last Will and Testament.
Let's leave that one for now. After you have chatted to the afflicted, your investigation in Merhojed is finished and you can make your way to the infirmary in Sasau.
Talk to brother Nicodemus
Johanka passes you on to the doctor of the ward, one brother Nicodemus. He spends most of his time at the alchemy station in the next room, so head there and ask him about the plague. He asks about the symptoms, so tell him.
At this point, you can either read the recipe book at the alchemy station until you discover the cure, or speak to Nicodemus again, telling him that you already know the cause of the plague. If you tell him that the symptoms point to water poisoning, he'll give you the (correct) recipe for the cure; if you tell him anything else, a cure can still be made, but it will fail and the afflicted people will die.
If you know anything of alchemy, you can create the antidote for yourself, or you can ask Nicodemus to make it for you. Either way, he sets off with Johanka to Merhojed. If you're keen to make it yourself, here's the formula:
Deliver the antidote to the sick
You'll find Nicodemus hanging around Old Straw and his wife. Talk to him first, before going to deliver the medicine to the other sick people in town. Once the cure has been administered to Bedrishka, Vincent and Daniel, return to Old Straw's wife and talk to her to complete the quest. Melichar the bailiff will then allow you into the shed to see the prisoner, and the main quest Questions and Answers can finally carry on.
Continue with: Kingdom Come Deliverance: Damsel in Distress.
Back to the main Kingdom Come Deliverance walkthrough.
Kingdom Come Deliverance: Damsel in Distress
A woman has been kidnapped. A woman named Esther, to be precise. This optional side quest is a spin-off of the main quest All That Glisters; follow that until you come to investigate an apprentice named Florian in Sasau, whose girlfriend Esther has gone missing. While you can wrap up that quest without rescuing Esther, it won't take very long.
Find where Esther is being held prisoner
Open up your map and look for Rovna in the north. Southwest of the town, a quest marker has appeared offering you your first hint as to where she is likely to be found. You may need to do a bit of mountaineering to climb a small hill there, but if you approach it from all directions, sooner or later you'll find a path that will protect Henry's footwear and his poor aching joints. A little way to the south of the yellow quest circle you'll find a camp, where Esther is being held against her will.
Save Esther
Henry will have to deal with three attackers now, which will be a tough fight if you want to take them on with a melee weapon. If necessary, don't be afraid to hang back with the bow and shoot them in the head. Otherwise you can wait until nightfall, and sneak into the camp. One of the bandits may still be up and about patrolling, but the other two should be asleep. Creep up on them and take the key to the hut where Esther is being held captive, or just pick the Very Easy lock with your lockpick. Be warned, however, that Esther won't talk to you if you're in combat, and she could be injured if the bandits wake up while she's escaping.
Follow Esther away from the camp, before accompanying her home. Now, go see Florian to tell him the good news.
Continue with: Kingdom Come Deliverance: The House of God.
Back to the main Kingdom Come Deliverance walkthrough.
Kingdom Come Deliverance: The House of God
Speak to Sir Divish at Talmberg castle, who will mention an accident at the construction site in Sasau. Henry is to go there and play detective until he fathoms out what really went on.
Talk to the overseer
By day, the overseer of the site walks around the monastery grounds. Ask him if you can see the scene of the accident – he'll refuse at first, but relent if you persist. Before you head there though, check in with Karel the master builder, who should be in the same area, wearing a grey top.
He has quite a story to tell, involving a demonic skull and other strange occurrences at the site. You'll receive two goals then: 'Question Leshek about the skull', and 'Search for clues'. Let's get to work.
Search for clues
This part of the quest is not only vague, it's completely optional, and you can end the quest without ever having investigated the monastery or accident site. Let's do it though, by heading to the building next to the monastery. You'll spot some bloodstains at the foot of a wooden ladder, which is where the boulder fell on top of the poor worker. The boulder itself is only a few meters away; examine it and Henry will take a piece with him.
Discover the origin of the stone
You'll be given a quest marker pointing to a quarry near Talmberg. Speak to Rupert there, who says the stone didn't come from here in the quarry. Head back to Karel and tell him the news.
Find the place where Leshek threw the skull away
Leshek is one of the stonemasons on Sasau's construction site. Listen to his story about the bedevilled skull, which he says he threw into the river. The game now marks an almost triangular search area north of the monastery, where you'll find the skull to the lower-right, on the shore, under an inconspicuous overhang of roots and foliage.
With the skull on your person, head to the southern part of Sasau. Near the fast-travel point you'll find the knacker (in this case also the grave digger), who tells you plainly that it's a forgery. Sounds like Henry now has to talk to Leshek, and discover whether he placed the skull at the site himself.
You'll be given a fairly comprehenseive quest marker leading to his location, however Leshek is no longer there. Speak to Zmola the assistant, telling him about the skull, and he'll suggest that you meet with him and Leshek in the evening.
Meet Leshek and Zmola at sunset
Sleep until about 10pm, then head to the large scaffolding at the monastery. You'll get into a short, somewhat puzzling cutscene, in which Henry is nearly killed by a falling brick. Climb the scaffolding after your attacker, where you'll be surprised by a murderous stonemason. Beat him up to learn the truth: he was hired for the attack, by Zmola himself.
Find and stop Zmola
Jeshek is hiding at he mill, it seems, and Zmola is currently making his way there. Hurry there immediately, as this part of the quest is time-sensitive – in fact, it's better to just jump off the scaffolding so you don't waste too much time. Whistle for your horse as soon as you can, then ride to the yellow search circle around the mill. You'll find him at the second building (there's a cooking pot and a campfire in front of it), where Zmola is dragging Jeshek's dead body away. If you lose him, you can still report Zmola and finish the quest, but you won't receive as much money as a reward.
Zmola claims to have found Jeshek like this, and that he was just bringing him to the doctor, but you can counter his lies with the First Aid II skill. Either way, Henry will eventually catch him out on his lie, and the pair will come to blows. Kill Zmola and report back to Sir Divish to receive a hefty sum of Groschen.
Back to the main Kingdom Come Deliverance walkthrough.