Valve+Shapeways: Converting 3D assets for video games into 3D printable design files
Now that it’s possible to create licensed Valve products on Shapeways, this tutorial will help you assess 3D video game models and adjust aspects of them to make them successfully printable in the various materials Shapeways offers. It may seem obvious, but things you can make in software cannot always be seamlessly translated into physical objects. Design assets you’ll find in computer animations and video games don’t usually take the laws of physics and gravity into account.
We’ll be using Autodesk Meshmixer for some quick edits and we’ll take advantage of Shapeways 3D Tools to help finalize any improvements before sending the model to print successfully. And if you get totally stuck, you can always visit our Shapeways forums and get advice and tips from our 3D printing community.
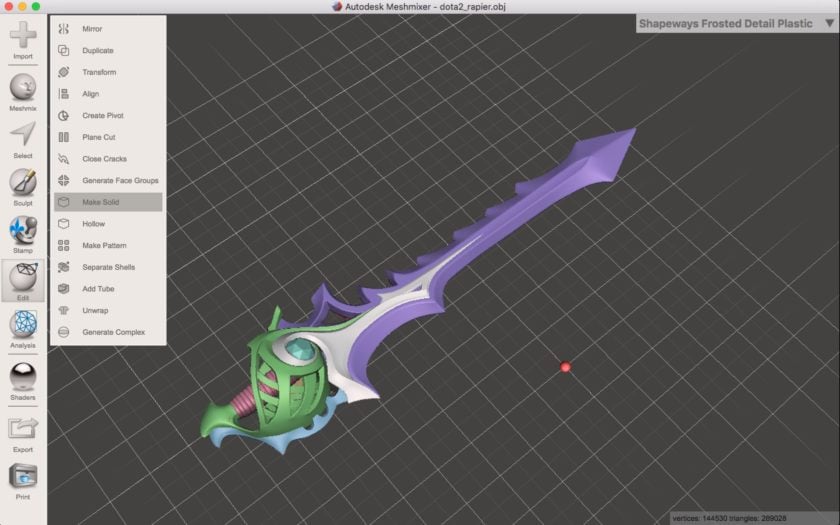
Open Meshmixer and choose File > Import to import the design file. I’m using a sword from DOTA. From the tool set on the left we’ll choose Edit > Make Solid. Depending on how quickly your computer works opening this tool will require a little bit of wait time.

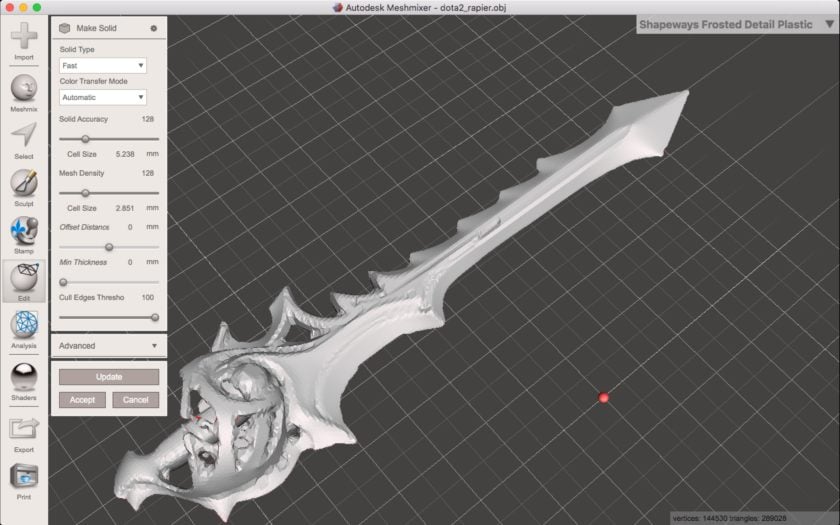
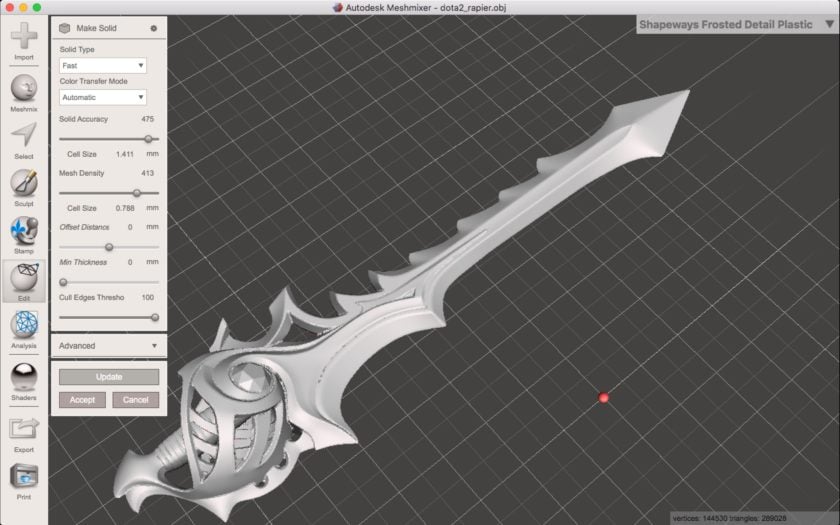
Once the Make Solid menu options load it will be somewhat obvious that the initial settings for Make Solid will probably appear a bit rough compared to our initial import. The trick is to test all of the adjustment sliders within the menu option. For example, simply sliding the Solid Accuracy slider to the right and clicking Update will improve the model for 3D printing.

Use the Mesh Density slider to to increase the fidelity of the newly solid model to more closely resemble the original imported version.

Once these adjustments are aesthetically pleasing you can simply choose File > Export and choose a name and set the file format to STL. Then you can upload to Shapeways and use Valve tags begin selling your creations. Once uploaded, 3D Tools will alert you to any printability issues. Here is a quick tour of how to use 3D Tools make your design printable once uploaded.
This tutorial is the quick and dirty version of prepping a model for printing. Should you need further help navigating printability errors we’ve created a collection of tutorials that hopefully address the majority of issues you’ll potentially encounter.
Video Game Asset Preparation Tutorial Collection
Basics
Video how-to: converting 3D computer graphics to printable files
Basic model design tips
Exporting for color printing
From 3D render to 3D print
Fixing Errors
Non-manifold warnings
Thin walls warnings
More thin walls advice
If your model is too detailed to successfully upload:
Polygon reducing with Meshlab
NetFabb and Meshlab for fixing


