Wasteland 1 - The Original Classic

Wasteland 1 - The Original Classic

54 ratings
Old Desert Ranger's Guide to Dominating Wasteland 1
By tarnuts
A guide for maximizing your experience with the original Wasteland - how to design and build characters, manage loot, and dominate the Wasteland in style. Spoiler alerts included to help preserve some of the surprises!
2
3
4
2
   
Award
Favorite
Favorited
Unfavorite
Introduction
For those who've never experienced the old-school Ultima-style text-based RPG's of the past, these games, while pioneering mechanics that have been replicated in countless games since, can be hard to get used to. However, of these games, Wasteland, with its top-down maps, was easier to navigate than most, and does not require the tedious tile-by-tile mapping of 3D dungeons which marked the earlier iterations. Likewise, the relatively large environments made possible complex ranged combat scenarios which would have been impossible in the Bard's Tale series, for example.

However, now that I've completely exposed the giant and ancient yellowed onion that's been on my belt since the Commodore 64 days, allow this old Desert Ranger to show you folks around the post-apocalyptic American Southwest! Don't worry, the radiation is perfectly normal background stuff. After all, what's a little fallout, friend?
Gameplay Mechanics (and How to Work It)
Wasteland follows some rather basic gameplay mechanics (give 'er a break, it was the late 80's!), which can be unfamiliar to newer players who recognize some of the basic mechanics discussed in the previous chapter, such as Attributes and Skills, but are more familiar with their conventions as they are in most modern RPGs with such elements.

Inventory & Item Management
In Wasteland, each party member has 30 slots to carry items in their inventory. Each item, whether it be a clip of ammo or a suit of armor, is treated as taking up the same amount of space and weight, and no limits are imposed or relaxed by low or high Strength attributes. Thus, parties are limited in the amount of supplies they can carry on a sojourn, and how much loot can be carried away.

Loot dropped by enemies in certain zones remains on the ground until picked up. There is no "despawn timer" for dropped loot. Therefore, if one's inventory is tight, it can be useful to leave certain items un-looted. Likewise, some stores carry limited stocks of items, and some unlimited. If characters sell items to a store which the store does not normally stock, the store will generally retain that item, allowing players to repurchase it later.

There are NO storage containers for you to use, other than selling items at the store (and you'll pay twice as much to buy items back), or leaving loot bags unlooted. Since each character only has thirty slots for gear, "quest items" and keys should not be picked up unless necessary. Keys which only open certain doors should be discarded after those doors are opened. Likewise, you will only need a max of seven suits of armor (plus seven Rad Suits) for your party, so sell any obsolete armor as soon as you get upgrades!

Healing by Waiting
Healing can be accomplished two ways - one is to go to an NPC doctor in game and pay per CON point to regenerate (the cheapest doctor is at Highpool). Otherwise, the best way is to go into the hottest part of the desert (it is VERY hot!) with canteens equipped on each character, and wait (hold down the " ` / ~ " key, checking the party via the space bar occasionally, until the party is healed. One can also regenerate indoors while waiting, but time progresses slower on interior maps vs the world map, so it's much slower to heal (and enemies often spawn!) Warning: this will NOT work (and will kill the party member(s)!) if anyone is at the health status of "Serious" or worse ("Critical, Mortal, Comatose" when attempting this!

Healing Status Effects and Disease
While characters in Serious or worse condition deteriorate over time, this can be stopped and reversed by successful Use of the Doctor or Medic skill on the wounded character - otherwise, standard HP-for-cash healing at an NPC infirmary will revive a character in bad shape. Diseased characters (white highlighted CON score) also usually lose HP over time and die while resting (radiation poisoning is no joke!) - these effects can ONLY be cured at NPC doctors for cash, and not by players in the field. Some effects appear to be more amusing/annoying than lethal (such as the Wasteland Herpes a character gets if you partake of the hooker's services in Needles!), but can hide a more serious effect which can be lethal. Thus, it's best to cure such effects immediately!

Radiation - Spotting and Avoiding It
Radiation poisoning is a nasty status effect that can kill characters easily. The simplest way to avoid it is simply not to step in the glowing radioactive-marked squares (only visible at night hours in the game!). They can also be detected using a Geiger counter, but this will only tell how close you are to a radiation square, not make them visible. If one must go into the heat, always wear a Radiation Suit on all characters who are doing so. Radiation Suits make great low-and-mid-level armor, but are weak in the end-game. Still, it's useful to keep one handy if one needs to cross a radiation field there is at least one point in the end game when this will be critical.

Heat Exhaustion
The desert will cause damage to characters without Canteens - the hotter the desert, the worse the damage. However, the Very Hot desert squares will never have random encounters - thus, paradoxically, it's the safest place to rest for well-equipped Desert Rangers! Still, be careful with new NPC's that one hasn't properly equipped yet...

NPC's and Hiring a Team
Starting out, you'll only have 4 desert ranger PC's, with open slots for three additional party members. Through the game, you'll encounter some NPC's that you can hire to your party: Jackie in Highpool, Felicia, Ace, and Mayor Pedros in Quartz, etc. Some are much more effective than others - Christina in Needles is one of the best, save for Covenant in Vegas and Vax at Base Cochise.

To get these NPC's, you must initiate an Encounter (type "E") and then have all party members "Hire" the NPC. With any luck they'll join immediately and you'll get a character slot filled. NPCs can help take some heat off your team in combat, and help dish out additional attacks and carry more stuff out. Therefore, it's wise to fill out your roster ASAP. Unfortunately, they don't always obey commands, which is annoying, and they sometimes have poorly developed skill and stat builds. Generally, PC's are much better, and when you get access to cloning, you can clone your best PC's and ditch your NPC's entirely!. However, you may wish to keep a single slot open for an NPC to allow parties to rescue NPC's in plot.

Party Order
Unlike the other Ultima games, in Wasteland, there are no "Front Line" and "Back Line" party member slots not exposed to melee. In the Wasteland, everyone fights, no one quits (and if you won't do your job, I'll feed you to the Scorpitron myself!). However, having party members in the front one or two slots with skills such as Perception Silent Move can allow the party to notice boobytraps and sneak up on guards etc. Characters in the front ranks tend to act sooner in combat, too. To switch up Party Order, type "O".
Character Creation & Attributes
Characters in Wasteland are defined by two major features: Attributes and Skills. Attributes generally determine how effective a character is (and in the case of IQ, whether they have access to) various skills. Skills generally determine what abilities a character has.

Stats and Skills can either grant passive effects (which function automatically when appropriate) or active (must be triggered by the player). To use an active skill, the player must type "U" or click "Use" and then type "S" or "A" or click "Skill" or "Attribute", and then type the appropriate number or click the appropriate skill or state. Attributes can sometimes be used in place of skills or even items to clear obstacles etc.

Rolling Starting Attributes
When one starts at Ranger Center with the starter party, one can venture immediately into the Wasteland and begin adventuring. However, it is probably a good idea to consider creating new characters of your own: the starter party isn't all that great in terms of starting stats. One can easily roll up a better party with a little patience.

Attributes and What They Do
There are seven main attributes: Strength, IQ, Luck, Speed, Agility, Dexterity, Charisma, and Maxcon. Maxcon goes up by 2 points at each level-up. Other stats rise by two points selected by the player at each level up. The highest possible initial stat roll for anything other than Maxcon is 18.

Strength The ability to overpower enemies or to lift, move, and break items. This is important in hand-to-hand combat and in physical tasks such as breaking down doors. Strong characters are more likely to succeed in clearing obstacles or lifting the gates of the Citadel!. Pugilism, Swim

IQ How well a character thinks and solves problems. This is probably the most important attribute because it determines which and how many skills a character may master. Certain skills can only be master by characters with an IQ of a certain level or above. Characters start with skill points equal to their IQ. During the course of the game, you’ll definitely want to raise your IQ. Perception, Demolitions, Medic, Metallurgy, Cryptology, Doctor, Alarm Disarm, Bomb Disarm, Electronics, Clone Tech, Cyborg Tech

Luck Lucky characters tend to find more things and avoid more damage than the unlucky ones. Luck also improves your odds in hand-to-hand combat. Brawling, Gamble

Speed determines order of action in combat rounds. High speed characters will act faster than slower characters and NPC's.

Agility How deftly you move. High agility enhances your acrobatic ability, so you can do things like dodge blows and jump on tables. The higher this value, the better you’ll perform in hand-to-hand combat. Climb, Acrobatics, Silent Movement

Dexterity Ability to master fine movements like picking locks or aiming weapons. Dexterity is very important in combat, and extremely useful in mastering the "thiefly" arts. Picklock, Safecrack, Forgery, Sleight of Hand, Helicopter Pilot, Knife Fight, Knife Throw, Clip Pistol, Rifle, SMG, Assault Rifle, AT Weapon, Energy Weapon

Charisma This attribute lets you know how likable or persuasive a character is. Although it may seem like a trivial trait. it might well make the difference between life and death as you try to convince someone that you’re trustworthy. Charisma also affects how an NPC will react to you when you want to hire him or trade equipment. Confidence, Bureaucracy

Maxcon is basically your Health score. The higher it is, the longer it'll take for your character to be disabled in combat. Dropping to 0 or below renders a character Unconscious or worse (Serious, Critical, Mortal, Comatose, and finally Dead). Characters at Serious or worse condition require the services of a conscious player with the Medic or Doctor skill, or healing from an NPC doctor, or they'll die!

Skills
During character creation in Ranger Center, and when visiting Libraries, a player can spend Skill Points to buy Skills. Purchasing skills wisely is one of the keys to successful play in Wasteland! While it is tempting to spend all of one's skill points immediately at Ranger Center, it's actually best to consider how they're used and how they improve before splurging.

Prioritizing Skills for Efficient Play
Depending on your intended play style, it can be extremely convenient to prioritize buying certain skills first, so they can be used and grow immediately. Brawling is almost a must (and should be bought at Level 2!) for melee fighting, which is the best way to grind XP. Every character should also have Climb, Swim, and Perception skills, which will help avoid environmental damage and traverse obstacles, and a healing skill (Medic or preferably Doctor). Outside of that, it makes sense initially to have some characters specialize into skills based on their Attributes, for maximum effectiveness.

Doctor vs. Medic
Since Doctor is a MUCH better healing skill than Medic, and Medic costs 2 skill points, one may wish to skip Medic, save the skill points, and get Doctor instead! However, with a max starting stat limit of 18 IQ, a character cannot purchase Doctor immediately, and must level up at least twice to purchase it. If you want to quickly build a team of Doctors (and easy healing!) from the get-go, see the Needles Sand Dune Exploit at the end! You may also simply wish to be very cautious early on, and level up one or more characters with 21 IQ and three free skill points and pick it up from the Needles Library as soon as possible.

Arranging Active Skill Priorities for Convenience
Some active skills get used more than others. A good initial priority would be, in order, 1/Picklock, 2/Perception, 3/Doctor or Medic, 4/Electronics, 5/Bomb Disarm, 6/Climb. Other good skills to choose for your initial 9 slots include Alarm Disarm, Safecrack, Confidence, and Metallurgy. To Reorder a character's skills, go to the character's skill menu, then use [Control+R].

Combat Skill Priorities
Combat skills depend greatly on what weapons are used. The highest priority for Melee fighters is Brawling - in fact, as two levels of Brawling costs 3 points to buy, and grants an extra attack in close combat, Brawling is the only skill I recommend players purchase at higher than first level.
Knife Fight will grant extra damage to players armed with Knives; Pugilism will do the same with unarmed characters ("Fists"). Pugilism should be prioritized over Knife Fight if one is focused on maximizing inventory space (don't need to carry a melee weapon); however, one may wish to skip both, and use tools such as Crowbars, Shovels and Pick Axes until Chainsaws and Proton Axes become available. Fighting with Fists or Knives is unlikely to level up Brawling (use a Crowbar, or better yet, a Chainsaw or Proton Ax!).

Ranged combat have skills divided by weapons. Clip pistol is used for the short-range 9mm VP91Z and .45 M1911A1 pistols given at Ranger Center; Rifle is for the M19 Rifle and M17 Carbine; Knife throw is for throwing knives (no, you can't use a regular knife for that!). Demolitions is for grenades or thrown chunks of TNT or Plastic explosives; SMG for the Uzi and Mac-17; Assault rifle for the M1989A1 and AK-97; AT Weapons include Manglers, Sabot Rockets, LAW Rockets and RPG-7's (weak to strong, in that order). Energy weapons (available in Vegas and late-game libraries) is for Laser pistols, carbines, rifles, Ion beamers, and the mighty Meson cannon.
Skills Ranked by IQ Requirement
The following is a listing of all skills and the minimum IQ required to unlock them - there are thirty-four (34) in all. Note that it is only possible to train up to 30 skills on each character, and after buying the 30th skill, that character will no longer be able to use Libraries.

The Attribute that fuels the skill is listed in [brackets]. Skill cost for initial rank is listed in (parentheses). Skill descriptions are verbatim from the original Wasteland manual when available. Spoiler blocks for specific places to use certain skills.

IQ 3
  • Brawling - [Luck] (1) Any fighter who can wander through a full-fledged bar fight without getting much more than a scratch is either very lucky or highly skilled in brawling. The higher your skill in brawling, the more attacks you get per round in hand-to-hand combat.
  • Climb - [Agility] (1) Gives you the ability to climb over fences, up sheer cliff faces, and out of pits.
  • Clip Pistol - [Dexterity](1) A must-have skill since your initial weapon issue will be either the M1911A1 .45 caliber or a VP91Z 9 mm automatic clip pistol. Without this skill, you won’t be very accurate with the weapon or have much luck fixing it if it breaks.
  • Knife Fighting - [Dexterity] (1) When fighting with knives, this give an advantage to a skilled fighter over an unskilled one.
  • Pugilism - [Strength] (1) One of the oldest forms of fighting, it teaches you how to dish out punches as well as avoid them. Handy for those close-up battles where the fists start flying.
  • Rifle - [Dexterity] (1) A good basic skill to have since many of the weapons sold by raiders are serviceable M19 rifles. You’ll rue the day you didn’t pick up this skill as you look helplessly at the rifle you can’t shoot accurately.
  • Swim - [Strength] (1) The desert sands don’t blanket the entire earth. This will come in hand in those spots where you have to swim.

IQ 6
  • Knife Throwing - [Dexterity] (1) A tricky skill that comes in handy when fighting gets heavy. You use up all your ammo and resort to throwing knives.
  • Perception - [IQ] (1) Helps the character find concealed items and notice when things are out of the ordinary. No one should be without it.

IQ 9
  • Assault Rifle - [Dexterity] (1) If you’re using an AK-97 or M1989A1 assault rifle, this skill helps you fire, load, and unjam it quickly. A skill that ranks up there in importance with walking and breathing.
  • AT Weapon - [Dexterity] (1) Helps you recognize and use anti-tank weapons like LAW rockets. A handy skill to have should you encounter something far tougher than your Ranger instructors ever told you about.
  • SMG - [Dexterity] (1) Lets a character control basic submachine guns like the Uzi or Mac 17. May make a big difference when you’re outnumbered three to one by bandits who’ve decided that they want the gold from your teeth.

IQ 10
  • Acrobat - [Agility] (1) This skill for the agile can get you out of a tough situation – like leaping off of bar counters while you’re surrounded by a hostile crowd.
  • Gamble - [Luck] (1) The skill that built Vegas, you’ll do well in all games of chance, and you’ll also be able to spot a crooked game from a mile away.
  • Picklock - [Dexterity] (1) This can get you into places where you want to go, but where other don’t want you to go.
  • Silent Movement - [Agility] (1) This helps you move unnoticed past a guard post; making it tough for enemies to catch up with you.

IQ 11
  • Confidence - [Charisma] (1) For an already charismatic person, good confidence can enable one to talk to a miser out of his fortune. It’s particularly useful for getting information from people who are suspicious of you.

IQ 12
  • Sleight of Hand - [Dexterity] (1) A thieving skill that lets you perform sleight-of-hand tricks – perfect when you need to amaze those you meet.

IQ 13
  • Demolitions - [IQ] (1) Teaches you how much of an explosive substance you can use without blowing yourself up.
  • Forgery - [Dexterity] (1) Helps you recognize or create a forged document. Someday you my just need to whip up a security pass to get by some vigilant guards.

IQ 14
  • Alarm Disarm - [IQ] (1) Trains you to recognize and disable alarms. If you want to get into a place without getting caught, this a good skill to have.
  • Bureaucracy - [Charisma] (1) Even though most of civilization ended with the bomb, an inordinate number of petty bureaucrats managed to survive. This helps you deal with them so you can get when you want.

IQ 15
  • Bomb Disarm - [IQ] (2) Allows you to defuse most explosive devices.
  • Medic - [IQ] (2) A vital skill that lets a character stabilize a badly-wounded comrade so he or she has a chance to recover.
  • Safecrack - [Dexterity] (2) An experience practitioner of this art can open safes sealed even before the holocaust.

IQ 16
  • Cryptology - [IQ] (2) Gives you the talent to encode and decode messages. Useful in helping you determine what a password might be.

IQ 17
  • Metallurgy - [IQ] (2) Increases your ability to spot, identify, and work with some basic metals. Can be used with a Pick Ax at a certain spot at the mine to dig silver (free cash) out of the wall!

IQ 19
  • Helicopter Pilot - [Dexterity](3) Allows you to fly a Helicopter, if you should ever find one. Can only be learned at Sleeper Base by a character with high Dexterity, and used only once when flying from the Citadel to Base Cochise, whereupon the chopper crash-lands on the roof.

IQ 20
  • Electronics - [IQ] (3) Allows you to penetrate some electronically locked doors and tamper with electronic devices. such as at the Mushroom Church in Vegas
  • Toaster Repair - [IQ] (3) Allows you to repair Broken Toasters to find loot inside this works only at the workbench in the Guardian Citadel.

IQ 21
  • Doctor - [IQ] (3) A much better option than Medic skill for healing wounded comrades!

IQ 22
  • Clone Tech - [IQ] (3) Can only be used at Sleeper Base - allows production of Clone Fluid and operation of Cloning pods. Clones take time to "bake"!

IQ 23
  • Energy Weapon - [Dexterity] (3) Allows a character to effectively fire, load, and unjam energy weapons such as Lasers, Ion Beamers and Meson Cannon. A vital skill for the end-game!

IQ 24
  • Cyborg Tech - [IQ] (3) Allows players to tinker with Cyborgs, such as Finster in Darwin Base!
Developing Characters - Raising Skills & Attributes
Wasteland is interesting in that while initial skills must be unlocked with IQ and purchased with Skill points, and higher levels of the skill can be force-purchased with high amounts of skill points, skills are usually boosted by repetitive use. To get higher Doctor skill, for example, heal a lot of wounded party members! Likewise, to raise Energy Weapons, SMG or Assault Rifle, burning through power packs and clips on Full Auto does the trick! Leveling up seems to happen more frequently when attempting difficult tasks - attacking the Scorpitron with a VP91Z, for example, is a good way to level up Clip pistol... if one can survive long enough to get into range!

Skill / Attribute Builds - Making the Most of Your Stats
Recognizing what Attributes feed into what Skills helps you know what characters will fit best into what roles. High IQ is a must for all characters, if you want them to be able to use and develop a lot of skills (and why wouldn't you?), but paying attention to what other stats each character is talented in will help you determine where it's smartest to focus your precious skill points when building characters. Some basic stat and build combos follow:

Melee Fighter / Bruiser - Strength, Agility, Luck, and Speed (in that order) - 2 ranks of Brawling, Knife Fight / Pugilism optional. Keep Shovel and Crowbar in inventory for clearing obstacles (and bashing heads)!
Point Man / Rifleman - Dexterity, Luck, Speed, Agility (in that order) - Picklock, Medic/Doctor, Electronics, Ranged Weapon skills (optional, but recommended). Arm with appropriate ranged weapons.
Charmer / Rogue - Luck, Charisma, Speed, Agility or Dexterity (in that order) - Gamble, Confidence. Pump up Luck well past 20 and use this character to open all Loot Bags initially. If higher Agility than Dexterity, equip and train for melee fighting, and for ranged combat / healing if vice versa.


Melee Grinding For Victory
It is almost never necessary to raise a skill past 1st level by spending skill points. The only one I'd recommend is Brawling, and doing that to two points early on. This allows the character to make two attacks each round in Melee, not just one, thereby effectively doubling the character (or party's!) effectiveness at close range. As melee kills grant double experience points, it is almost mandatory to "grind" XP via fighting by using melee weapons, and developing Brawling skill. Relying on melee can be trying when engaged at range by robots etc, but the XP rewards and cash savings are worth it!

How to Level Brawling Skill
When grinding in melee combat, Brawling skill goes up extremely quickly on characters with high Strength and Luck. A score of at least 20 (30 is much better!) in both will help greatly to push Brawling quickly. Also, it is important to ensure the character is equipped with a weapon that is not a Knife or Fists - using these will level Knife Fight or Pugilism, respectively, and not Brawling. Using a Crowbar, Pick Ax, Shovel, Sledgehammer, Chainsaw, or Proton Ax will develop Brawling.

One trick that can be quite effective in the mid game is to purchase Spears ($35 each) and give them to characters that wish to level Brawling (preferably Strong, Lucky ones!). Go to the Guardian Citadel, and while the party is armed with melee weapons, stand two spaces away from Brother Goliath (the Guardian who stands in front of the gates) and equip the character you want to level Brawling with a Spear. Combat should begin immediately, have everyone but that character Evade, and have him attack. Spears level Brawling, oddly enough, and it is highly unlikely that you will hurt or kill Brother Goliath with a spear. Rinse and repeat until Brawling levels up! You can do the same thing with other weak weapons such as VP91Z's for Clip Pistol, etc.

Leveling Up Passive Skills
Passive skills, such as Climb, Swim, Acrobatics, Gamble, etc can be leveled by engaging in these activities - to level Swim, go jump in the river (and take your lumps!). To level Climb and Acrobatics, try climbing the sand dunes in Needles! To level Gamble, play slot machines, gamble at tables, etc. In all cases, try doing this on characters with high scores in the right attributes (Agility for Climb / Acrobatics, Strength for Swim, Luck for Gamble, etc) for faster level-ups!

Leveling Up Combat Skills
Firing weapons of different types will lead to better skill using them - the more bullets fired (and the tougher the enemy), the more likely your skill-ups. Thus, automatic weapons (SMG's, Assault Rifles, Energy Weapons) tend to level up faster, as you'll be firing bursts and emptying full mags in single combat rounds. However, again, high Agility will lead to more success and faster (and higher) skill leveling. In turn, higher skill will result in more damage inflicted, and less likelihood of your weapons jamming (and being more likely to clear a jam reliably!).

Leveling Up Ranged Combat Skills
By far the easiest way to level up ranged combat skills, especially with weak weapons like Clip Pistols, is to take on Brother Goliath at the gates to the Guardian Citadel. However, as this involves being fired on from the parapets above, which must be cleared first to do this safely, this can generally only be farmed in the mid-to-late game. However, as Brother Goliath is strictly melee, and does not move, one can use him for "target practice" with VP91Z's or M17 Carbines quite easily, leveling skill rapidly without killing or possibly even hurting him.

Leveling Up Doctor / Medic
To level healing skills you will need to have opportunities to use them. This usually means entering lots of tough fights and taking Serious or worse damage, and healing your wounded party members. However, there are more cynical means that can be used to provide a steady stream of healing opportunities. As these methods are by no means certain to rescue your characters (especially with the weaker Medic skill!), it is best to Save the game before attempting this, and it's best to use a throwaway NPC as a "training dummy", just in case!

The simplest way to do this is give the weak NPC inadequate armor and walk into Vegas and get into a few fights. After they've been blasted to Serious or worse condition, leave the city and go into the desert. Alternately, you can remove the hapless NPC's Canteen and go into the hottest part of the desert and wait for the heat to cause Serious or worse damage. Once the NPC is deteriorating, you can then attempt to heal them and raise your skill level. As Doctor is more effective than Medic at improving characters in worse condition (Mortal, Comatose), if leveling Doctor skill, it is recommended to wait until the character deteriorates to at least Mortal condition before attempting healing. This will make the attempt more difficult and will increase the chances of success leading to a skill-up.

It is strongly recommended to level up at least two of your PCs (if not all of them!) in Doctor skill before heading into the more serious end-game content. This will greatly improve your chances of survival, as it is likely that multiple party members will be seriously wounded, and relying on a single Medic can be very, very risky! If you do find yourself with a sole highly trained medic, make sure they're wearing your best armor to increase your party's chances of survival.
Items, Weapons and Armor
Wasteland has a surprisingly short repertoire of weapons and armor, compared to some of the Ultima-style games. However, there's enough variety to give the game a good bit of flavor.

Armor
Armor works by absorbing damage - some attacks are easier to absorb than others. Weaker armors from earlier parts of the game are less likely to stand up to bursts of fire from end-game enemies; higher level armor will generally make characters nigh-invulnerable in earlier areas. Thus, armor upgrades are some of the most important upgrades in the game. Worth noting, some armors (Robes) will let your party pass without combat in certain parts of the Temple of Blood, but only if the entire party is wearing them!

Armor types (and AC) from weakest to strongest, are as follows:
  • Robes (AC 1)
  • Leather Jacket (AC 1)
  • Bulletproof Shirt (AC 2)
  • Kevlar Vest (AC 4)
  • Radiation Suit (AC 5)
  • Kevlar Suit (AC 6)
  • Pseudo-Chitin Armor (AC 10)
  • Power Armor (AC 14)

Ranged Weapons
Ranged Weapons are divided into eight classes with attendant skills: Throwing Knives, Demolitions, Clip pistol, Rifle, SMG, Assault Rifle, AT Weapon, Energy weapon. A full list of these weapons and their attendant skills are as follows:
  • Spear - Brawling
  • Throwing Knife - Knife Throw
  • Grenade - Demolitions
  • TNT - Demolitions
  • Plastic explosive - Demolitions
  • Flamethrower - no related skill!
  • VP917 9mm pistol - Clip pistol
  • M1911A1 45 pistol - Clip pistol
  • M17 Carbine - Rifle
  • M19 Rifle - Carbine
  • Uzi SMG Mark 27 - SMG
  • Mac 17 SMG - SMG
  • AK 97 assault rifle - Assault rifle
  • M1989A1 NATO assault rifle - Assault rifle
  • Mangler - AT weapon
  • Sabot Rocket - AT weapon
  • LAW Rocket - AT weapon
  • RPG-7 - AT weapon
  • Laser pistol - Energy weapon
  • Laser carbine - Energy weapon
  • Laser rifle - Energy weapon
  • Ion Beamer - Energy weapon
  • Meson Cannon - Energy weapon

Melee Weapons
Melee weapons are varied throughout the game. Some are more powerful than others; most use the Brawling skill. Needless to say, the Proton Ax is the most devastating melee weapon in the game - only two exist per playthrough. A listing of melee weapons follows:
  • Fists - Pugilism (1d6)
  • Knife - Knife fight (3d6)
  • Ax - Brawling (3d6)
  • Chainsaw - Brawling (6d6)
  • Club - Brawling (3d6)
  • Crowbar - Brawling (3d6)
  • Pick Ax - Brawling (3d6)
  • Proton Ax - Brawling (14d6)
  • Shovel - Brawling (3d6)
  • Sledgehammer - Brawling (3d6)

Useful Items Not to be Without
Much like a proper interstellar hitchhiker wouldn't be caught dead without a towel, a Desert Ranger always, always should have his or her canteen! Likewise, a Geiger Counter (one per party is sufficient) and several coils of Rope to climb walls, traverse pits and scale buildings (and packs of TNT and Plastic Explosive to blast one's way into places!) are wonderful things to have. Crowbars can be used to pry things open; Shovels can be used for digging and clearing and bashing through obstacles (as can sledgehammers and raw Strength sometimes!). You can even mine silver for free cash in one location in the Mines using a Pick Ax!
Combat - Maximizing Your Potential & Gains
Fighting is required for progression and is probably the fastest and best way to level your characters. Enemies come in groups, at different ranges, sometimes spread out. Early on, enemies will tend to attack in melee range; later, they'll often require you to run to them if you want to engage them close up (and they'll shoot at you each round you spend running). Thus, one may wish to use melee when "grinding" for XP, and use ranged weapons (and lots of full-auto) when pushing through "dungeons" (such as the Sewers under Las Vegas!).

Combat Choices & Tactics
In combat, each character will have the choice to Run, Use, Hire, Evade, Attack, Weapon, or Load/unjam. Each character gets to choose what they will do at the beginning of each combat round (assuming they're conscious); after each decides, the combat round is played out, and you get to decide for each character again.

Run: Running does not necessarily mean "running away", though one can attempt that if one wishes. Running can be done either individually (disbanding that party member) or as a Party. Choosing to run as a Party pretty much negates all the other moves everybody else in the party does - you can't have your melee character move the party, and everyone else shoot as they are carried along. However, you CAN send your melee guy charging out alone while the rest blaze away with guns - just don't be surprised if he gets badly wounded and needs medical attention, and your medic is several squares away!

Use: Pretty much the same thing as Using an item outside of combat, but while enemies are trying to kill you.

Hire: Only works on special hireable NPC's. Don't waste time trying to tame Wasteland Mongrels etc with it.

Evade: Attempt to avoid damage this round. Use if out of ammo, out of melee range, and the rest of your party is healthy and shooting.

Attack: If equipped with melee weapons, a character will only have the option to Attack groups that are in adjacent squares; those with ranged weapons may attempt to attack any group in line of sight and range. If equipped with an automatic weapon with sufficient ammo, will include the options for Single, Burst, or Full Auto fire.

Weapon: Equips a new weapon from your inventory. Mainly used after expending an AT weapon or when running out of ammo and switching weapons.

Load/unjam: Use to reload an empty gun, or unjam one that has jammed (ammo counter has white highlight).

Combat Tips
Focus auto-fire and explosive attacks like grenades and TNT on big groups of enemies, and save your armor-piercing weapons like AT weapons and Energy weapons on powerful robots. Power packs are limited in number and should be carefully hoarded, using single shots and bursts where appropriate. Weak enemies are most efficiently dispatched with melee weapons, saving ammo.
Spray and pray to your hearts content with SMG's and Assault Rifles, though - plenty of clips to be had out there!

Pay attention to your health and take "breaks" if possible to rest and heal up in the desert if possible. If you encounter a powerful group of enemies that devastate your party (wandering into Vegas with inadequate armor for instance), run away if possible and use your Doctor or Medic skills to heal your party to Unconscious, then go to the desert and rest. Remember: armor is life - if you're getting pounded in a new zone, try to find better armor before going back!
Useless Skills and Items
You may be shocked to find out that some items in Wasteland are best used as vendor trash. Reflexively picking up items, when there are no ways to store items that merchants don't want (and you're basically re-buying them from merchants anyway), it can be best to just know what to skip anyway unless you're scrounging for things to sell to Crazy Wulfgang for cash (and there are faster ways!).

Likewise, certain Skills don't get a lot of use in the game, and may have been intended to be used in more robust plot lines that may not have been fully developed by the time the game had to release. Some may only be used once or twice in the entire game, and there may be other options to do the same thing without having to spend precious skill points on it! Still, in later replays, one might want to spend the points and try doing it that way just for the fun of it.

Junk Items
  • Book - Certain books may contain Paragraph entries; otherwise, just sell 'em.
  • Clay Pot - No use, just sell.
  • Hand Mirror - No use, just sell.
  • Jewelry - Certain pieces may contain Paragraph entries; otherwise, just sell 'em.
  • Map - Certain maps may contain Paragraph entries; otherwise, just sell 'em.
  • Toaster - Once you've repaired the Broken Toaster and gotten the loot out, the toaster serves no purpose. Sell or Drop.

One-Use or Seldom-Used Items
Match - Can be used upon entering the Cave in Highpool to make the vicious dog weaker. Can also be used immediately when entering the Root Cellar in the Agricultural Station to find additional items in the boxes. Otherwise, useless.
Jug - Only really used to make Clone Fluid with the clone fluid machine in the Sleeper Base... and there are a few in the storeroom for you to use (you shouldn't need more than two, really). Otherwise useless.

Useless (or Seldom-Used) Combat Skills
  • Clip Pistol - I know the manual says it's "essential" - but melee is better early on anyway for farming experience. You'll outgrow your handguns so fast you won't even miss this.
  • Knife Fight - While characters with high Knife Fight can be impressive in late game with blades, it's much better to focus on Brawling early on. In the later game, Chainsaws and the Proton Ax make much better melee weapon choices anyway.
  • Pugilism - Slightly better than Knife Fight, since you can save an inventory slot and duke it out with your bare Fists. Brawling is still way more important.
  • Rifle - Much like with Clip Pistol, this skill is outgrown quickly.
  • Knife Throw - An almost-useless skill. Throwing Knives are weak weapons and use up lots of inventory slots, much like Grenades and TNT, but only hit single targets and don't do much damage. Just sell these if you find them.
  • AT Weapon - You might get away with skipping this one as energy weapons start becoming available right about when AT weapons start becoming desirable. AT Weapons are also slow to use in combat, as you must re-arm between shots, meaning you fire only once every other round.
  • SMG - Debatable re: whether to skip this one in favor of Assault Rifle, as both types of weapons become available almost at the same time (and Assault Rifles are better).

Useless (or Seldom-Used) Environmental Skills
  • Bureaucracy - No known use (possibly the clerk in Quartz?)
  • Forgery - Can be used to break through the Webs of Lies in Finster's Mind Maze (but so can using one's IQ attribute). Otherwise useless.
  • Sleight of Hand - Can be used to calm down the angry crowd in Scott's Bar in Quartz.
  • Cryptology - Can be used to crack a code in Base Cochise, but otherwise not necessary.
  • Metallurgy - Almost unused - can be used to ID the silver vein in the Mines (use Pick Ax repeatedly for free money). Can take a while to mine out enough to be worthwhile, and doing so will trigger a lot of fights as you try to get out.
  • Toaster Repair - Only used in the Guardian Citadel - items from Broken Toasters can be found elsewhere (though there are some power packs in there which can be handy).
  • Helicopter Pilot - Only used once, kills some enemies that one might want to kill normally (and get the XP from) instead.
  • Alarm Disarm - Can be useful to stop enemies from appearing in certain areas... but what's the fun in that?
NPC's for Hire by Location
Highpool
Jackie - ST 8, IQ 10, LK 8, SP 8, AG 8, DX 8, CH 12, SKP 3, MAXCON 10 Found in the Cave, in the back, behind some rocks (you will need to use the Climb skill). There is a vicious dog in the cave that will attack you: leave the loot (Jewelry) unless you want to fight Bobby and bring down the wrath of the Red Ryder!!!

Quartz
Felicia - ST 12, IQ 13, LK 13, SP 10, AG 9, DX 11, CH 13, SKP 3, MAXCON 16 Held hostage in Ugly's Hideout by Ugly John himself. Has a bomb strapped to her - can be disarmed by a character with the Bomb Disarm skill (and a bit of luck!), or one can get the disarm code by allowing Ugly John to escape.
Mayor Pedros - ST 16, IQ 14, LK 12, SP 10, AG 12, DX 12, CH 13, SKP 4, MAXCON 18 Felicia's husband. Imprisoned in the Courthouse.
Dan Citrine - ST 11, IQ 12, LK 11, SP 13, AG 10, DX 12, CH 12, SKP 4, MAXCON 16 Imprisoned at the Courthouse's 2nd floor. If Dan is in your party when you open the cells, his dad will give you $1,000 when he flees.
Ace - ST 17, IQ 18, LK 20, SP 13, AG 14, DX 15, CH 13, SKP 6, MAXCON 30 Imprisoned in the basement of Ugly's Hideout (trapdoor under the bar). Owner of the disabled Jeep near Quartz (will drive you to Needles before it breaks down). Works for Faran Brygo in Las Vegas.

Needles
Christina - ST 17, IQ 15, LK 17, SP 13, AG 14, DX 17, CH 13, SKP 3, MAXCON 30 A tough mercenary woman found in Downtown Needles. Hire her early on for a bit of additional muscle for the party, or just to get her Rad Suit and Uzi if you're hard up for weapons and armor but don't want an NPC!
Ralf - ST 12, IQ 8, LK 14, SP 9, AG 12, DX 12, CH 6, SKP 3, MAXCON 18 A hobo held prisoner in the Temple of Blood, strapped to a table with a laser beam about to cut him in half (no, Mr. Bond, I expect you to die)!
Mort - ST 14, IQ 15, LK 18, SP 12, AG 13, DX 14, CH 19, SKP 5, MAXCON 31 A city slicker found in a cell in the Needles Police Station.

Las Vegas
Covenant - ST 29, IQ 18, LK 15, SP 15, AG 17, DX 20, CH 14, SKP 4, MAXCON 40 One of the better early-game NPC combatants, up there with Ace and Christina.
Dr. Mike Scott - ST 16, IQ 21, LK 13, SP 9, AG 10, DX 14, CH 12, SKP 2, MAXCON 35 Found in the Mushroom Temple near the infirmary. Starts with level 5 Doctor skill but not much else.

Darwin Township
Metal Maniac - ST 19, IQ 20, LK 18, SP 17, AG 19, DX 20, CH 18, SKP 4, MAXCON 40 Needs to be cured of poisoning by Antivenom (use a Chemical and a Fruit on the chemistry bench in Darwin Township).
Mad Dog Fargo - ST 18, IQ 19, LK 19, SP 16, AG 19, DX 20, CH 18, SKP 4, MAXCON 38 Needs to be cured of poisoning by Antivenom (use a Chemical and a Fruit on the chemistry bench in Darwin Township).

Guardian Citadel
Redhawk - ST 12, IQ 18, LK 12, SP 12, AG 12, DX 20, CH 15, SKP 0, MAXCON 60

Base Cochise
VAX - Built by a robot factory assembly line in the lower levels of Base Cochise (choose the "Protocol Droid" option. Extremely high stats, starts at "Private" rank and will level up extremely quickly. Comes with Power Armor, Pseudo-Chitin Armor a Laser Rifle, and a large supply of Power Packs - can be worth hiring him just to get the items, even if you prefer clones to NPC's.

Sleeper Base - Cloning PC's
The Sleeper Base gives one the ability to Clone PC's. You will need to use a Jug in the clone fluid machine, use the Clone Tech skill on it to generate the fluid, then give the fluid to a PC that you'd like to clone, disband them, and walk them into one of the open Clone Chambers. This will start the clone "baking" and after a certain amount of time you will get a new party member with the same Attributes and Skills as the original (minus inventory items).

Since Clones are PC's (and thus can be micro-managed and never refuse to trade items or otherwise obey orders), they can be far more reliable than other players. Better still, since you can choose your best characters to clone, you can really make the most of available party slots. It can be useful to leave one of the seven slots in your roster open, as NPC's can be important for the plot (though it's really not necessary simply to complete the game).

Pushing Limits - Building Up a Main Character as a "Clone Template"
Since Clones have the same stats as the character that was cloned, it can be very useful to focus leveling on the character to be cloned before doing it. Probably the easiest way to do this is to acquire the Power Armor from the Guardian Citadel's vault, as well as a Proton Ax (either from the special building in Vegas or from the Guardian jailer). Equip the best armor you can get!

Then, go to the hellscape area in Darwin Base and grind random encounters, having your "template" character Attack in melee with the Proton Ax, and all others Evade. This will ensure that all kills (and experience) go to your template character, while the rest are less likely to be hurt. If you build up IQ (and thus free Skill Points) on the character and then clone them, the free skill points will be passed to the clones who can then learn different skills! Focused grinding in this way will also produce a character (and clones!) with high MAXCON.
Exploit - "Machete Order" - Accessing Advanced Items Early
This entire section should be considered SPOILER content, so text will be hidden to preserve surprises. However, if you're having trouble with some of the early fights while leveling up new characters, these tips can be invaluable.

Needles - Doctor Skill, Christina, Early Automatic Weapons
Your first stop in Needles should be the Library, after gaining 21 IQ and 3 free skill points to spend on as many PC's as possible to get Doctor skill. If you don't have this yet, go to the Sand Dunes or Quartz Courthouse Roof and level up until you have 21 IQ and 3 free skill points (see the Exploits section for more details). You may also wish to level up Dexterity on your PC with the highest Picklock skill (and hopefully also Electronics!) to help penetrate doors more easily.

Your next stop should be Downtown Needles on the east side. Find the tough-looking warrior woman (blue-shirt NPC), type "E" for Encounter, and Hire her. CHRISTINA is a badass and comes fully equipped with an Uzi and Rad Suit. Equip her with a brawling weapon such as a Crowbar, Shovel or Ax to start with, unless you want her to rip clips and slaughter your enemies (and hog all the XP)! She also is quite a capable melee fighter, with good starting Strength and 3 points in Brawling. You may eventually outgrow her, but she will be a solid NPC while she's with you.

If you're after automatic weapons, you have two major choices: the Waste Pit and the Police Station. If taking the former, you will want to bring a Crowbar and a strong character, as well as a few packs of TNT (try picking locks or using the crowbar on doors before blowing them with TNT). It is best to attempt this zone at night, so you can see the radioactive squares (there aren't many, thankfully). When inside, follow the halls east, then north, then west to the next level down. Trash worms will attack you, but usually aren't that dangerous. However, there is a Pit Ghoul below who is significantly tougher (and worth a lot of XP)! There is radiation in the Pit Ghoul room; to the south are some doors to blast through, and cabinets containing a couple of M1989A1 NATO Assault rifles.

"Now I have a machine gun - Ho Ho Ho!" ~ John McClane

The Police Station also contains some automatics, mainly Uzi's and Mac 17's in the Armory. You can pick the lock, but this will activate a robot turret that does some serious damage to your party, and can be difficult to kill. You can manually deactivate the robot and open the door to the armory by activating a switch in another room on the south side of the building. There are also rooms full of Cyborg Policemen for you to slaughter if you like; however, they tend to be rather tough at lower levels, and can be bypassed entirely.

Vegas - More Automatics, Rad Suits, Dr. Mike, Energy Weapons Skill
So you want more machine guns for your team, and those Bulletproof Shirts ain't cutting it no more? OK, warm up your Picklock skill (or bring plenty of TNT) and head for Vegas. You want to enter on the center east (right) tile to be close to the Mushroom Church. There will be two fixed encounters to clear - a group of Warroid Mark 2's (tough!) and a Rad Angel. You can Run from the robots - stick to the east edge of the map and Run north each combat round until they are out of range. They may shoot you up some, but they won't give chase, and at extreme range they should miss more often. You will need to fight the Radangel but she's not that insanely tough. Enter the Church and use the password "NRC" and tell them you've brought them the BLOODSTAFF to gain entry.

Once inside the Church, you will see two halls to the east and west, and a big room in the center with two smaller rooms next to it. The room on the left contains Assault Rifles and other weapons; the room on the right contains Rad Suits. You can blast the doors with TNT, or use Picklock and Electronics to get by. I prefer to use skills vs. blasting, as these doors are tough and give good opportunities for leveling up these skills. The hall on the left has a lot of locked rooms with Church NPC's (good Picklock practice); the hall on the right has the Library and Dr. Mike Scott (hireable NPC!). Dr. Mike is a decent NPC and a great healer, but he's not all that combat-oriented. Still, he can level up and learn how to fight reasonably well with some training.

Last but not least is the Mushroom Church's library - if you have high IQ and three free skill points, you can learn Energy Weapons skill here. This is invaluable to do before venturing into the Sewers or any later-game content, as Laser weapons begin appearing. You can use Lasers without Energy weapon skill, but it's not recommended - you'll waste tons of Power Packs for little effect. Stick to what your characters know!

Darwin Township's Black Market - Chainsaws and Kevlar and Guns (Oh My)!
In the northeast (upper right) corner of the world map, up where the big river starts, there is a mountain range surrounded by a thick belt of radiation to the south. Approaching from the south without Rad Suits is a quick way to expensive Radiation Poisoning treatments or character deaths; however, the base can be approached safely from the north without Rad Suits (cross the river via the bridge and walk along the east edge of the map through the valley between the mountains. In the middle is Darwin Township.

In the southwest corner of town (lower left) there is a small building that contains the Black Market. You will be asked for a password - you can either tell them "CRETIAN", or fail it intentionally - on the 2nd fail, you will be attacked by two Biker Scum with Uzis (which can be looted and sold). Kill them and belly up to the counter - this is the best weapon store in the game (they do not buy or sell other items). You can purchase armor up to and including Kevlar Suits and Rad Suits here, as well as SMG's, Assault Rifles, AT weapons (in limited supply) and most importantly, Chainsaws. I recommend purchasing a full set of Chainsaws for your team for melee combat, and the best armor you can afford.

Storming The Guardian Citadel - Power Armor, Proton Ax, Advanced Energy Weapons

The Guardian Citadel has the most powerful armor and weapons available - however, some of the enemies can be extremely challenging, especially if one has not unlocked the Sleeper Base and acquired the Pseudo-Chitin Armor! Ensure the party has a small supply of TNT and the best available armor equipped!

Gaining Entry / Energy Weapons: The walls of the parapet left of Brother Goliath can be tunneled through with TNT. Advanced energy weapons can be found to the left of the main entry hall: there is an Ion Beamer on one of the Guardians, and the vault within has a Meson Cannon, as well as numerous power packs and other items. Beware - it is boobytrapped!

2nd Area: Proton Ax & Entry to Inner Sanctum / Power Armor Vault - Taking the door on the right (north of the museum), you'll find a hallway. Go north and right for the Proton Ax, the Guardian Warden has it. To get into the inner sanctum, you'll need to get to the door to the left of the north stairs, then use a character with a very high Strength attribute on the crank to open the portcullis. Go upstairs and use the terminal: the password is "ROSEBUD" - inside are 5 Power Armor suits!
Exploits (for Wascally Wasteland Wabbits)
OK, OK - it's an old game. There are exploits in it you could drive a truck through - there, I said it! Since you're here anyway, I'll cut to the chase and get to the goodies.

The Basic of Basics - Character Creation Items = Infinite Cash
So you don't like Hell Razor, Angela Deth, Thrasher and Snake Vargas? Trade all their goods to a couple of them, delete two of the others, and make a single PC that you want to keep, rolling up good stats and giving him a proper name. Then create a fresh PC (don't bother to roll up good stats on this one, give him a trash name). Go to Quartz (2x3 town to the west), in the SW (lower left) corner, is the Emporium. Sell all your goods on the other two you don't like, and your trash PC, then Pool the money on your "keeper" character, then go back to Ranger Center and delete the others. Create new trash characters and repeat until you have at least $2000 cash (enough to buy Bulletproof Shirts for your entire party to start with); more if you want rifles etc. Both can be purchased at the Emporium or at Leroy's Arms Counter in Needles.

Quartz Courthouse Roof = Free Early XP
In Quartz, there is an alleyway on the east end of town which appears like a black square going between two small buildings near the Courthouse. Walk onto this square and you will find yourself in a small square room. When examining the south wall text prompts you that a rope could be used - using Rope towards this wall will allow you to scale it and attack the rooftop guard. Once cleared, there are glass windows on the east wall, which you can walk along. This will not only level up Perception skill to 3, but any character with Perception will gain a small amount of XP for each step along the glass wall. Thus, by simply walking north and south along this glass wall, you can gain XP for free. Careful, though - breaking through the glass, or clearing out the Courthouse, will end this freebie!

Needles Sand Hills = Free Early XP
One trick to quickly gain a few initial levels and do things like access the Doctor skill early (and thus put Doctor conveniently high on one's skill menu) is to go to the SE (lower right) corner of Needles (2nd town, 4 squares, somewhat north, west of the river) after having purchased the Climb and/or Acrobatics skill, and attempting to cross the sand dunes. They will push you back, with a message going "oops!" - occasionally your Climb and Acrobatics skills will also level up. There will also be random combats with minor enemies as you do so: Brass Jerks and Leather Jerks are the toughest. Each move against the dunes gains a tiny amount of XP for each character with the Climb and/or Acrobatics skills, and combined with the XP from the fights will allow you to level up quickly. Put points into IQ skill until IQ is 21 or higher, then go to the Library (go to the east / right edge of the map and go north, then look inside the big crumbled wall). Up there is the library, the police station, the infirmary, and the ammo bunker.
Passwords & Keys
So you missed a clue or paragraph entry, or forgot to write down the password? Don't know what the heck that item is for? The following may help you (spoiler blocks enabled!)

Passwords
Quartz
  • Scott's Bar - Tell Ellen "URABUTLN" and she will give you the passkey to her daughter Laurie's room and tell you "URAQT2"
  • Stagecoach Inn - Tell Laurie either of the passwords for Ellen, above, and she will give you ammo and the Courthouse password.
  • Courthouse - The password is "MUERTE"
  • Ugly's Hideout - The password is "KAPUT"

Needles
  • Downtown - The password to the gambling hall (the "Acapulco Club") is ACAPULCO.
  • Temple of Blood - The launch code to exit is "MOTEKIM"

Las Vegas
  • Mushroom Church - The entry password is "NRC" - say you brought the "BLOODSTAFF" as a gift, and they will let you in.

Darwin Township
  • Black Market - The password is "CRETIAN"
  • Darwin Base - The password is "PROTEUS".

Savage Village
  • The password to enter is "REDHAWK"

Guardian Temple
  • The password to the vault is "ROSEBUD"

Key / Quest Items
A listing of all keys and quest items, and the locations where they can be used. Spoiler blocks explaining use for those who need additional hints!
Highpool / Needles
  • Engine This can be acquired (or bought) from the Rail Nomads, and is used to repair either the Pump in Highpool or Ace's Jeep in Needles. Fixing the pump in Highpool rewards the character with a stash of goods, though it's questionable whether it's worth the price! Tip - always let your character with the highest luck collect rewards and loot first!

Quartz
  • Passkey Lets you into the office in the Stagecoach Inn. Probably better to pick the locks for skill practice, though.
  • Room key 18 Get it from Ellen at Scott's Bar by using the password (see above). Use it to unlock Room 18 (Laurie's Room) at the Stagecoach Inn. Give Laurie the password again and get the stash!
  • Visa Card Get it from the Brakeman at the Rail Nomads, and bring it to Head Crusher at Scott's Bar in Quartz. He eats them with peanut butter. Where is he getting peanut butter in the Wasteland? Don't know, but shiz is weird, yo.

Needles
  • Ruby ringFound on the dead Mushroom Priest. Begins the questline with the Temple of Blood and Bloodstaff

Las Vegas Mushroom Temple / Sewers
  • Android Head Needed to repair Max - found in the 2nd half of the sewers, where you have to tunnel north through the walls, on the left side.
  • Bloodstaff Found on the Blood Priest in the bottom of the temple in Needles. Can be used as a gift for the High Priestess of the Mushroom Temple to open the way to the Sewers. A more efficient method is simply to get the Sonic Key from one of the groups of robots in Vegas.
  • Fusion Cell Needed to repair Max - found in the 1st half of the sewers, after crossing the river (use a Rope!) on the upper right side.
  • Onyx Ring Faran Brygo's ring. Turn in to Fat Freddy as proof you've killed him.
  • Power Converter Needed to repair Max - found in the 1st half of the sewers, in the room immediately to your right. No need to go to Tosche Station after all...
  • Rom Board Needed to repair Max - two are found in the 2nd half of the sewers, one in the foyer room where the android lab is, and another in the android lab itself.
  • Servo Motor Needed to repair Max - two are found in the 1st half of the sewers (in the 1st dead-end hall on the left, and to the left after the big pit); the other two are found in the 2nd half (near the entrance to the android lab area and south of the foyer room in the android lab area).
  • Sonic Key Used to open secret doors to the Sewers in the Mushroom Temple and the Android Lab Door in the Sewers. Can be found on the Cyborg Commandos or other robots in Vegas, or otherwise dug up on the Golf Course with a Shovel.

Sleeper Base / Darwin
  • Antitoxin
  • Chemical
  • Clone Fluid
  • Finster Head
  • Jug
  • Secpass 1
  • Secpass 3
  • Secpass 7
  • Secpass A
  • Secpass B

Guardian Citadel / Base Cochise
  • Blackstar Key
  • Grazer Bat Fetish
  • Nova Key
  • Pulsar Key
  • Quasar Key
Errata
This guide was relatively quickly churned out to get it in the hands of players immediately, but will be refined in the future as I work through this playthrough. Expect some updates as I go!

Intro Text from Wasteland Manual
The following is an excerpt from The History of the Desert Rangers, The Early Years, by Karl Allard, 2087, Allard Press, Ranger Center Hardbound pp. 293, $20 gold.

Tensions grew with the coming of 1998. The United States’ Citadel Starstation was slated to be fully operational by March, Soviet charges that the space station was merely a military launching platform alarmed a number of nonaligned nations. The right wing governments in the South and Central Americas, many of them set up by the U.S. during the Drug Wars (1987–1993), pledged their support to the U.S. The NATO nations, including the new African members also declared their alliance with the U.S. That move forced most of the remaining neutral powers to join the Soviet protest. In six short weeks, only Switzerland, Sweden, and Ireland continued to declare themselves neutral nations.

Two weeks before Citadel was due for full operation, the station transmitted a distress signal. Immediately after the message was sent, most of the satellites orbiting the planet were swept clean from the sky, leaving the great powers blind. In military panic, each sent 90 percent of their nuclear arsenals skyward. Although the destruction was tremendous, it was not complete. Pockets of civilization remained, some even oblivious to the military exchange.

On the same day that the U.S. and Soviet Union were attempting to extinguish each other, a company of U.S. Army Engineers were in the southwestern deserts building transportation bridges over dry riverbeds. They worked deep in the inhospitable desert valleys, surrounded by a number of survivalist communities.

Located directly south of their position on that day was a newly-constructed federal prison. In addition to housing the nation’s criminals condemned to death, the prison contained light industrial manufacturing facilities.

Shortly after the nuclear attack began, the Engineers, seeking shelter, took over the federal prison and expelled the prisoners into the desolate desert to complete their sentences. As the weeks passed, they invited the nearby survivalist communities to join them and to help them build a new society. Because of each communities’ suspicions towards one another, times were difficult at first. But as time nurtured trust, this settlement – which came to be known as Ranger Center – grew to be one of the strongest outposts. Ranger Center even proved powerful enough to repel the hands of rancorous criminals who repeatedly attacked in attempts to reclaim what was once “rightfully theirs.”

The citizens of Ranger Center, after first believing that they were the only ones who survived the nuclear maelstrom, soon realized that communities beyond the desert’s grip had also survived, Because they had such success in constructing a new community, they felt compelled to help other survivors rebuild and live in peace.

Toward this end, the Desert Rangers, in the great tradition of the Texas and Arizona Rangers a century before, were born.
9 Comments
The Yar May 3, 2024 @ 11:30am 
There a couple of very powerful exploits not listed here that I think exist in all versions of the game. Also pugilism is by far the most powerful skill for combat, but only after leveling it up pretty high.
JRockSmooth Apr 14, 2024 @ 7:58pm 
530k, I was incorrect. 2nd Lieutenant now.
JRockSmooth Apr 14, 2024 @ 3:45pm 
If you take a fresh party to the south end of the main map river, turn north and constantly fail to swim, put something on your UP key, and just let them sit at UNC/1hp for a few hours.

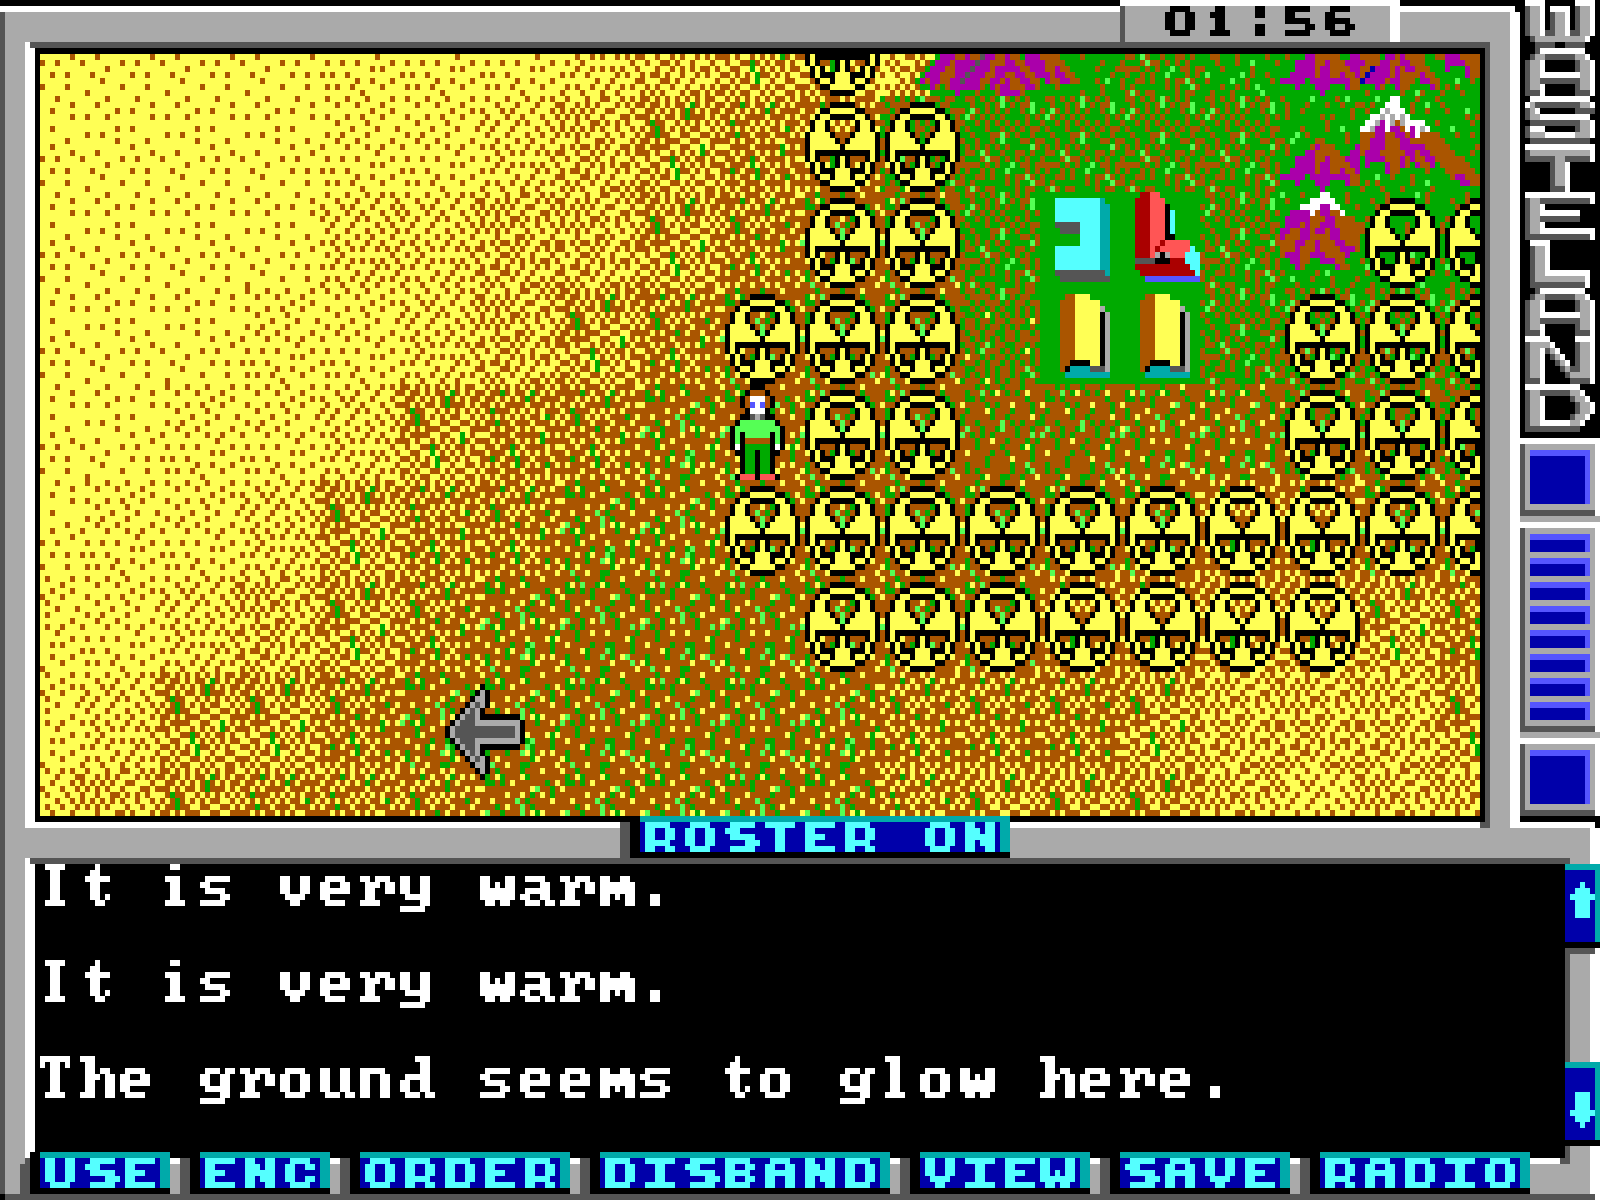
I am at 53k exp for doing this, no battles no nothing.

Not sure why or how, but there it is.

Remastered version.
Harry Nov 14, 2021 @ 11:09am 
Great guide btw, I'm now prepared to finally face Wastelands :flyinghappy:
Baraz Oct 13, 2021 @ 6:11pm 
Follow-up : by "order", I imagine you mean only in terms of priority for training or leveling the skill.

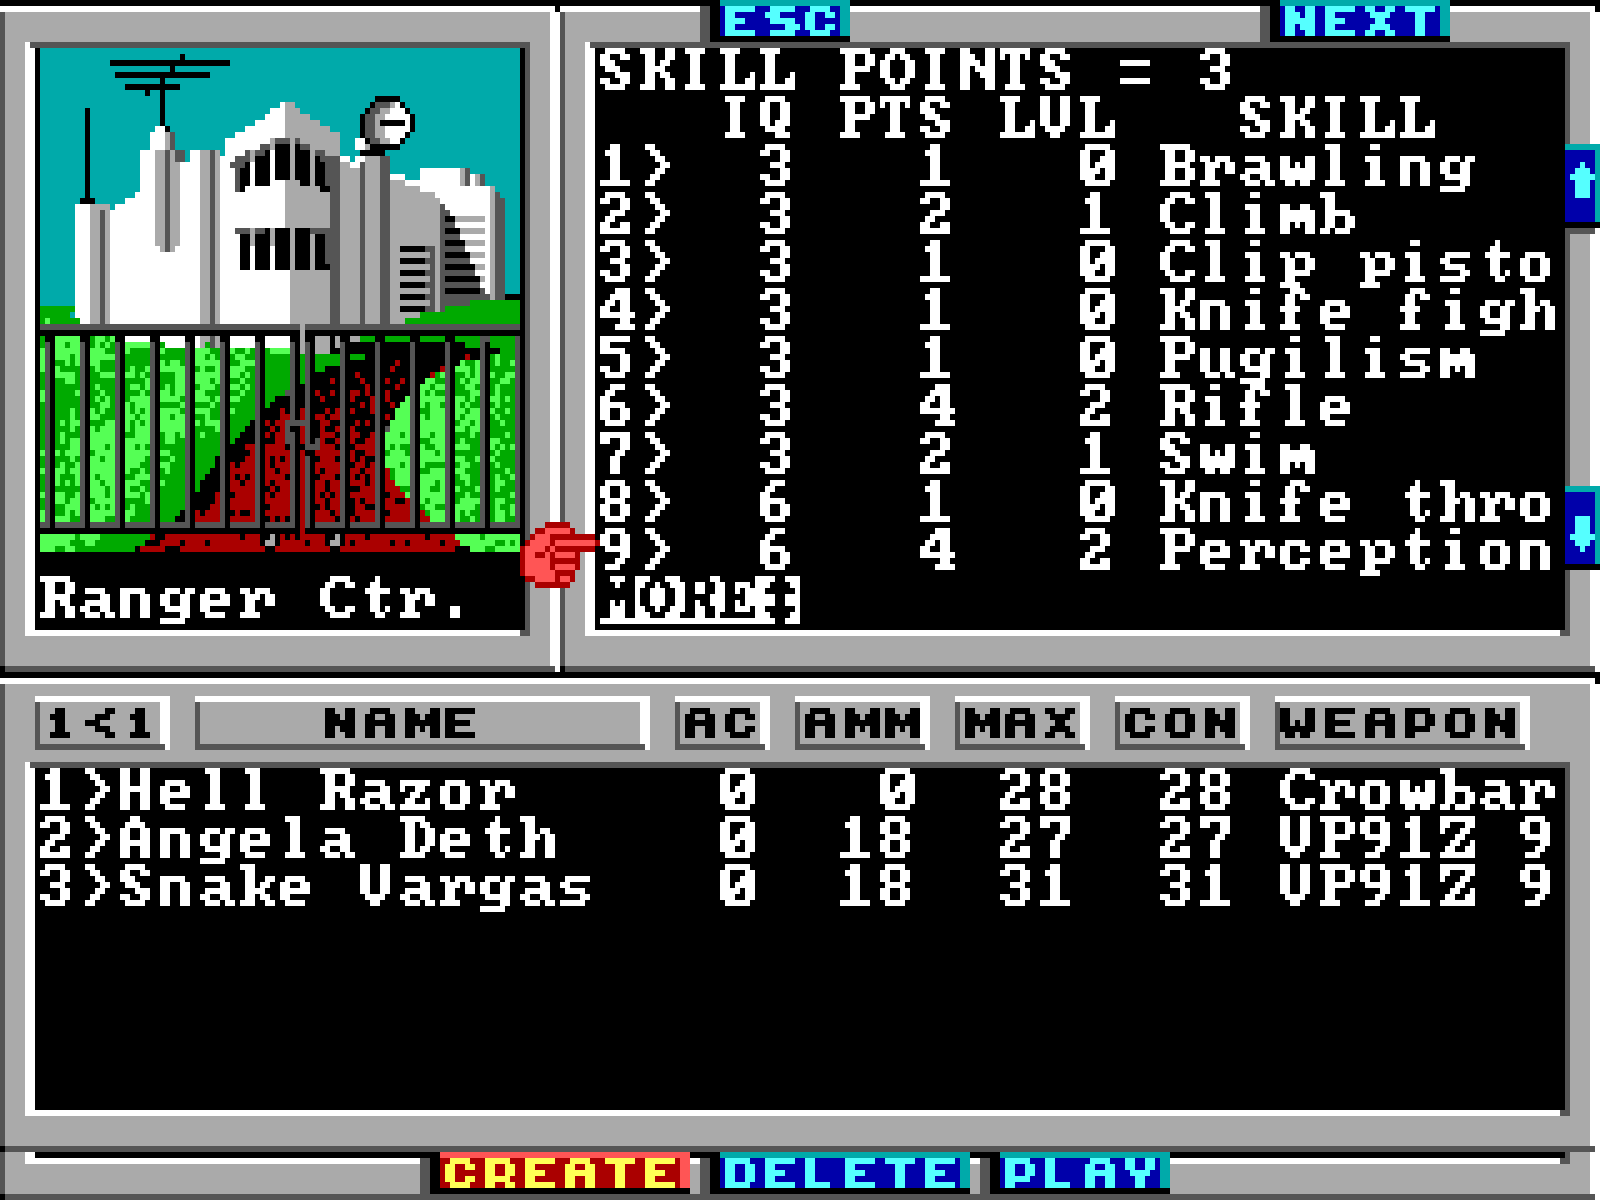
The manual does not say a word about the literal Order of skills, though the game UI makes it a thing. So, as a newb, I still wonder the way we order the skill list for a character has some kind of impact.
Baraz Oct 13, 2021 @ 5:54pm 
Thanks for this guide.

What is the importance of placing Skils in a certain order ? As a brand new player to Wasteland 1, this is a bit puzzling, but here is my guess: 1) Pistol 2) Rifle = means the character will prioritize shooting the pistol if in the inventory. But Skills like Picklock is active and Perception passive I presume. So the need to order them is odd. I'll check the player's guide to see if they explain it.

nb: Btw, Errata means Errors and is used to list corrections for errors in something that was written. I presume you meant Annex (extra notes and/or references). Or you meant you will be making corrections as time passes.
rhony2 Feb 21, 2021 @ 8:31pm 
In terms of the high end late game weapons which are rare, I remember one trick I used on the AppleIIc. I would make multiple copies of the 2nd floppy disc and after getting one and going back to the 1st disc, I would once again go back to a location that required the 2nd floppy and I would put in an unused copy of the 2nd floppy disc and redo that section of the game and get another of the same rare weapon. I remember that I ended up giving 4 of my characters with Meson Cannon using this. How to do this in the PC version? Haven't tried this yet on the steam version but I noticed that in the save game files there are two files names Game1 and Game2. I am assuming that Game1 represents the first floppy and Game2 represents the second. You should not overwrite Game1 since that is where your character info is saved, but since I believe Game2 represents the 2nd floppy, if you overwrite the 2nd floppy with a pristine copy of the Game2 file you might be able to recreate this.
EolSunder Nov 27, 2020 @ 9:48pm 
start created characters with high IQ for skills, try to get good luck and dexterity. Other good stats are a bonus. Raise IQ to 23 (for energy weapons later), then raise luck to 20 (helps with melee chance to hit and energy weapons later), then work on raising dex (for late game shooting). Chainsaws melee do same damage as assault rifles, and since you are built for melee early game, why worry about assault rifles when assault rifles won't do squat late game. brawling then energy weapons.
EolSunder Nov 27, 2020 @ 9:43pm 
no need for automatic weapons at all. They are mid game weapons, like chainsaws. By the time you outlive your poweful brawling ability with chainsaws, you'll be working on late game weapons, energy/laser weapons. Chaincaws won't cut it late game, and there is only really 1 high end melee weapon (photon axe) . The 2nd axe you won't get until near end-game (citadel). But you'll get plenty of energy weapons. Ignore all weapons and skills for anything except chainsaws (early game) and energy weapons (late game) since chainsaws do the same damage as automatics, without needing clips. Start with 2 brawling (maybe 3 if you want) and your set for most of the game. Sell everything, get chainsaws and kevlar suits, and your good for a very long time.